- First Name
- Rob @ OSEV
- Joined
- Nov 13, 2020
- Threads
- 82
- Messages
- 1,780
- Reaction score
- 3,744
- Location
- Pittsburgh
- Website
- opensourceev.com
- Vehicles
- Jeep & R1T & Silverado EV
- Thread starter
- #1
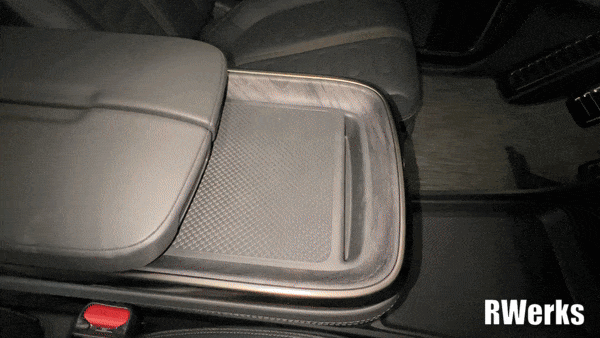
Welp, my dudes, I've done it. I have successfully replaced the POS wireless charging pad with a Magsafe / Magenetic Qi chaging pad that functions correctly. It's 100% powered using the existing lead in the wireless charging pad cavity and does not require using the USB-C ports in the center console.

The phone in the video is an iPhone 13 Pro with an Otterbox Lumen case on it. In addition to charging, it also holds the phone in location reasonably well. The solution is basically a combination of a few different parts:
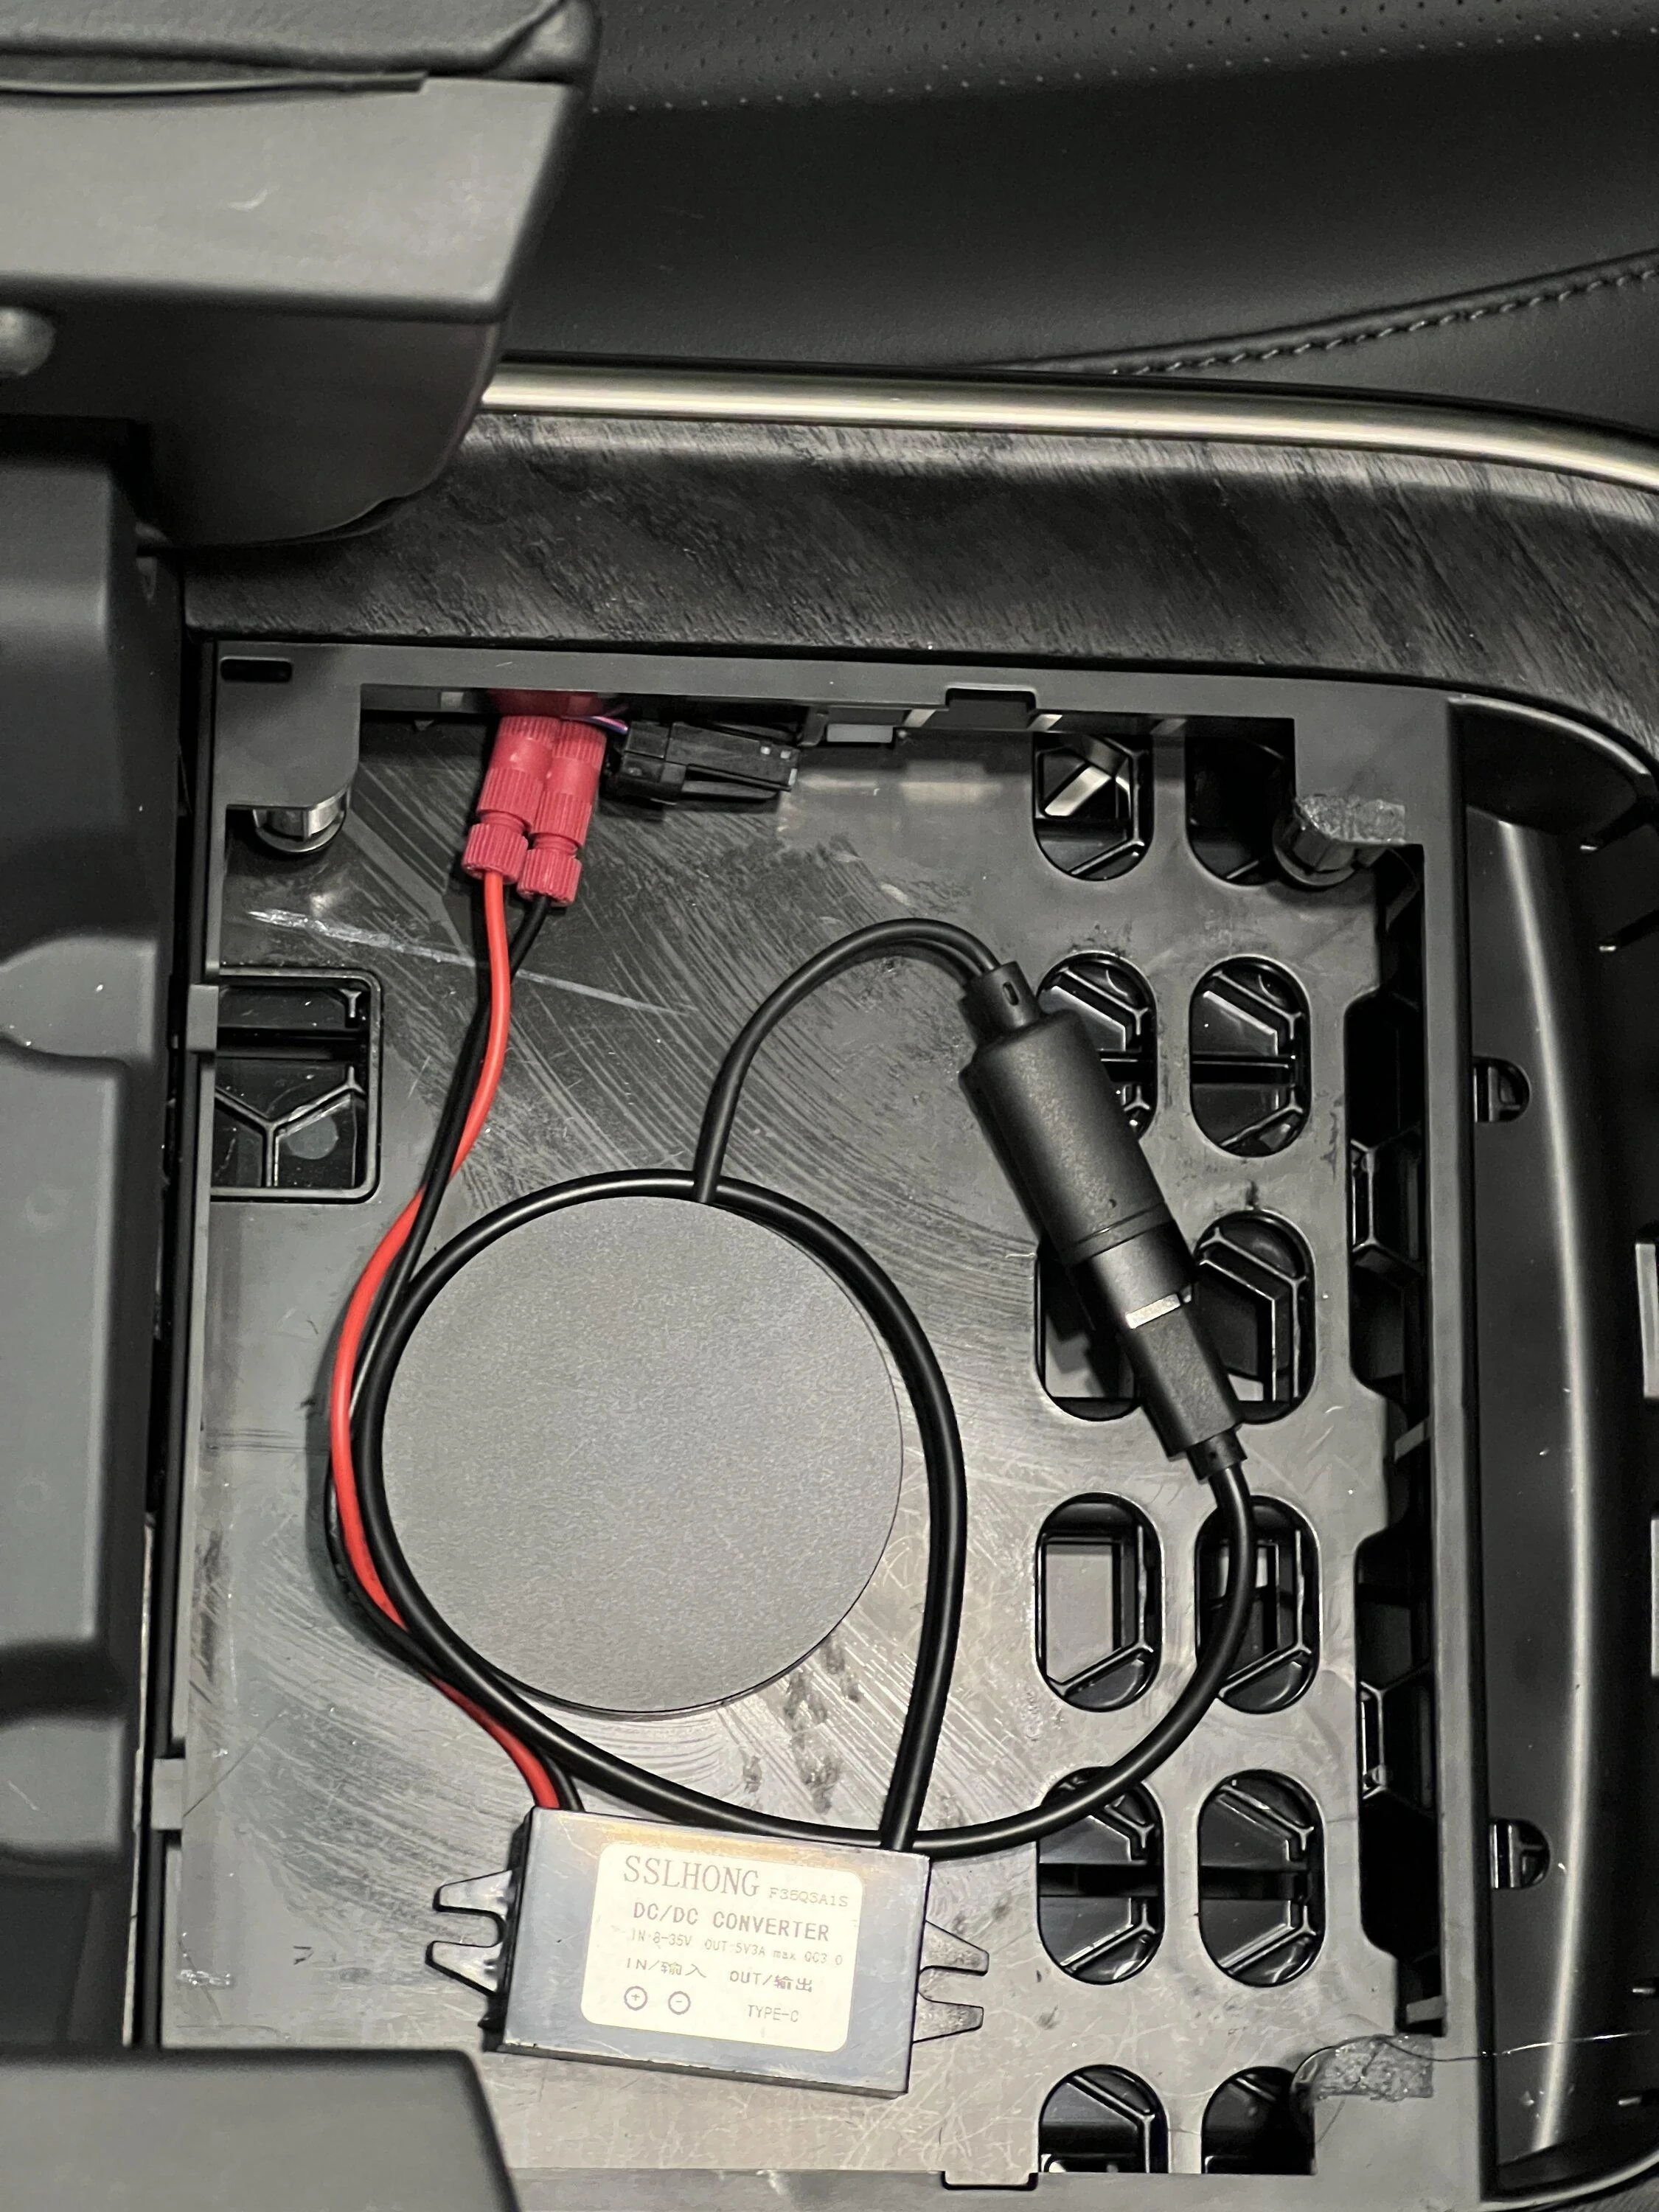
On the inside, it looks like this:

(Please ignore the finish on the top of the plate - it's printed in PETG and I unfortunately have to use glue to get the first layer to adhere to my glass build plate.)
In doing this, I've learned a few things:
The phone in the video is an iPhone 13 Pro with an Otterbox Lumen case on it. In addition to charging, it also holds the phone in location reasonably well. The solution is basically a combination of a few different parts:
- A third-party Magsafe / Magnetic Qi charger. This charger was selected because it holds (much) stronger than the Apple OEM part and it has a comparibly small pigtail with a USB-C female port on it.
- A 12-24V to 5V DC-DC converter. This takes the 12v raw power from the truck and steps it down to the point where the charging pad can accept it. It also has a USB-C male end and is QC 3.0 which means that it puts out more than 3A, which is a requirement for just about any wireless charging pad.
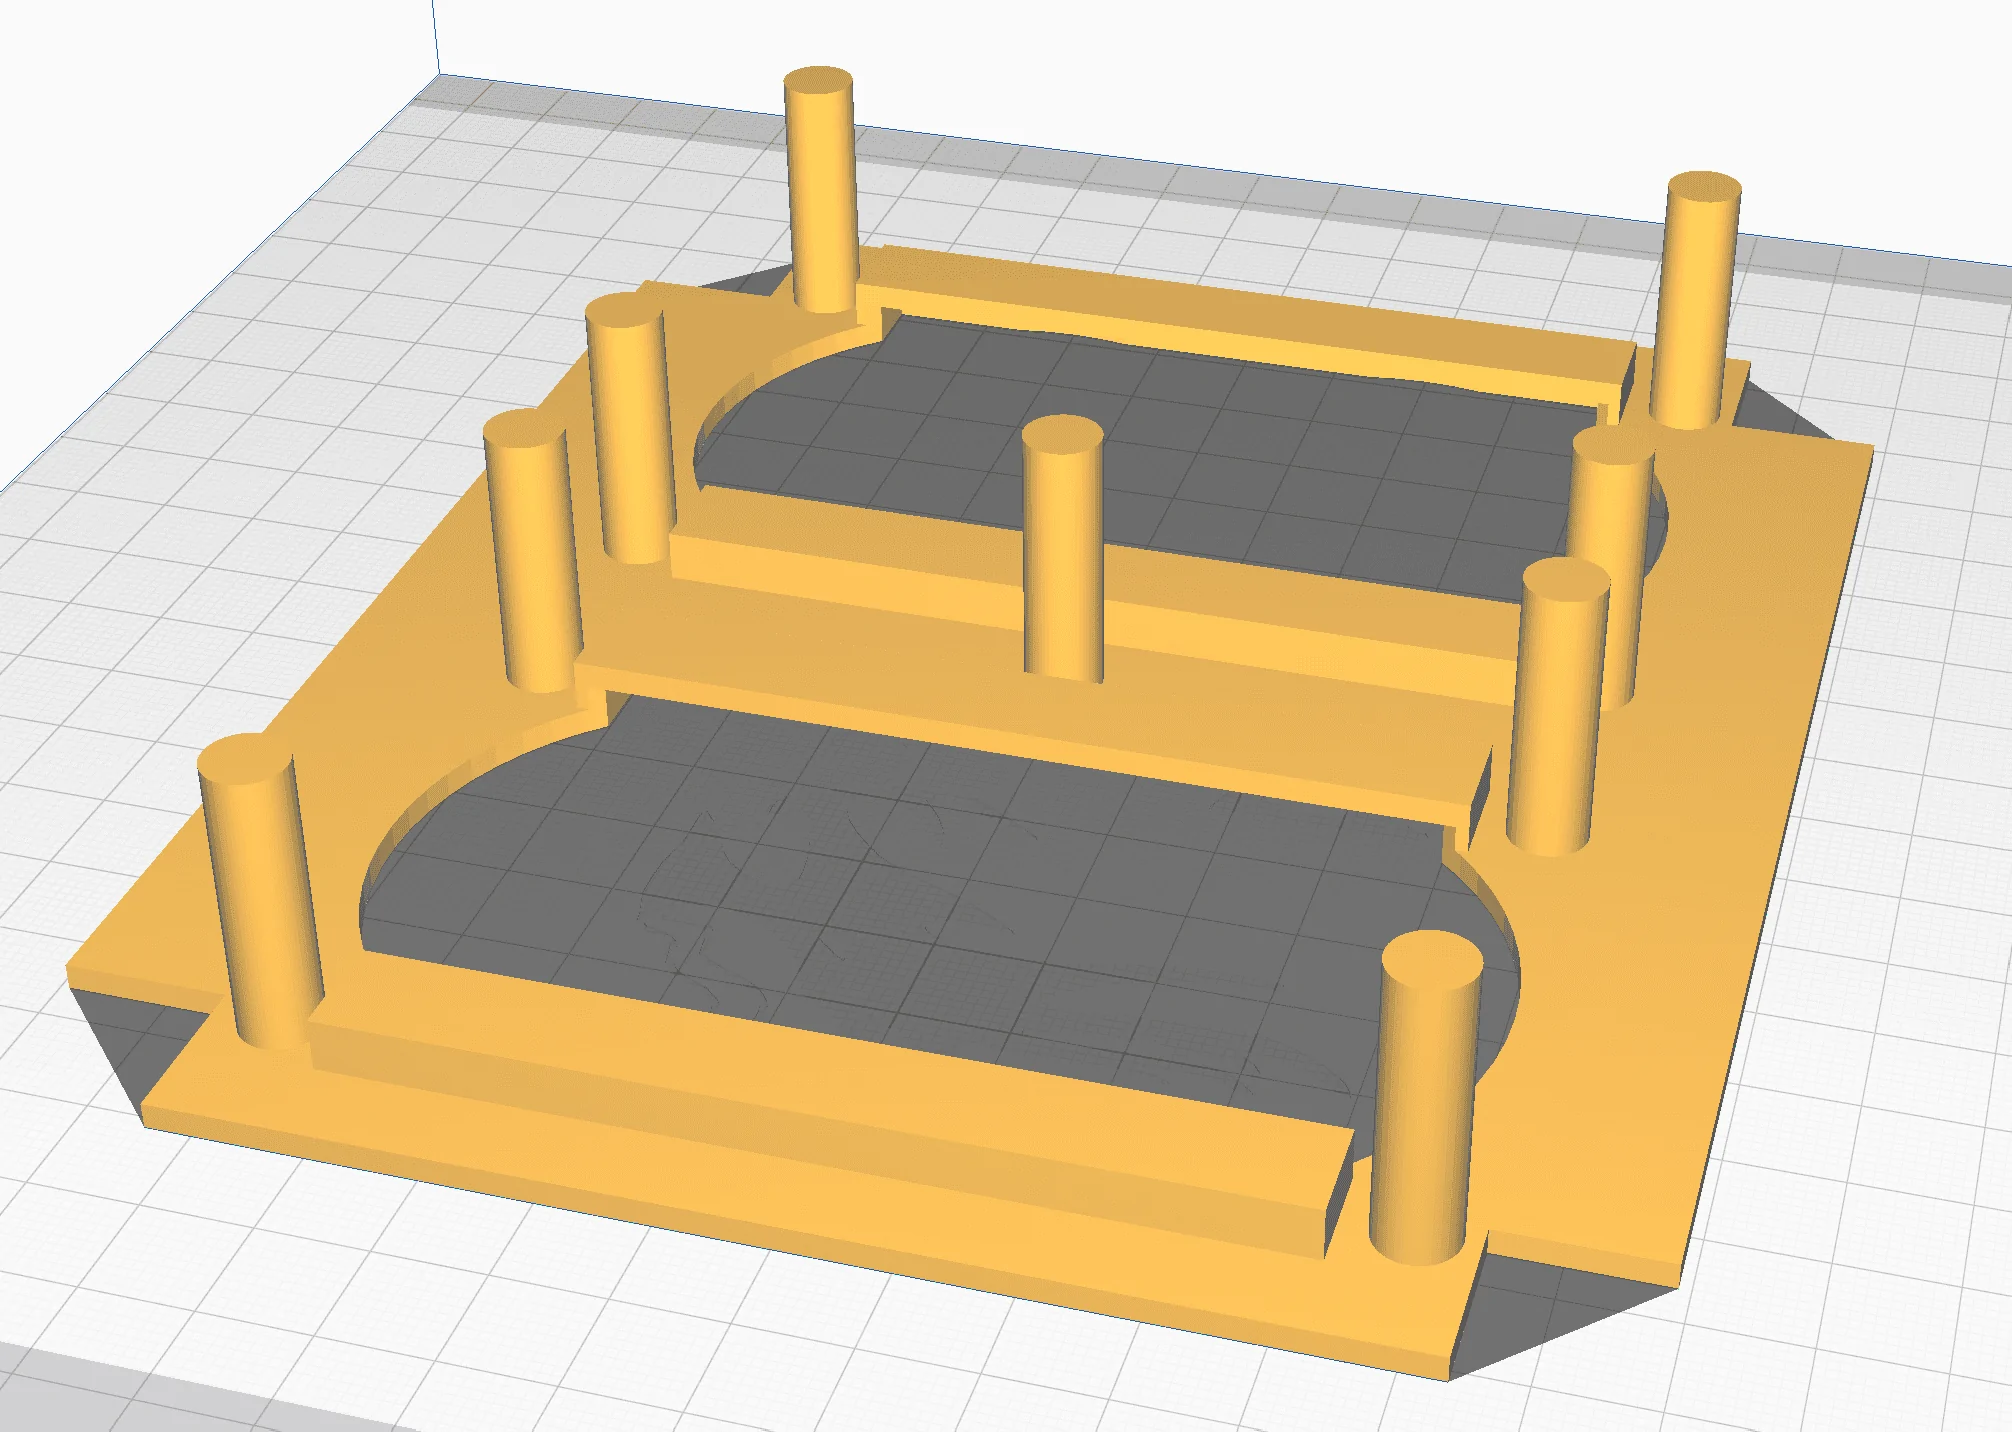
- A 3D printed shelf that I designed which holds the charging pad to the same level as the the POS charging pad. This is important so that the Rivian rubber mat installs as normal.
- Two posi-tap connectors to splice into the stock wiring with no adverse effects.
On the inside, it looks like this:
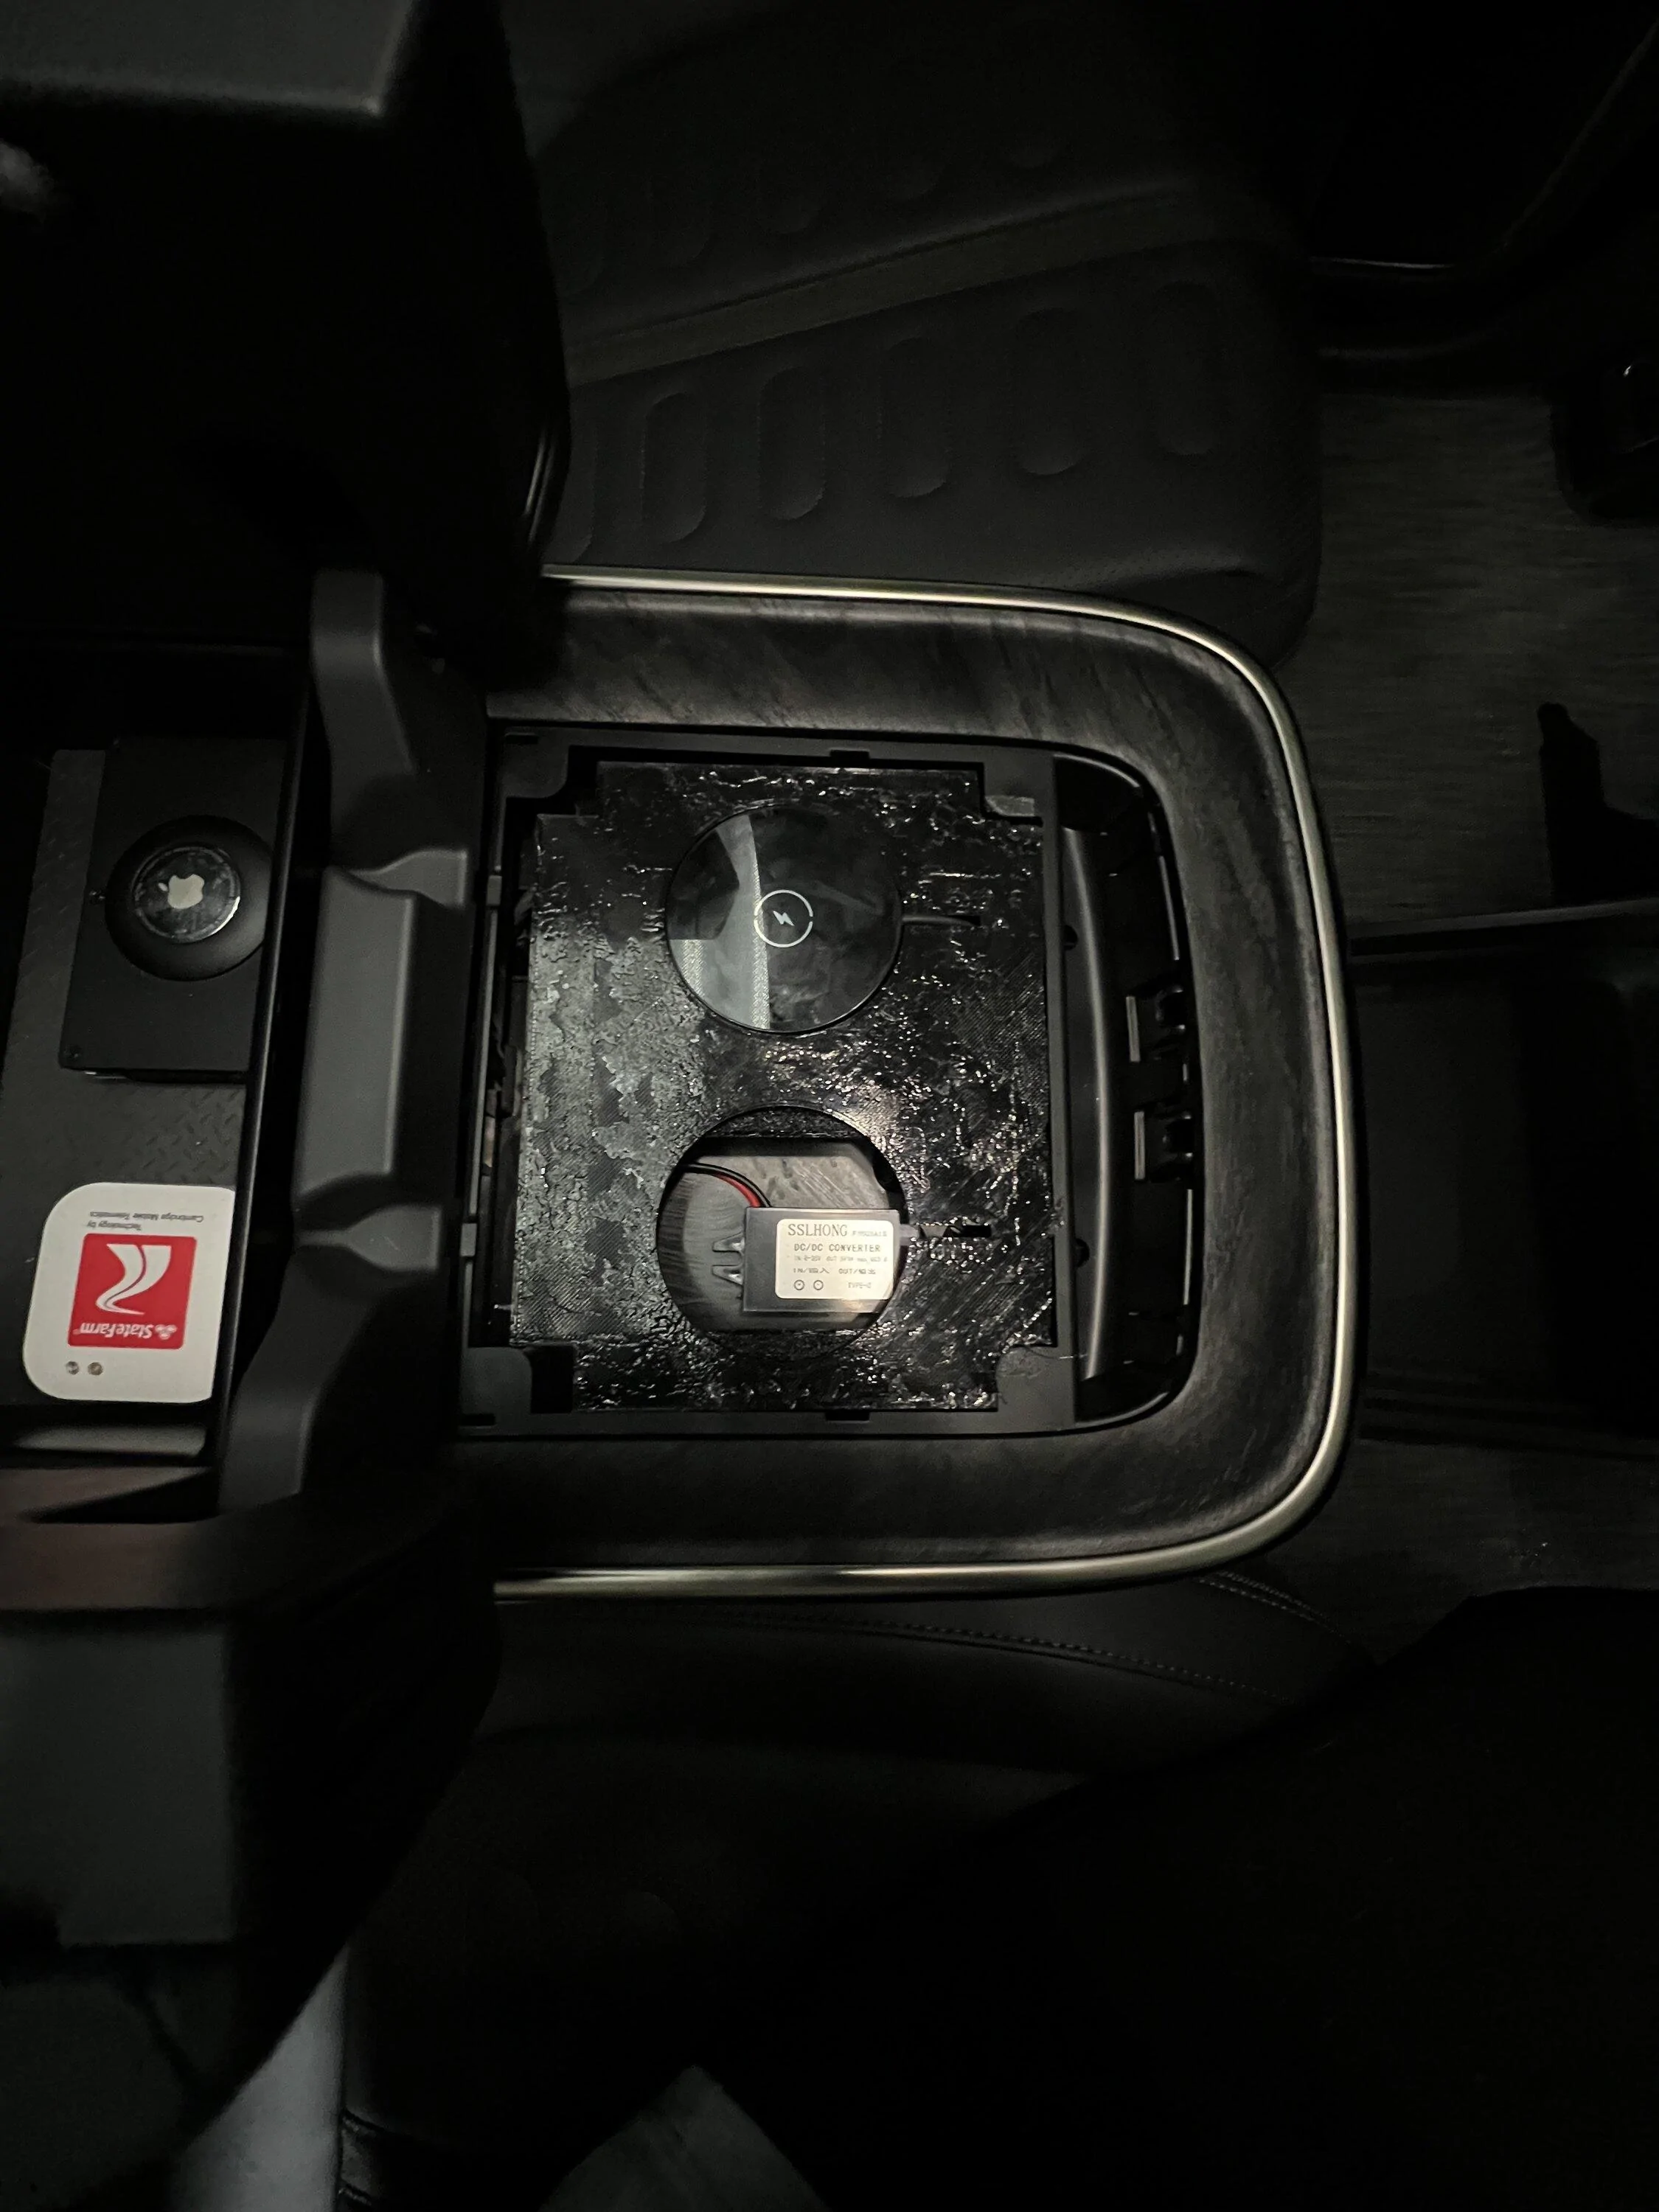
(Please ignore the finish on the top of the plate - it's printed in PETG and I unfortunately have to use glue to get the first layer to adhere to my glass build plate.)
In doing this, I've learned a few things:
- Either the plate or the pad need to be able to slide forward and back to account for the different thicknesses of cases. For instance, I have a thin case on my iPhone and my wife has the Otterbox. My current design necessitated that I cut the deck of the 3D printed plate to account for the larger phone. That's no bueno.
- Tapping into the POS pad wiring was surprisingly difficult due to the very small gauge of the wires they uses. (26? 28?) They are quite tiny considering the significantly higher wattage that POS pad pulled. I had to be very mindful when screwing down the posi-tap as the wires really wanted to just bend out of the way.
- Wiring is a problem, from a space perspective. I'm glad I chose to use these items instead of a 'on the desk' pad with a 6 ft cable or whatever. The limited depth of the cavity and the bulkiness of the cables wouldn't go together well, especially considering the shelf just sits in there.
- Heat doesn't seem to be an issue at all. In my testing (YMMV) everything was room temperature or very, very slightly warm. I don't see a need for a fan like what was in the old POS pad.
- I need to revise the design of the 3D printed shelf so it can adjust for smaller and larger phones / cases.
- I need to create a second design for a solo charger, not the dual variety that I've printed for myself.
- I'm going to wire in a second pad and do a stress test with warm temperatures out doors charging two phones at the same time.
- I may see if I can source the components here in bulk for a group buy or similar. If you're interested, please post below. Right now, everything here is pretty hard to come by, and the posi-taps are stupid expensive if you're looking for lower quantities.
Sponsored
Last edited:
")