Ervan
Member
- First Name
- Evan
- Joined
- Mar 9, 2023
- Threads
- 3
- Messages
- 18
- Reaction score
- 95
- Location
- Sunnyvale, CA
- Vehicles
- R1T Adventure, Lg pack, Forest Green
- Occupation
- Designer
- Thread starter
- #1
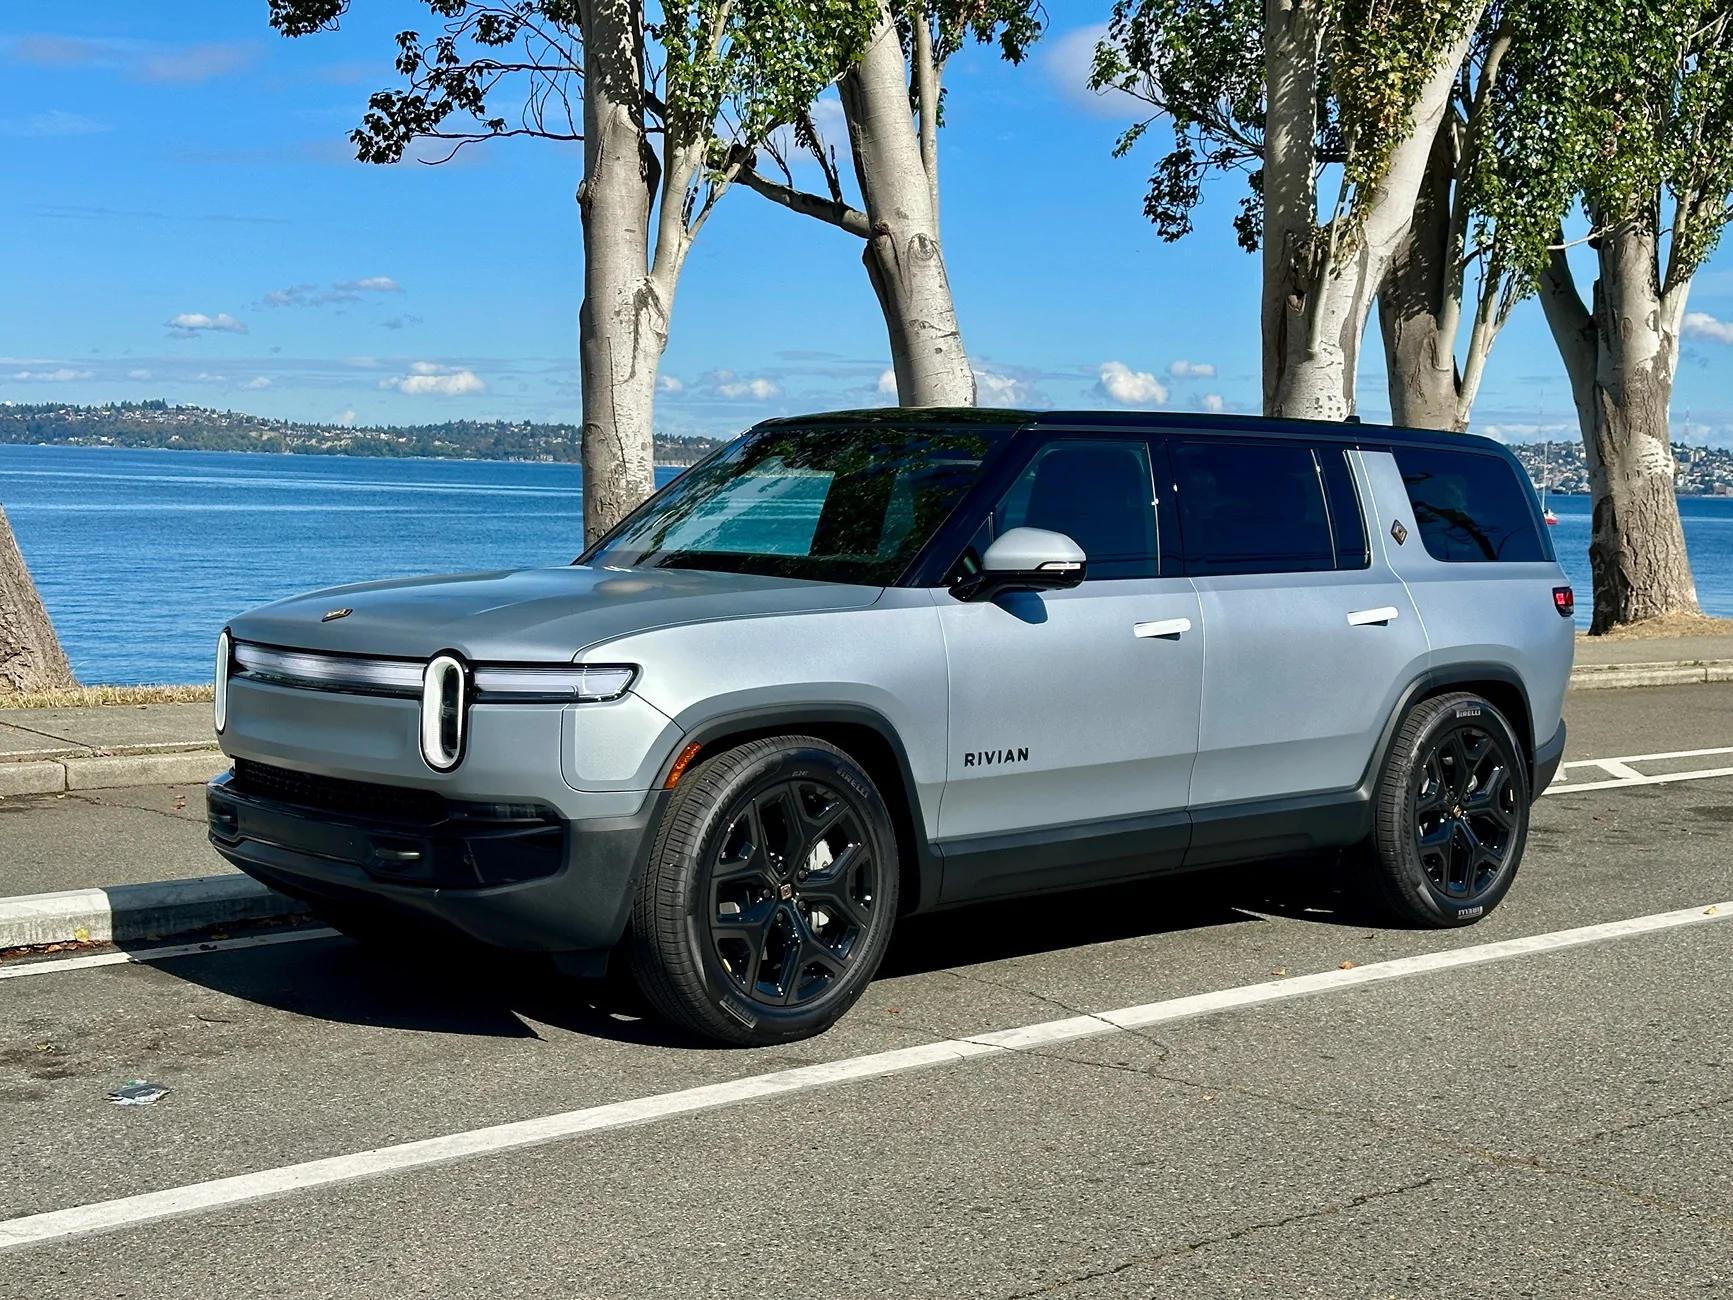
Sharing a recent install I just completed in my 2022 R1T Quad.
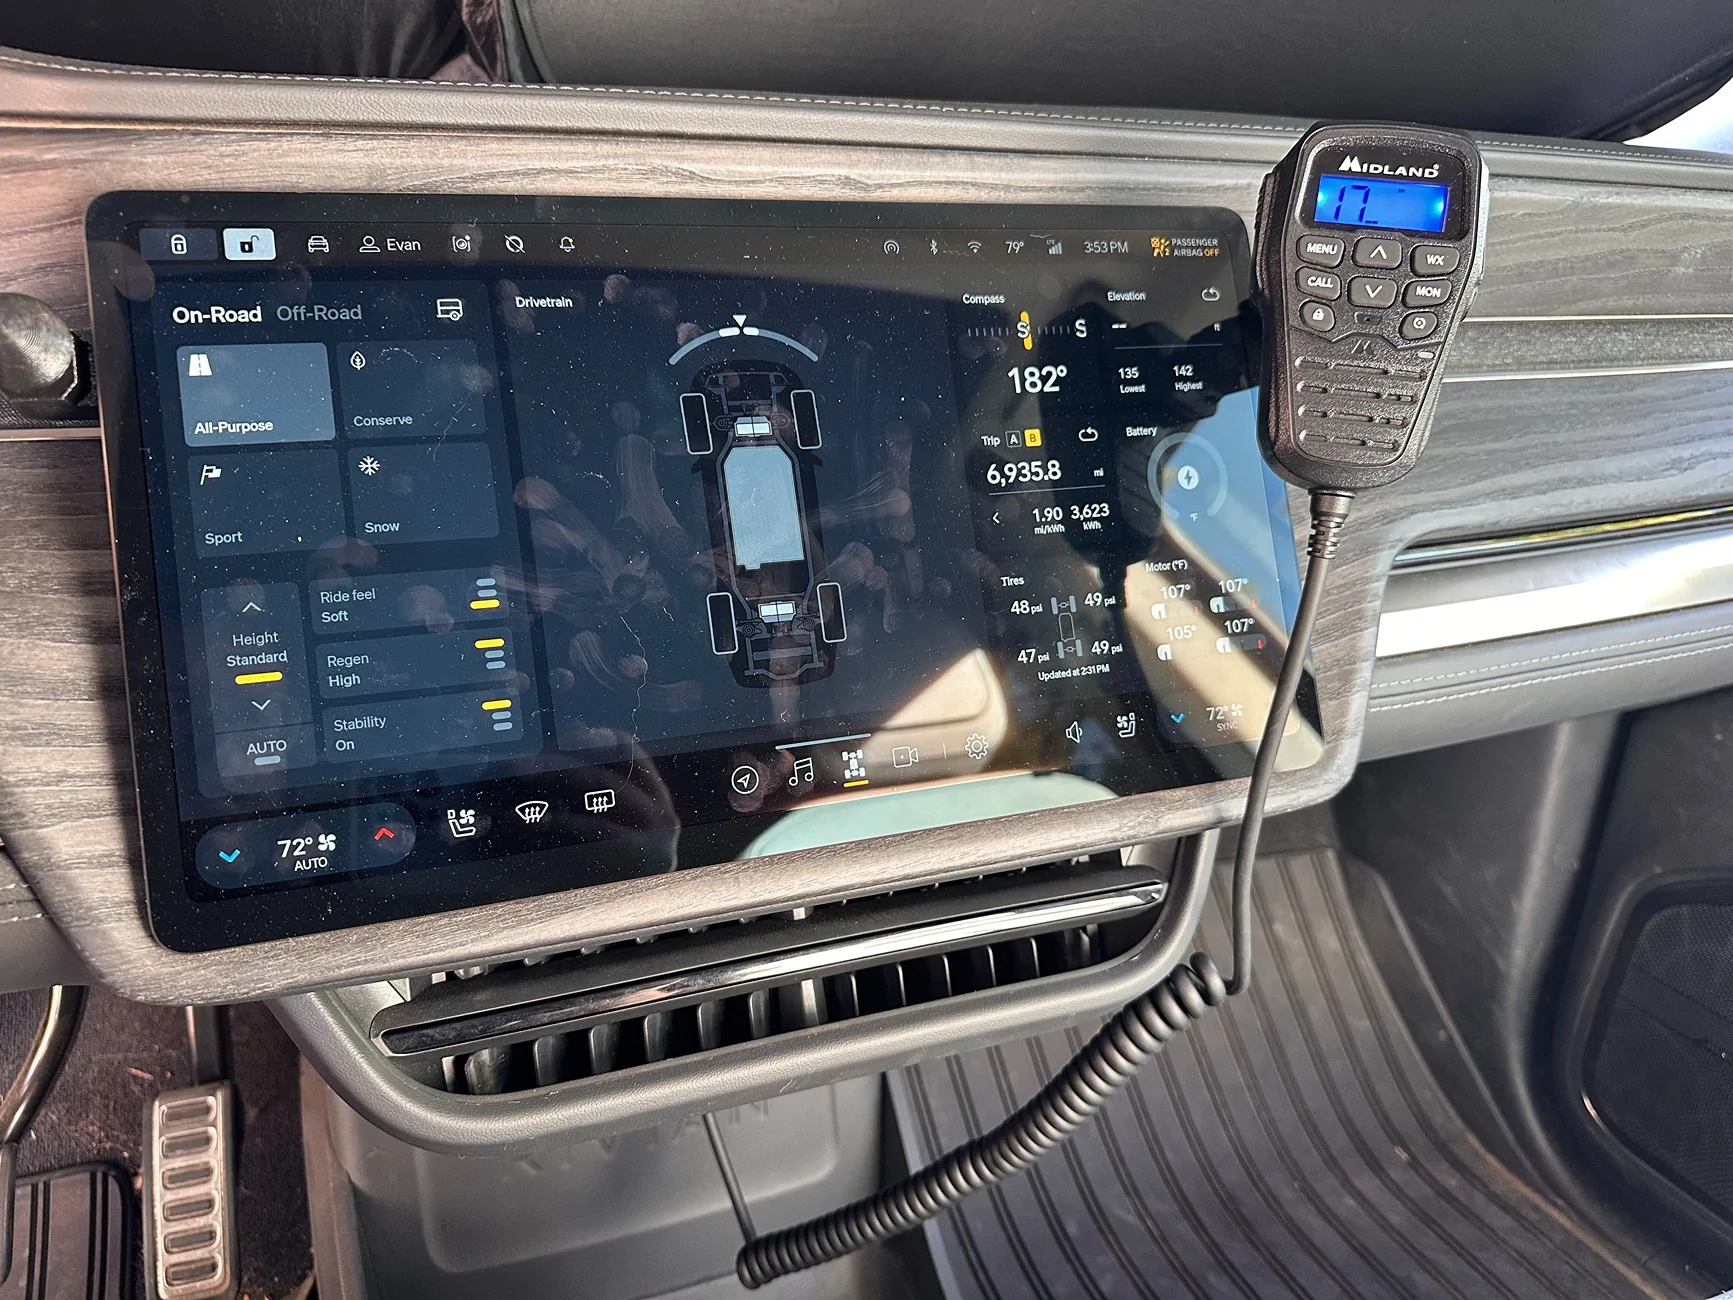
I decided a handheld walkie just wasn't enough -- so I put in a hidden, hardwired Midland MXT275 under the front passenger footwell!
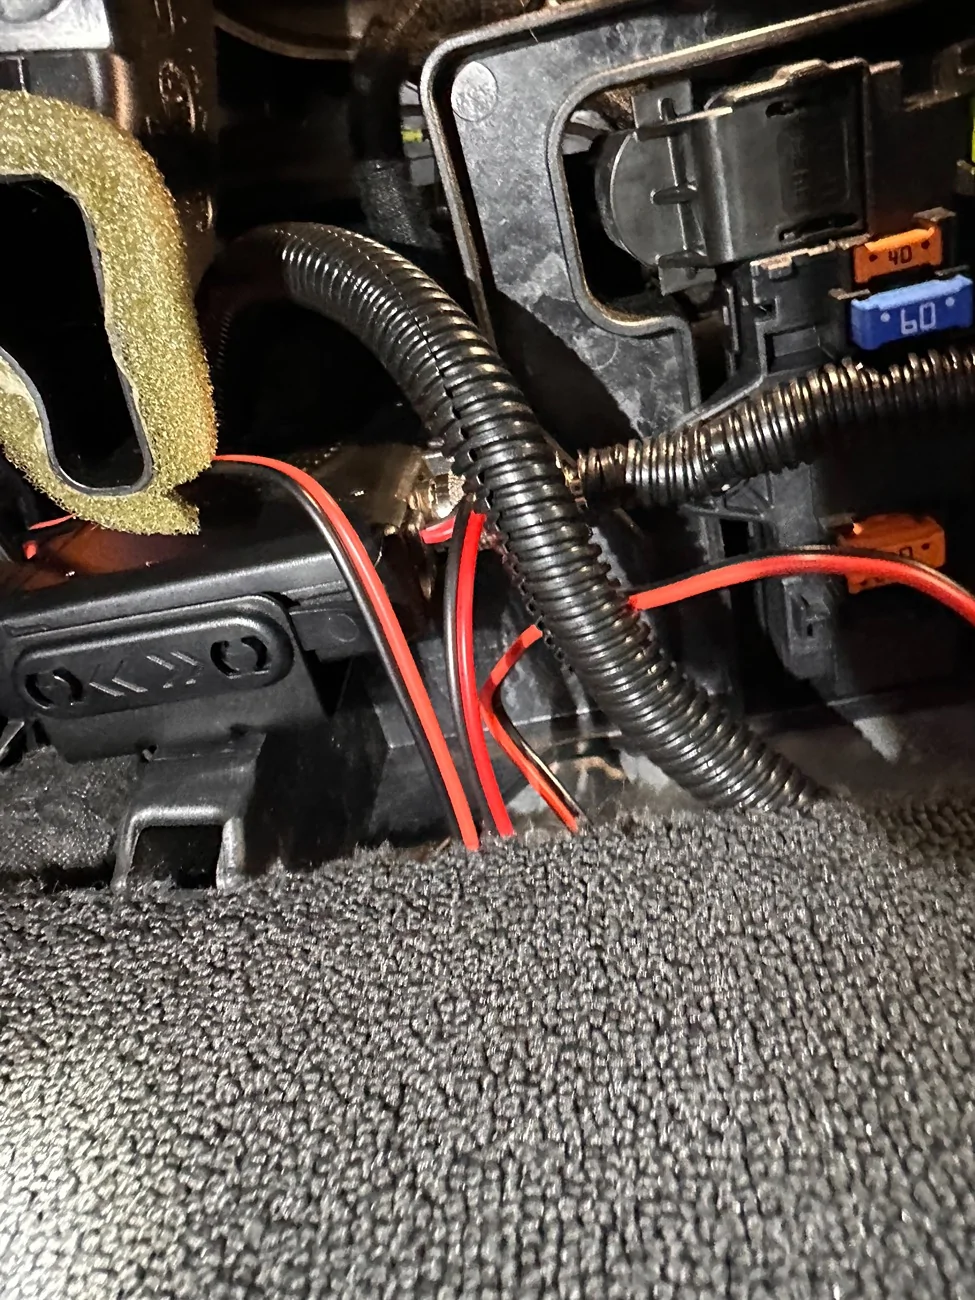
I wanted a clean, no-show install for when not off-roading and also didn't want to take up any cargo space (like under rear seats), so mounted it under the dash/front passenger footwell, which also meant running less cable or a separate speaker. I used a more shielded antenna cable than most seem to be and I don't get any interference that I can tell.
Radio body is under the footwell and the Midland MXT275 has controller in the mic.

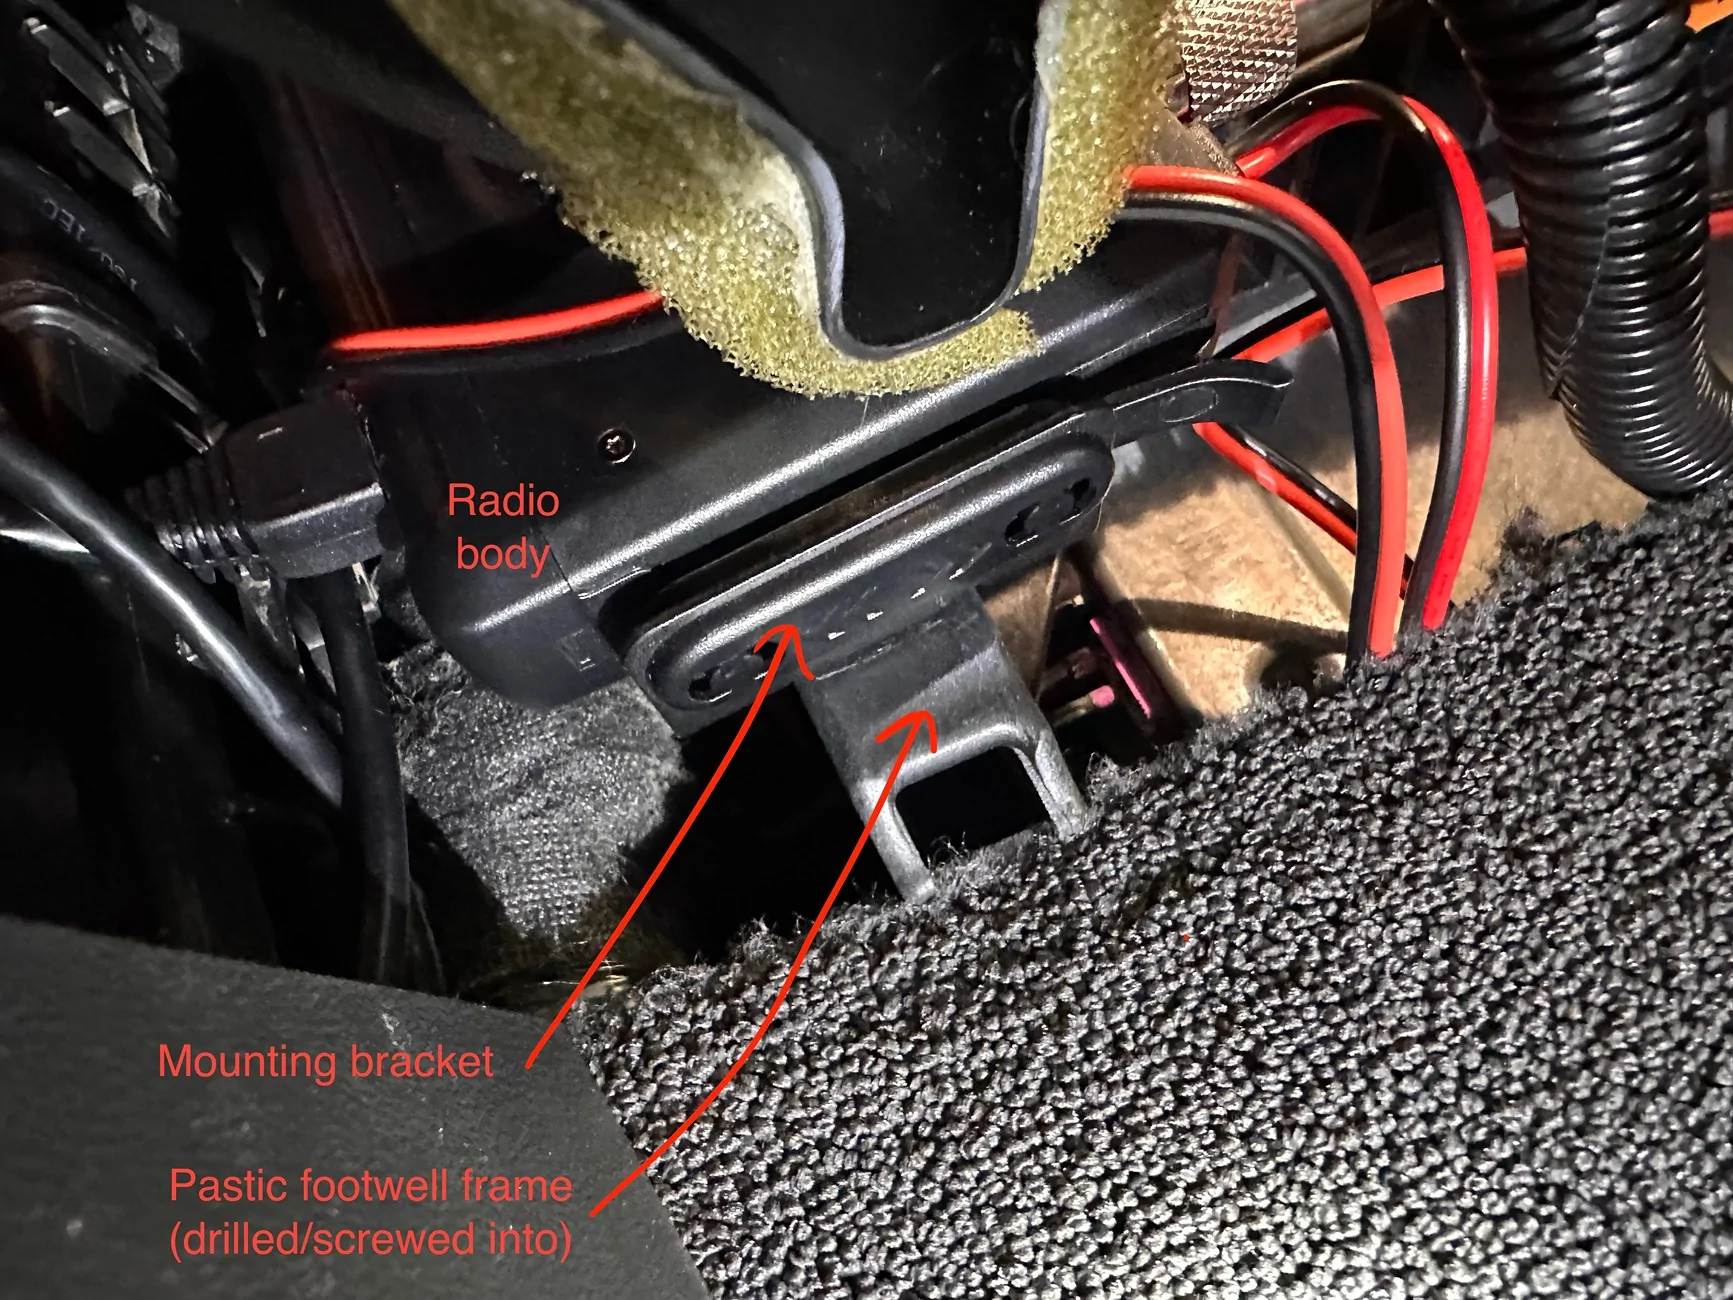
Mounted the radio behind the passenger footwell up next to the fuses, very close to where you can run wires through the firewall grommet. I'm a big dude (6'4", 280lbs) so working in this space was challenging, but with a small right angle drill you can drill into the plastic frame and screw the radio mount there which then the radio snaps in and out of. There's just enough space out of the way of things for all bits and cables to fit with reasonable amount of room.
I faced the speaker out, plugs go to right so more space under fuse panel.

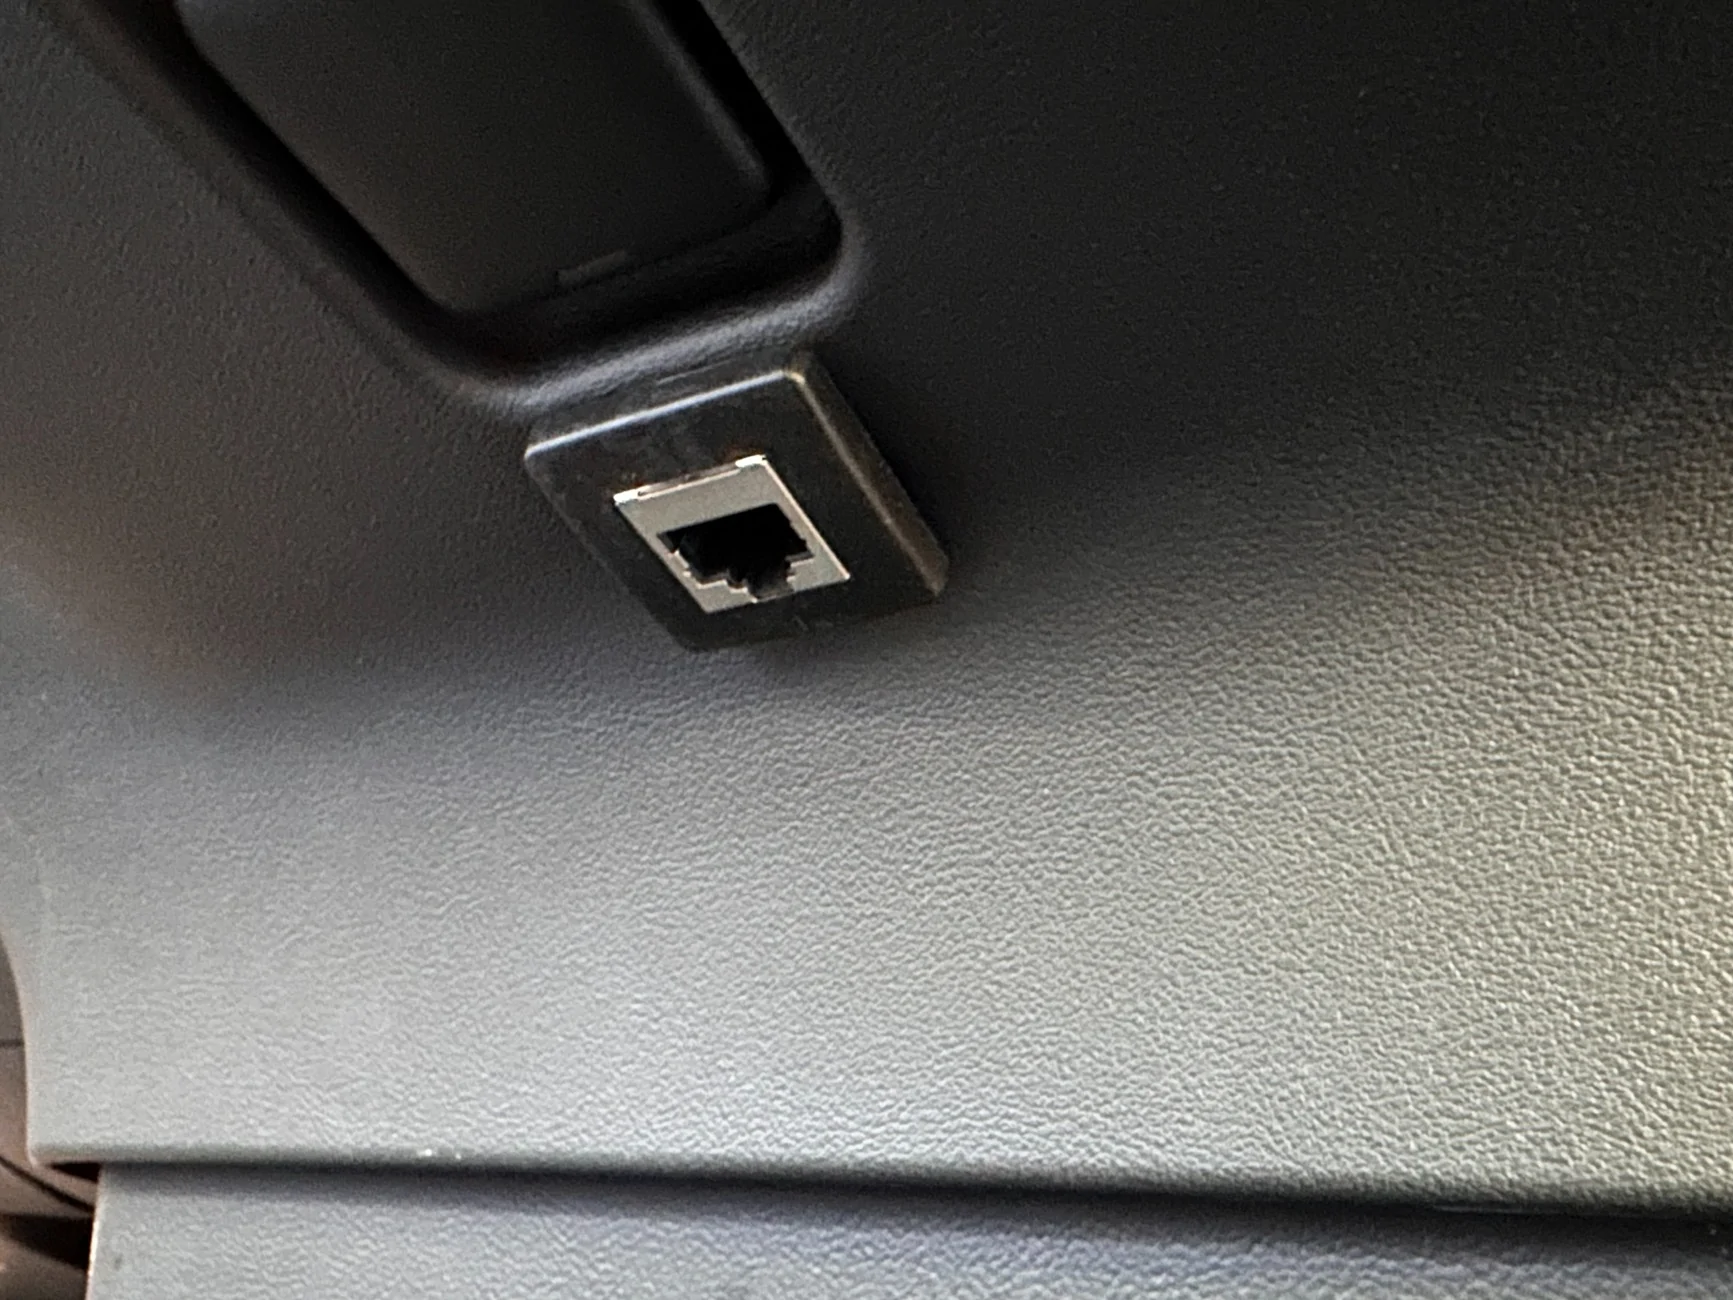
I removed the full width dash panel (remarkably easy, a few screws, little popping action, boom!). Then I panel mounted a RJ45 Cat6 cable outlet under the dash behind the 12v outlet. Inside the dash it just fits between the airvents under the dash. I used a stepped drill bit to make a round hole then cut/filed square to pop it in.

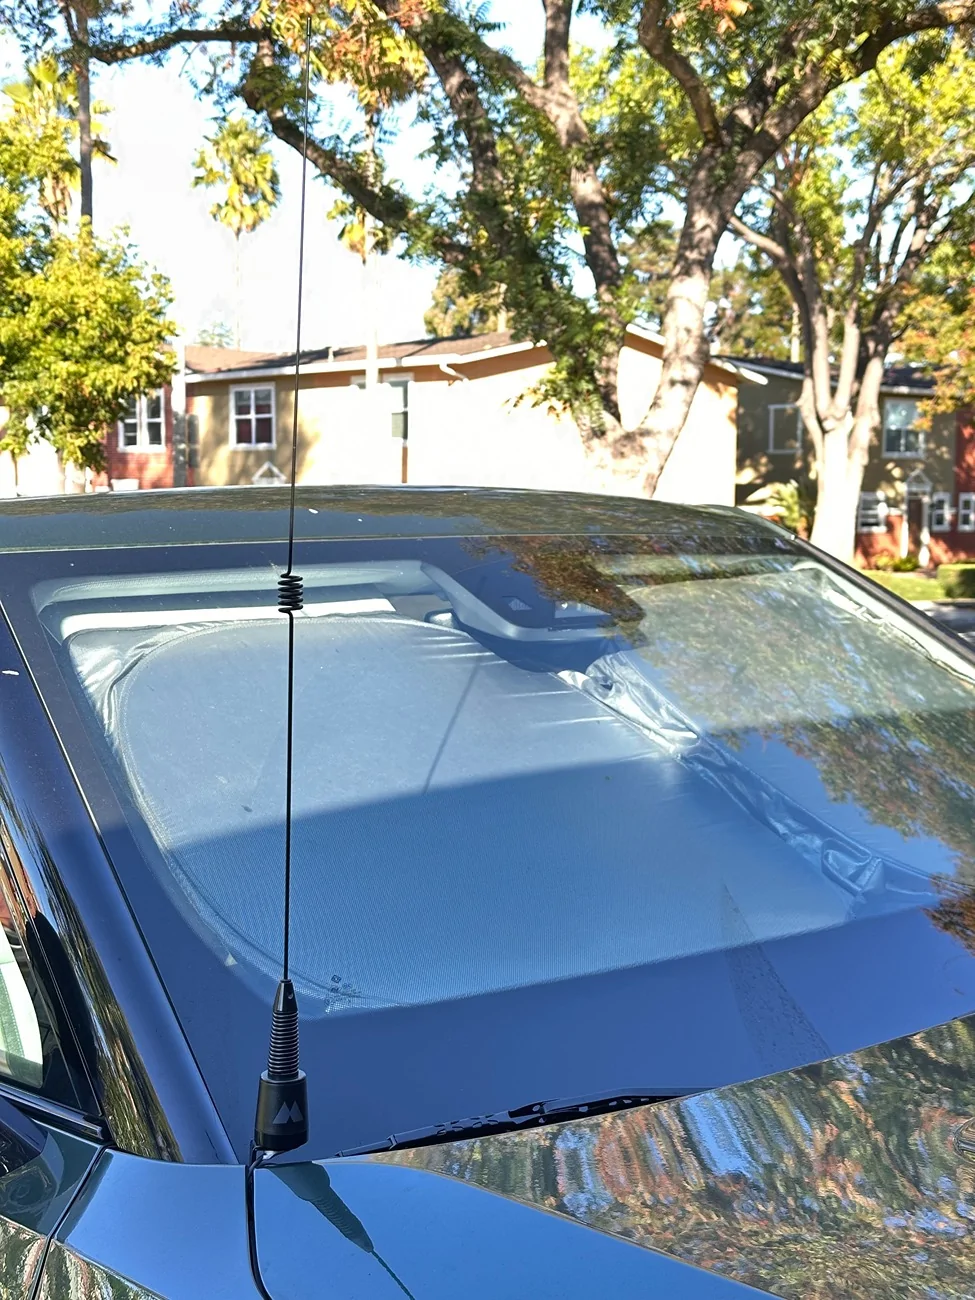
Then, I installed the right side M&R ditch light mount which mounts to the body (very, very stable and well made) and ran an NMO cable through the firewall up to the mount and antenna. Midland antenna fits nicely here.
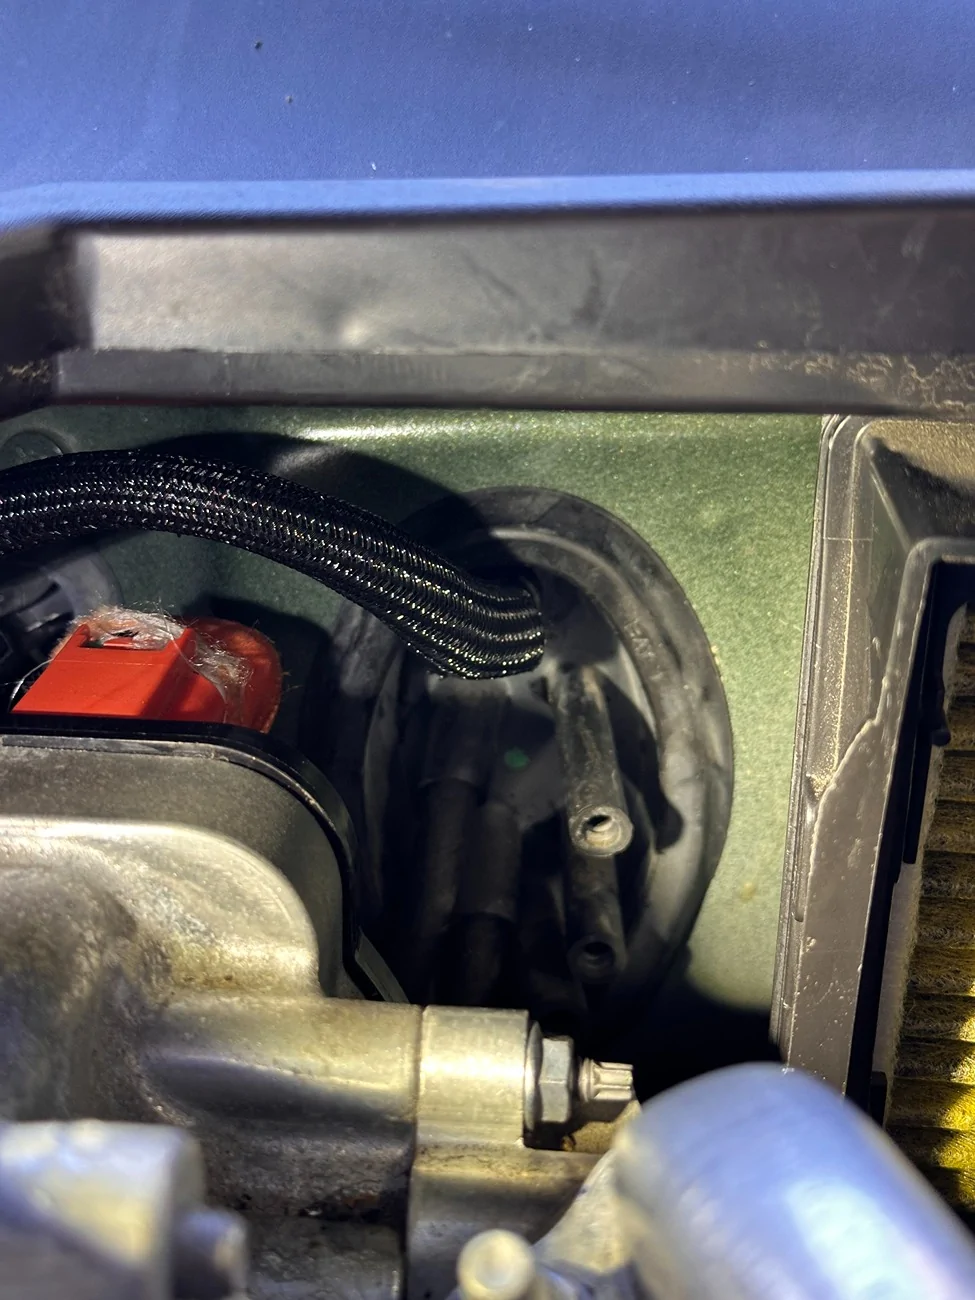
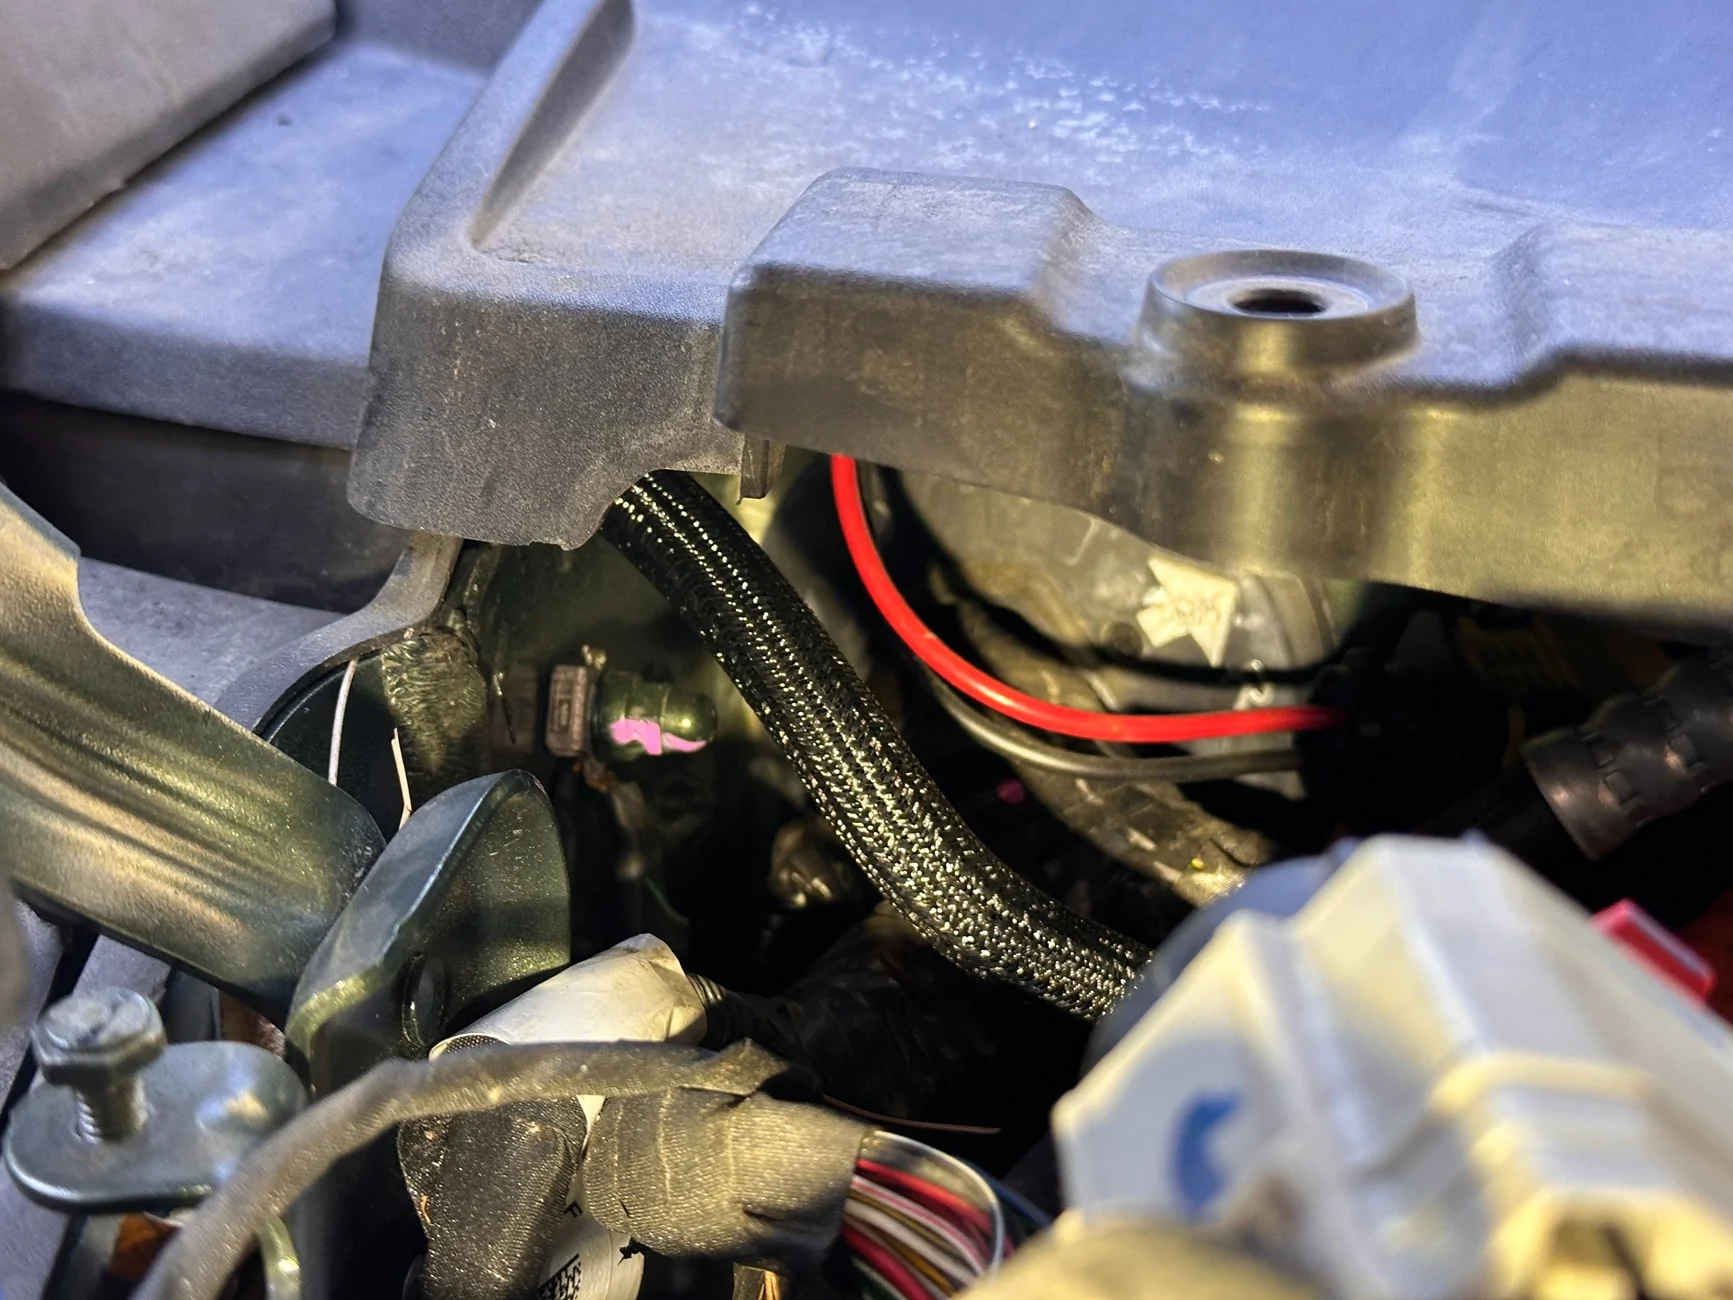
The NMO antenna cable and 12v power for the radio are through the firewall grommet (which is just left of the air vent filter intake, which you need to pull out to get to the grommet). Running the cables is a nightmare if you have the plugs on or a large cable, so either be good at cutting then reinstalling the plugs or use a lot of lube!). I used a stiff wire feed / tape thing from Amzn (see parts list) which helped so much -- as did a 9 year old kid to help fish things out as you push them through the grommet from the frunk side):
You can feed the cables sort of up through the cover panels along the body edge and is a pretty clean look afterwards.
Parts list (no affiliate links):
MXT275 MicroMobile® GMRS 15-Watt Two-Way Radio - MXT275 ($170)
Midland - MXTA26 MicroMobile 1.5 inch Base Diameter 6DB Gain Whip Antenna ($60)
M&R Body-Mount Ditch Light Brackets ($110 for L & R)
C101NMO Antenna Mount Cable Assembly, NMO, 6ft - Shielded ($50) - extra shielding and fits the ditch bracket perfectly
Qaoquda Cat5e RJ45 Square Flush Mount Cable, RJ45 ... Shielded Panel Mount ... 1M/3Ft ($13)
NEIKO 11402A Stubby Drill Bit Set for Metal, 5 Piece ($16) - for drilling in the footwell plastic frame in tight spaces
Fish Tape Wire Puller ($14) - to get through the firewall grommet
Many thanks to so many brave souls on this forum who posted pics of their Rivians in various states of disassembly, especially @HighVoltOverland (here) & @zonehawk (here) for their posts. Couldn't have done it without y'all.
I decided a handheld walkie just wasn't enough -- so I put in a hidden, hardwired Midland MXT275 under the front passenger footwell!
I wanted a clean, no-show install for when not off-roading and also didn't want to take up any cargo space (like under rear seats), so mounted it under the dash/front passenger footwell, which also meant running less cable or a separate speaker. I used a more shielded antenna cable than most seem to be and I don't get any interference that I can tell.
Radio body is under the footwell and the Midland MXT275 has controller in the mic.
Mounted the radio behind the passenger footwell up next to the fuses, very close to where you can run wires through the firewall grommet. I'm a big dude (6'4", 280lbs) so working in this space was challenging, but with a small right angle drill you can drill into the plastic frame and screw the radio mount there which then the radio snaps in and out of. There's just enough space out of the way of things for all bits and cables to fit with reasonable amount of room.
I faced the speaker out, plugs go to right so more space under fuse panel.
I removed the full width dash panel (remarkably easy, a few screws, little popping action, boom!). Then I panel mounted a RJ45 Cat6 cable outlet under the dash behind the 12v outlet. Inside the dash it just fits between the airvents under the dash. I used a stepped drill bit to make a round hole then cut/filed square to pop it in.
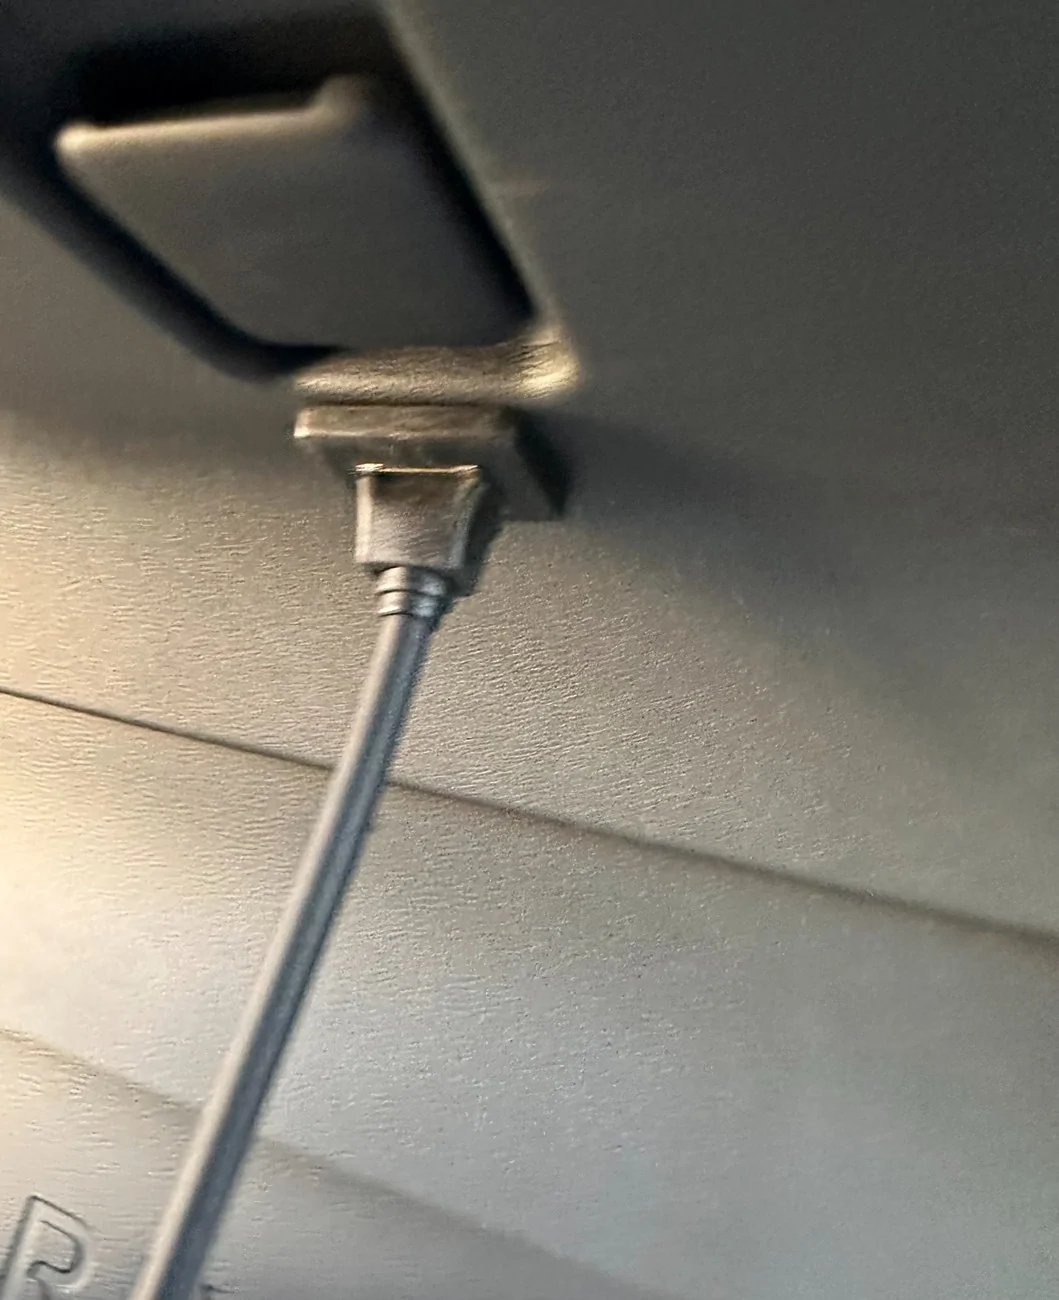
Then, I installed the right side M&R ditch light mount which mounts to the body (very, very stable and well made) and ran an NMO cable through the firewall up to the mount and antenna. Midland antenna fits nicely here.

The NMO antenna cable and 12v power for the radio are through the firewall grommet (which is just left of the air vent filter intake, which you need to pull out to get to the grommet). Running the cables is a nightmare if you have the plugs on or a large cable, so either be good at cutting then reinstalling the plugs or use a lot of lube!). I used a stiff wire feed / tape thing from Amzn (see parts list) which helped so much -- as did a 9 year old kid to help fish things out as you push them through the grommet from the frunk side):
You can feed the cables sort of up through the cover panels along the body edge and is a pretty clean look afterwards.
Parts list (no affiliate links):
MXT275 MicroMobile® GMRS 15-Watt Two-Way Radio - MXT275 ($170)
Midland - MXTA26 MicroMobile 1.5 inch Base Diameter 6DB Gain Whip Antenna ($60)
M&R Body-Mount Ditch Light Brackets ($110 for L & R)
C101NMO Antenna Mount Cable Assembly, NMO, 6ft - Shielded ($50) - extra shielding and fits the ditch bracket perfectly
Qaoquda Cat5e RJ45 Square Flush Mount Cable, RJ45 ... Shielded Panel Mount ... 1M/3Ft ($13)
NEIKO 11402A Stubby Drill Bit Set for Metal, 5 Piece ($16) - for drilling in the footwell plastic frame in tight spaces
Fish Tape Wire Puller ($14) - to get through the firewall grommet
Many thanks to so many brave souls on this forum who posted pics of their Rivians in various states of disassembly, especially @HighVoltOverland (here) & @zonehawk (here) for their posts. Couldn't have done it without y'all.
Sponsored

 s.
s.