Sponsored

sacramentoelectric

Well-Known Member
Joined
Sep 4, 2021
Threads
14
Messages
538
Reaction score
1,138
Location
sacramento
Vehicles
BMW iX, BMW i3
Clubs
 
Rivian R1T R1S Rivian R1T No Drill Fridge Slide DIY Installation Walkthrough side profile_1.16.1


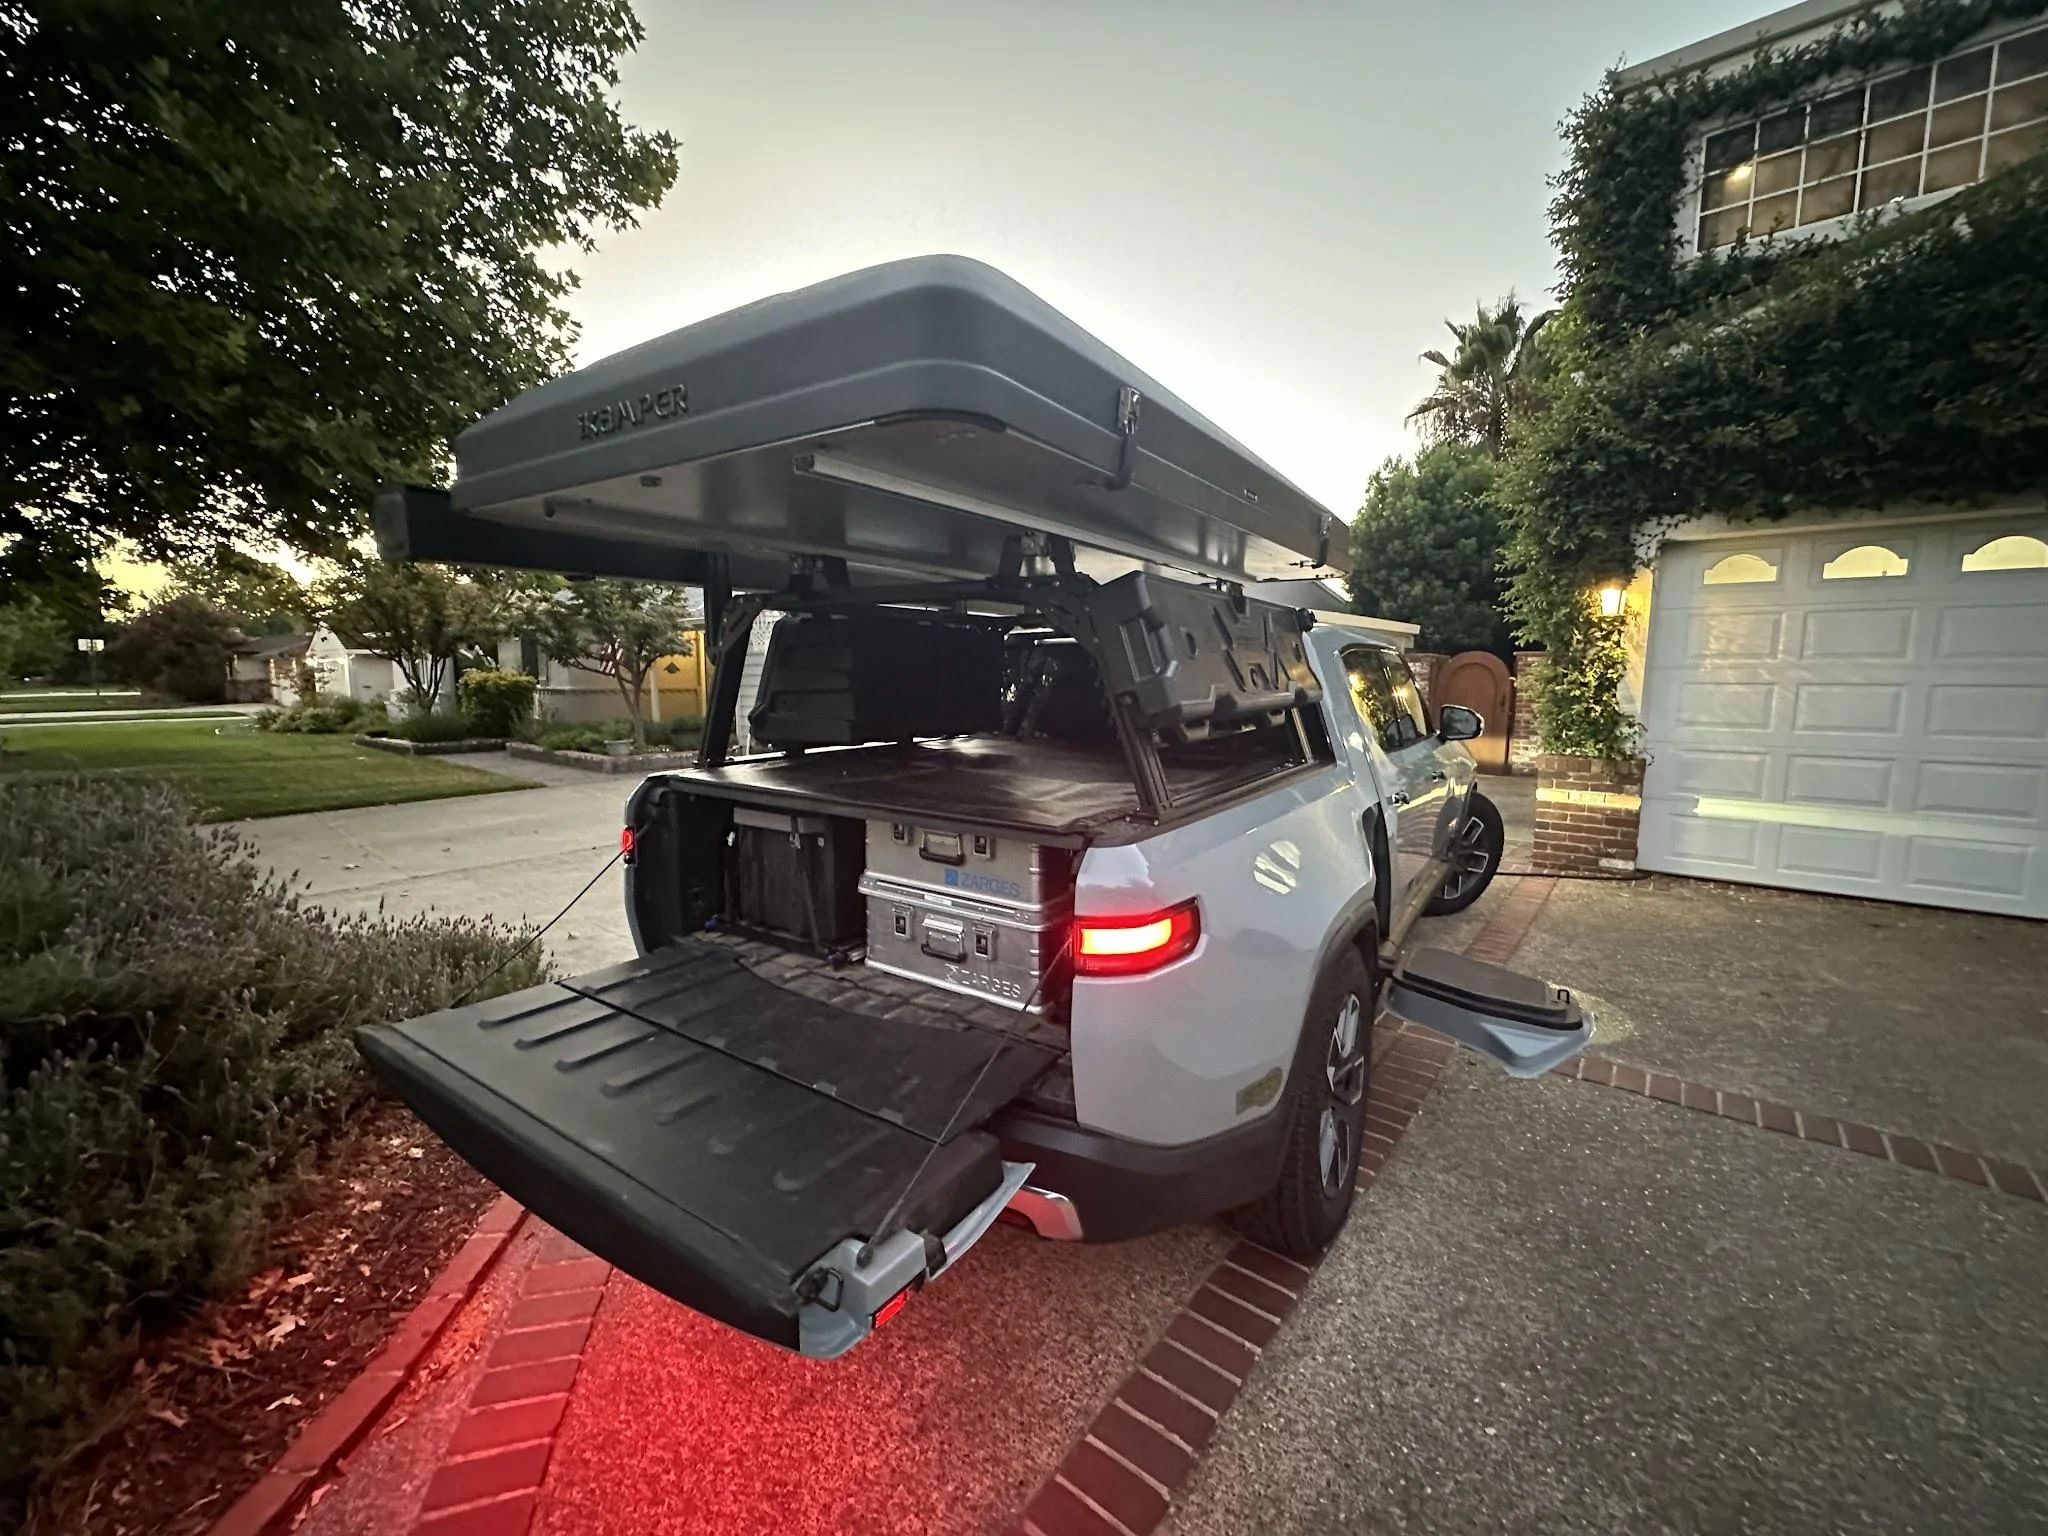
If you've been scratching your head on how you can install a fridge slide in the bed of the R1T without blocking access to the spare tire, this tutorial is for you. Installing a slide in an R1T isn't as simple or as affordable as most with vehicles but it is possible without drilling or making permanent modifications to the truck or blocking the spare tire hatch. You only need to remove two screws to take out the slide after installation. All in, you're looking at about $600-700 in parts including a generic fridge slide and two or three hours for the installation. You don't need any special tools or skills. If you can turn a screwdriver, you can complete this installation in an afternoon.

Rivian R1T R1S Rivian R1T No Drill Fridge Slide DIY Installation Walkthrough IMG_5224


Instead of bolting the slide down to the floor of the bed like in most vehicles, we're going to attach aluminum extrusions to hinges secured to a MOLLE panel installed on the back wall of the bed.

Rivian R1T R1S Rivian R1T No Drill Fridge Slide DIY Installation Walkthrough IMG_5227

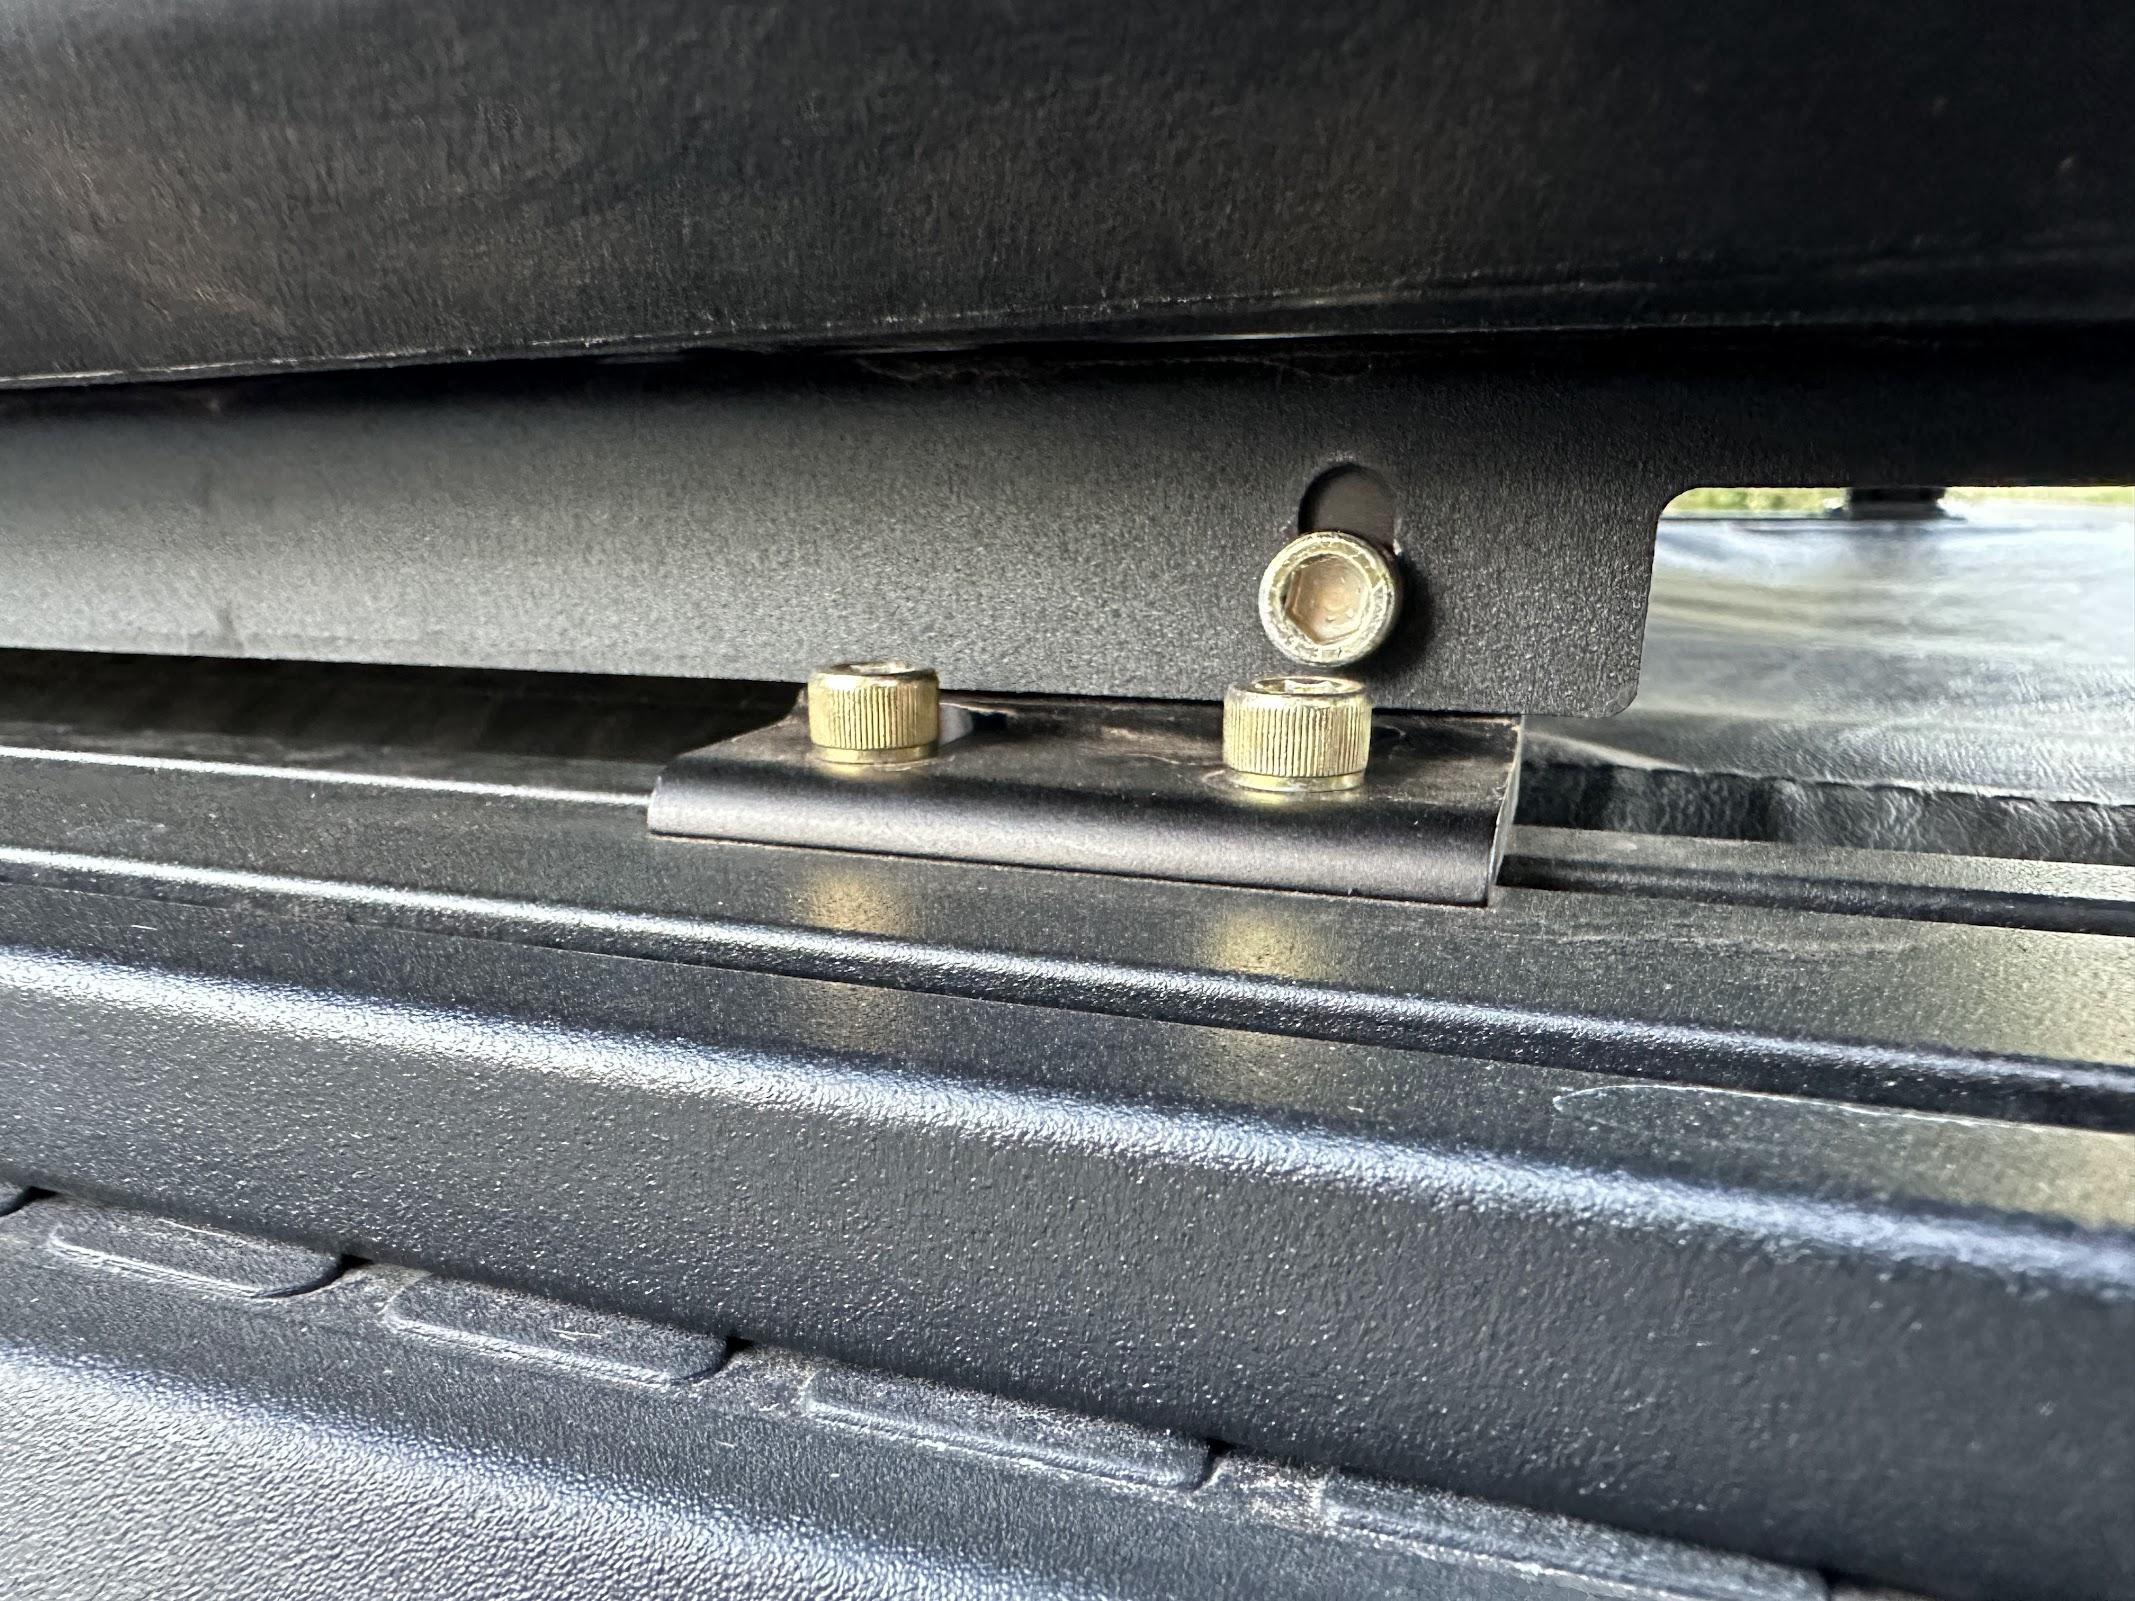
(Right hinge needs to be tightened down in this photo.)

This will allow the slide to pivot up with the spare tire compartment door. You'll need to order and install the Bedside Rack System - Cab Wall MOLLE Panel Kit | Rivian R1T (2022+) - BuiltRight Industries. Make sure to order the MOLLE Nuts | Threaded MOLLE/PALS Fastener - BuiltRight Industries as well. You'll need those fasteners to bolt the hinges to the panel. Those two parts together are about $417. Installation of the molle panel is very straightforward and there are tutorial videos online.

Next you're going to need a pair of 48" T Slot Aluminum Extrusions. You only need two sticks so the ten pack I've linked is way more than you need. They're also available in black if you prefer to have everything blend in. To attach the extrusions to the molle panel, you'll need hinges like this or this. You will need to tap the extrusion to attach the hinge so if you don't have a tapping bit, there are some hinges that also come with what you'll need in a kit. If you've never tapped extrusion before, it's easy. You need a tapping bit, handle, and cutting lube (or just use WD40.) There are plenty of Youtube tutorials to show you how.

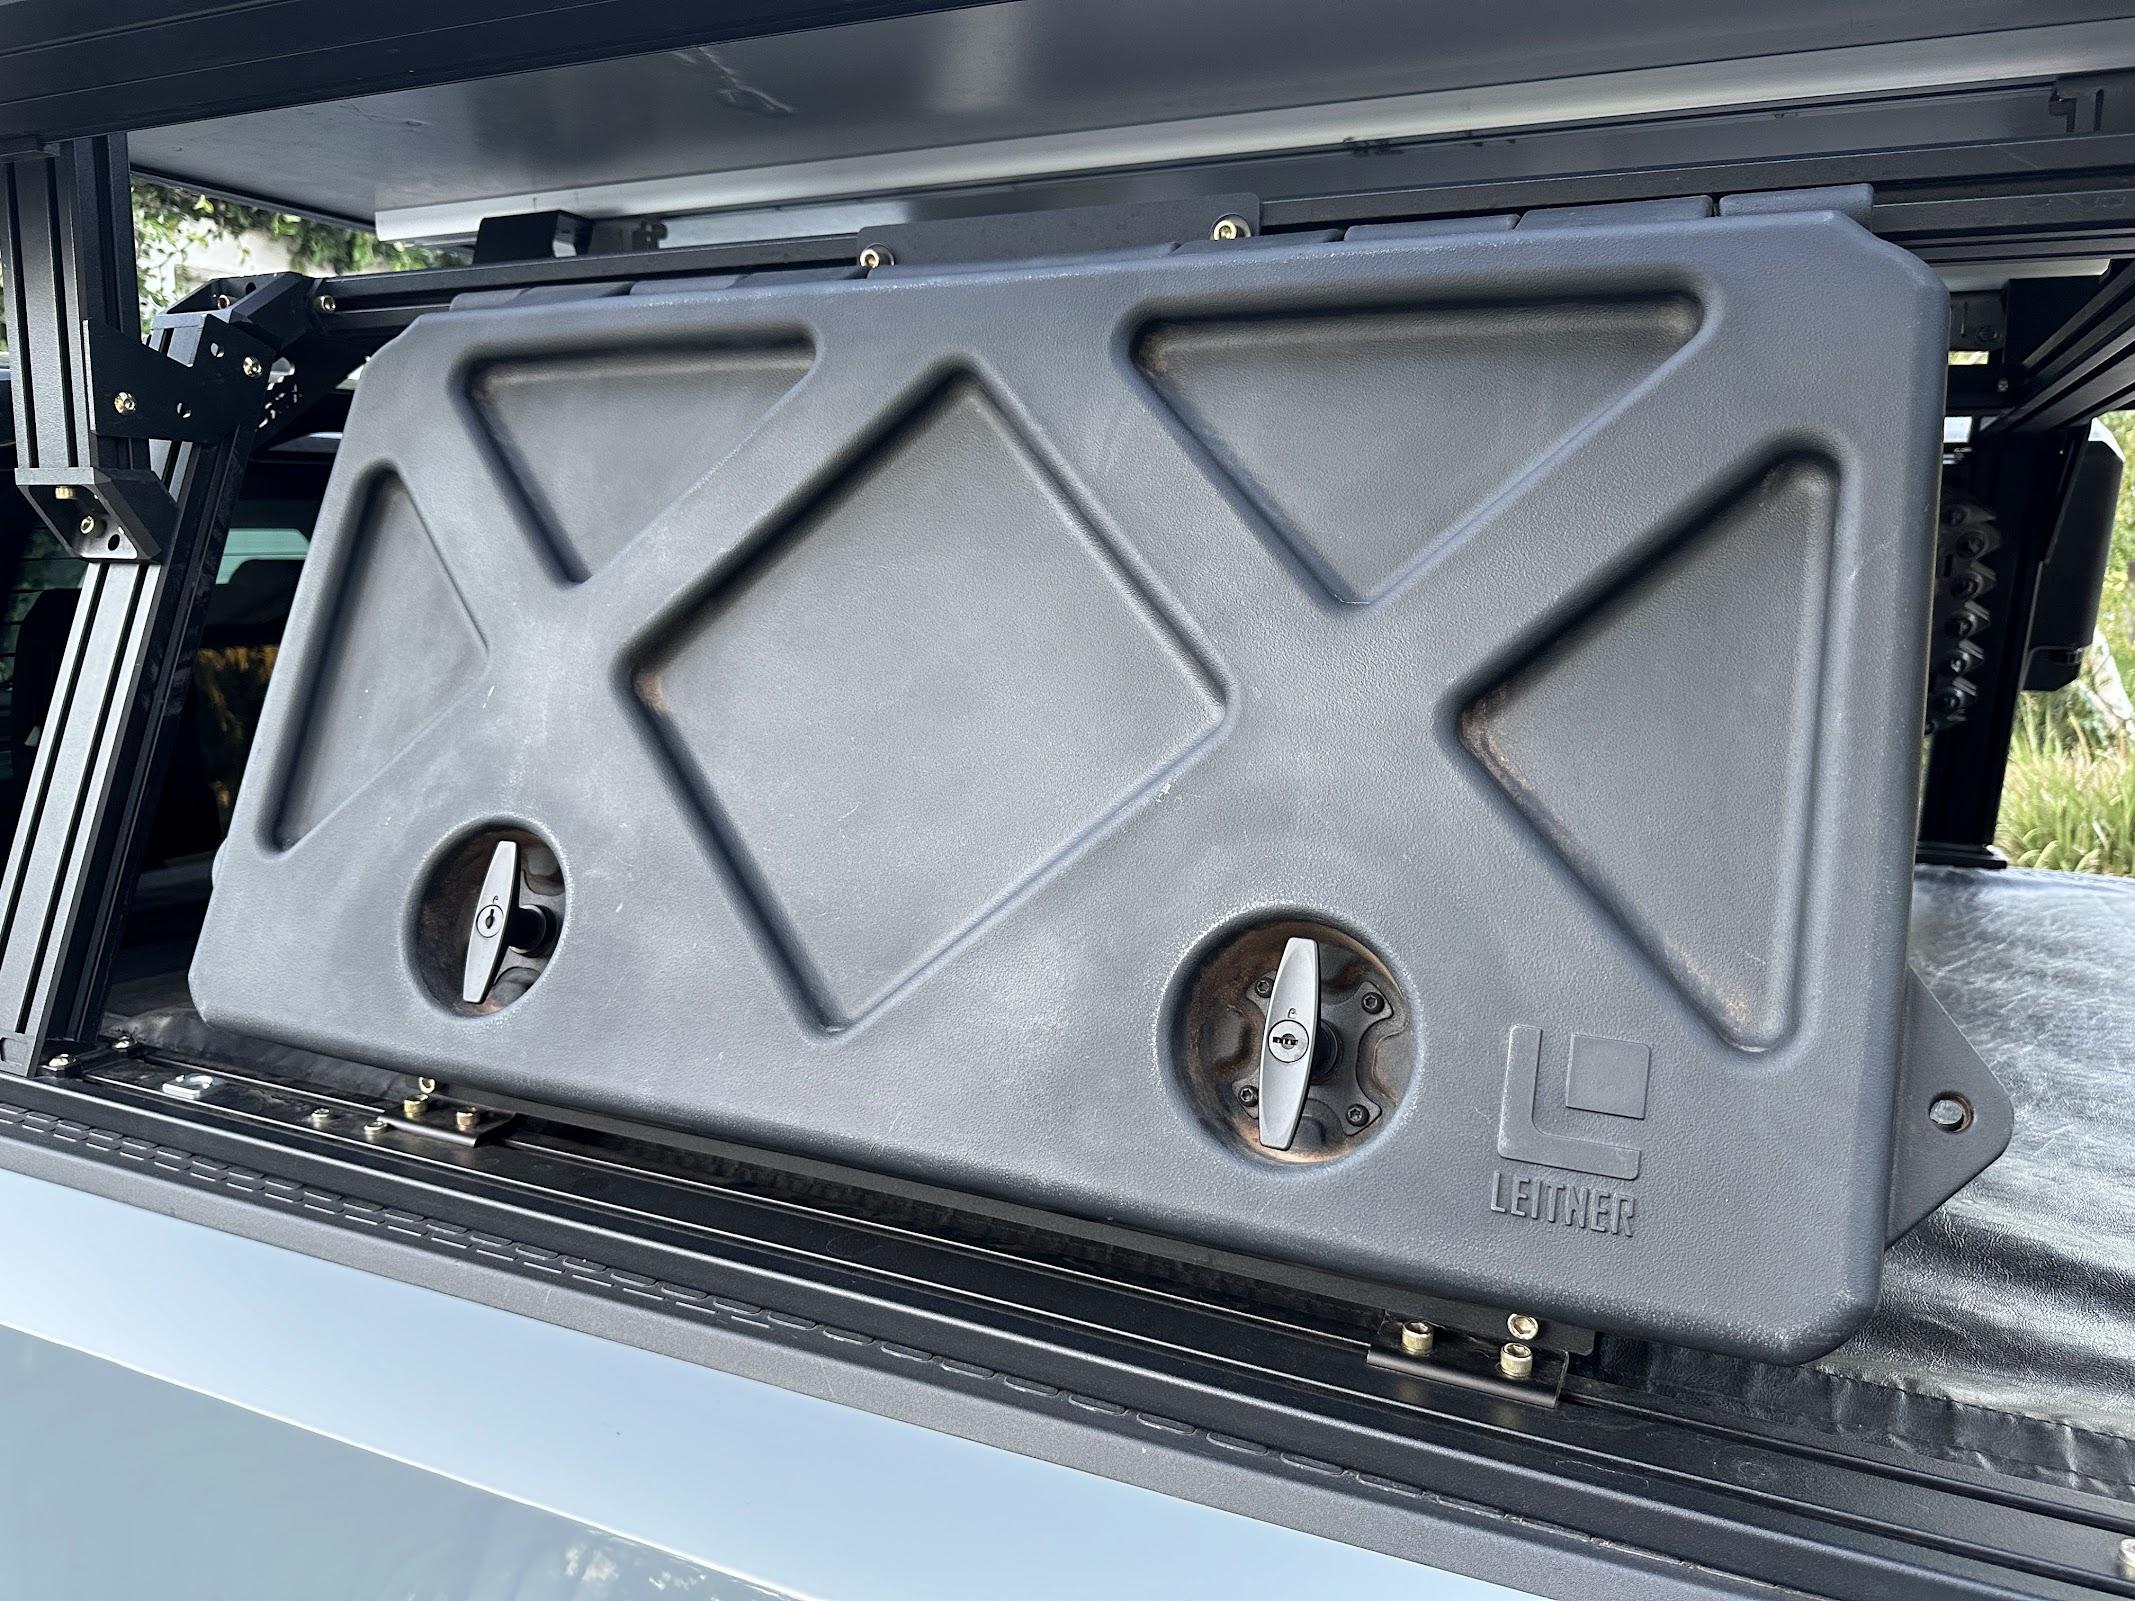
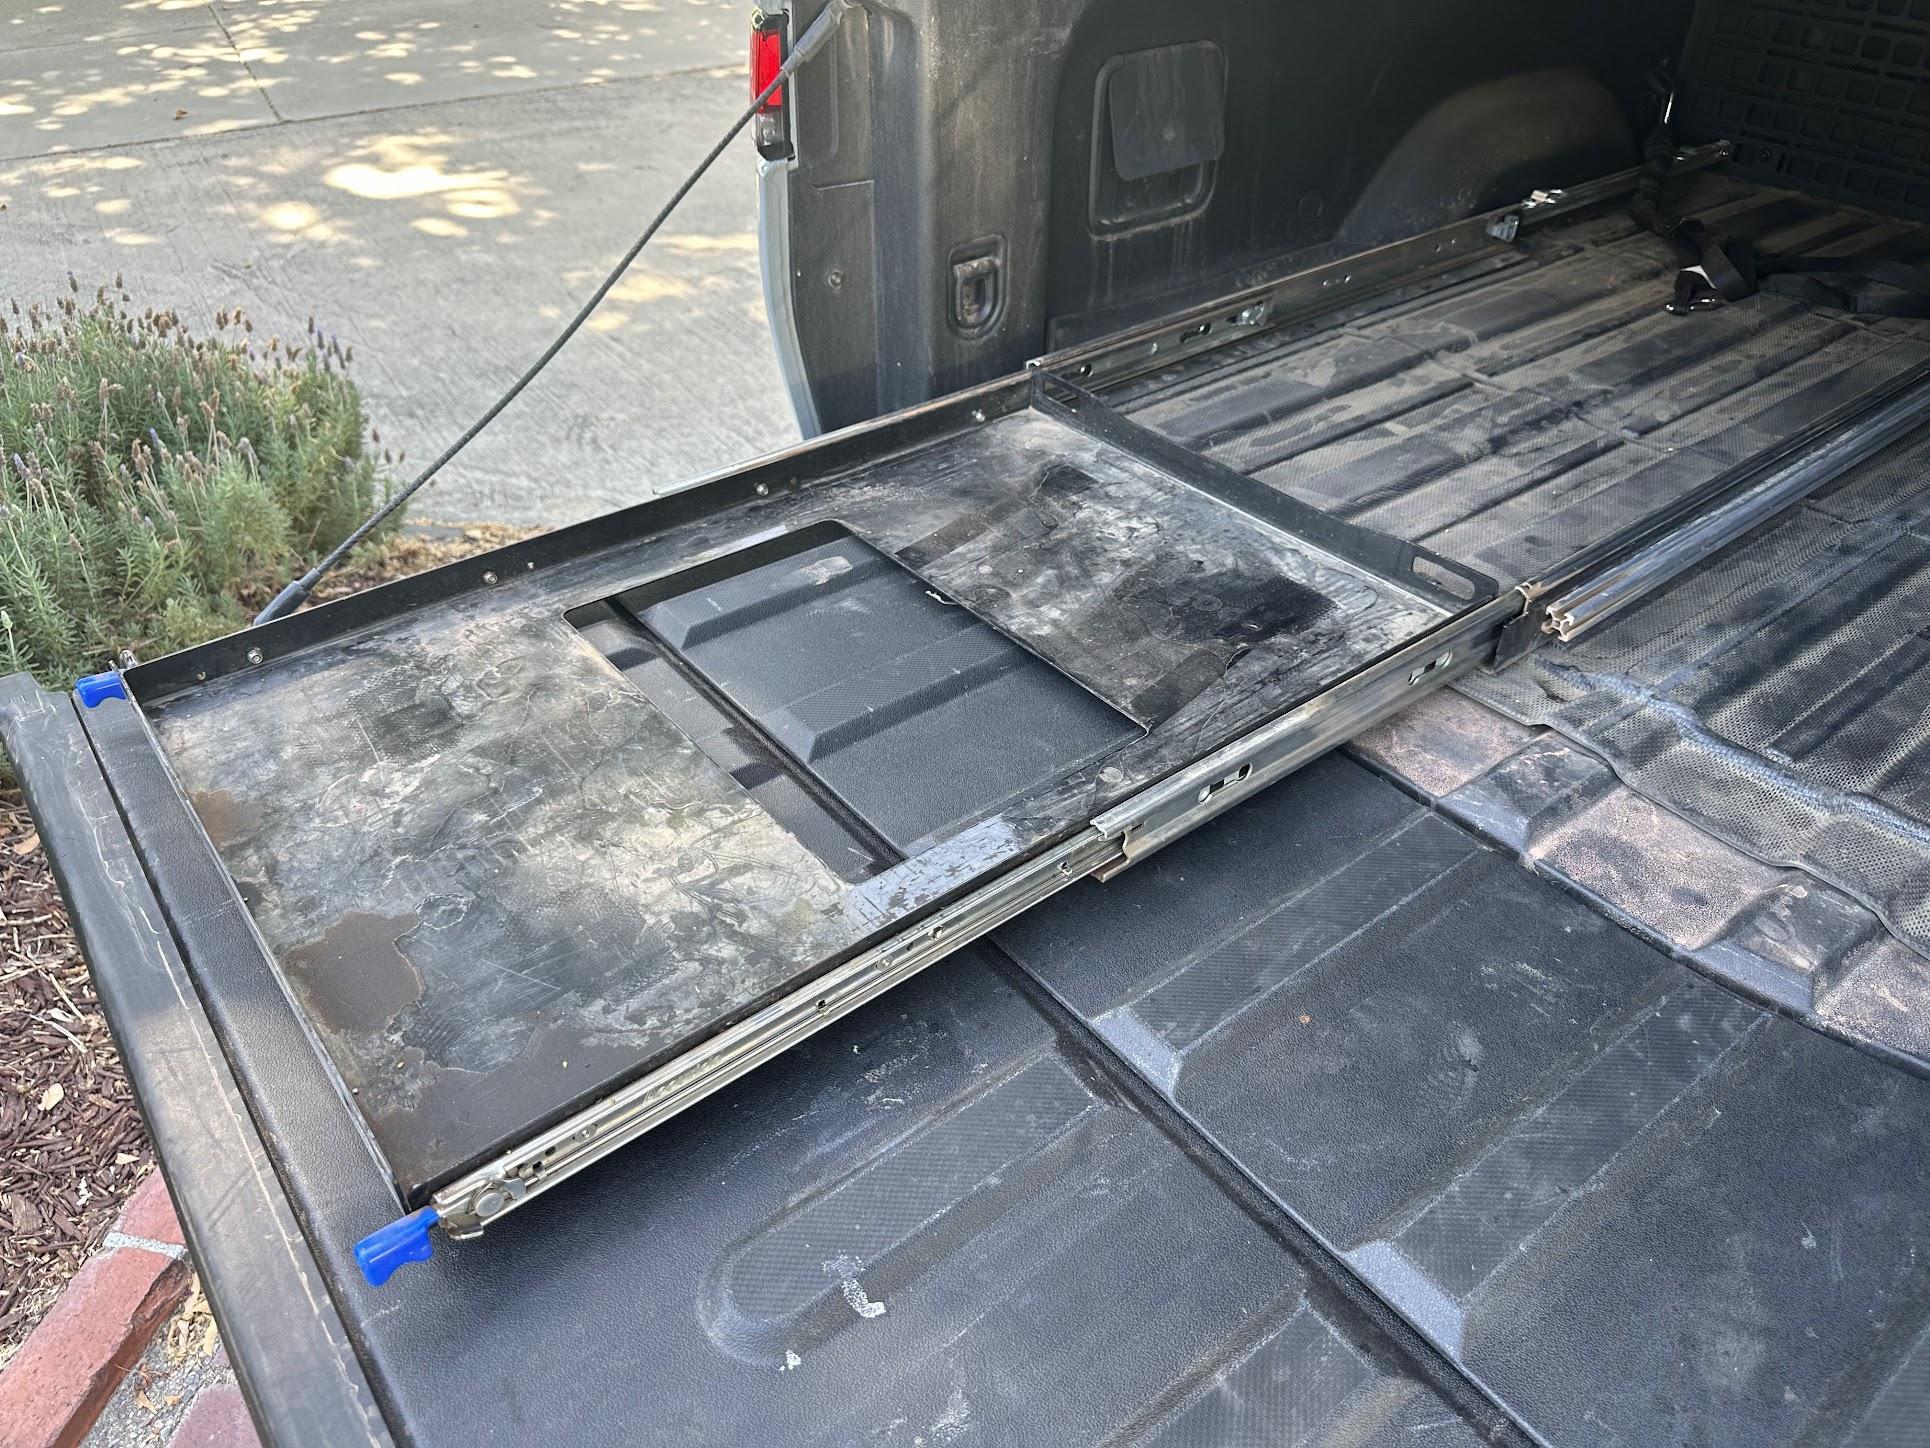
To figure out where you're going to want to install the hinges to the molle panel, you will first need to attach the 2020 extrusions to your fridge slide. This is the one I used but most slides will probably work with this method as long as there's some way to attach the extrusions to the side rather than the bottom of the tray. Try to find the most low profile slide you can as there just isn't much height to work with in the R1T bed and most fridges won't fit under the cover (more on this later.) Make sure the slide you get has bolt holes on the side so you have a place to attach the extrusions. Check out this photo of the slide:

Rivian R1T R1S Rivian R1T No Drill Fridge Slide DIY Installation Walkthrough 61yF+Zy++9L._AC_SL1500_


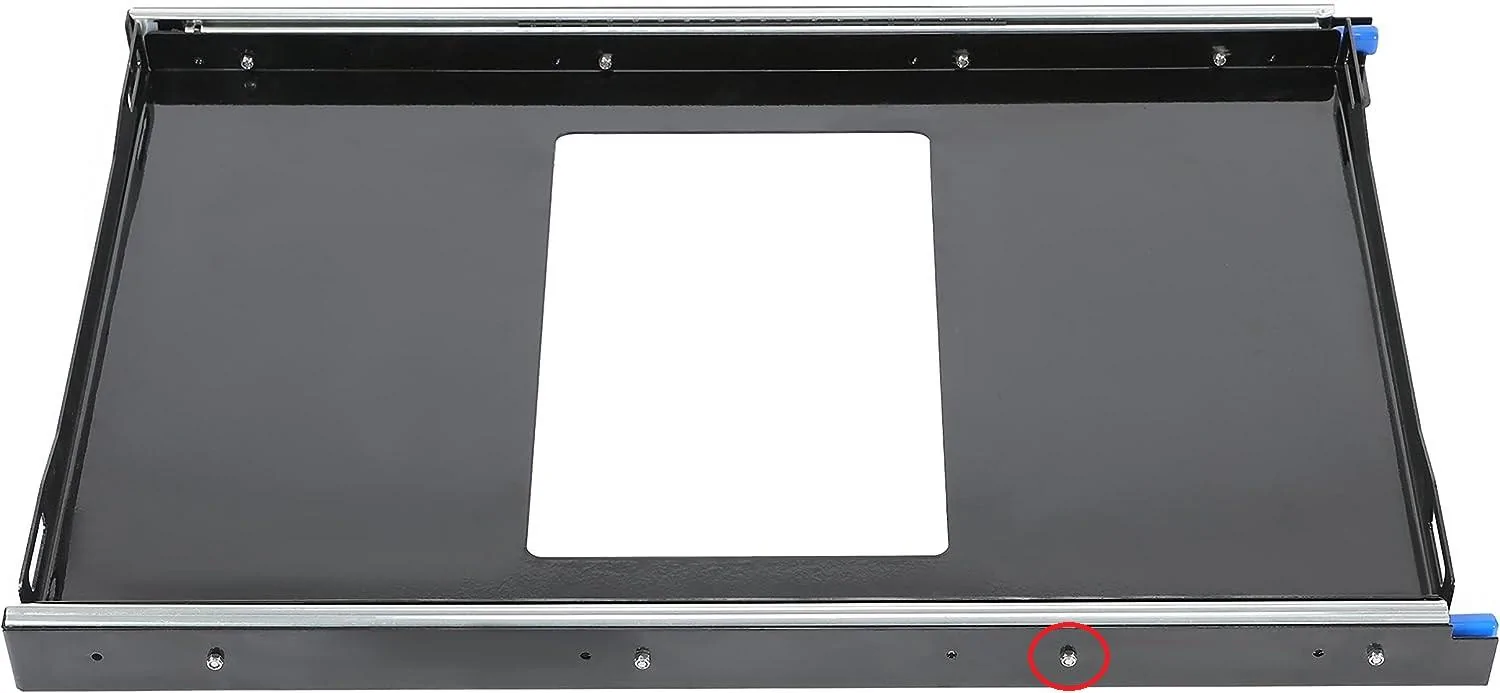
See the nuts on the side (one is circled in red)? You're going to take those off and replace them with slide in t-nuts to attach your slide to the extrusion. Putting the extrusions to the side of the slide keeps it as low as possible in the bed. The bolt and nut you'll need depends on the slide you use. The slide I ordered happened to use M5 bolts to attach the pieces matching the M5 slide in t-nuts I already had. Get the corresponding slide in tnuts that match the size of your bolt. McMaster-Carr or places that sell parts for 3D printers will have what you need.

Rivian R1T R1S Rivian R1T No Drill Fridge Slide DIY Installation Walkthrough IMG_5229

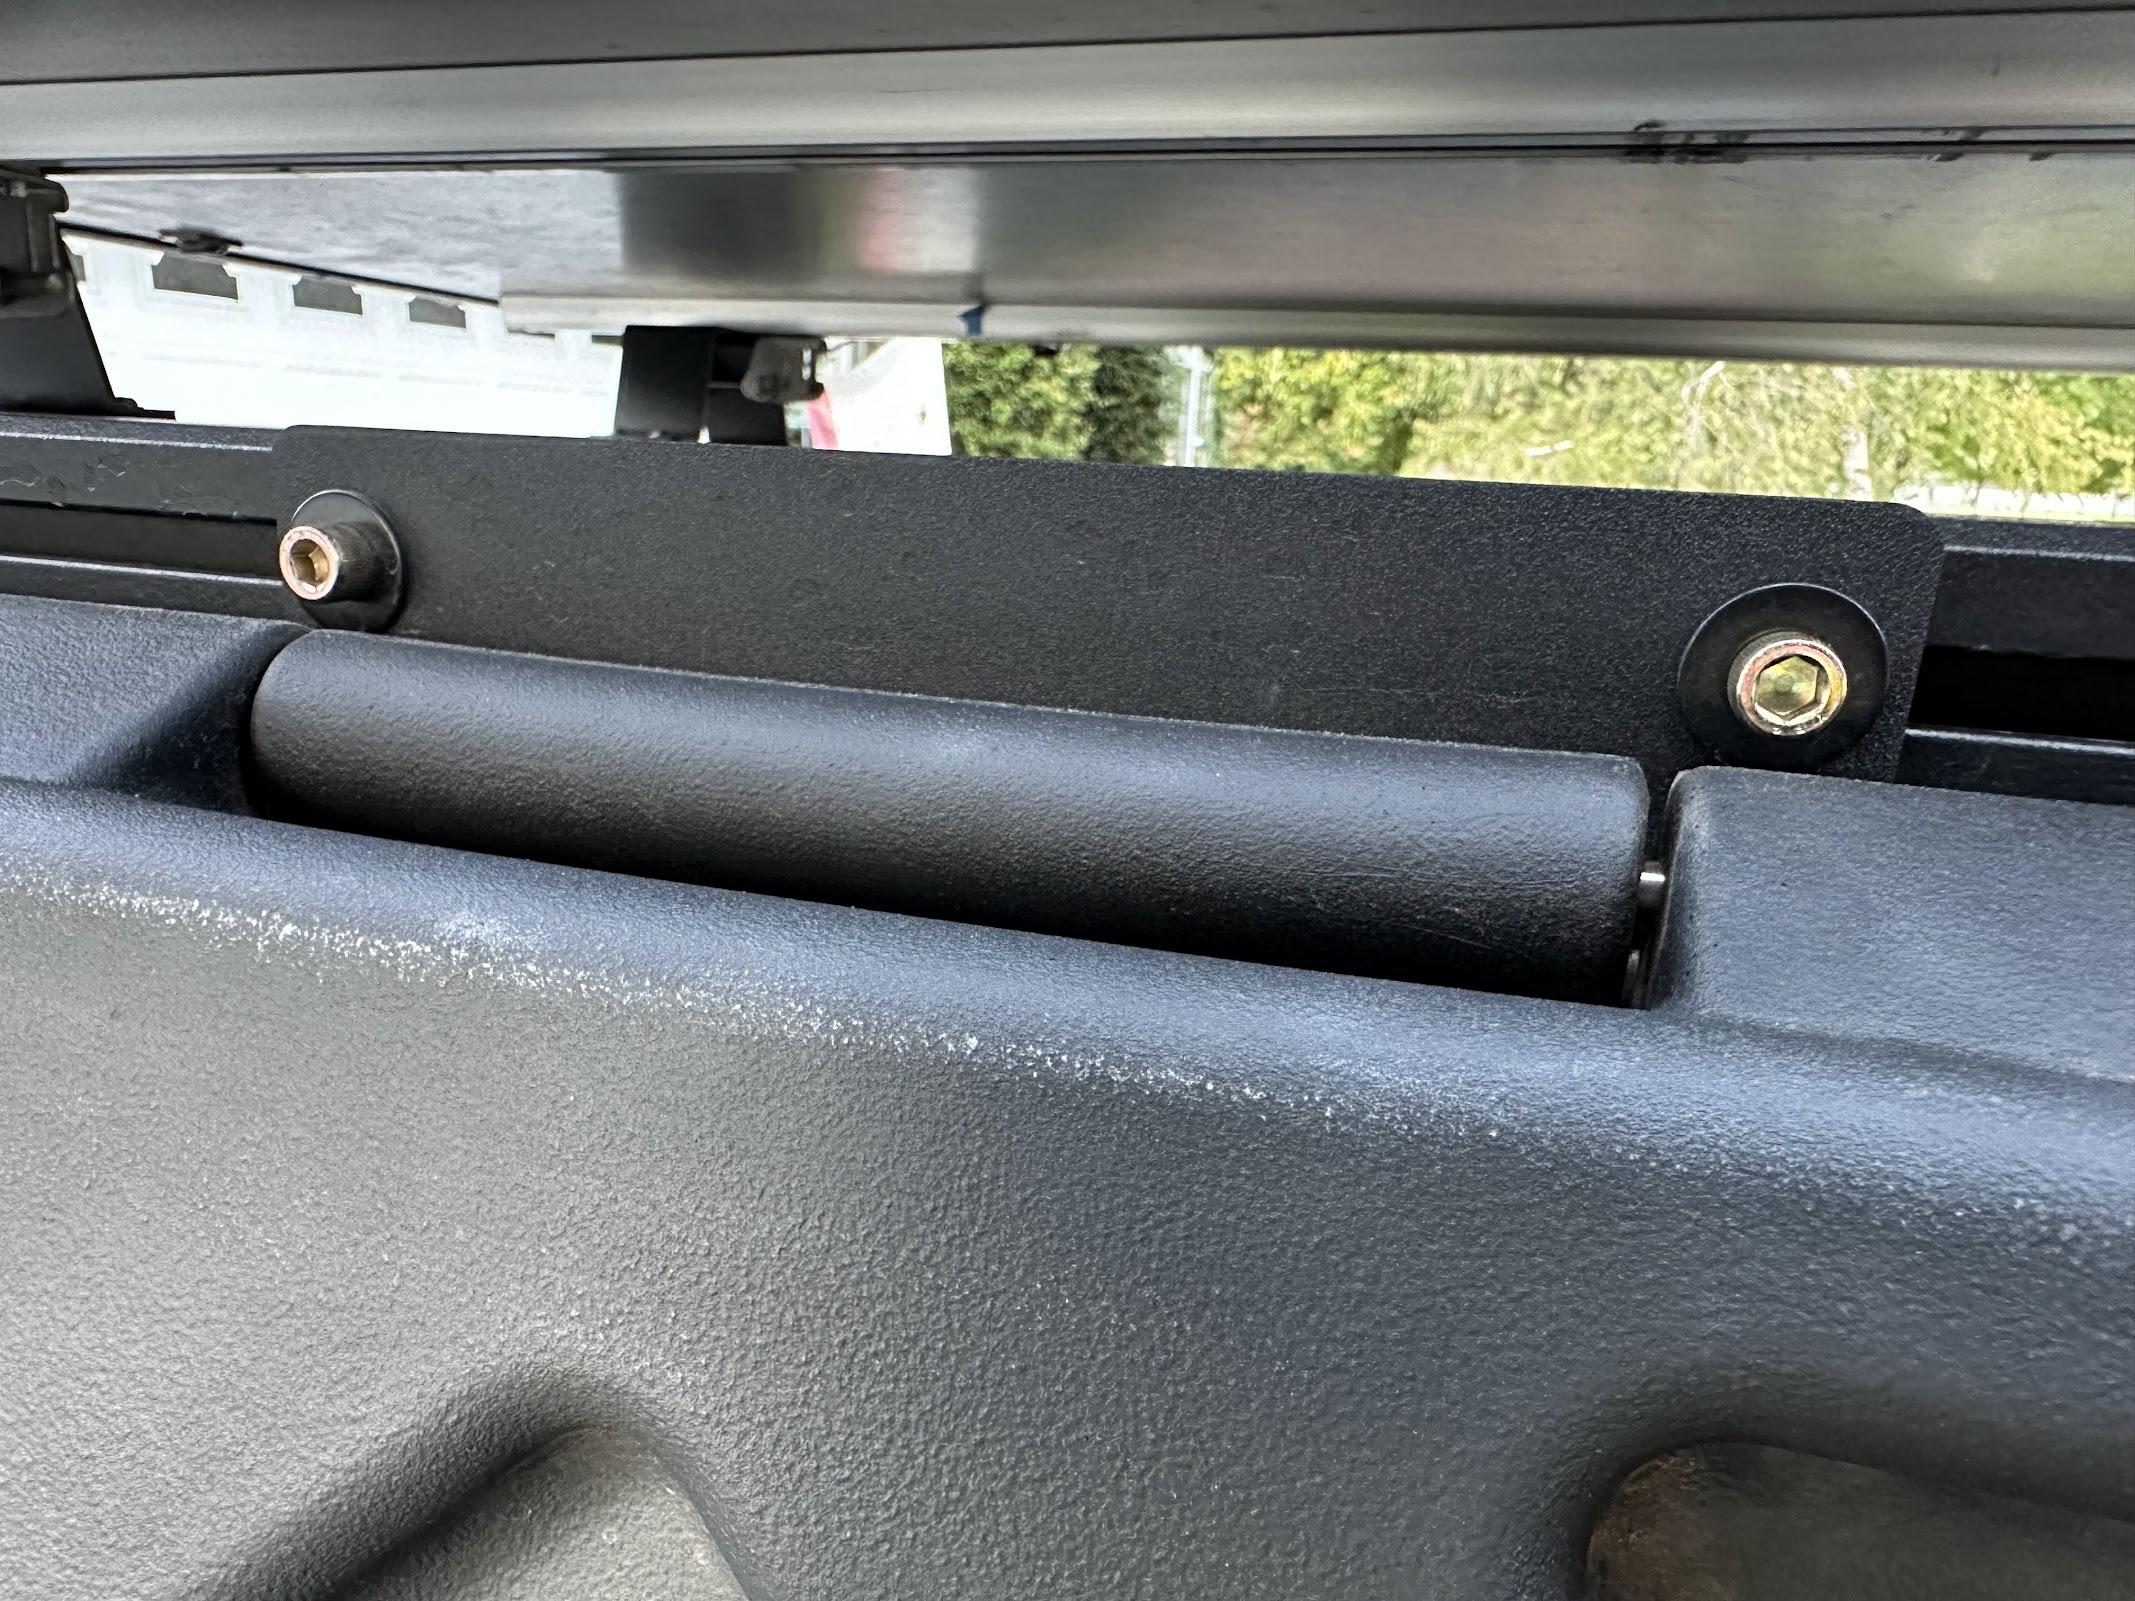
This photo shows where I've bolted the slide to the extrusion.

Once you've connected the rails to the slide, you'll be able to work out where you will need to place the BuildRight fasteners on the molle panel. I moved mine to the left side of the bed to fit under my Gearpod but if you're going to plug into the outlets, the right side is probably a better location.

Put one side of the hinge on the extrusion and one side loosely on the Buildright fasteners. The hinges, extrusion, and the panel are all aluminum so there's going to be enough flex for you to get things more or less lined up without perfect placement. Line everything up and tighten everything down. Don't worry about bending the hinges a bit or tightening them down all the way. We just don't want them coming apart.

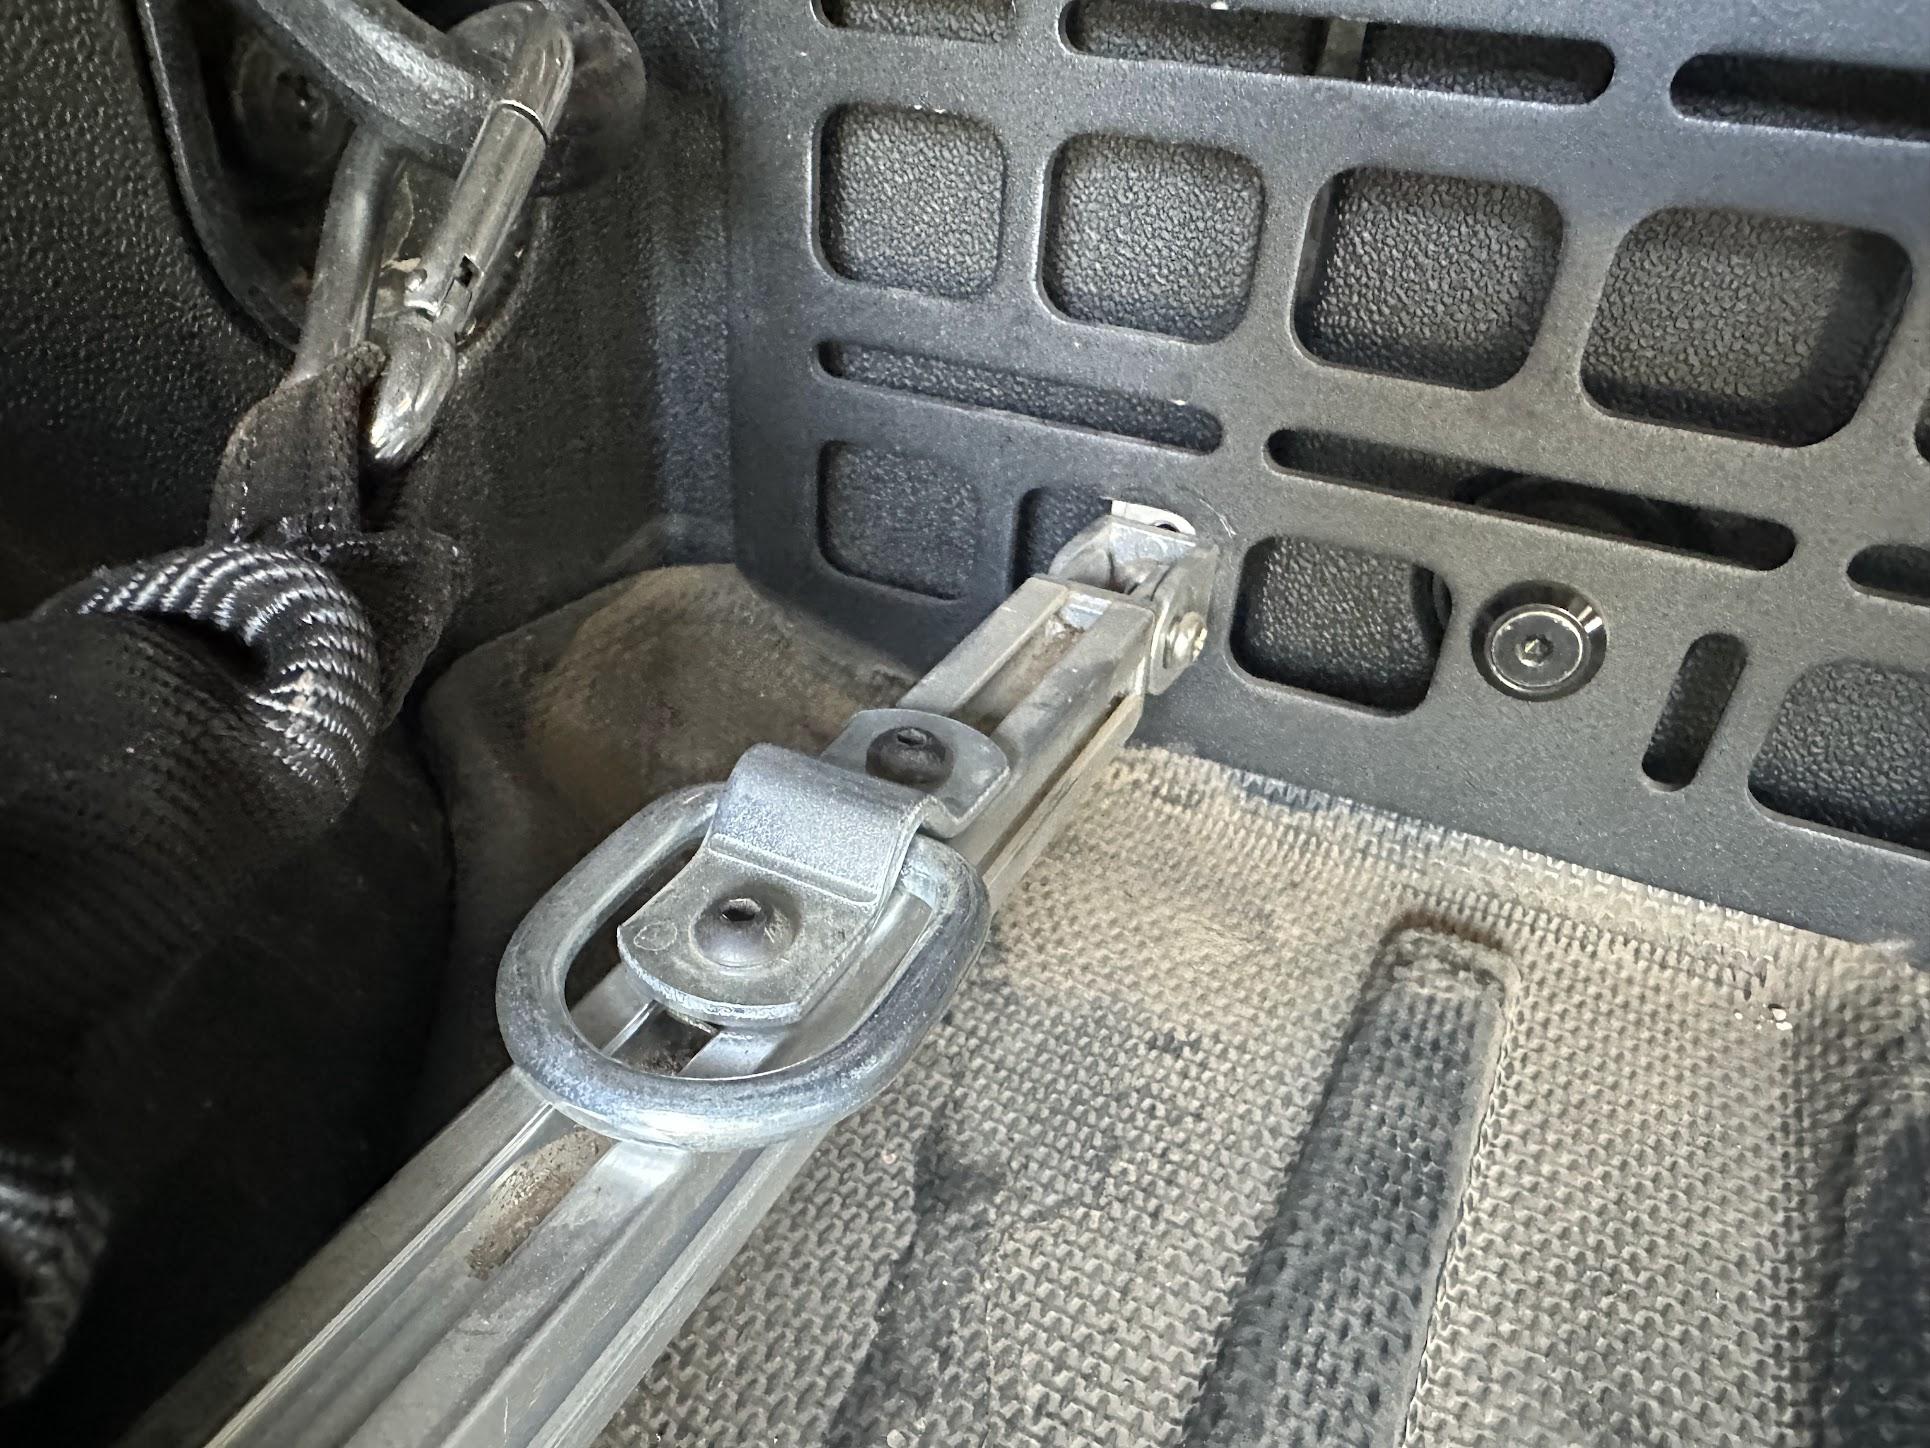
To create some extra tie down points along the extrusion, you can use the same slide in t-nuts with some D Ring Tie Down Anchors (pictured above.)

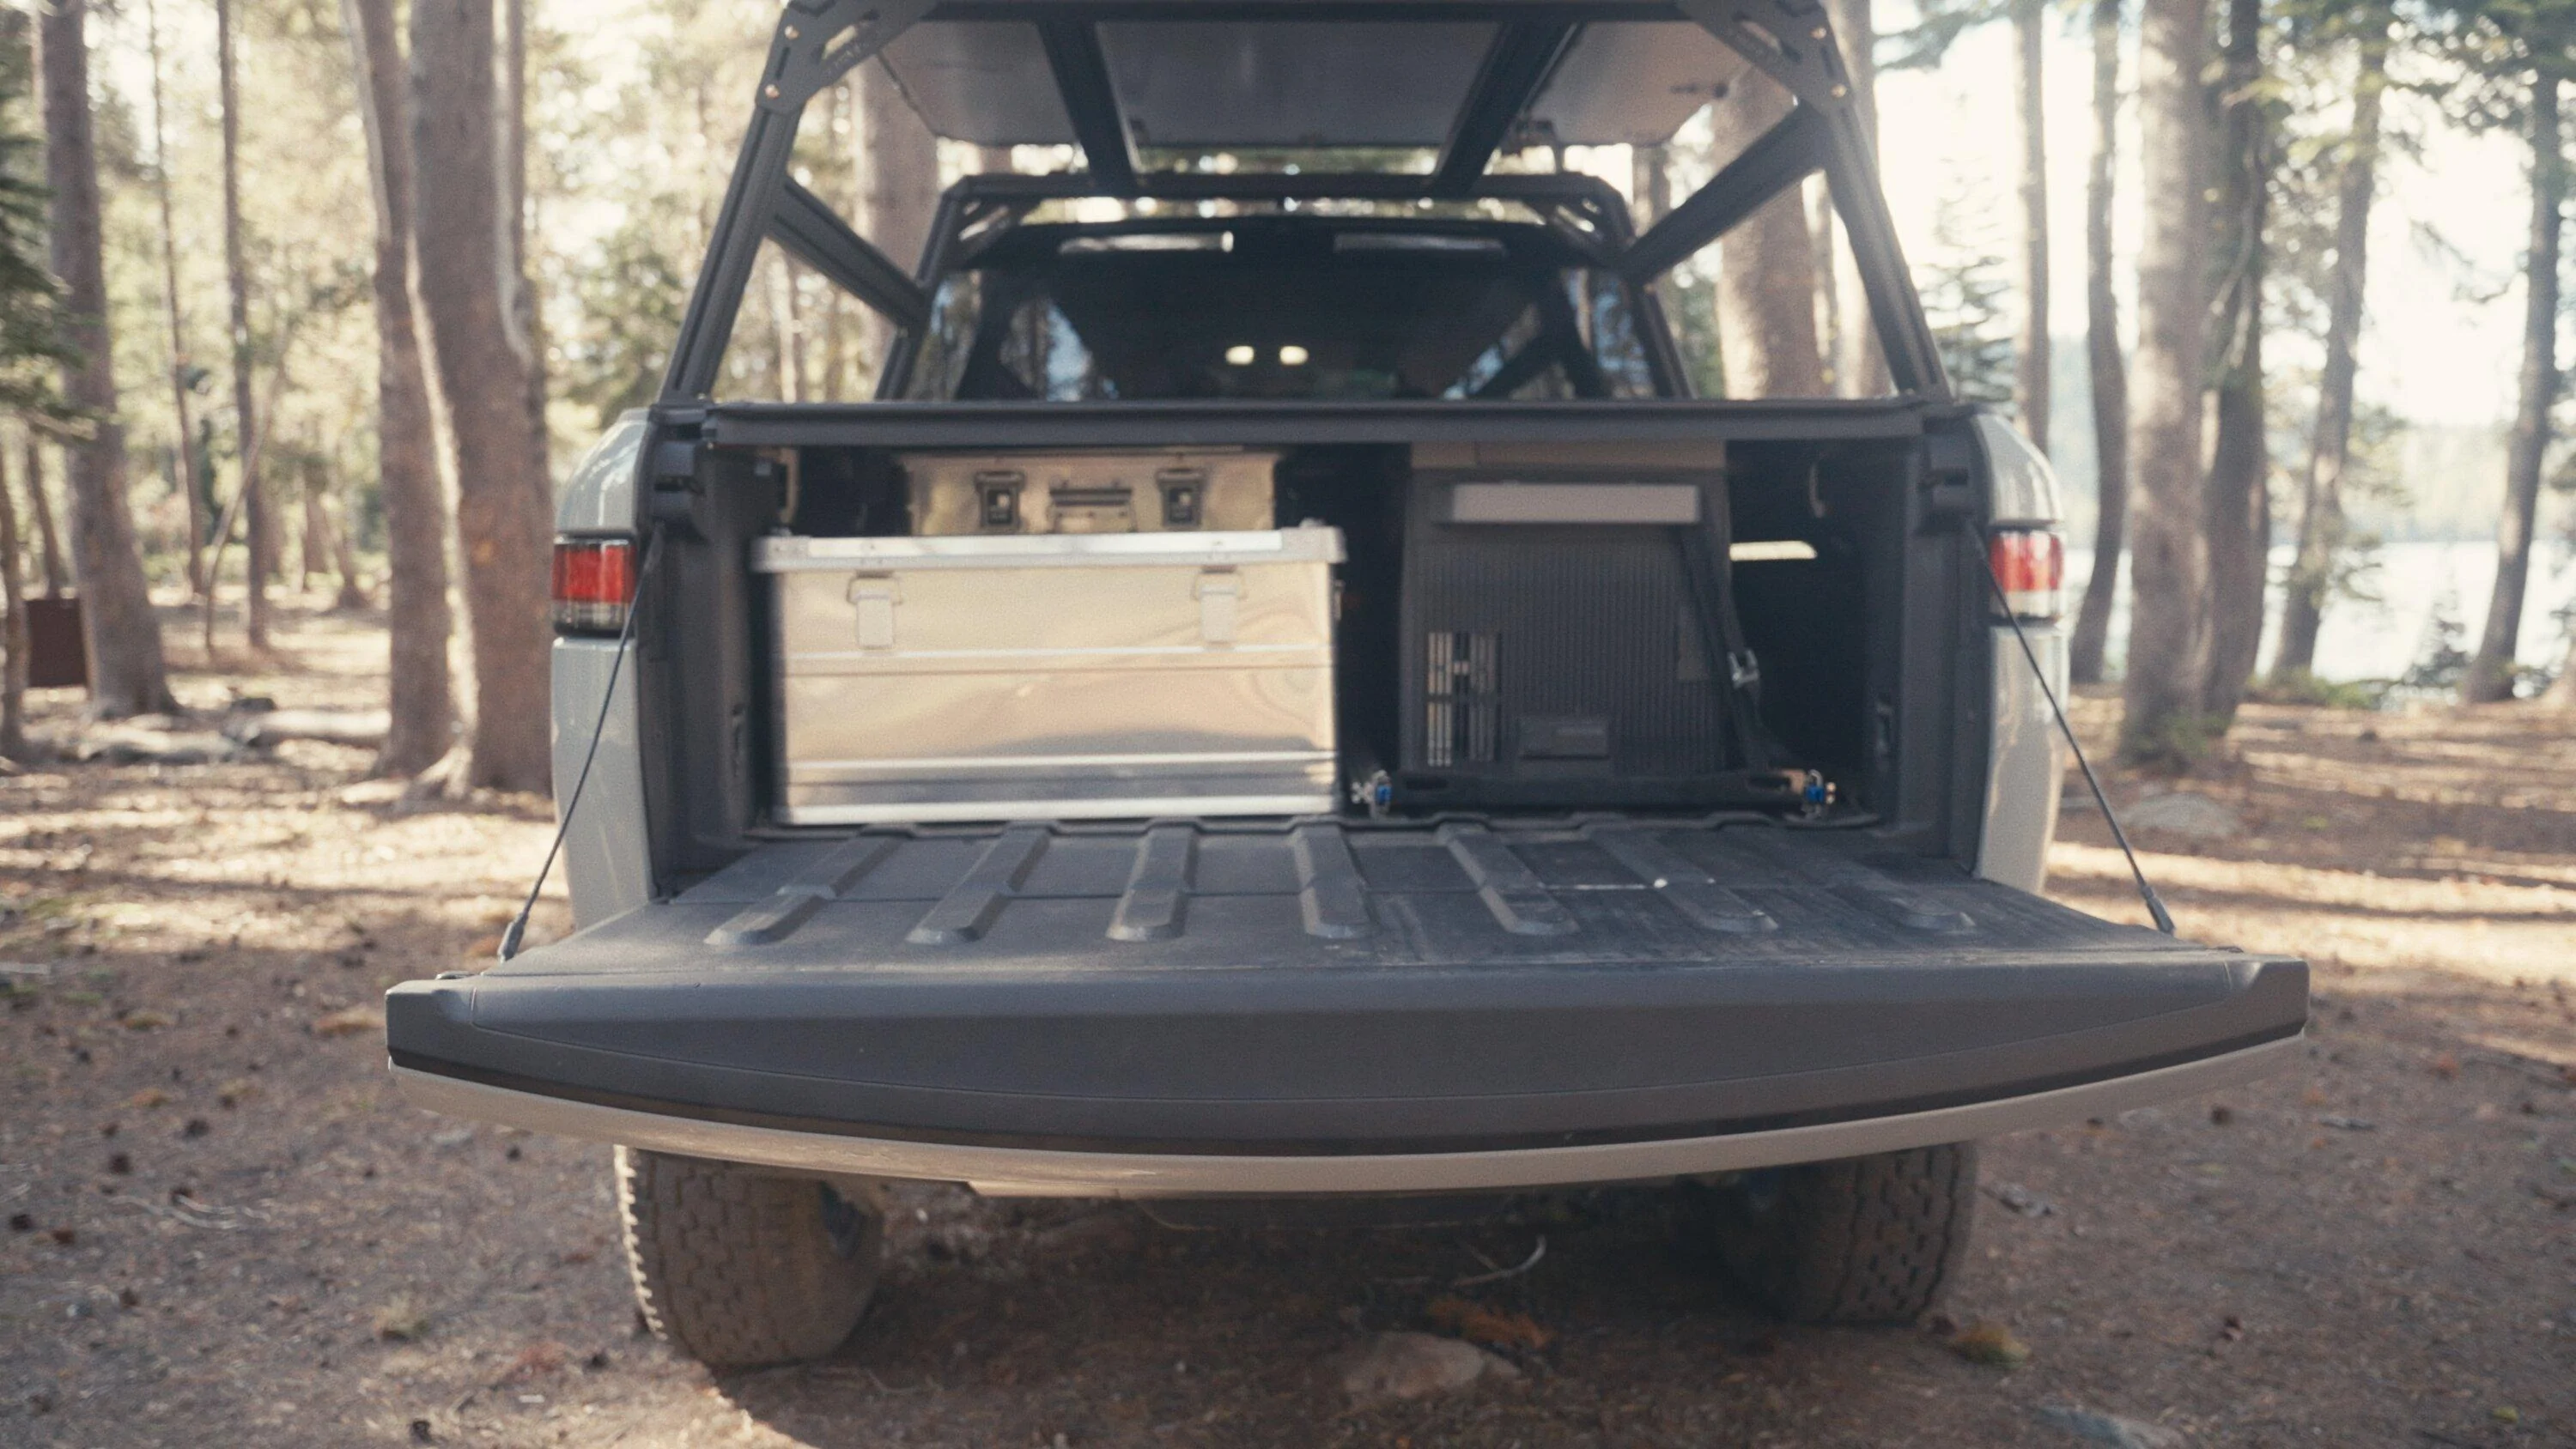
These extrusions will keep your slide secure along the length of your bed but it doesn't do much for lateral forces. At least with the slide I used, it nestles into the grooves in the bed and the weight of the fridge has kept everything in place even in pretty significant off road off camber situations. I also generally keep a box packed next to the fridge (pictured below) that would keep it from moving too much even if it did slip out of the grooves. If you're really worried about it sliding across the bed, you can always attach a d-ring to the front of the extrusion and lash it to one of the bed rings.

Rivian R1T R1S Rivian R1T No Drill Fridge Slide DIY Installation Walkthrough IMG_4907


I should note that I have a BestEVMod truck bed mat liner underneath the slide. It has a lip on the end of the matt that does slightly interfere with the operation of the slide. I generally have to gently lift the fridge when I slide it out to clear the lip. You will need to have the bed mat in place before you install the molle panel.

A few things to keep in mind when selecting fridge to go with this setup. The distance from the top of the slide to the bottom of the tonneau rail is only about 16.4in.

Rivian R1T R1S Rivian R1T No Drill Fridge Slide DIY Installation Walkthrough IMG_5238


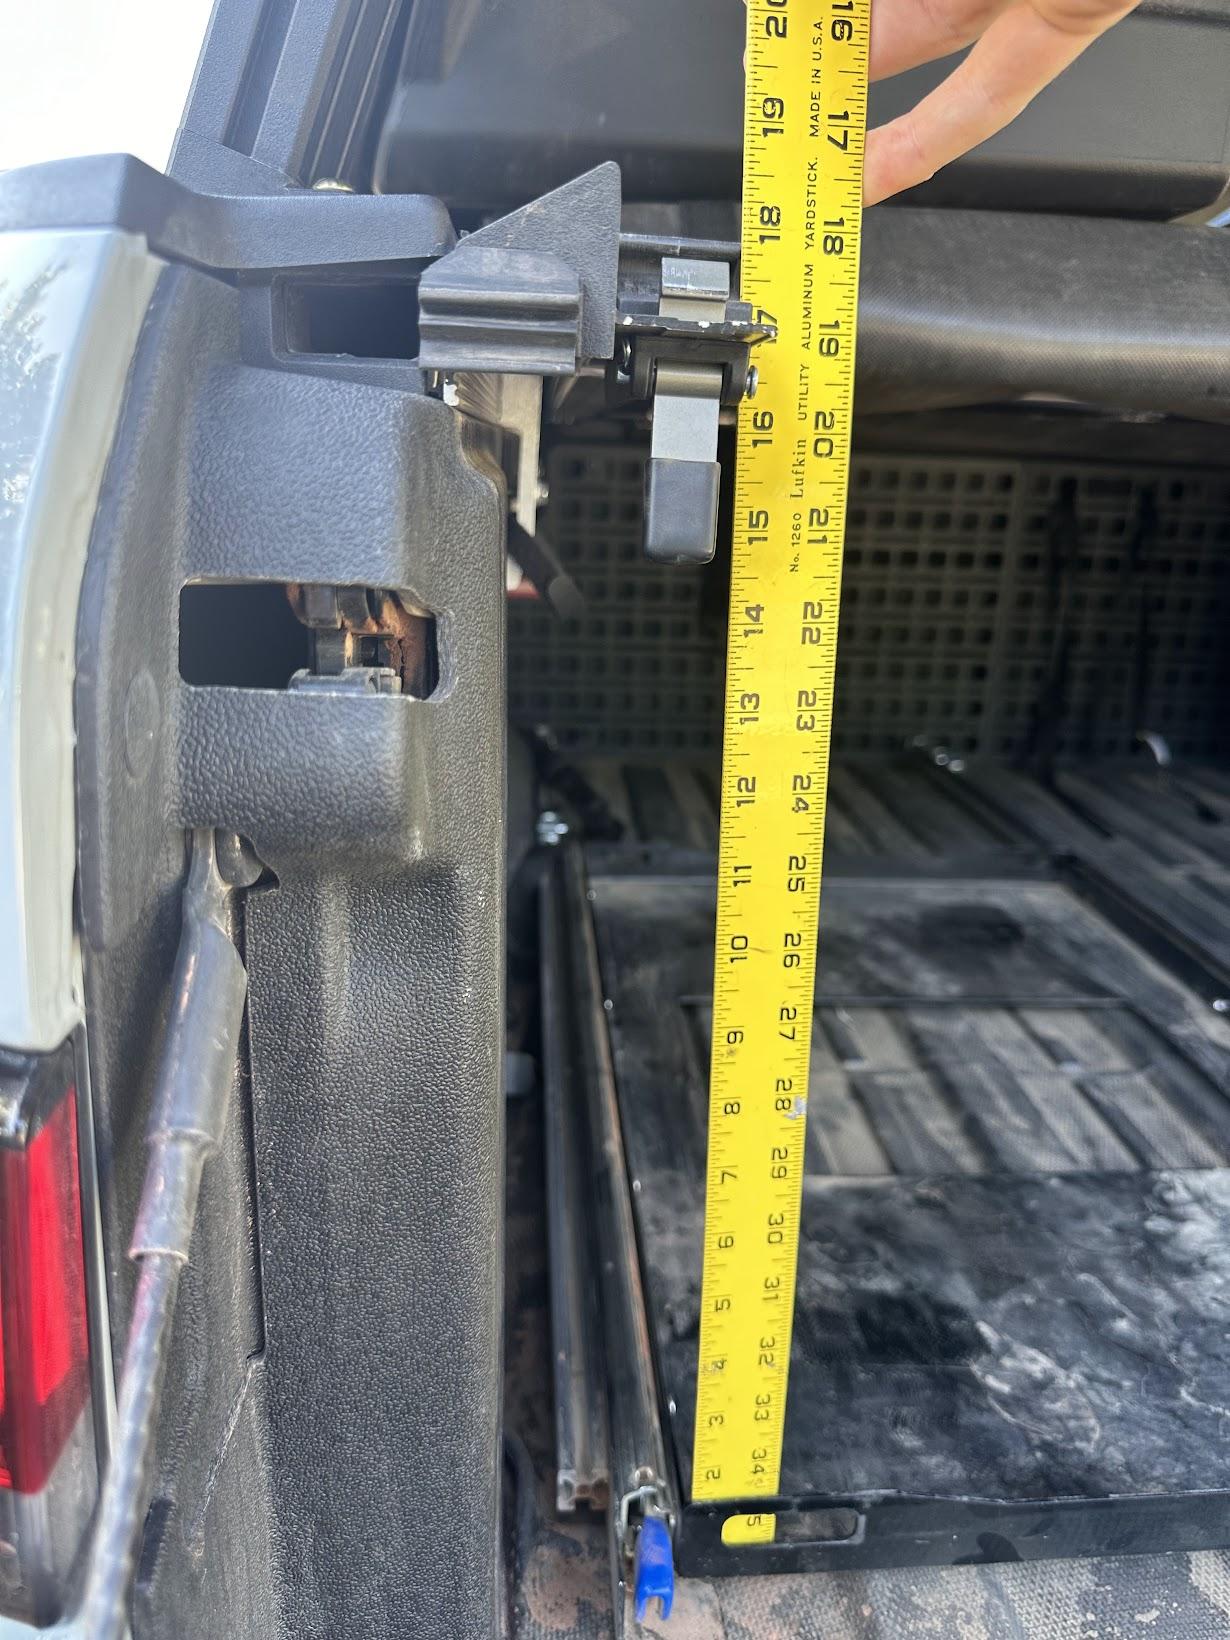
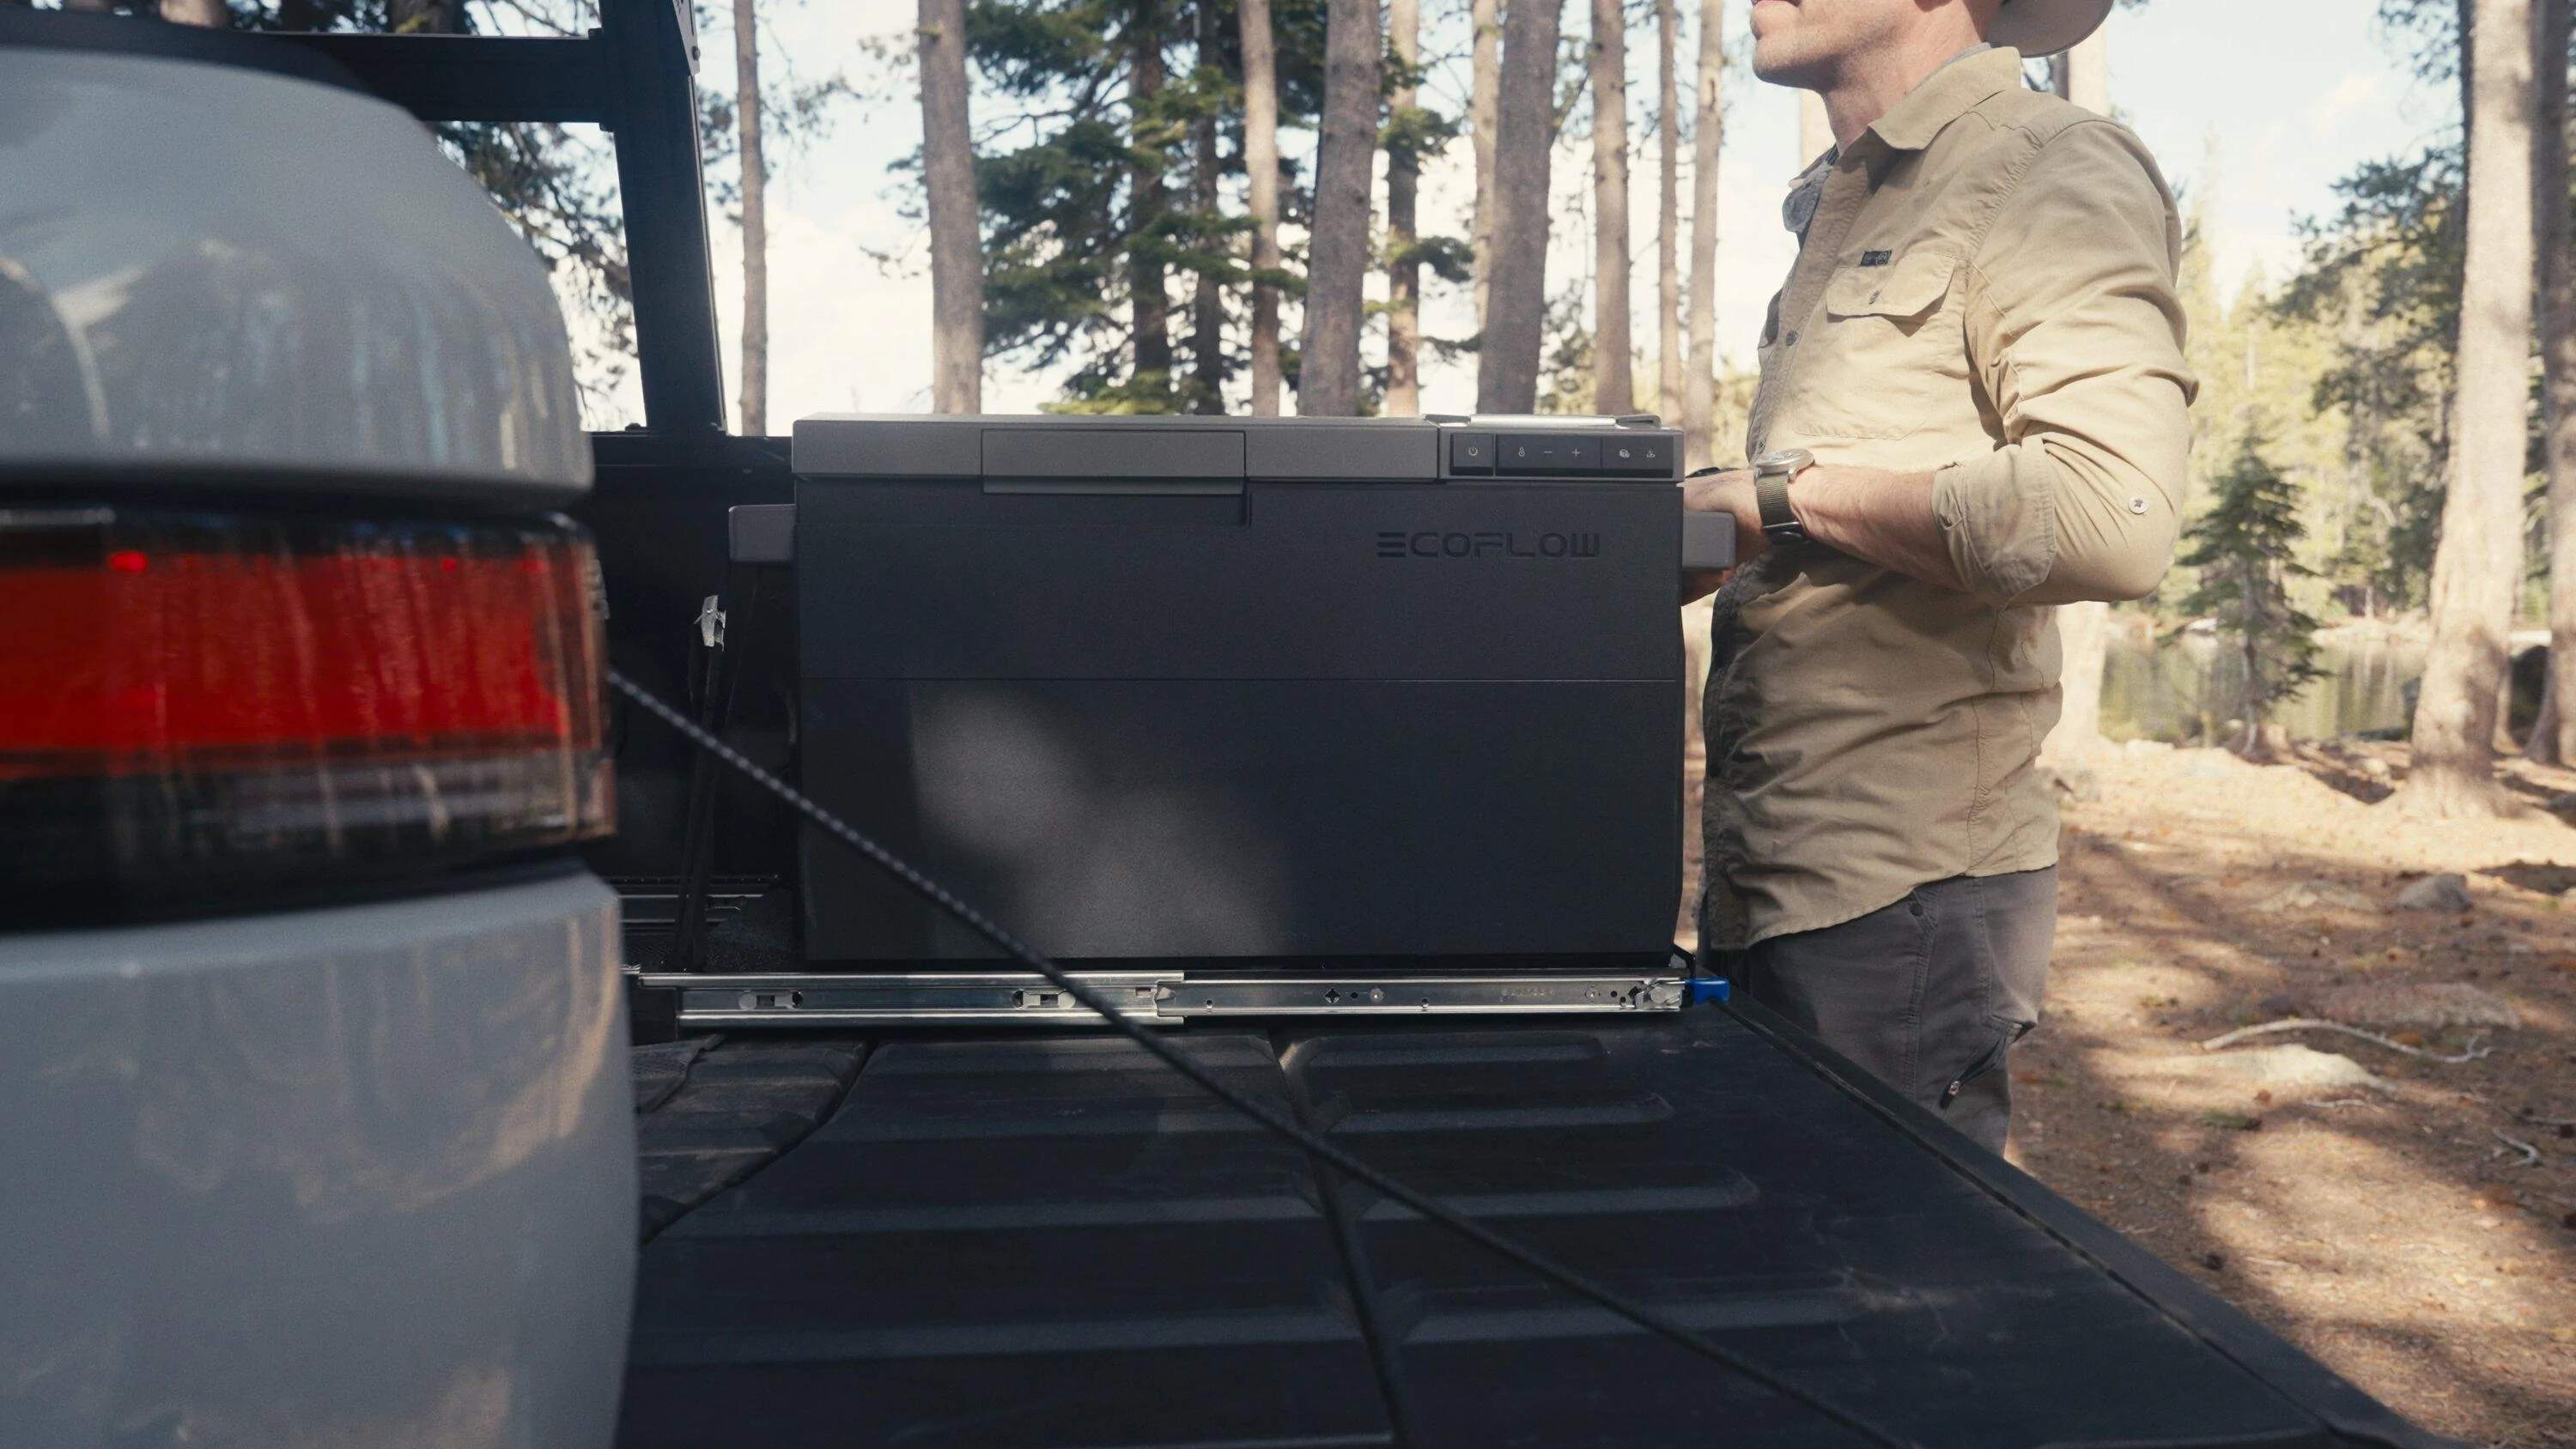
That measurement is an estimate since I don't have a Rivian manual or electric top to precisely measure against. I'd say it's within a .1 of an inch. That's not enough for most fridges. The way I got around this was to go with the EVSportline RMaxx Soft Tonneau Roll-up Bed Cover for Rivian R1T. I got tired of waiting for Rivian to come out with their own tonneau cover so I bought this third party cover and it's fantastic. It's easy to install and crucially, it provides extra clearance in the bed since the soft top sits up higher than the Rivian manual and electric tonneaus. This allows me to fit an Ecoflow Glacier underneath the cover.

Rivian R1T R1S Rivian R1T No Drill Fridge Slide DIY Installation Walkthrough back profile_1.1.1


It just fits but I do need to unlatch the cover to slide out the fridge. That extra clearance under the soft top also allows you to stand up a full size propane bottle underneath the tonneau. For those of us out West with fire bans, it's great to be able to safely strap a propane bottle to the molle panel in the bed and use it with portable gas fireplaces.

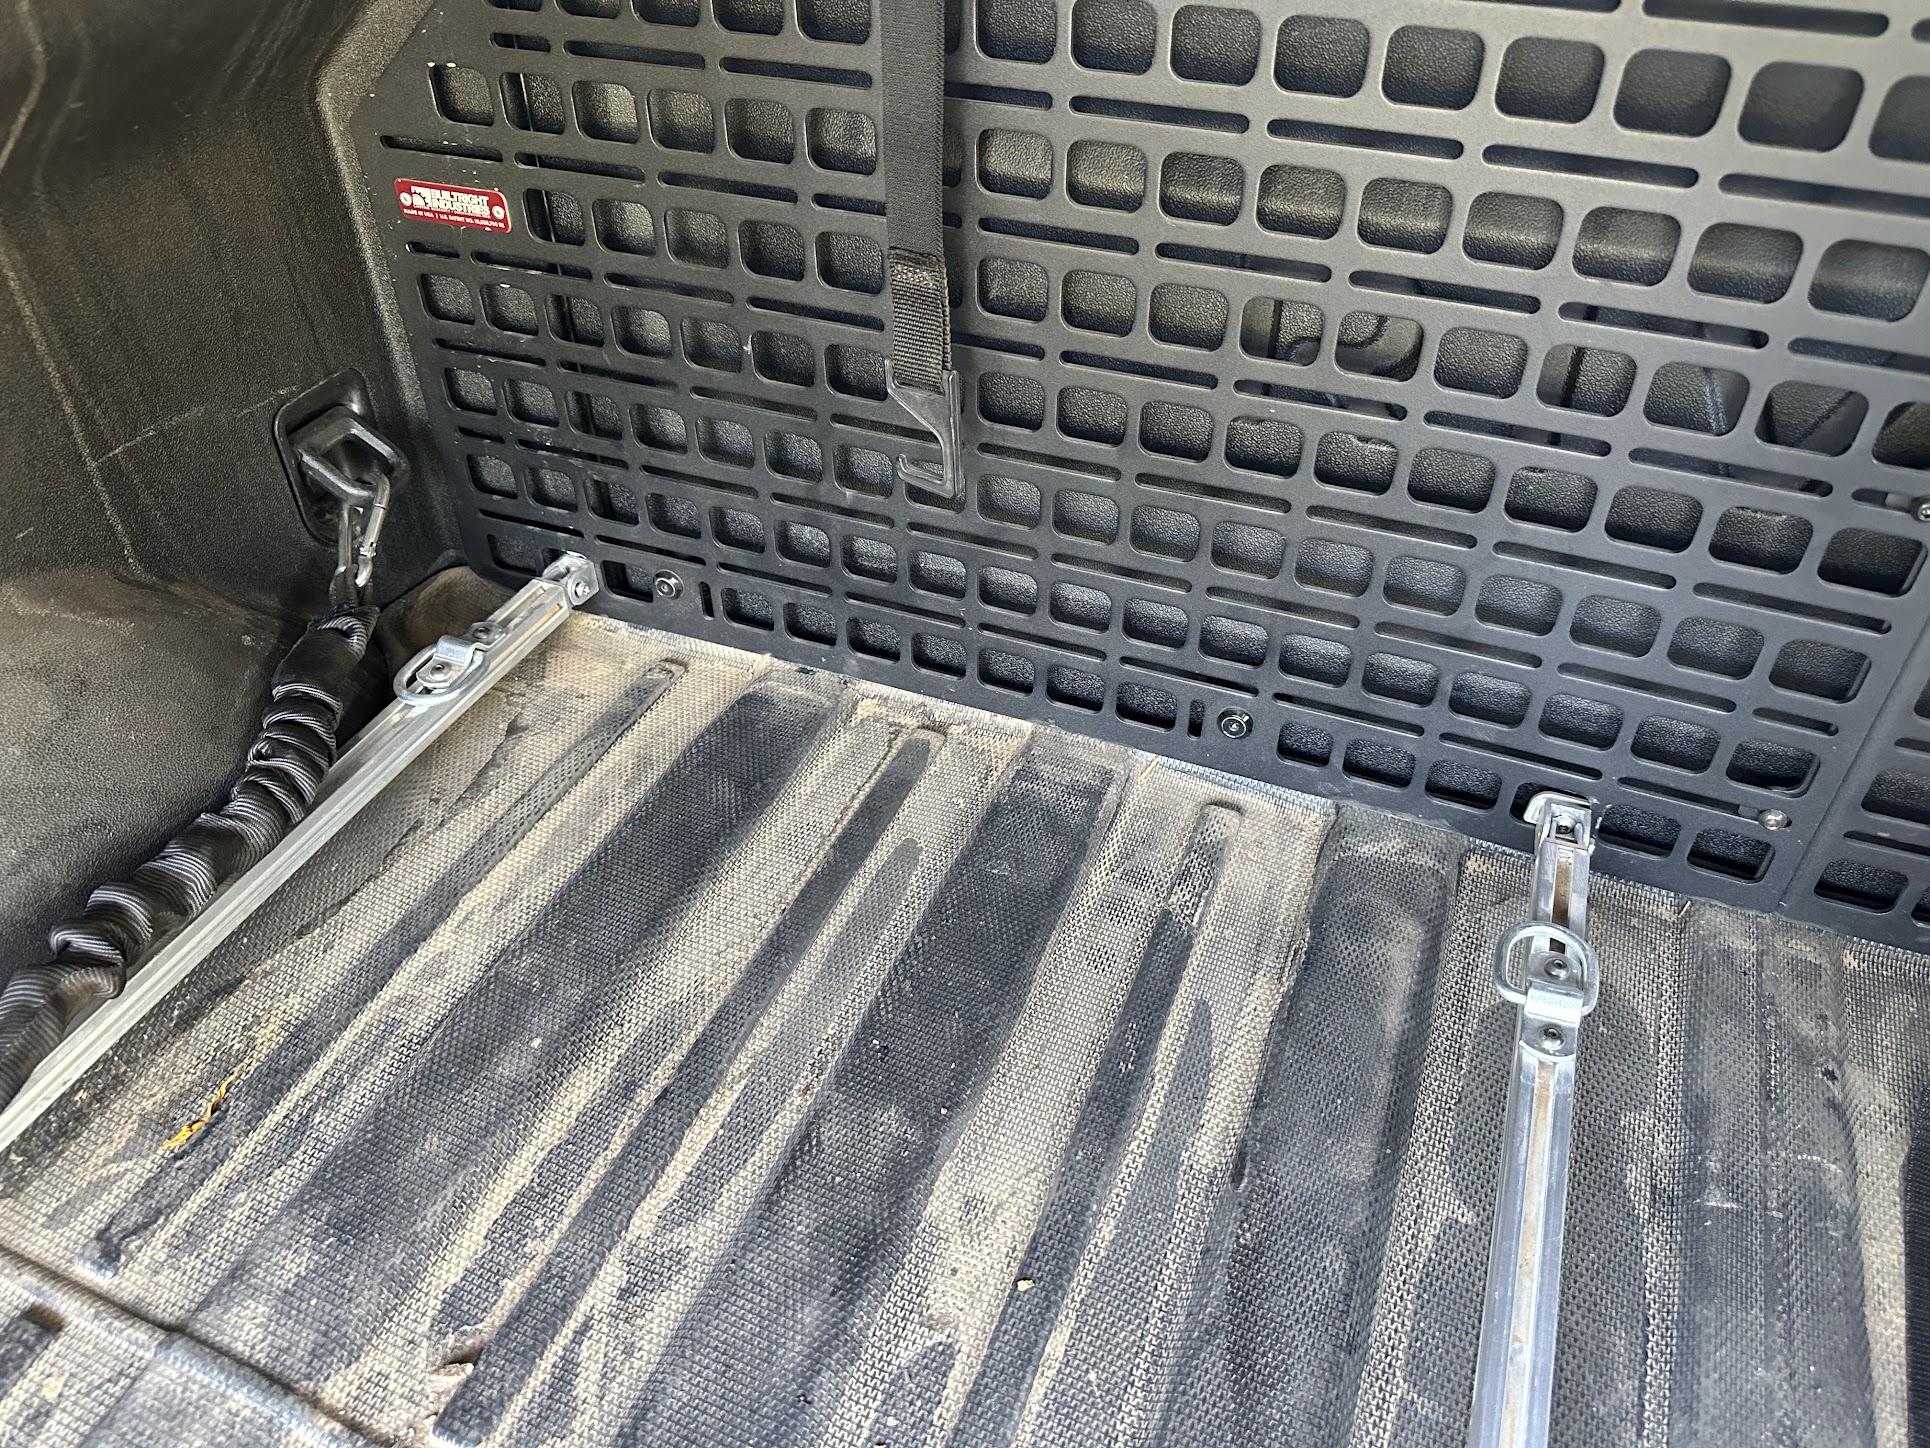
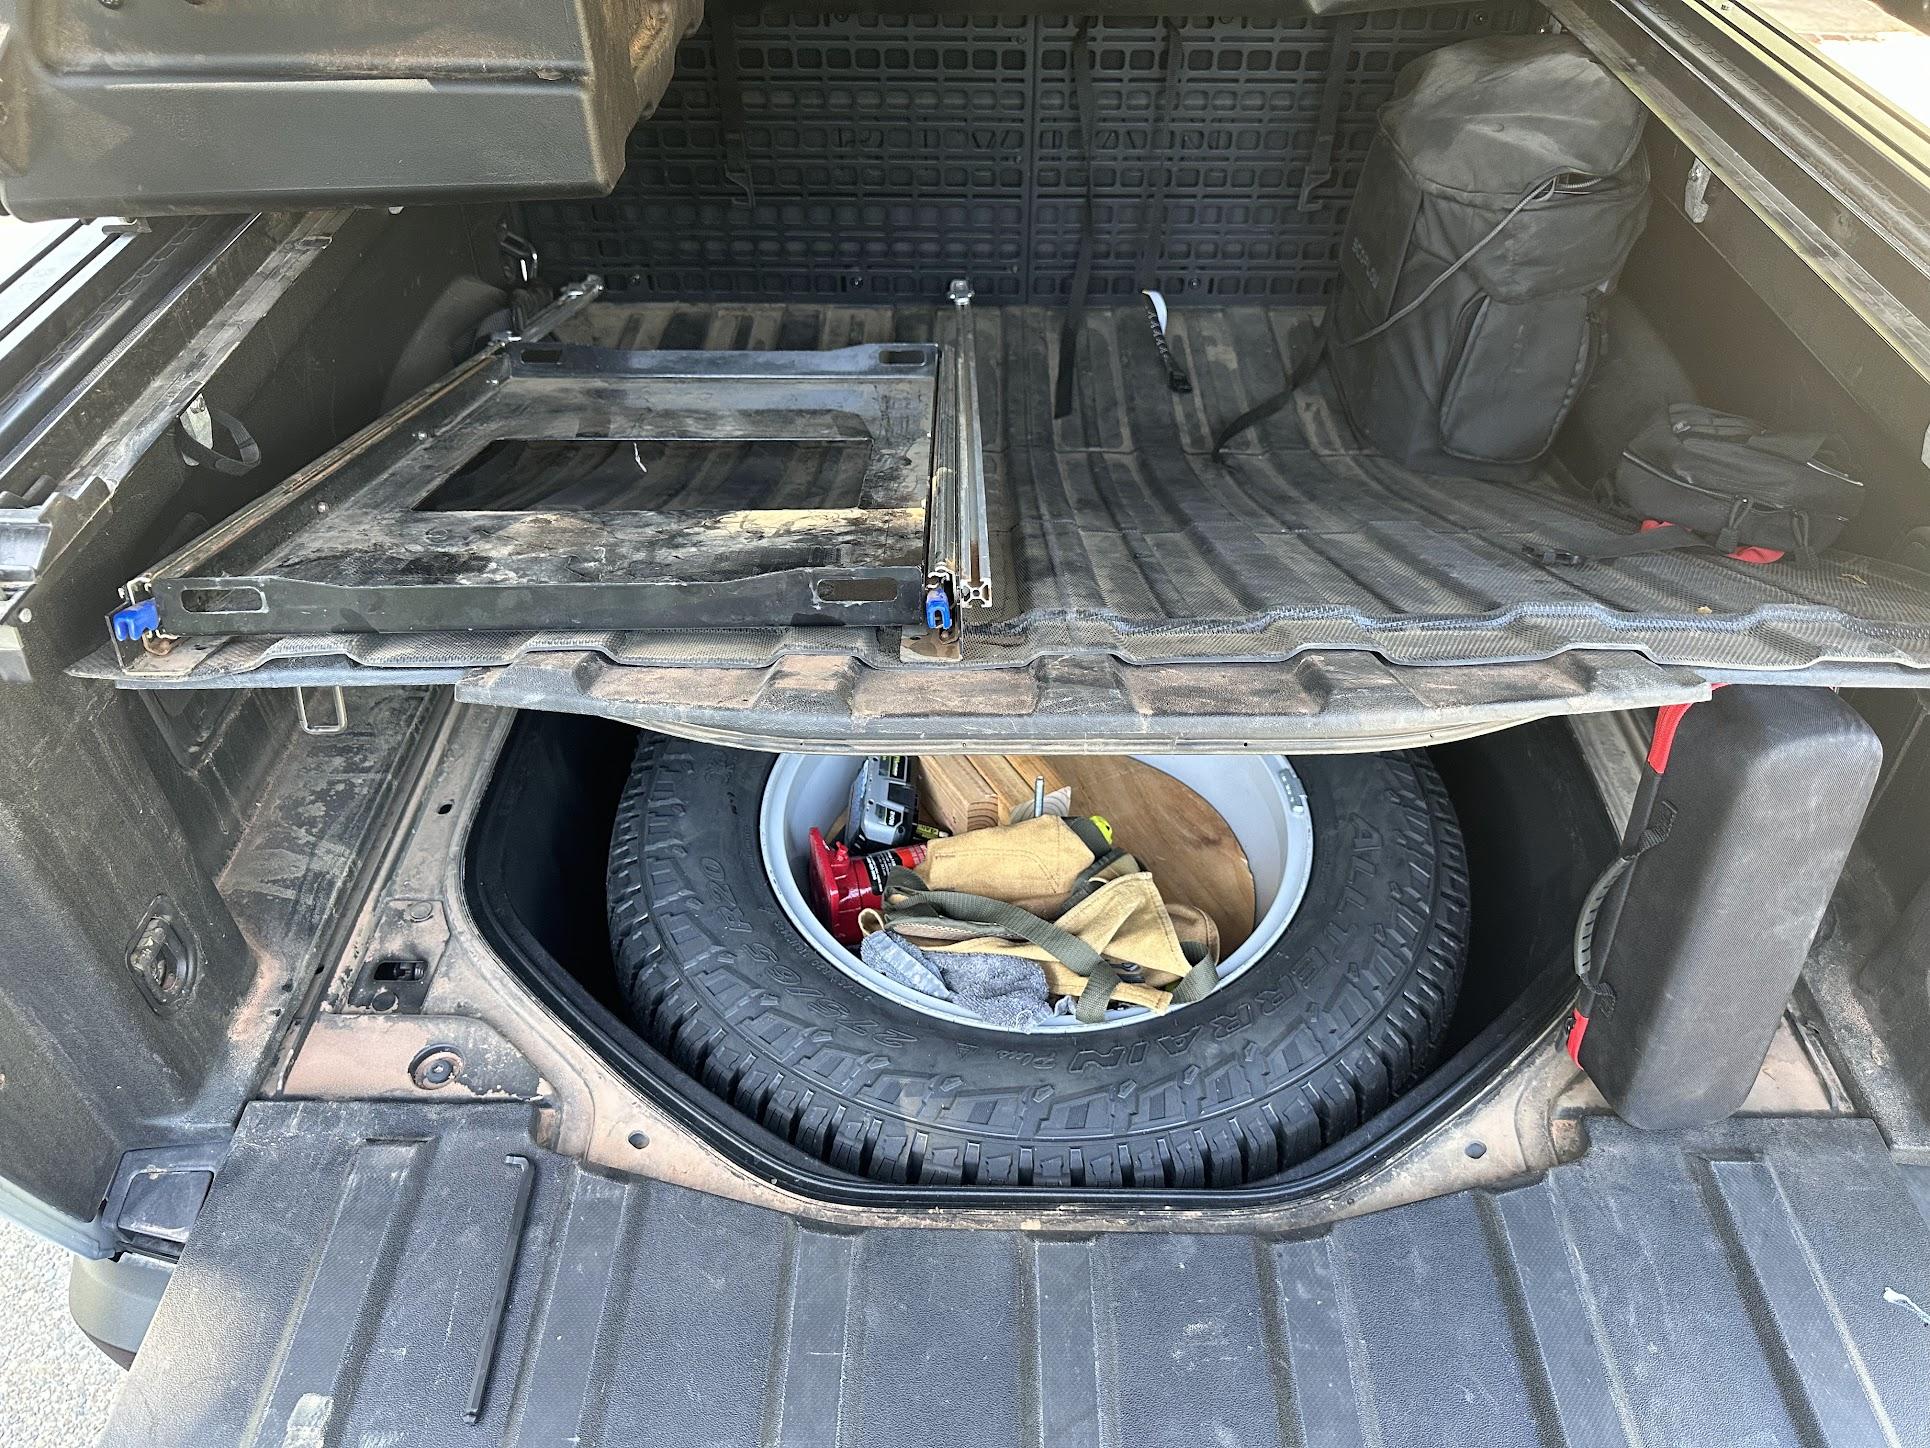
To access the spare tire with this slide in place, you do still need to take the fridge off the slide before lifting the lid. The weight of the slide and bed mat if you have one is more than the gas struts will lift so keep a large hex key with you or some other hook that you can use to lift the lid once you pull the handle. You will also need to prop up the lid once it's lifted. As you can see in the photo below, the rails for my soft tonneau do limit the height that the spare tire lid will lift. It still gives plenty of clearance to remove the wheel from the cavity. Just remember to unscrew the bolt holding down the wheel before trying to lift it out.

Rivian R1T R1S Rivian R1T No Drill Fridge Slide DIY Installation Walkthrough IMG_5237


I really love the convenience of having the fridge slide. It's not the most affordable mod but the molle panel has been useful on its own and I find it to be a great value. All it takes to remove the slide is taking out the two screws in the hinges. If you routinely carry a fridge in the back of your R1T, I think you'll really enjoy having a slide.

If you have any questions, I'll monitor this thread and will answer the best I can.
Sponsored


EVTrukHog

Well-Known Member
First Name
Matt
Joined
Aug 31, 2021
Threads
37
Messages
666
Reaction score
1,018
Location
USA
Vehicles
R1T, C6 Corvette, Ford Explorer
Great ingenuity and write-up! I’ve got to admit that I don’t see the need for the slide. I place my Dometic directly in the bed - which has a bed mat in it. The Dometic just fits under the factory tonneau cover. It easily pulls out onto the open tailgate for access to the fridge, and pushes back in under the tonneau. YMMV, but the slides don’t seem necessary to me.
 
OP
OP
sacramentoelectric

sacramentoelectric

Well-Known Member
Joined
Sep 4, 2021
Threads
14
Messages
538
Reaction score
1,138
Location
sacramento
Vehicles
BMW iX, BMW i3
Clubs
 
Great ingenuity and write-up! I’ve got to admit that I don’t see the need for the slide. I place my Dometic directly in the bed - which has a bed mat in it. The Dometic just fits under the factory tonneau cover. It easily pulls out onto the open tailgate for access to the fridge, and pushes back in under the tonneau. YMMV, but the slides don’t seem necessary to me.
You're right. It's not necessary but it is nice to have. The fridge I have is pretty heavy all loaded up and having it on the slide makes it much easier to move in and out. Personally, the easier something is to deploy, the more often I'll use it. I wanted the molle panel anyway so the leap to the slide wasn't much of a lift.
 

EVTrukHog

Well-Known Member
First Name
Matt
Joined
Aug 31, 2021
Threads
37
Messages
666
Reaction score
1,018
Location
USA
Vehicles
R1T, C6 Corvette, Ford Explorer
You're right. It's not necessary but it is nice to have. The fridge I have is pretty heavy all loaded up and having it on the slide makes it much easier to move in and out. Personally, the easier something is to deploy, the more often I'll use it. I wanted the molle panel anyway so the leap to the slide wasn't much of a lift.
I’ve had that molle panel for several months and really appreciate the utility of it. Nice work on adding the slides and thanks for sharing!
 

sac602

Well-Known Member
First Name
ray
Joined
Feb 4, 2022
Threads
7
Messages
241
Reaction score
193
Location
el dorado hills
Vehicles
4Runner, Lexus NX Hybrid
Clubs
 
Last edited:

Sponsored

cmugler

Well-Known Member
First Name
charles
Joined
Sep 22, 2021
Threads
18
Messages
99
Reaction score
66
Location
santa barbara
Vehicles
model3, Sprinter Bambi conversion
Occupation
retrired
Great setup, I ended up getting the Explorer Bear 40liter fridge that will fit under the manual cover (if I ever get it) and is very rugged with metal exterior
 

seanocono

Well-Known Member
First Name
Sean
Joined
Oct 18, 2022
Threads
2
Messages
442
Reaction score
630
Location
LA
Vehicles
Tesla Model X Plaid, GMC Sierra Denali EV
Clubs
 
Fantastic write up. You have a killer setup, OP. So much cool gear. How do you like the EcoFlow Glacier?
 

Leonbmx

Well-Known Member
Joined
Jan 28, 2022
Threads
4
Messages
141
Reaction score
145
Location
Seattle, WA
Vehicles
2022 Rivian R1T, 2020 Tesla MY
Occupation
Boeing Design Engineer
Clubs
 
OP
OP
sacramentoelectric

sacramentoelectric

Well-Known Member
Joined
Sep 4, 2021
Threads
14
Messages
538
Reaction score
1,138
Location
sacramento
Vehicles
BMW iX, BMW i3
Clubs
 
Fantastic write up. You have a killer setup, OP. So much cool gear. How do you like the EcoFlow Glacier?
It's good but it feels like a first-generation product. It's well built and having the internal battery is convenient but the way the water drains from the ice maker and the button placement weren't particularly well thought out. It's too easy to hit the buttons and accidentally change the settings. The optional wheels and handle shouldn't be an extra cost option. The ice maker is a delightfully over the top luxury to take with you camping. Making fresh ice for drinks out in the desert is awesome. Like all the rest of the Ecoflow devices, the app interface is excellent. You can easily check the battery status and manage zone temps from your phone. Ecoflow has been on a roll with their appliances and I expect the v2 Glacier will be the one to get but I've been happy with this one so far.
 

Sponsored

swhme

Well-Known Member
First Name
Sam
Joined
Sep 12, 2021
Threads
42
Messages
492
Reaction score
1,010
Location
Santa Fe, NM
Vehicles
R1S, Land Cruisers, BMW 535&335, MB 300TD, Cayenne
Occupation
Nerd
Clubs
 
What are those boxes mounted to your bed rack? ?
 
OP
OP
sacramentoelectric

sacramentoelectric

Well-Known Member
Joined
Sep 4, 2021
Threads
14
Messages
538
Reaction score
1,138
Location
sacramento
Vehicles
BMW iX, BMW i3
Clubs
 
What are those boxes mounted to your bed rack? ?
It's a Leitner Gearpod Dual. It's not made to attach to the rack I have but it fits well with the right hardware. You'll need at least a 20" Xtrusion Overland rack to make it fit. If you go with the 23" rack, you can get one half of their parallel bar kit to make it work. The only downside of this particular fit is that I can't as easily roll up my soft top. There isn't enough clearance between the box and the roll top unless you slide it back rather than roll it.

Rivian R1T R1S Rivian R1T No Drill Fridge Slide DIY Installation Walkthrough IMG_5258

Rivian R1T R1S Rivian R1T No Drill Fridge Slide DIY Installation Walkthrough IMG_5259

Rivian R1T R1S Rivian R1T No Drill Fridge Slide DIY Installation Walkthrough IMG_5260
 

swhme

Well-Known Member
First Name
Sam
Joined
Sep 12, 2021
Threads
42
Messages
492
Reaction score
1,010
Location
Santa Fe, NM
Vehicles
R1S, Land Cruisers, BMW 535&335, MB 300TD, Cayenne
Occupation
Nerd
Clubs
 
It's a Leitner Gearpod Dual. It's not made to attach to the rack I have but it fits well with the right hardware. You'll need at least a 20" Xtrusion Overland rack to make it fit. If you go with the 23" rack, you can get one half of their parallel bar kit to make it work. The only downside of this particular fit is that I can't as easily roll up my soft top. There isn't enough clearance between the box and the roll top unless you slide it back rather than roll it.

IMG_5258.jpg

IMG_5259.jpg

IMG_5260.jpg
I’ve got the ORR rack, so I’ll have to measure to see what I can make work, but it looks great!
 

seanocono

Well-Known Member
First Name
Sean
Joined
Oct 18, 2022
Threads
2
Messages
442
Reaction score
630
Location
LA
Vehicles
Tesla Model X Plaid, GMC Sierra Denali EV
Clubs
 
It's good but it feels like a first-generation product. It's well built and having the internal battery is convenient but the way the water drains from the ice maker and the button placement weren't particularly well thought out. It's too easy to hit the buttons and accidentally change the settings. The optional wheels and handle shouldn't be an extra cost option. The ice maker is a delightfully over the top luxury to take with you camping. Making fresh ice for drinks out in the desert is awesome. Like all the rest of the Ecoflow devices, the app interface is excellent. You can easily check the battery status and manage zone temps from your phone. Ecoflow has been on a roll with their appliances and I expect the v2 Glacier will be the one to get but I've been happy with this one so far.
Great review. Thank you. I’ve had my eye on this fridge because of the swappable battery.
Sponsored


Top