- First Name
- EveryAmp
- Joined
- Sep 15, 2021
- Threads
- 21
- Messages
- 151
- Reaction score
- 234
- Location
- Atascadero, CA
- Website
- everyamp.com
- Vehicles
- Rivian R1T, Tesla Model 3, & Model Y
- Occupation
- 3D-Printing
- Thread starter
- #1
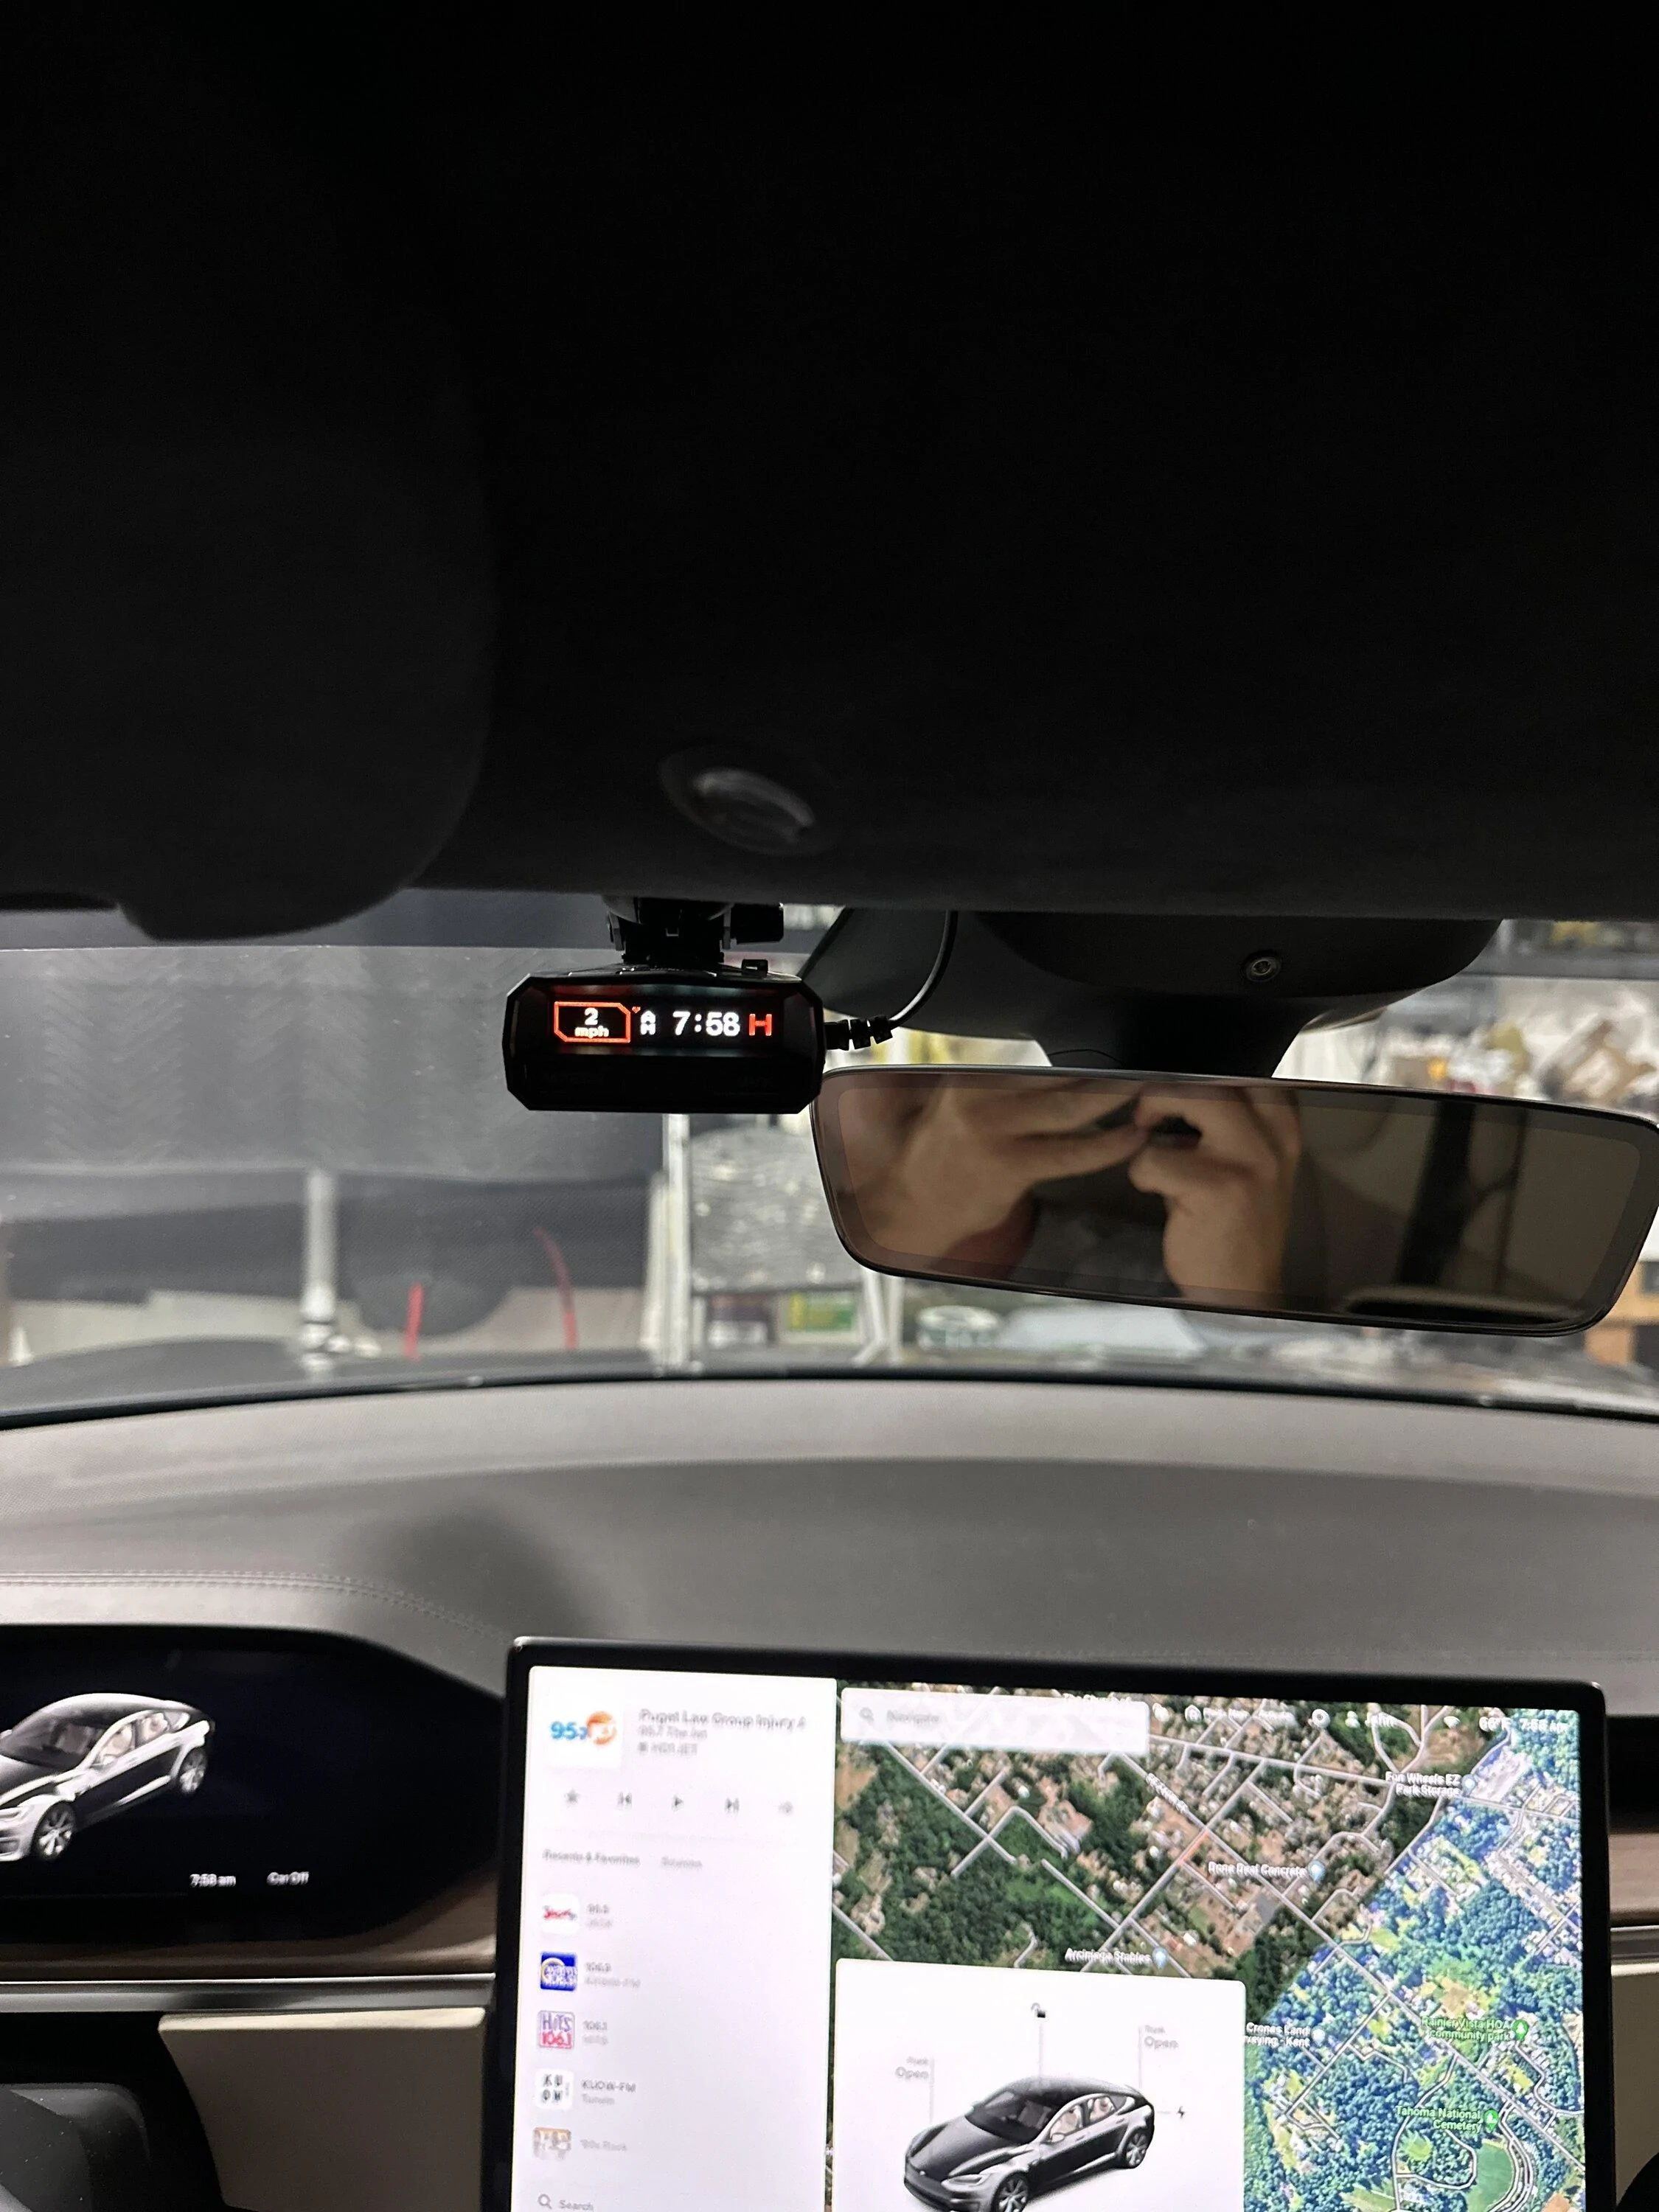
If you're looking for a simple way to mount a radar detector, or really almost any dash mount accessory, you've come to the right place. In a previous post we walked you though hardwiring a Valentine One radar detector to a Tesla Model 3. That installation required pry tools to remove trim and fish cables to a switchable power source, subject to software changes.
For our Rivian we took a much simpler approach. No hardwiring, no disassembly of trim. A simple 2-3 minute installation and we were up and running.

All you need is three items, assuming you already have a radar detector of choice. We're fans of Valentine One but there are many other great detectors out there for your choosing.
Parts Lists


Think of these items as Legos. There's catalogs of components that you can mix and match to build nearly any type of rig you want. The other great thing is you do not need to stick to one manufacturer of these components as they all use industry standard ball sizes.
Tools Needed
The Install
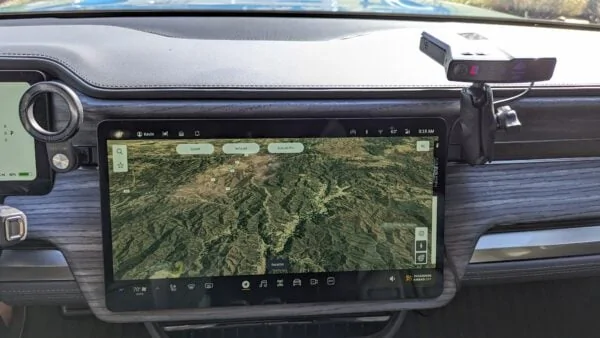
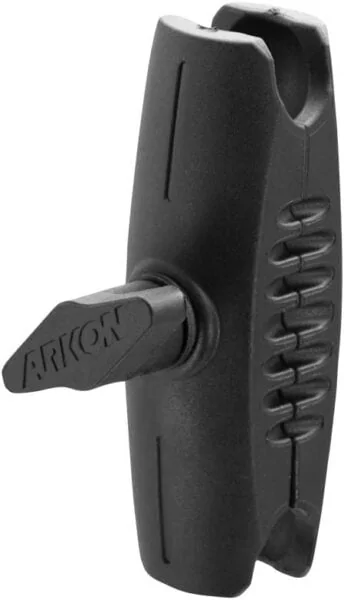
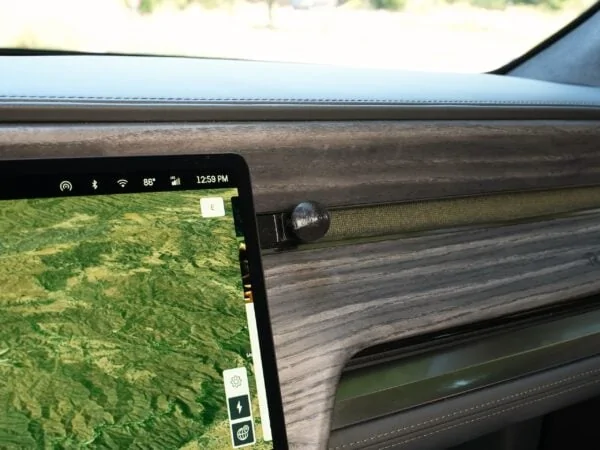
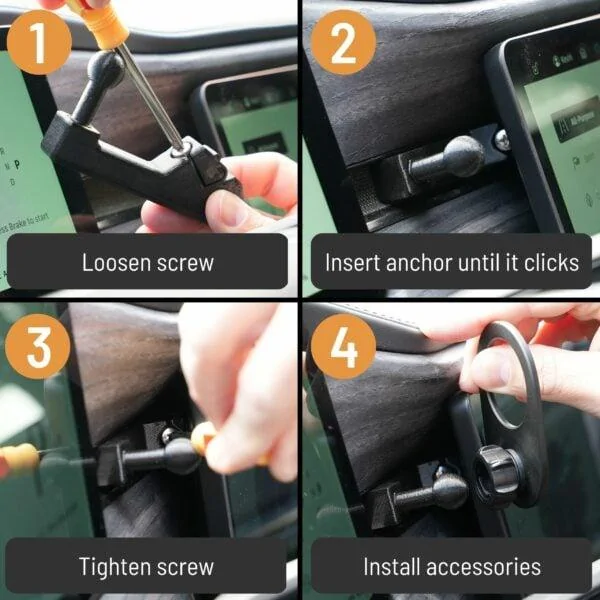
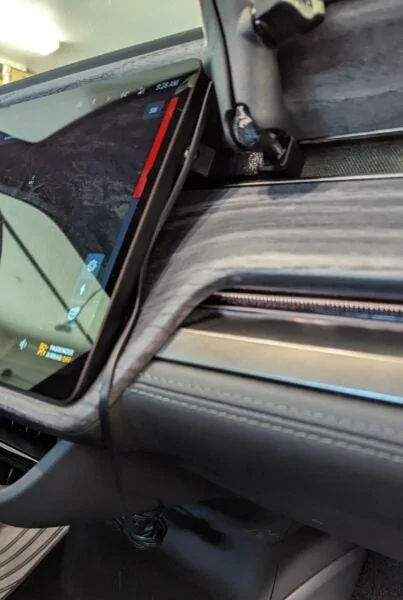
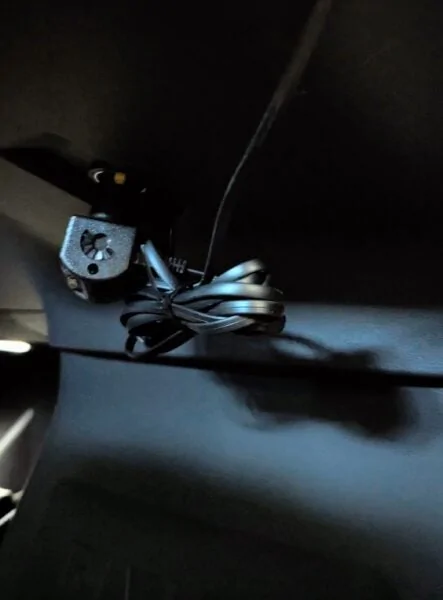
First insert the Dash Anchor behind either side of the main display. I chose the passenger side for the radar mount, since I have my phone mount on the driver side.

Summarizing our instructions page, once you feel the anchor click into place behind the screen you can secure it into place by tightening the screw with a Philips head screwdriver.

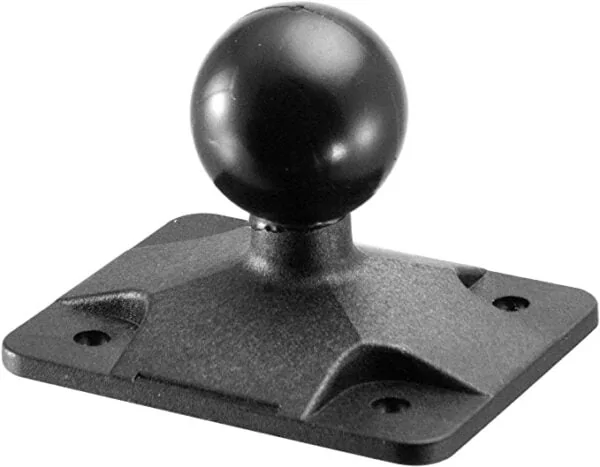
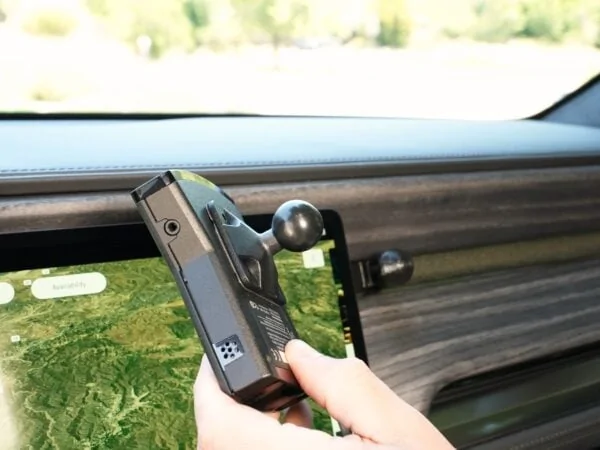
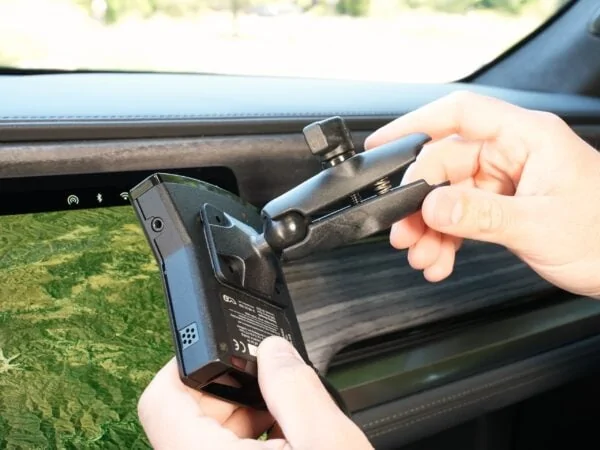
Attach your adhesive adapter plate to the underside of the radar detector.
Use the socket arm to join the adapter plate and dash anchor together and tighten it down once you've found a level position with a clear view over the dash.
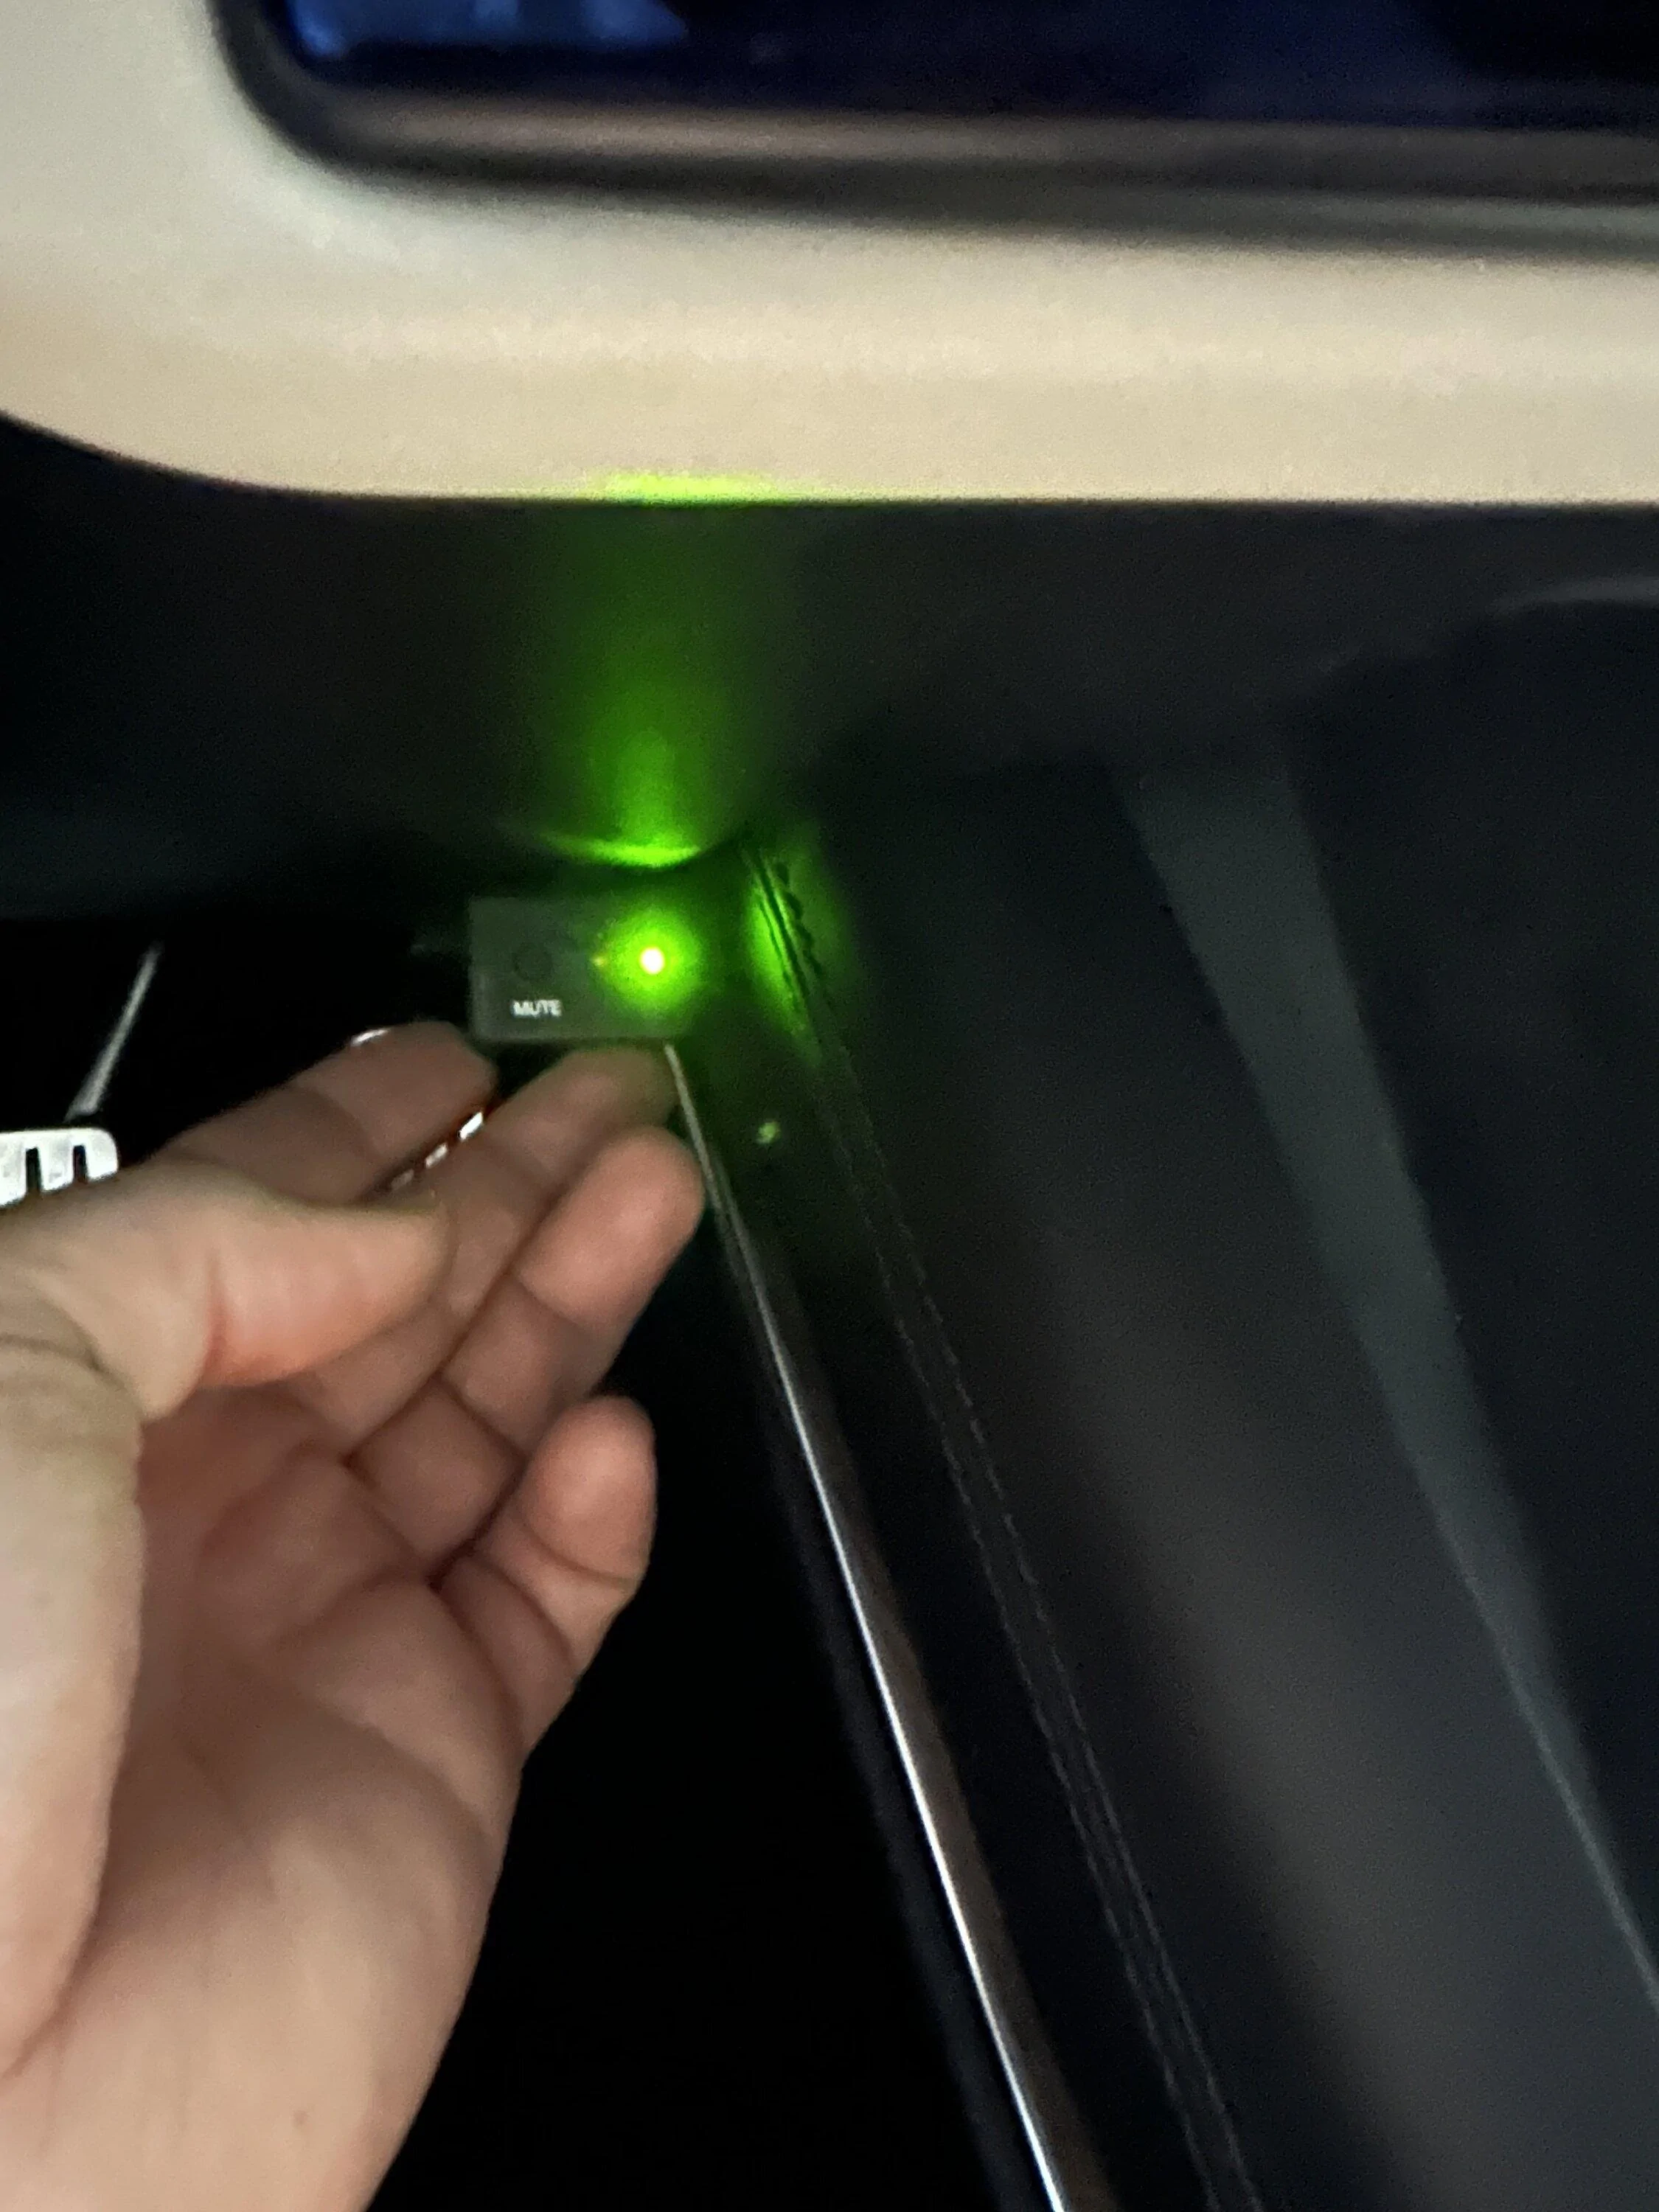
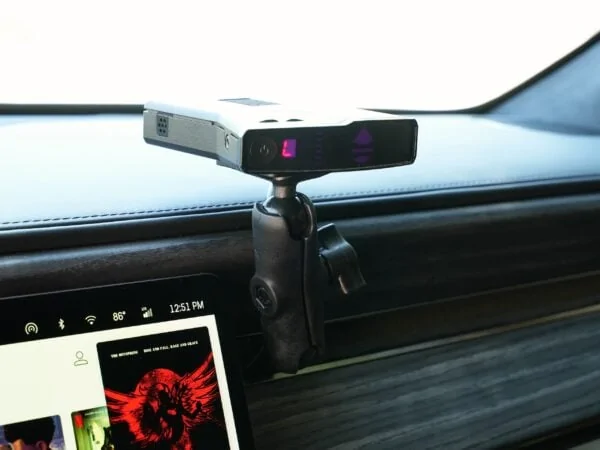
All that's left is to power it up. I chose the simple route of running it to the 12V location under the center display area. It is switchable, such that it will turn off the radar detector when you exit the vehicle and automatically come back on when you get in. As we learned with Tesla this is subject to change with OTA updates but as of June 2023 this is true.


With this installation method you can choose to leave the radar installed all the time, swap out the accessory by loosening the socket arm, or remove the entire thing with a Philips screwdriver to the dash anchor.
For our Rivian we took a much simpler approach. No hardwiring, no disassembly of trim. A simple 2-3 minute installation and we were up and running.
All you need is three items, assuming you already have a radar detector of choice. We're fans of Valentine One but there are many other great detectors out there for your choosing.
Parts Lists
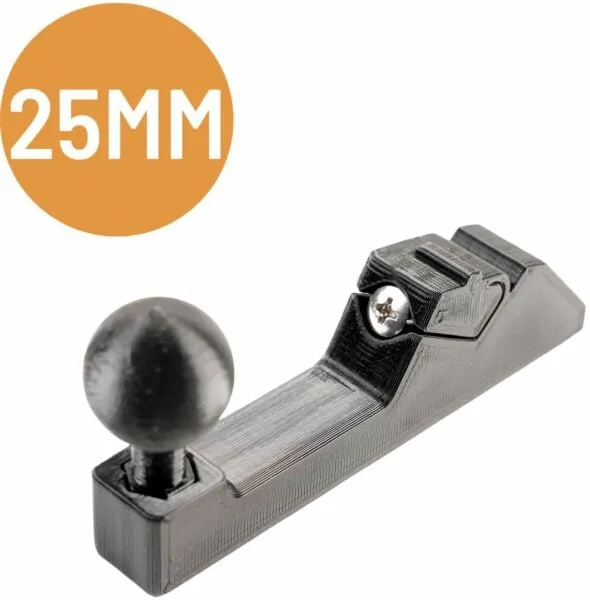
Think of these items as Legos. There's catalogs of components that you can mix and match to build nearly any type of rig you want. The other great thing is you do not need to stick to one manufacturer of these components as they all use industry standard ball sizes.
Tools Needed
- Philips Screwdriver
The Install
First insert the Dash Anchor behind either side of the main display. I chose the passenger side for the radar mount, since I have my phone mount on the driver side.
Summarizing our instructions page, once you feel the anchor click into place behind the screen you can secure it into place by tightening the screw with a Philips head screwdriver.
Attach your adhesive adapter plate to the underside of the radar detector.
Use the socket arm to join the adapter plate and dash anchor together and tighten it down once you've found a level position with a clear view over the dash.
All that's left is to power it up. I chose the simple route of running it to the 12V location under the center display area. It is switchable, such that it will turn off the radar detector when you exit the vehicle and automatically come back on when you get in. As we learned with Tesla this is subject to change with OTA updates but as of June 2023 this is true.
With this installation method you can choose to leave the radar installed all the time, swap out the accessory by loosening the socket arm, or remove the entire thing with a Philips screwdriver to the dash anchor.
Sponsored