Budman
Well-Known Member
- Thread starter
- #1
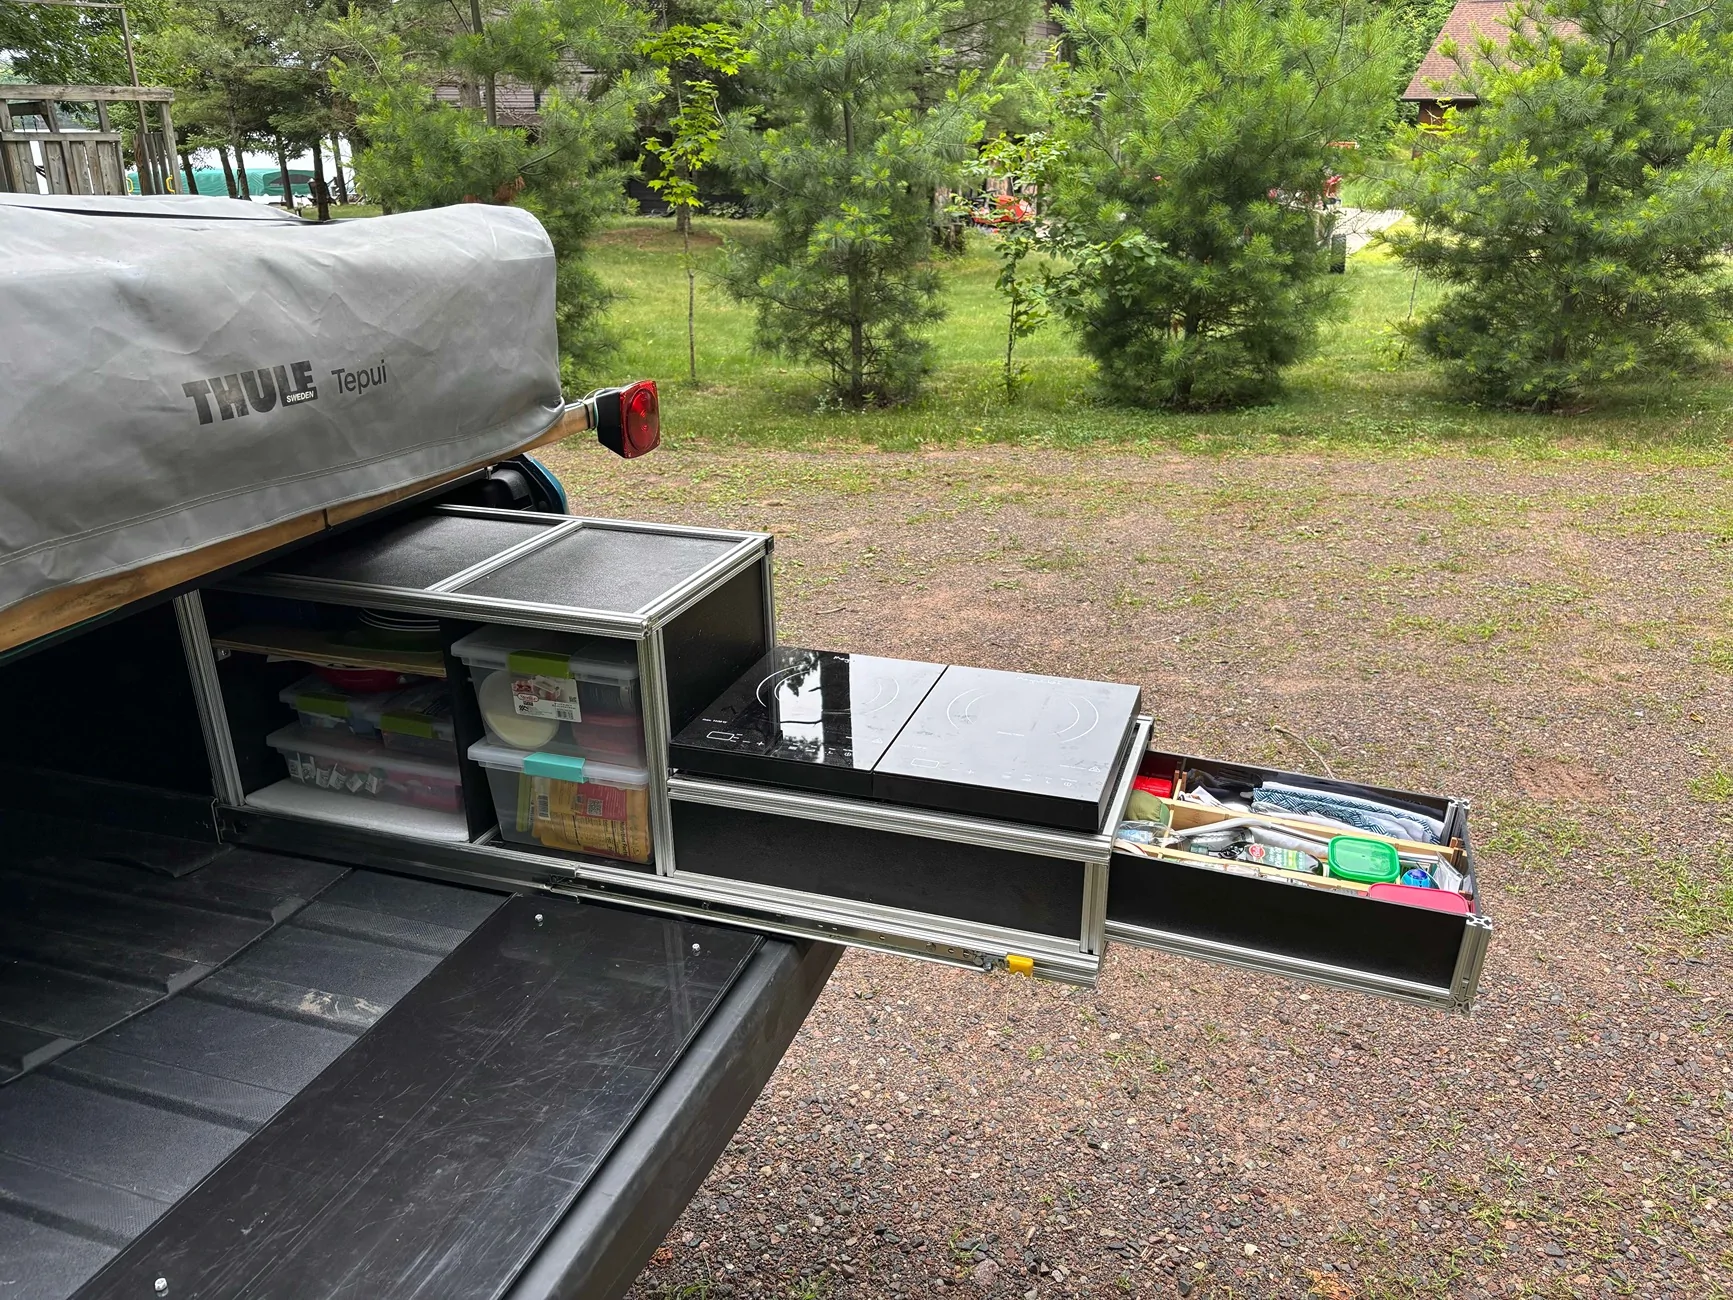
A recent post by @electruck4x4 (https://www.rivianforums.com/forum/threads/what’s-your-go-to-camp-kitchen-cooking-setup-🍳.52813/) asking for examples of how people are doing a camp kitchen generated a request that I share details of how I did mine for folks to make their own. It's a pretty fun project. This is my third iteration so I think I now have it pretty dialed in.
I apologize I don't have detailed plans and quantaties of parts to order. This post will give you the general idea of how I did it. There are many ways it can be assembled, you will need to count the parts yourself and order accordingly......
The metal bars are easily cut with a power jig saw or miter saw with a metal blade.
You will notice in the first photo there is a black plastic board on the tailgate. That is the sliding cover that encloses the pantry/storage area and serves as a flat work area when removed (rubber feet on the bottom for stability)
A link to a SketchUp file is here:
https://app.sketchup.com/share/tc/northAmerica/kUtCG1RneLA?source=desktop&rtc-engine-version=19

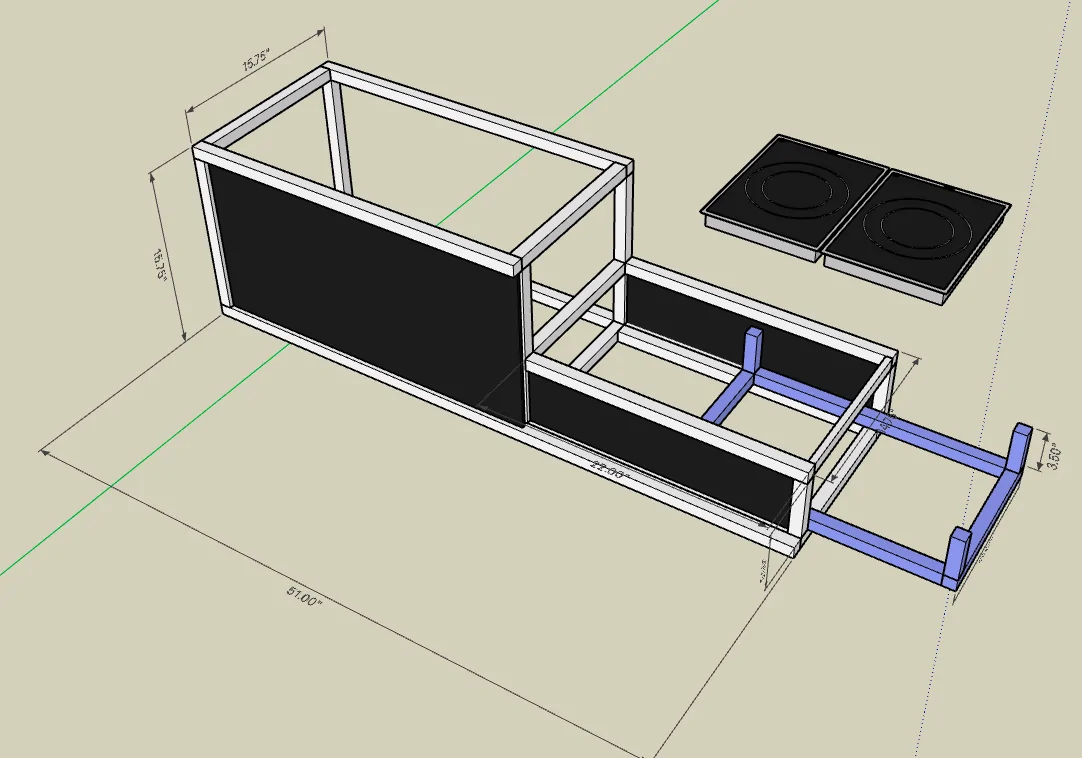
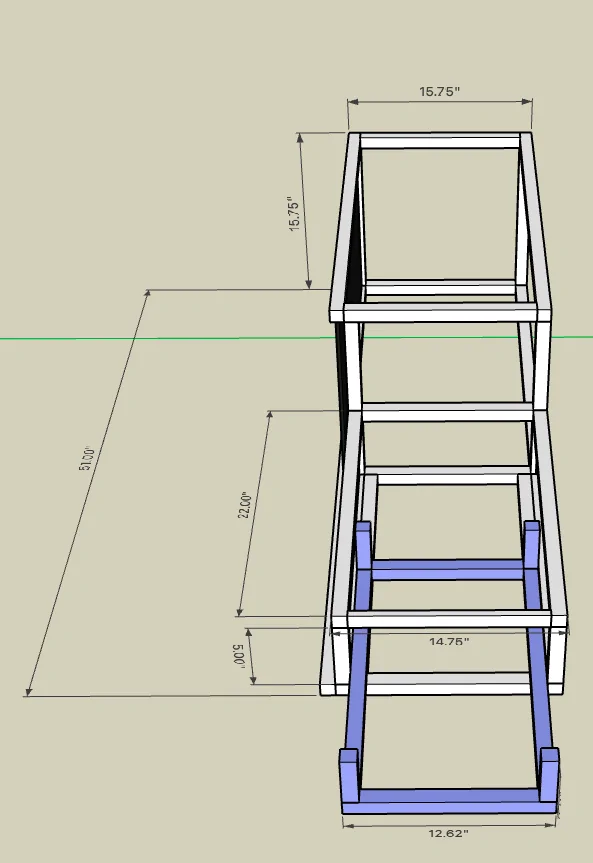
Here are some of the key dimensions from my Sketchup design:. The most critical is the 51" length. That is the absolute longest it can be when paired with the slides I used.
The Blue pieces are the slide-out drawer (details to follow):


I used heavy duty 48" slides like these:
https://www.amazon.com/VADANIA-Indu...g+heavy+duty+slide&qid=1763665827&sr=8-1&th=1
All the metal bars, plastic panes, connectors/fasteners came from 8020.net. Specific links are below. You can often find this stuff at a discount at industrial surplus stores. That is where I got most of my material and saved a lot of money on shipping.
The metal bars are these specific items. If you order supplies be sure to stick with the "10 series" compatible components.
https://8020.net/1010.html
https://8020.net/1050.html
You will need a bunch of nuts and bolts. I used these T-nut items for 8020.net
https://8020.net/3393.html
The bottom and back of the frame structure has heavy duty connecting plates like these:
https://8020.net/4081.html
https://8020.net/4351.html
https://8020.net/4108.html
Everything that sits on top of the bottom framing structure are held together with connectors like these. Images below show how I used them.
https://8020.net/33440.html
https://8020.net/33460.html
The slide out drawer runs on plastic rails like these:
https://8020.net/6710.html
The black plastic panels are this material:
https://8020.net/2613-s.html
The induction burners are similar to this one.
https://www.amazon.com/Secura-1800-...prefix=induction+cooktop,aps,325&sr=8-15&th=1
I have not given specific quantities of fasteners/connectors to order because there are many ways this could be put together and you might want to tweak the design. You will have to count them up for yourself.....
Some more photos and hints/tips on construction.
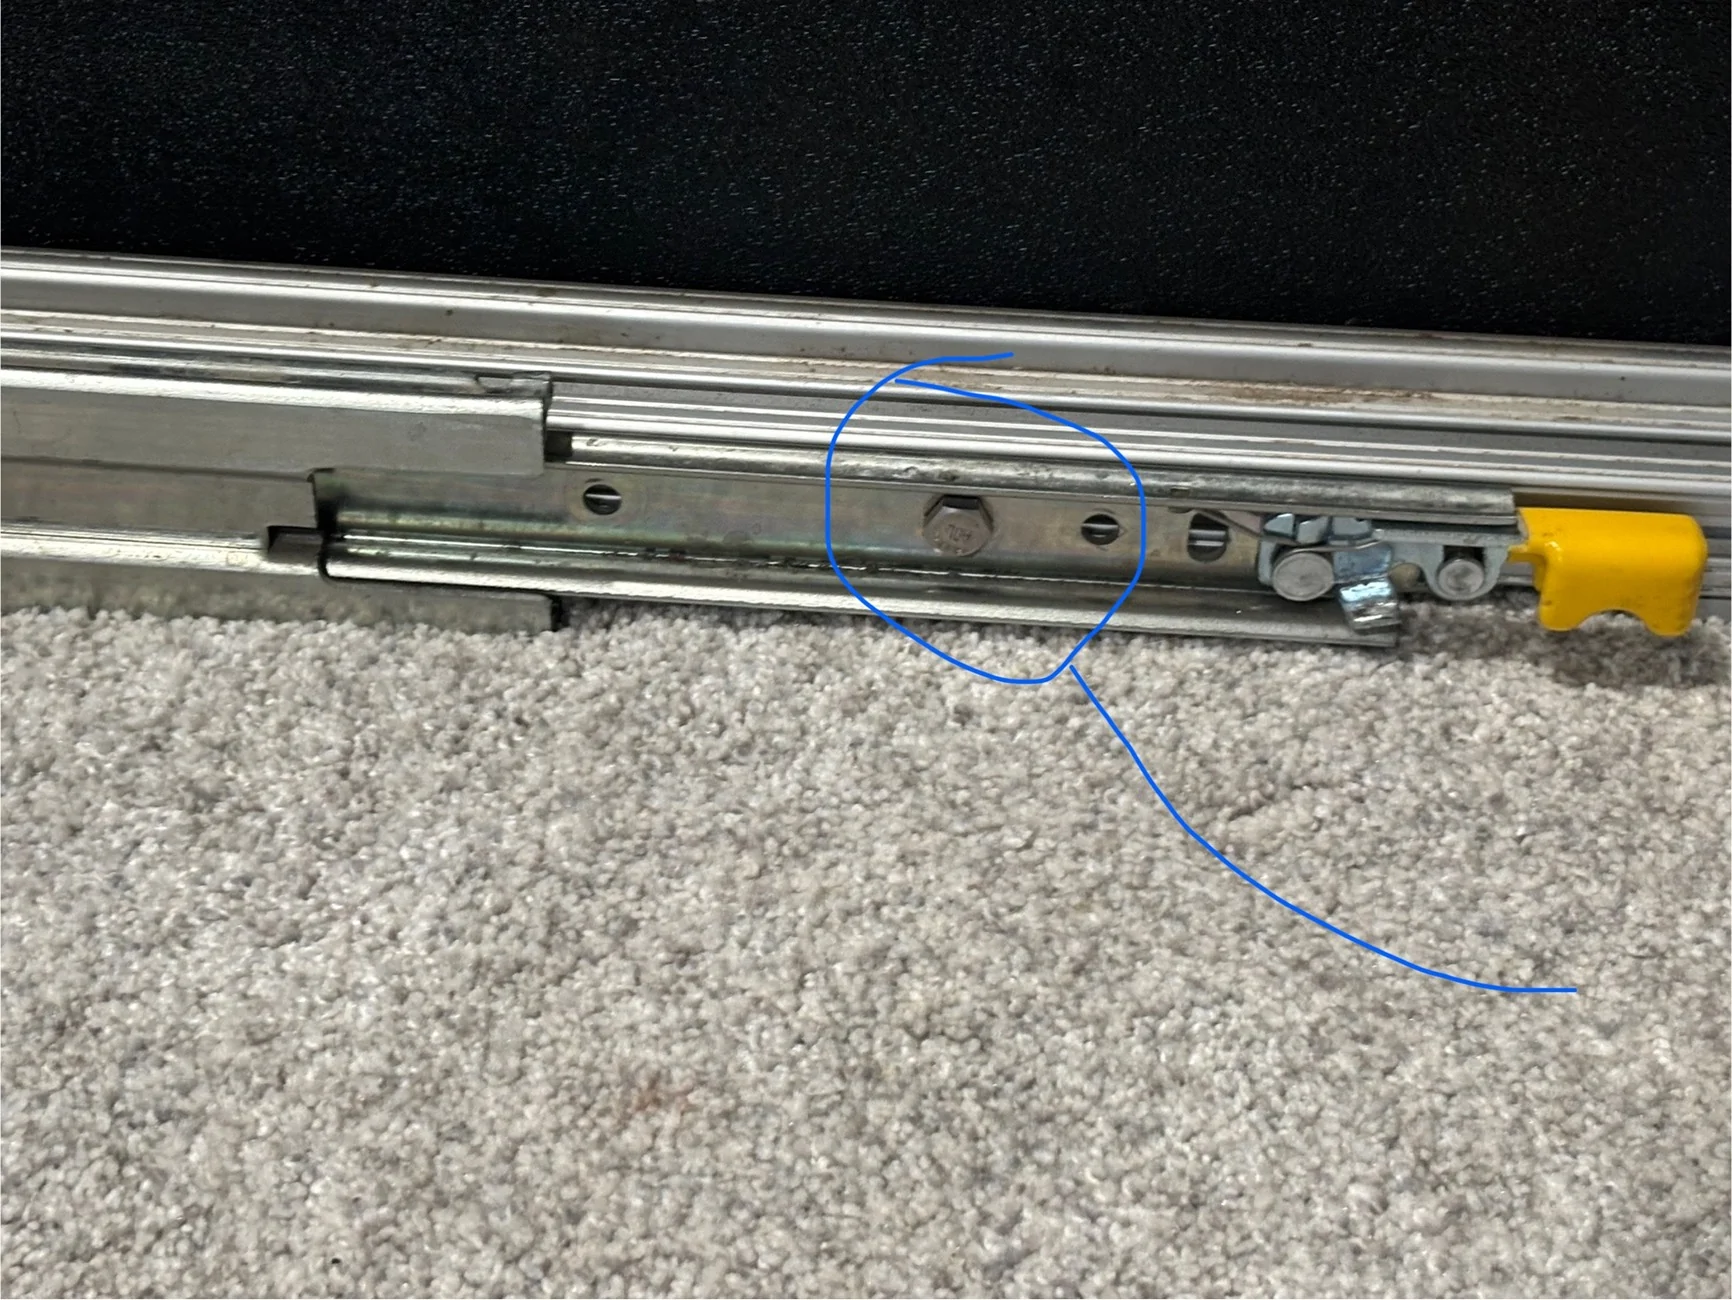
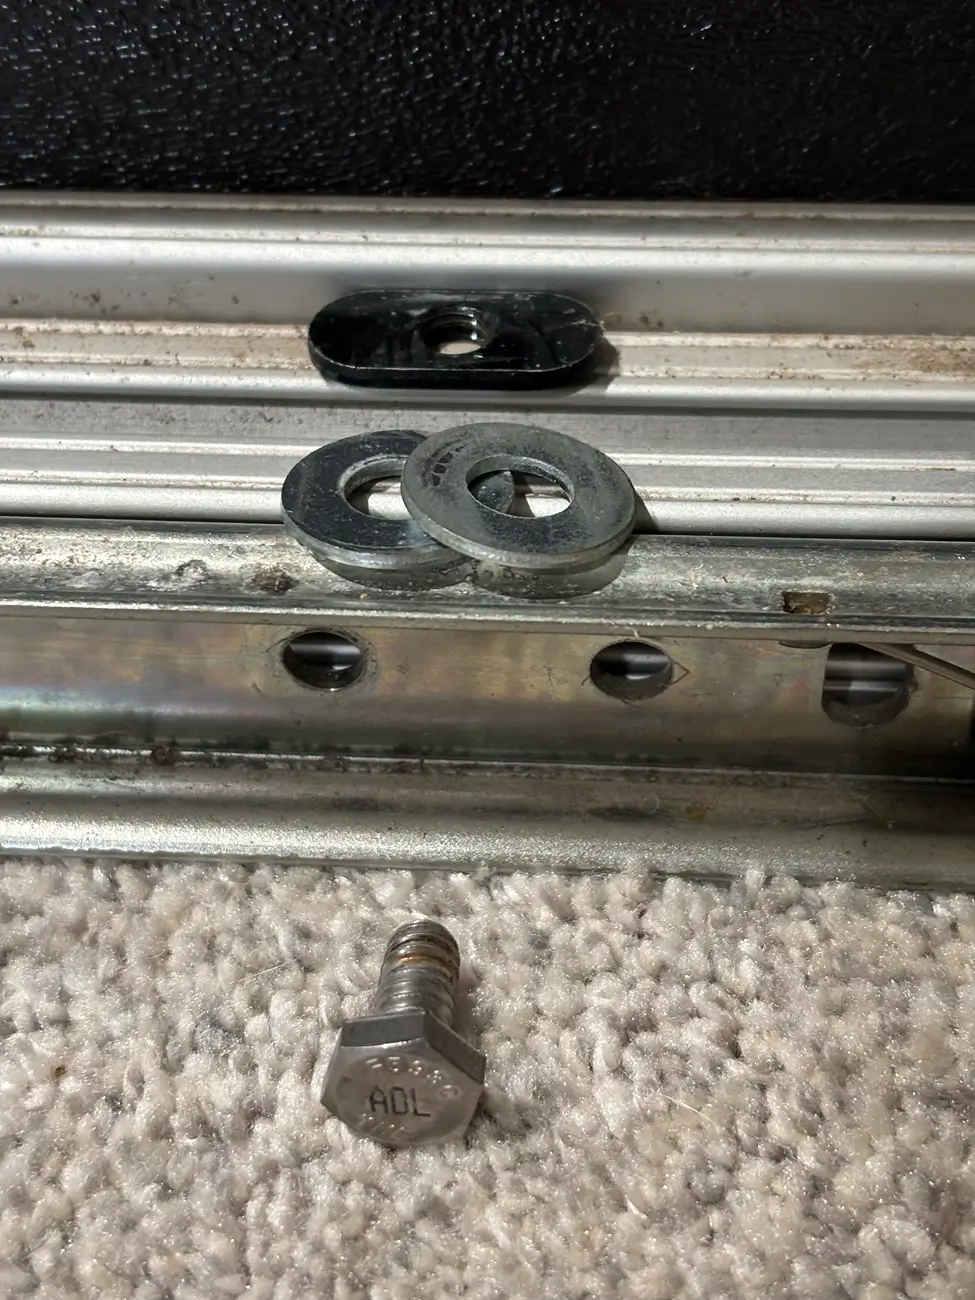
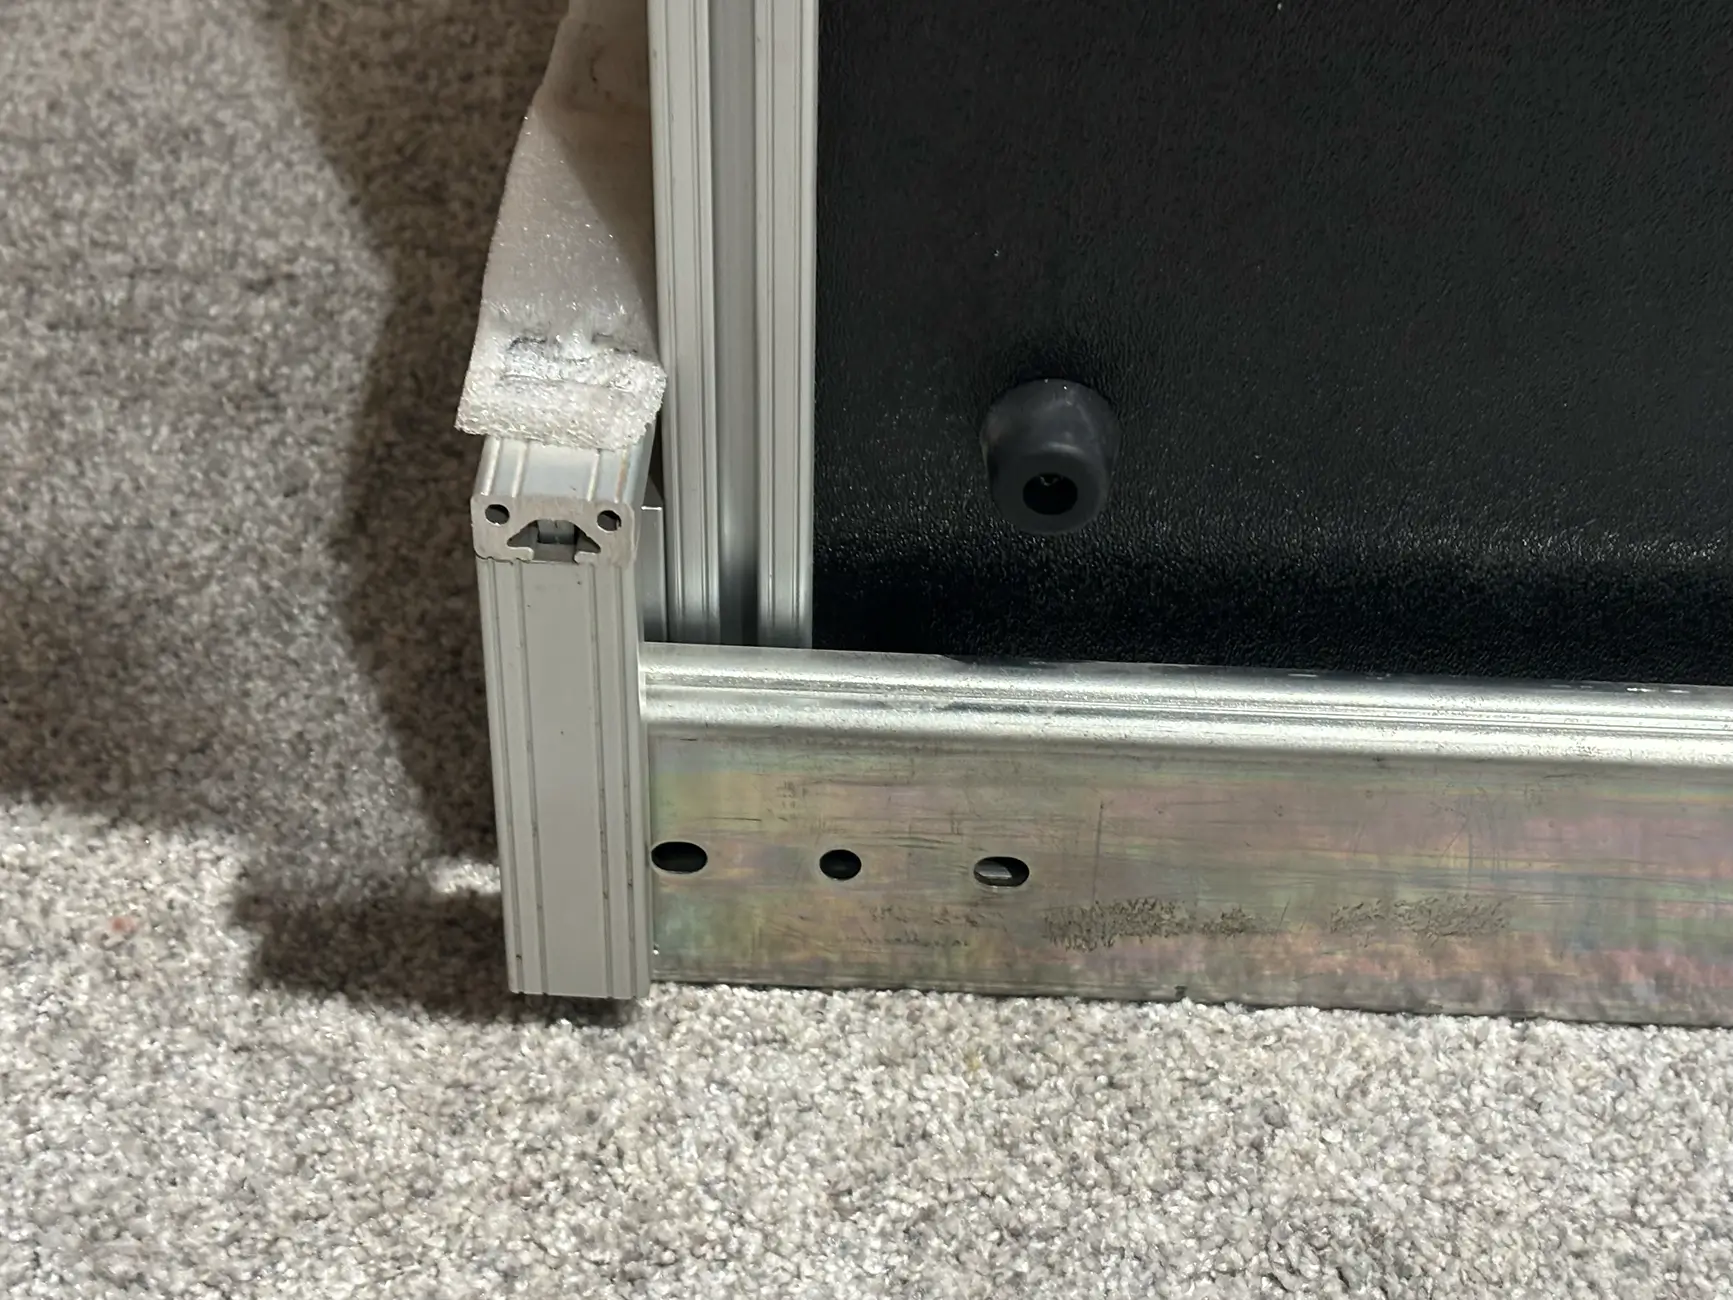
I attached the 8020.net square bars to the slides with bolts and T-nuts like shown in these photos. This is the hardest and most critical thing to get right. All slides might be a little different so no specific dimensions given, just my example.


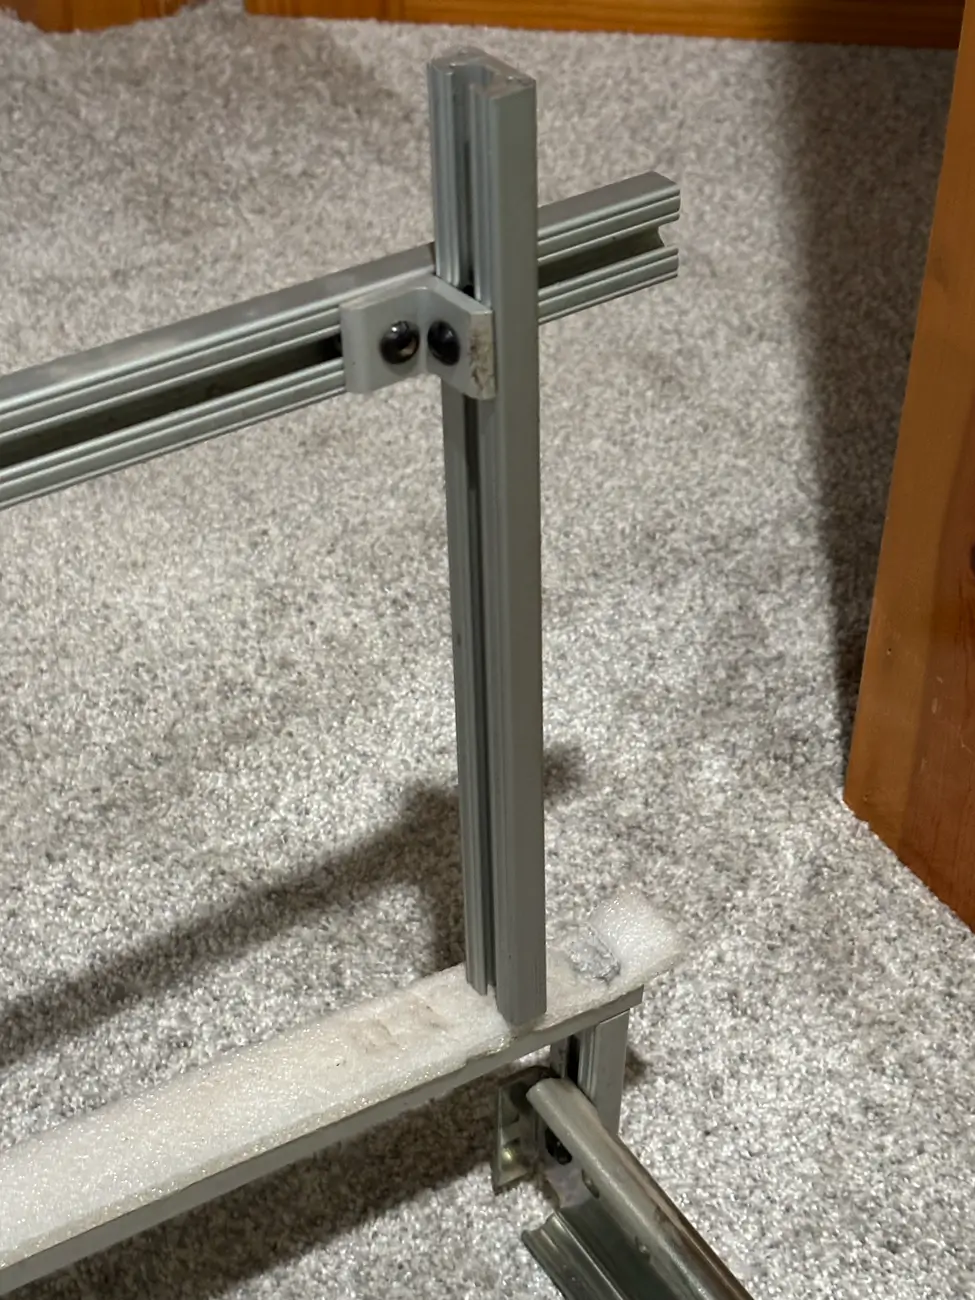
As I mentioned, the 51" length for the bottom frame is the absolute maximum I could make it and still close the tailgate. Securing the Slides to the front wall of the bed is also critical. I went through multiple attempts to find a good solution and this is how I did it.
I put a cross bar between the slides to act as hold down feature, more on this later.. When you connect the bottom frame of the kitchen to the slides make sure it is right up against the crossbar or else you won't be able to close the tailgate when you push the slides in to the close position.
When I want to install the kitchen in the bed I attached the members shown below to the wall of the bed by using the 6mm attach points scatters around the bed. I don't have an image of it installed but this one kinda shows what I mean. Push down on the vertical member to put some down-force on the slides to hold them in place then tighten the bolt on the T-nut in the 90 deg corner bracket.
Lastly, a few images showing some details of the assembly. Do the bottom frame first using heavy duty connecting plates then piece together the rest using those internal fasteners. You need to give some thought to the order in which you attach each piece and what connectors you use where....
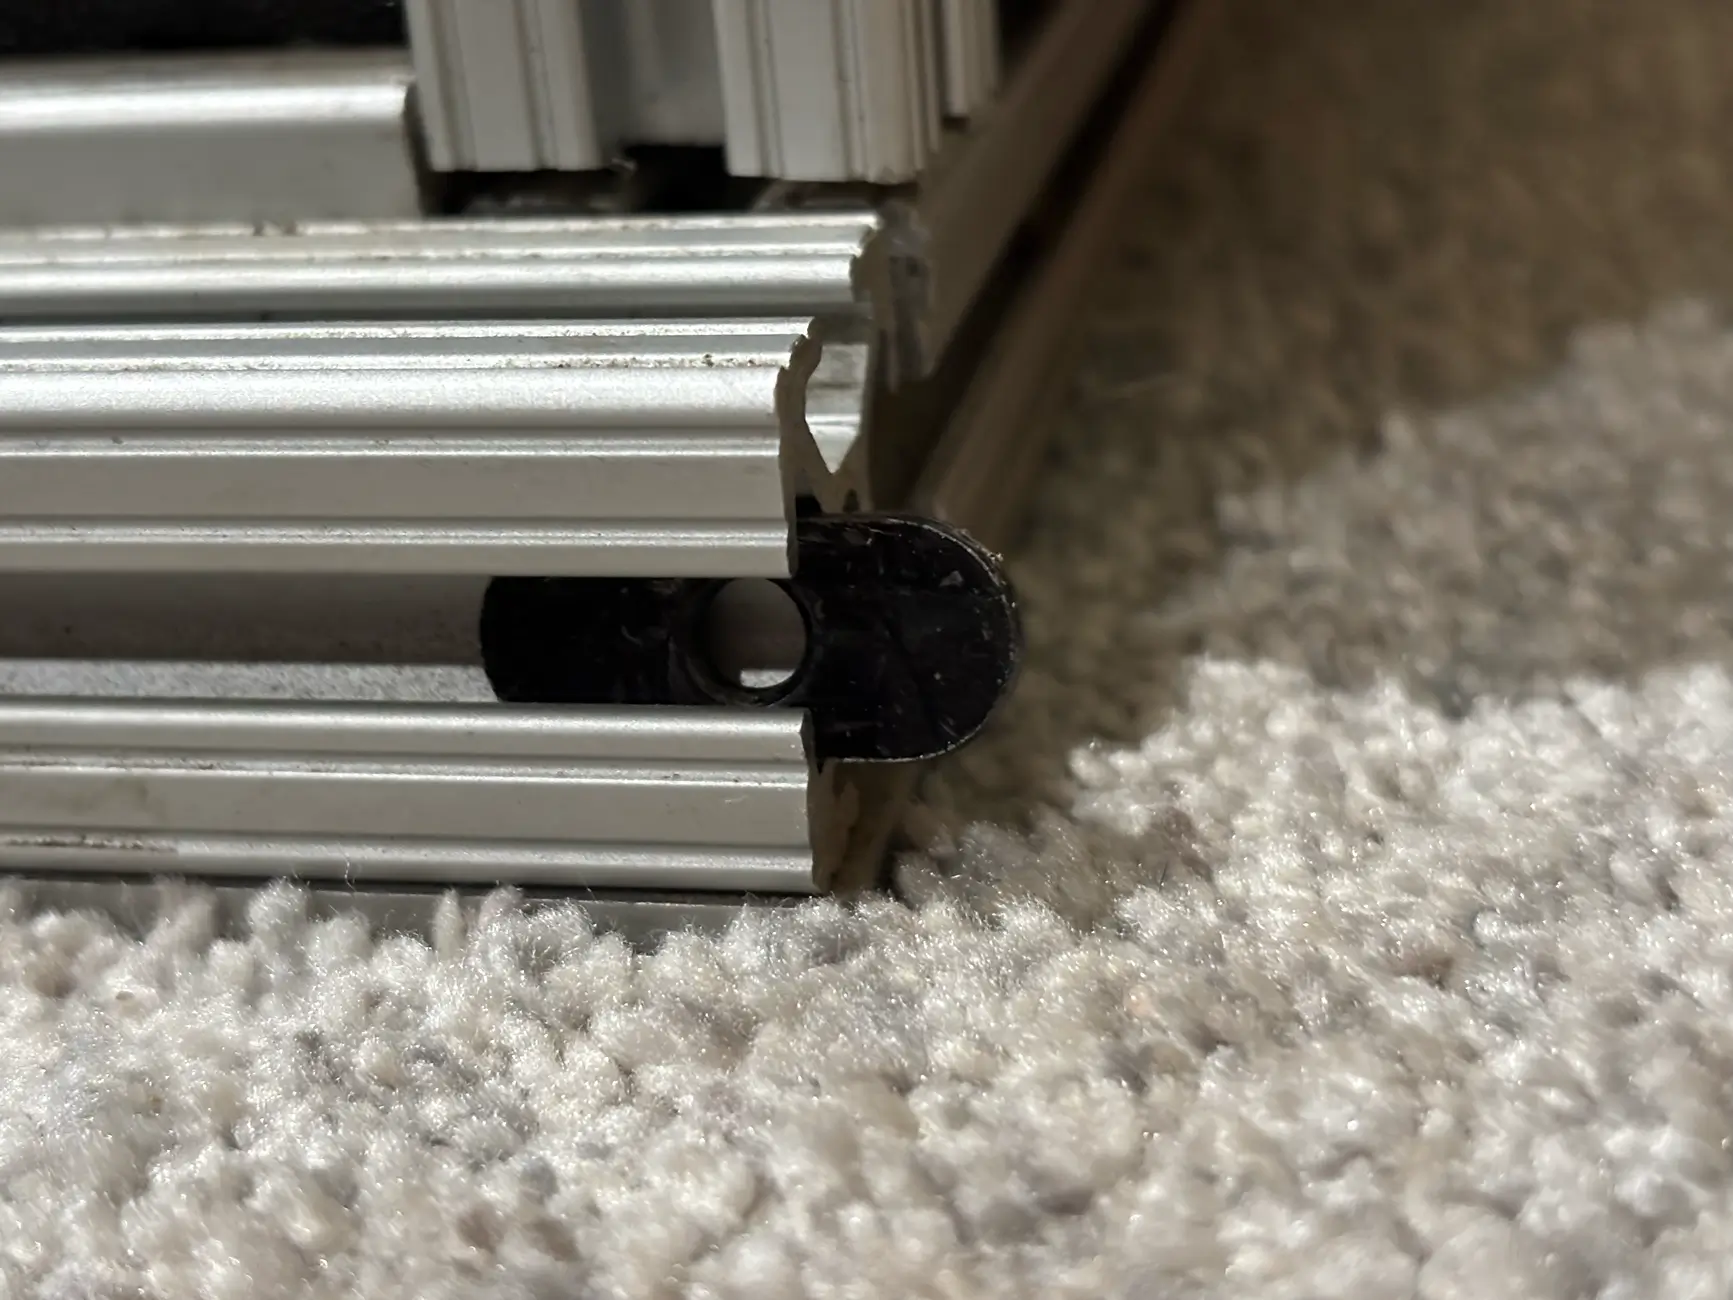
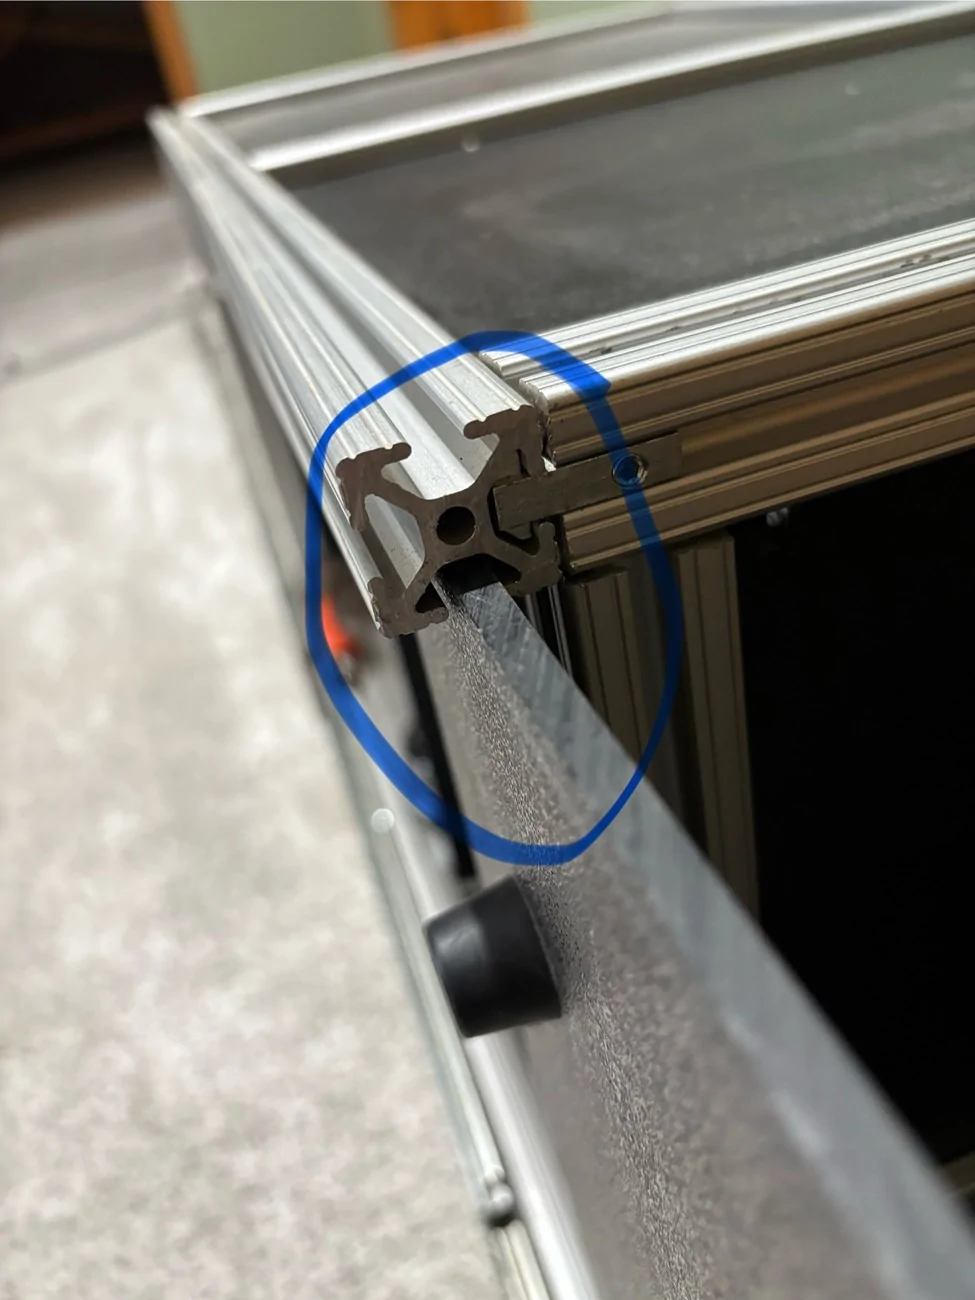
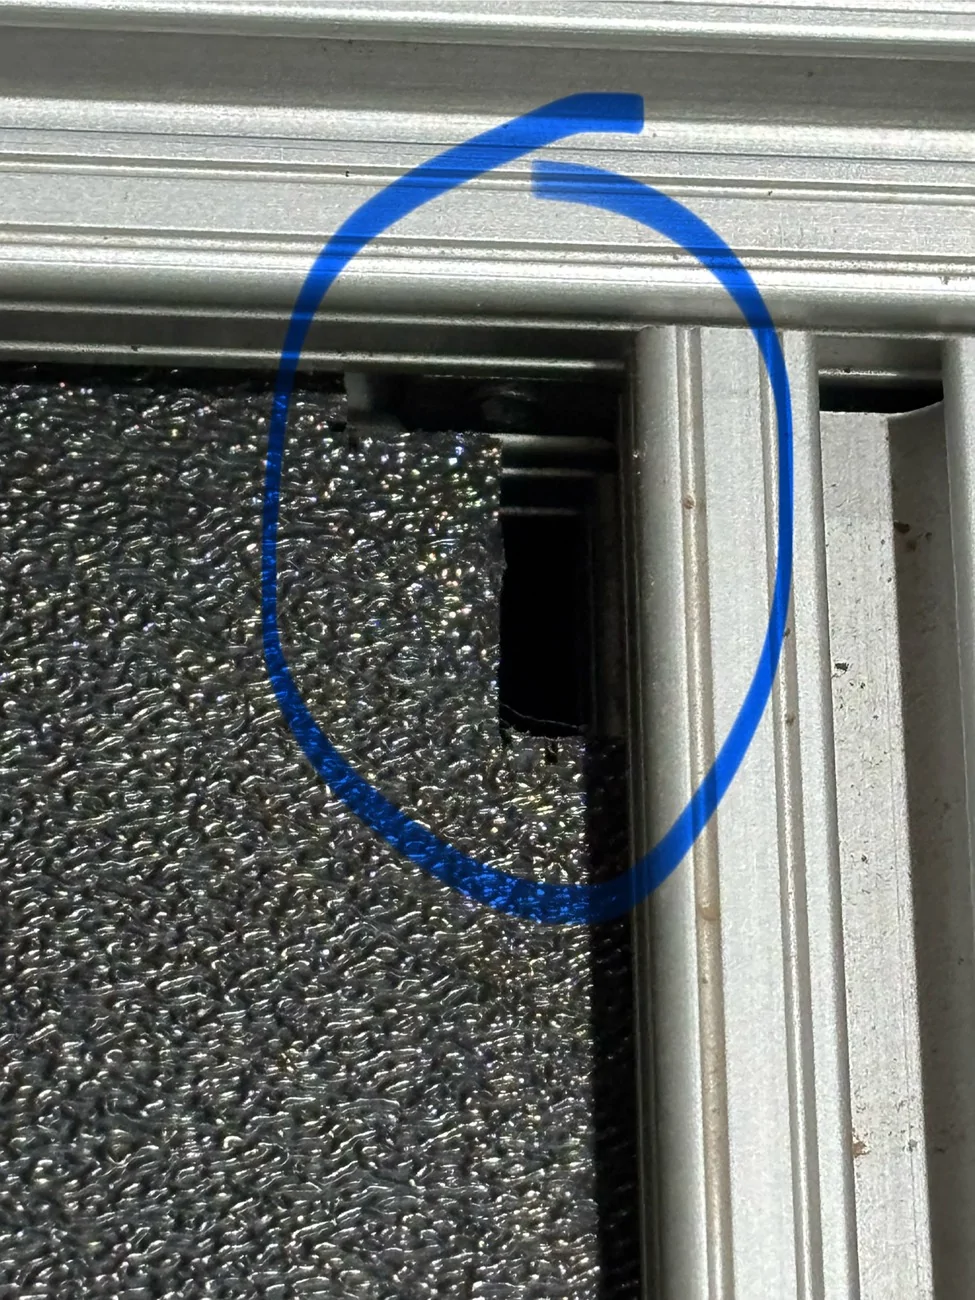
This shows one of the connectors and how the plastic panels slide in the slots of the bars.
More examples of the connectors for the uprights. Pay attention to "inside-outside" connector types. You will need some of both. Sorry I don't have specific quantities you need as there are many ways this can go together.
You will need to notch the panels in places to accommodate the 90 deg internal fasteners like shown above.
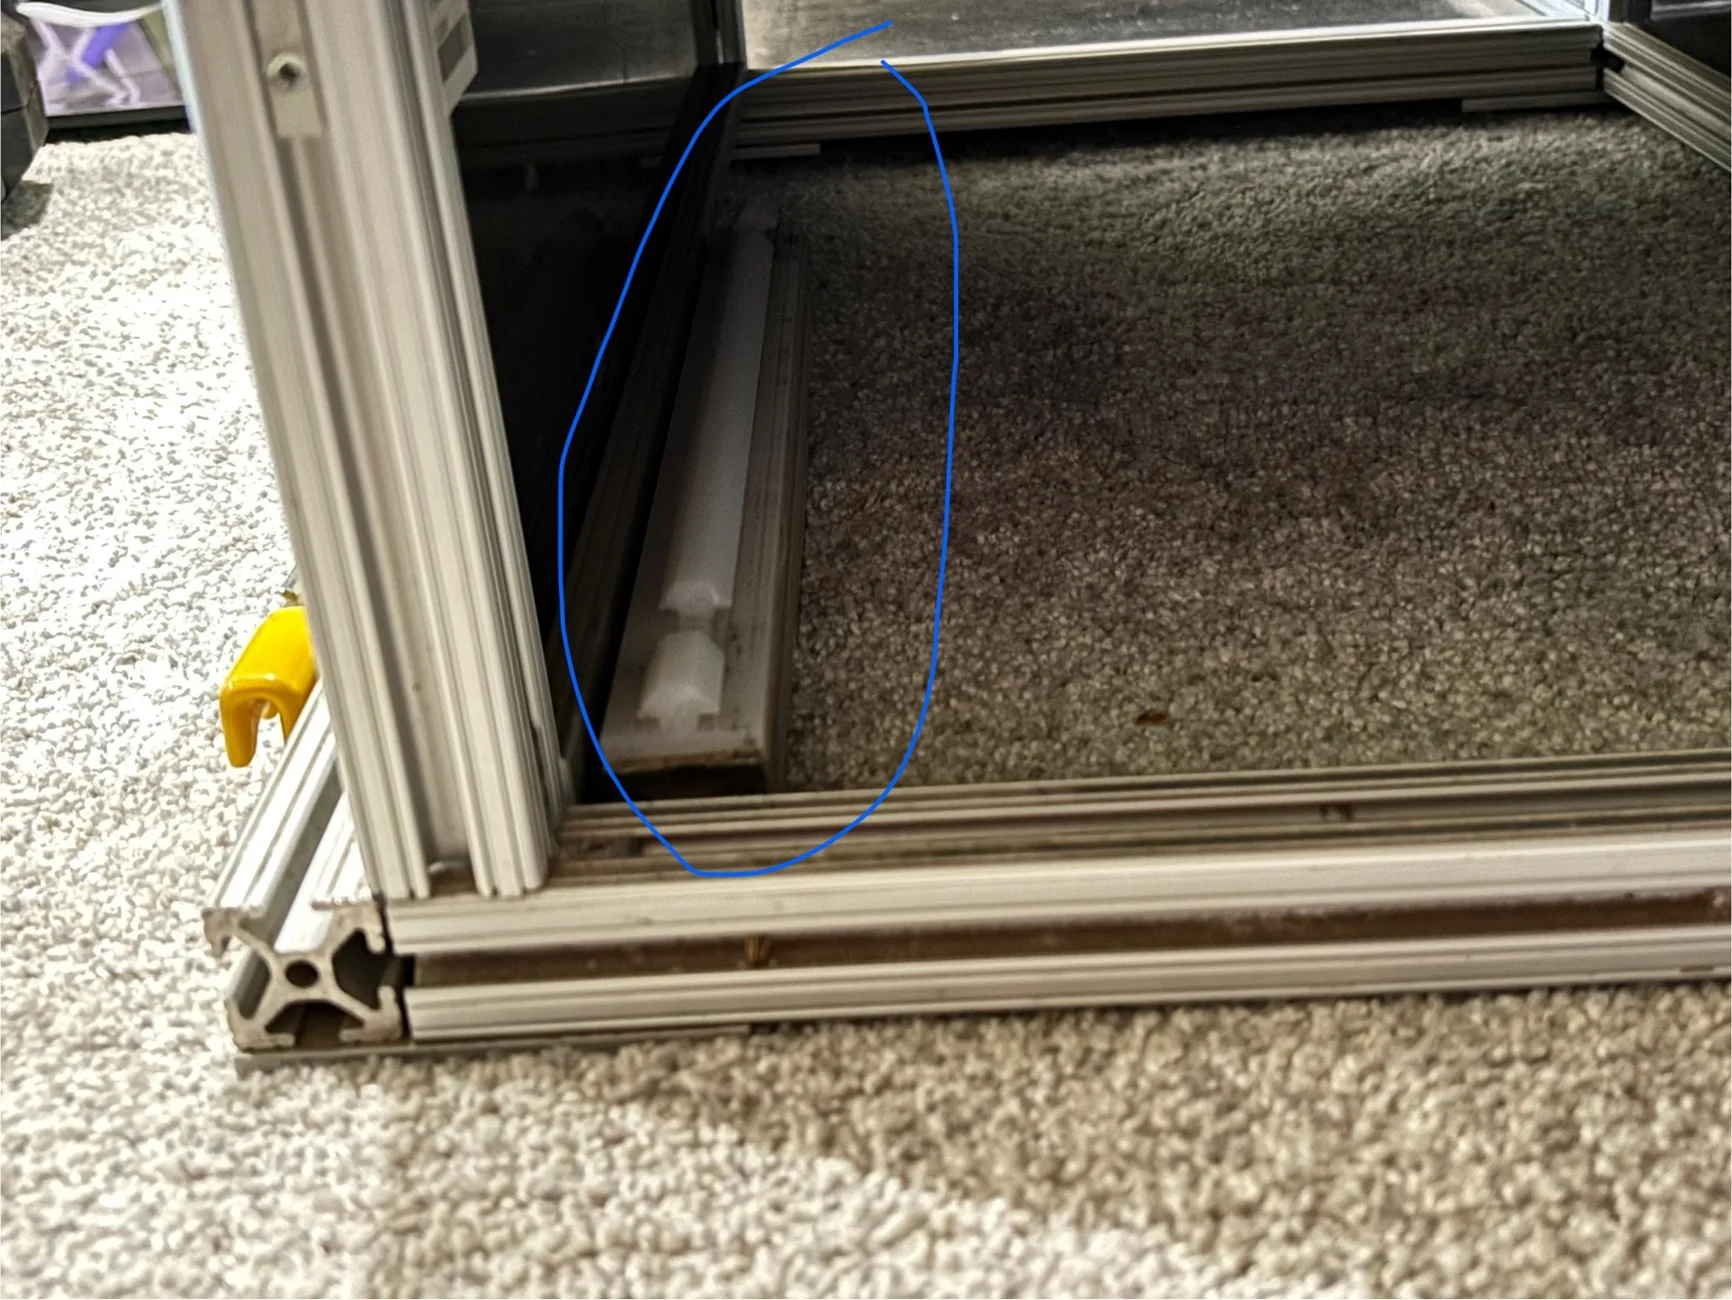
What the drawers slide on;
I apologize I don't have detailed plans and quantaties of parts to order. This post will give you the general idea of how I did it. There are many ways it can be assembled, you will need to count the parts yourself and order accordingly......
The metal bars are easily cut with a power jig saw or miter saw with a metal blade.
You will notice in the first photo there is a black plastic board on the tailgate. That is the sliding cover that encloses the pantry/storage area and serves as a flat work area when removed (rubber feet on the bottom for stability)
A link to a SketchUp file is here:
https://app.sketchup.com/share/tc/northAmerica/kUtCG1RneLA?source=desktop&rtc-engine-version=19
Here are some of the key dimensions from my Sketchup design:. The most critical is the 51" length. That is the absolute longest it can be when paired with the slides I used.
The Blue pieces are the slide-out drawer (details to follow):

I used heavy duty 48" slides like these:
https://www.amazon.com/VADANIA-Indu...g+heavy+duty+slide&qid=1763665827&sr=8-1&th=1
All the metal bars, plastic panes, connectors/fasteners came from 8020.net. Specific links are below. You can often find this stuff at a discount at industrial surplus stores. That is where I got most of my material and saved a lot of money on shipping.
The metal bars are these specific items. If you order supplies be sure to stick with the "10 series" compatible components.
https://8020.net/1010.html
https://8020.net/1050.html
You will need a bunch of nuts and bolts. I used these T-nut items for 8020.net
https://8020.net/3393.html
The bottom and back of the frame structure has heavy duty connecting plates like these:
https://8020.net/4081.html
https://8020.net/4351.html
https://8020.net/4108.html
Everything that sits on top of the bottom framing structure are held together with connectors like these. Images below show how I used them.
https://8020.net/33440.html
https://8020.net/33460.html
The slide out drawer runs on plastic rails like these:
https://8020.net/6710.html
The black plastic panels are this material:
https://8020.net/2613-s.html
The induction burners are similar to this one.
https://www.amazon.com/Secura-1800-...prefix=induction+cooktop,aps,325&sr=8-15&th=1
I have not given specific quantities of fasteners/connectors to order because there are many ways this could be put together and you might want to tweak the design. You will have to count them up for yourself.....
Some more photos and hints/tips on construction.
I attached the 8020.net square bars to the slides with bolts and T-nuts like shown in these photos. This is the hardest and most critical thing to get right. All slides might be a little different so no specific dimensions given, just my example.
As I mentioned, the 51" length for the bottom frame is the absolute maximum I could make it and still close the tailgate. Securing the Slides to the front wall of the bed is also critical. I went through multiple attempts to find a good solution and this is how I did it.
I put a cross bar between the slides to act as hold down feature, more on this later.. When you connect the bottom frame of the kitchen to the slides make sure it is right up against the crossbar or else you won't be able to close the tailgate when you push the slides in to the close position.
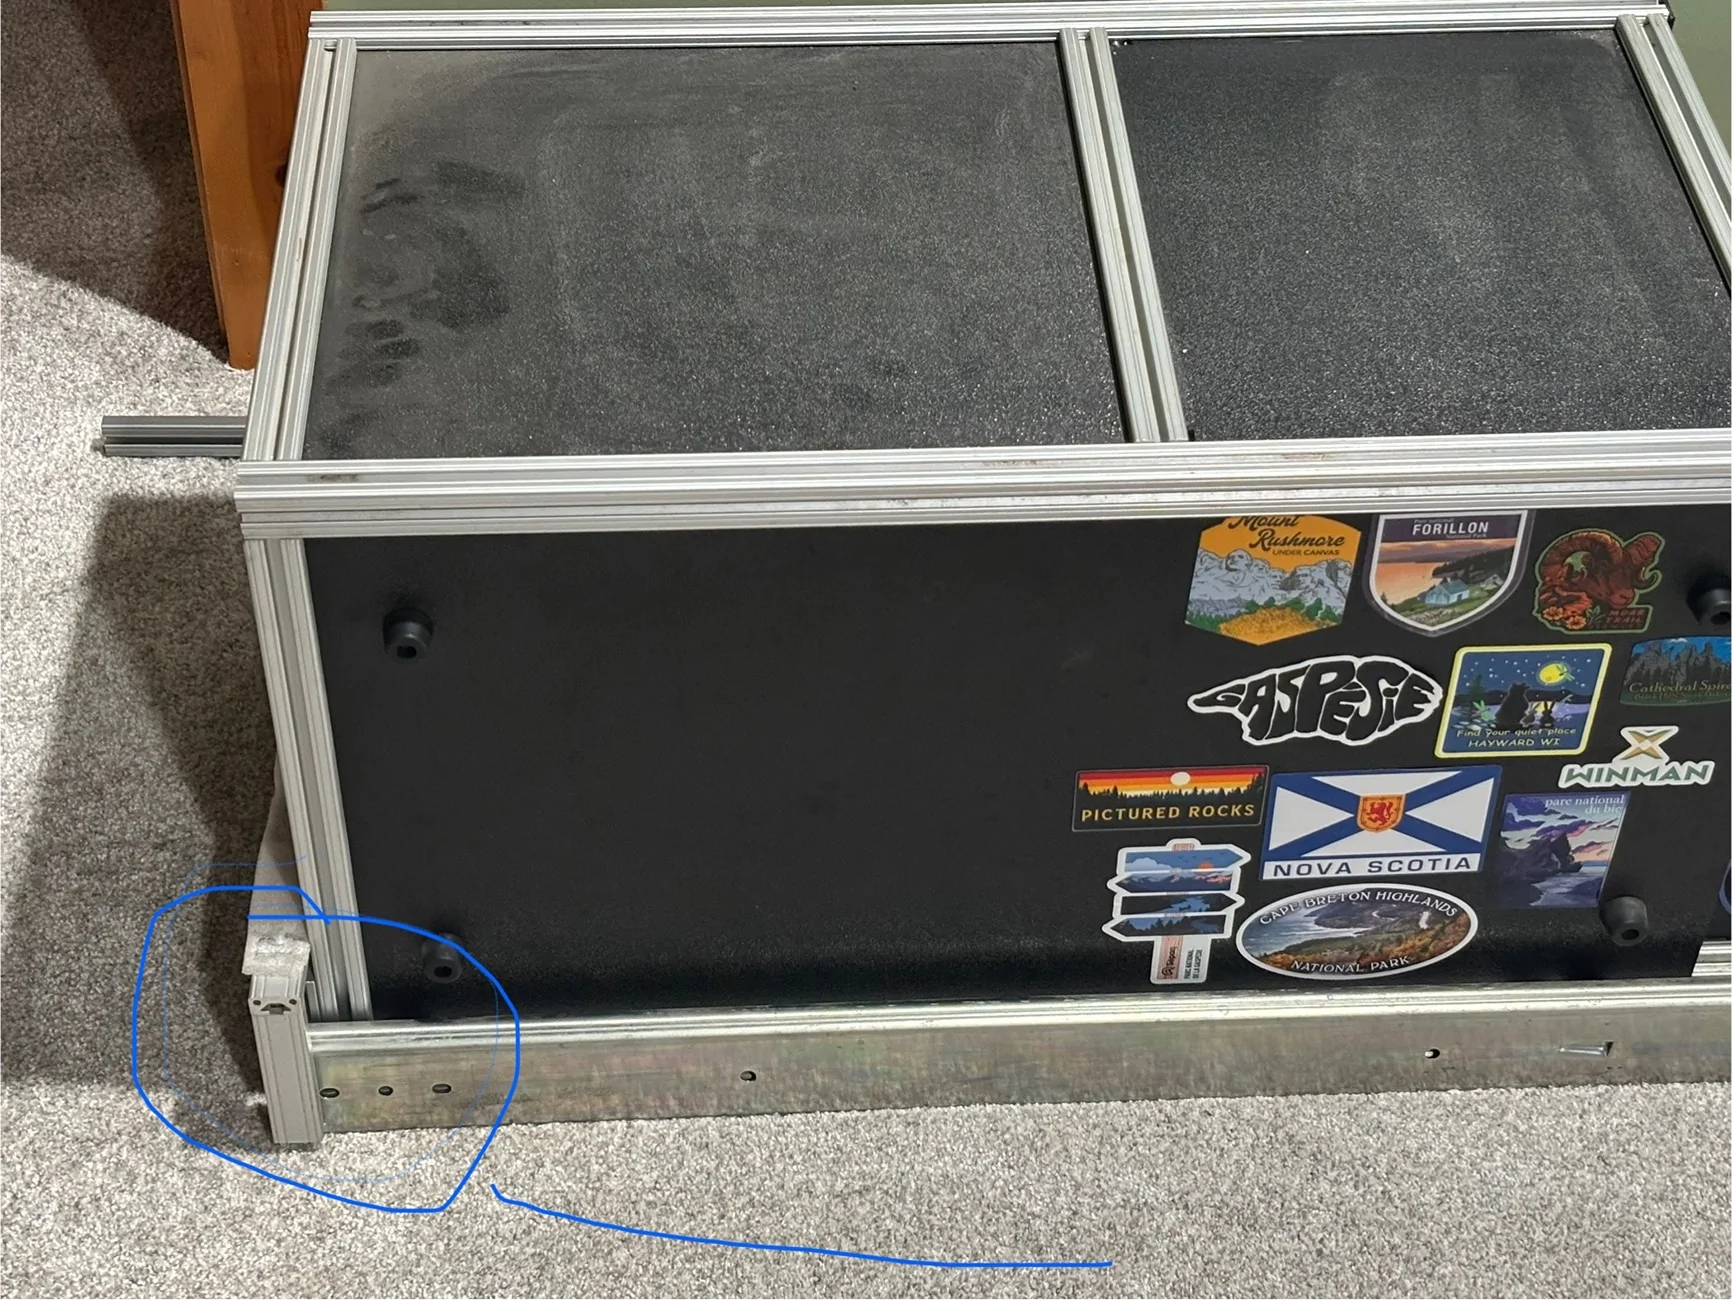
When I want to install the kitchen in the bed I attached the members shown below to the wall of the bed by using the 6mm attach points scatters around the bed. I don't have an image of it installed but this one kinda shows what I mean. Push down on the vertical member to put some down-force on the slides to hold them in place then tighten the bolt on the T-nut in the 90 deg corner bracket.
Lastly, a few images showing some details of the assembly. Do the bottom frame first using heavy duty connecting plates then piece together the rest using those internal fasteners. You need to give some thought to the order in which you attach each piece and what connectors you use where....
This shows one of the connectors and how the plastic panels slide in the slots of the bars.
More examples of the connectors for the uprights. Pay attention to "inside-outside" connector types. You will need some of both. Sorry I don't have specific quantities you need as there are many ways this can go together.
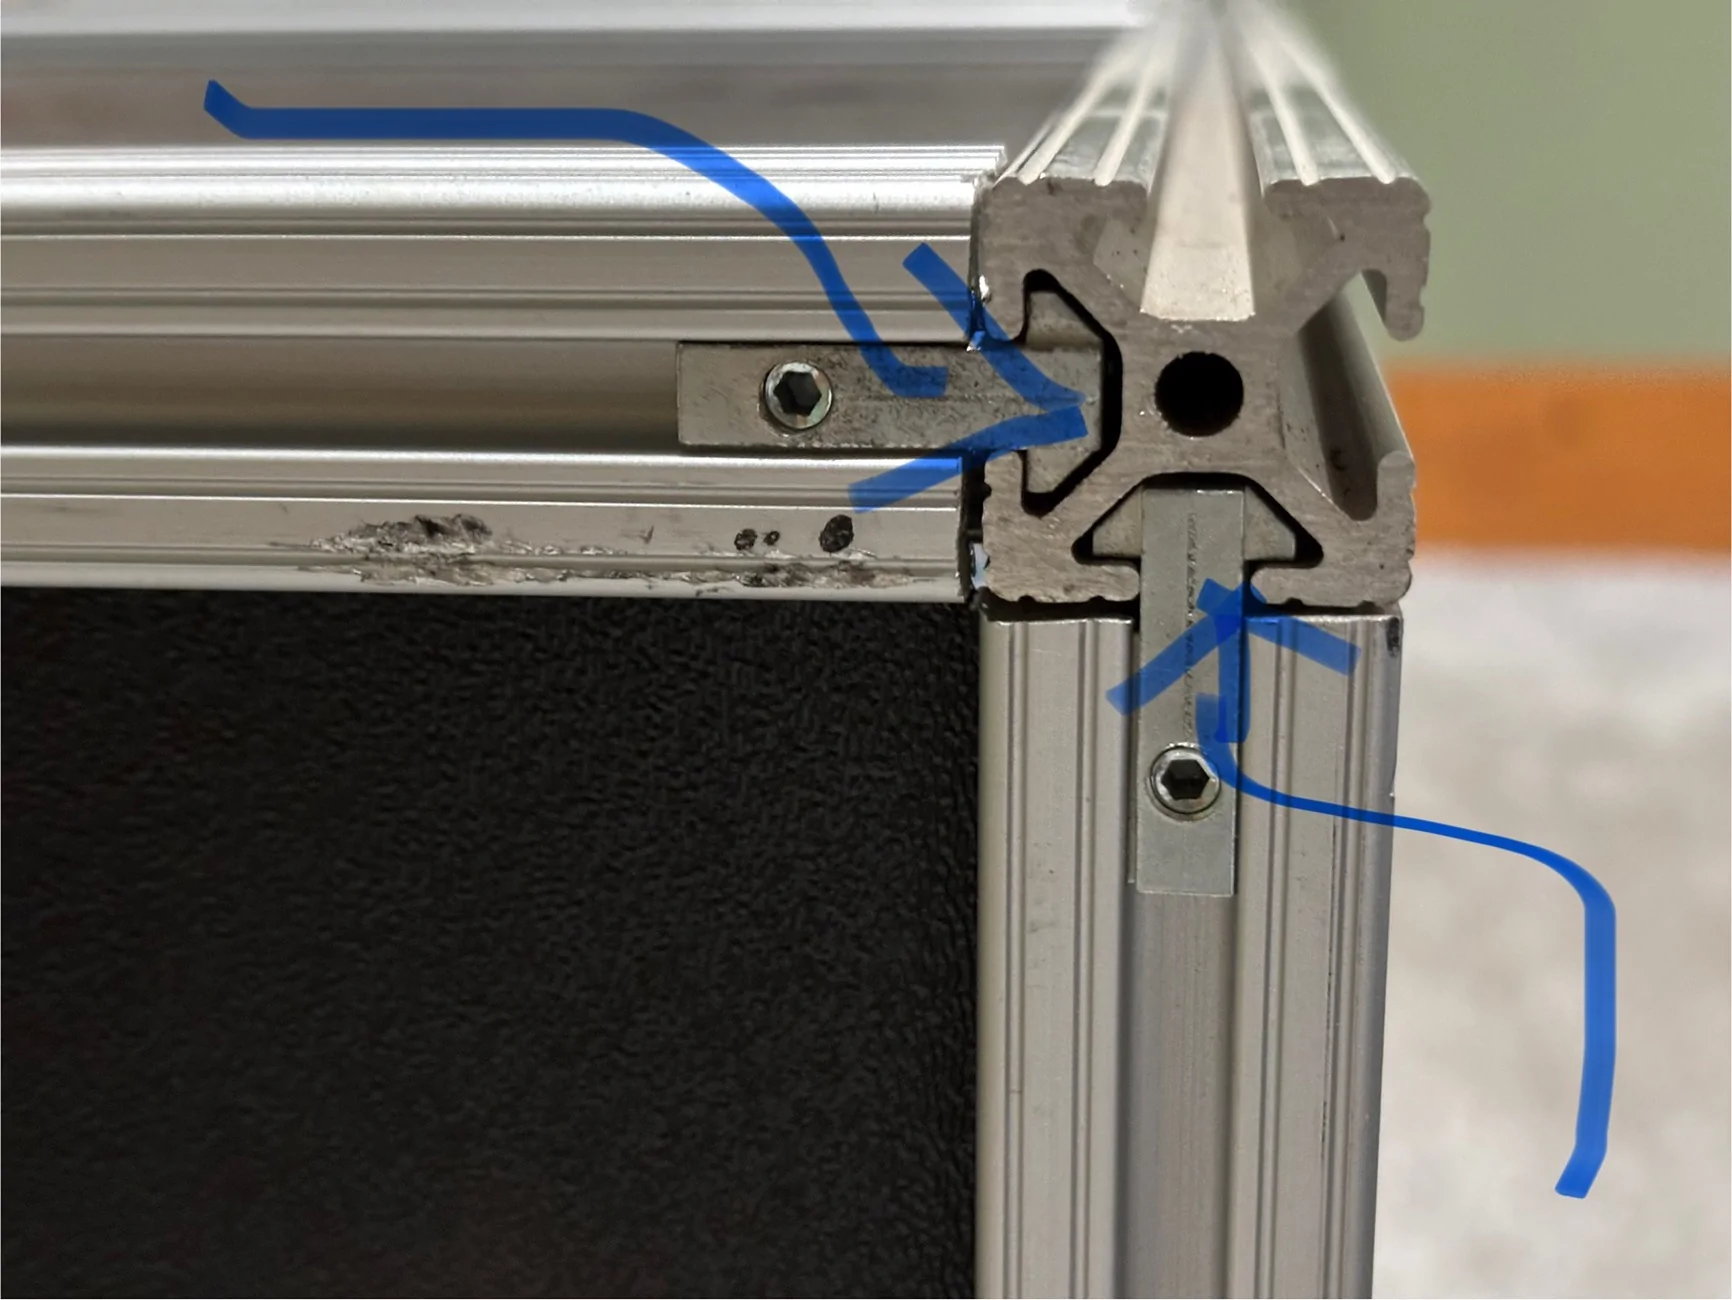
You will need to notch the panels in places to accommodate the 90 deg internal fasteners like shown above.
What the drawers slide on;
Sponsored
