bgmaxey
Active Member
- Thread starter
- #1
Hi: I haven't seen any posts on the install of the Xtrusion OVRLND rack for the R1T, so here are my thoughts. I am not particularly handy so the install took me over four hours. The lack of instructions also proved somewhat challenging (all available instructions are for their XTR1 rack generally and it even appears that there are some outdated parts on those instructions). I also ordered their AXS Molle swing gate, which meant I had a lot of parts that confused me - in retrospect, it would have been better to build that first to eliminate those parts from the rack equation. Also, as I am not handy, I make up words below - sorry.
All that being said - this rack is extremely well engineered and there are many really nice details. If one is zen, the parts all make sense. And the rack is rock solid - really happy that I will be able to finally carry 16' kayaks.
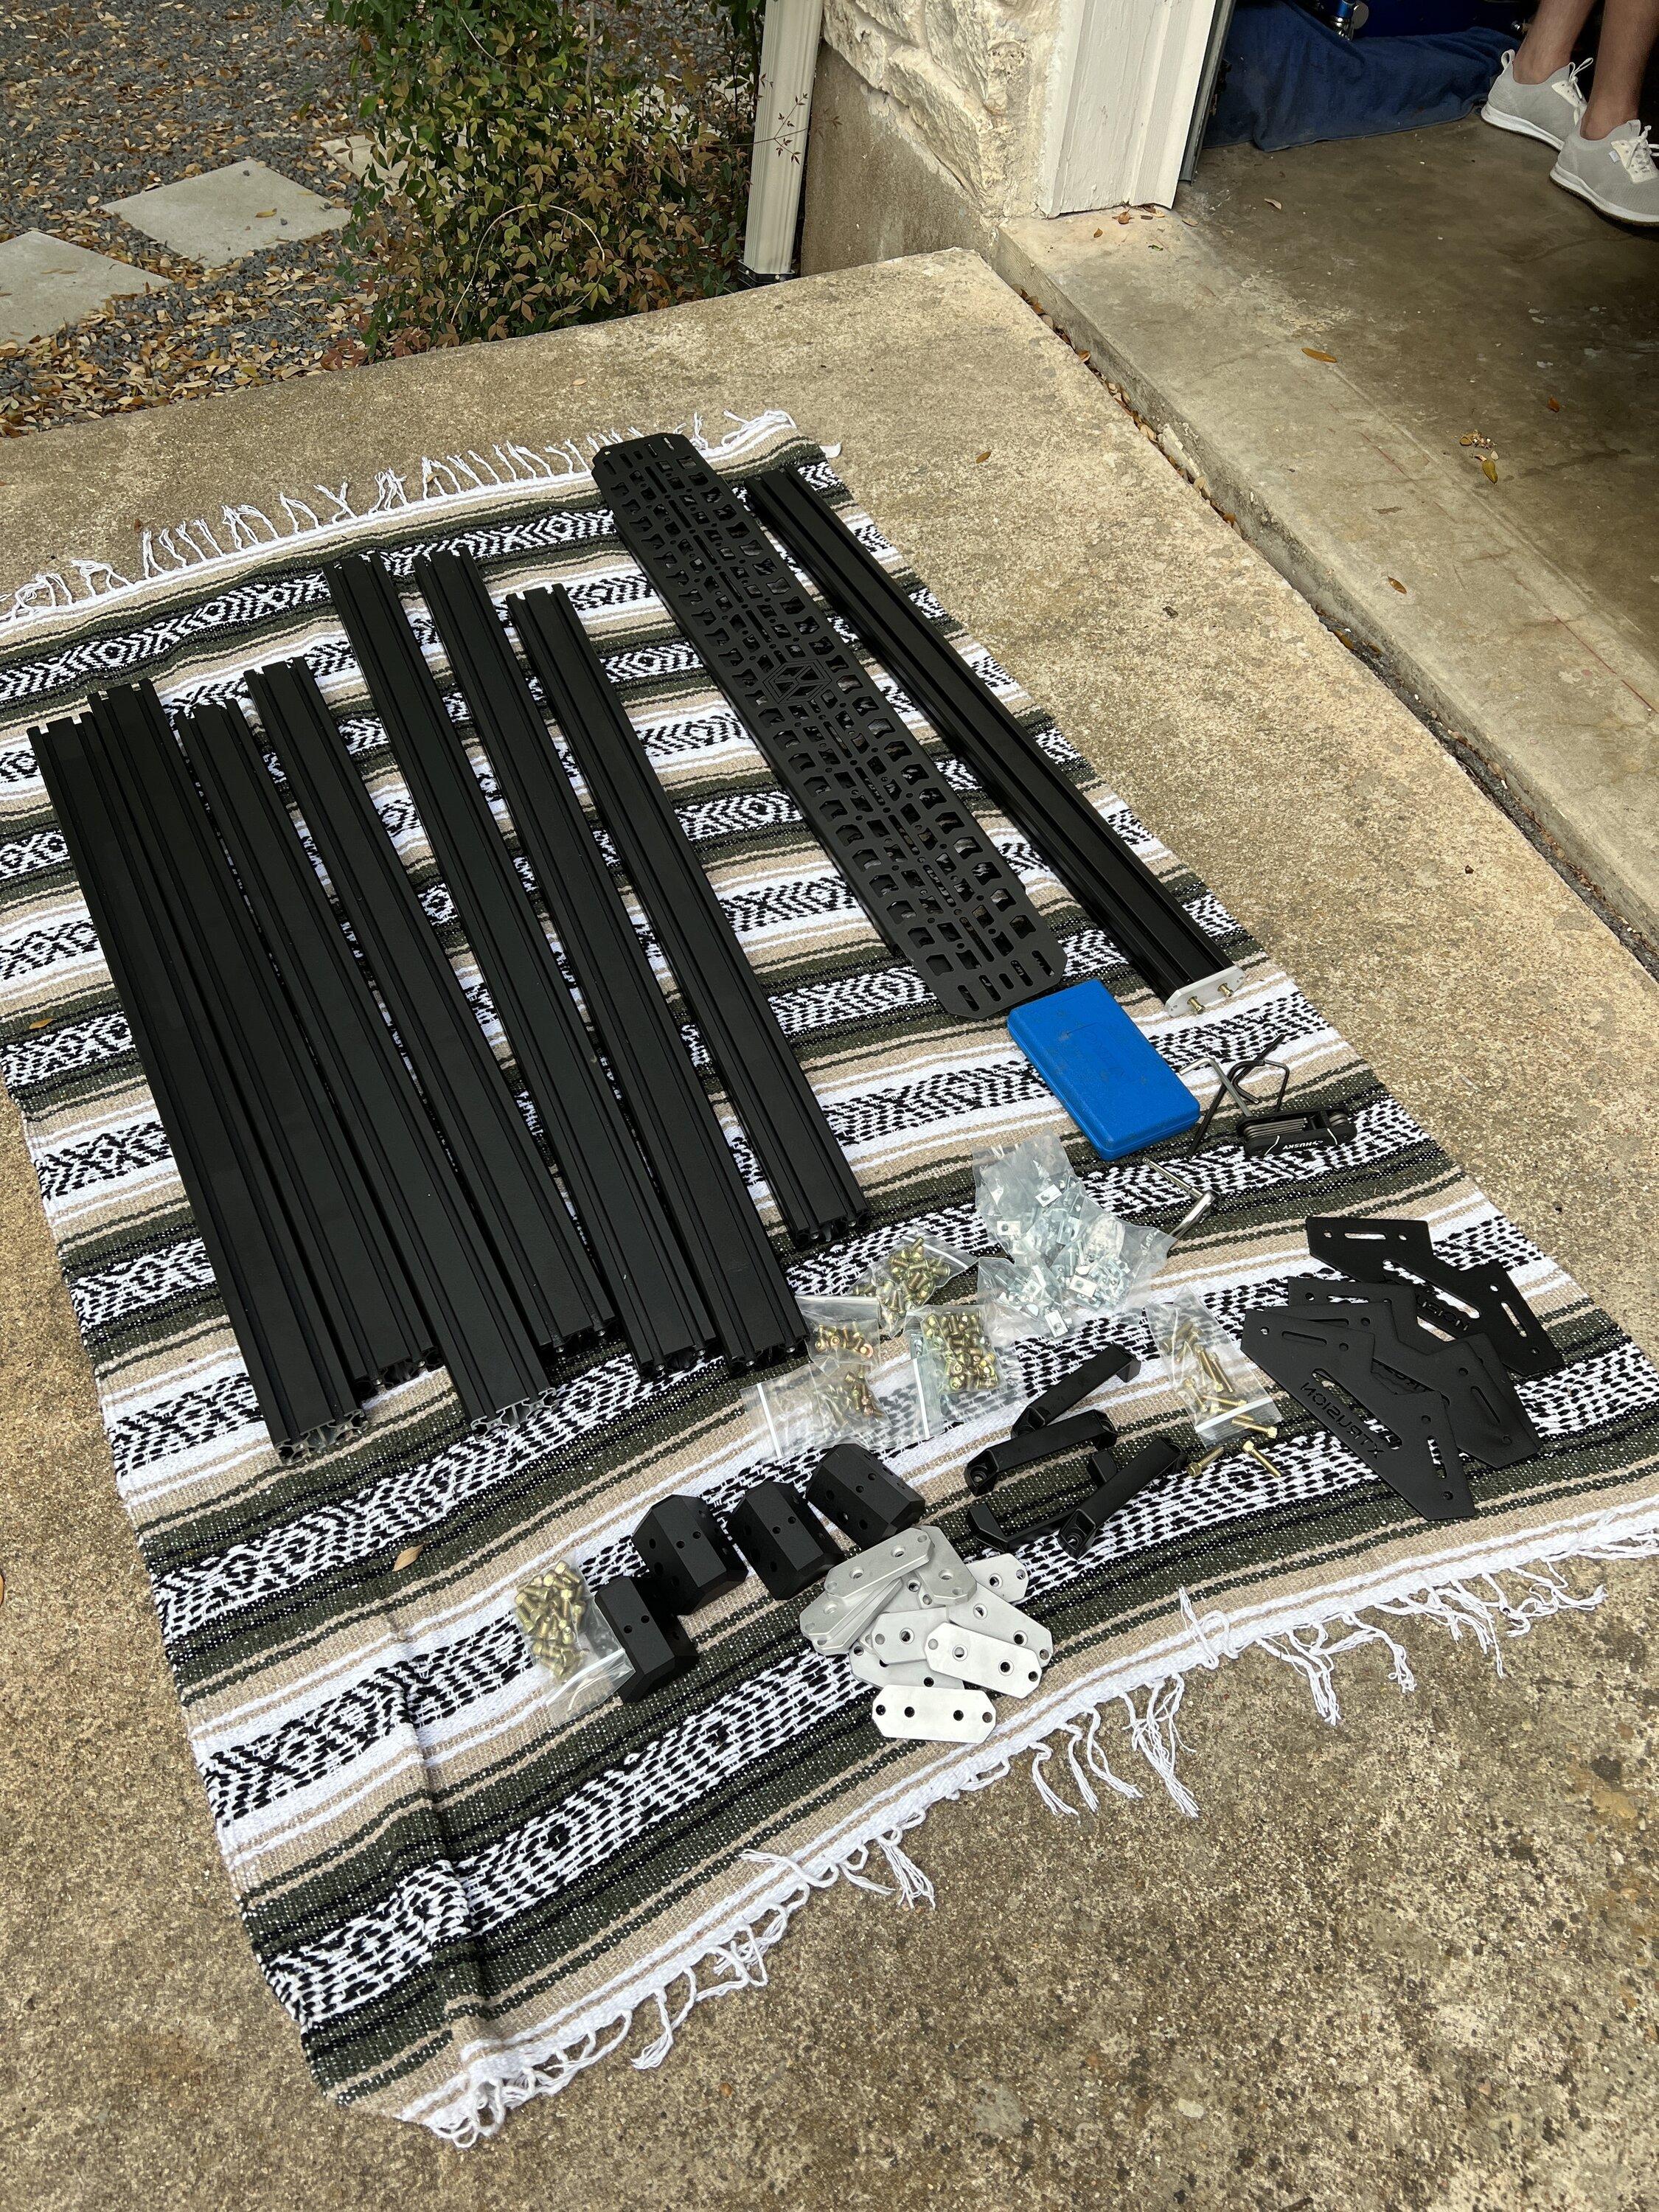
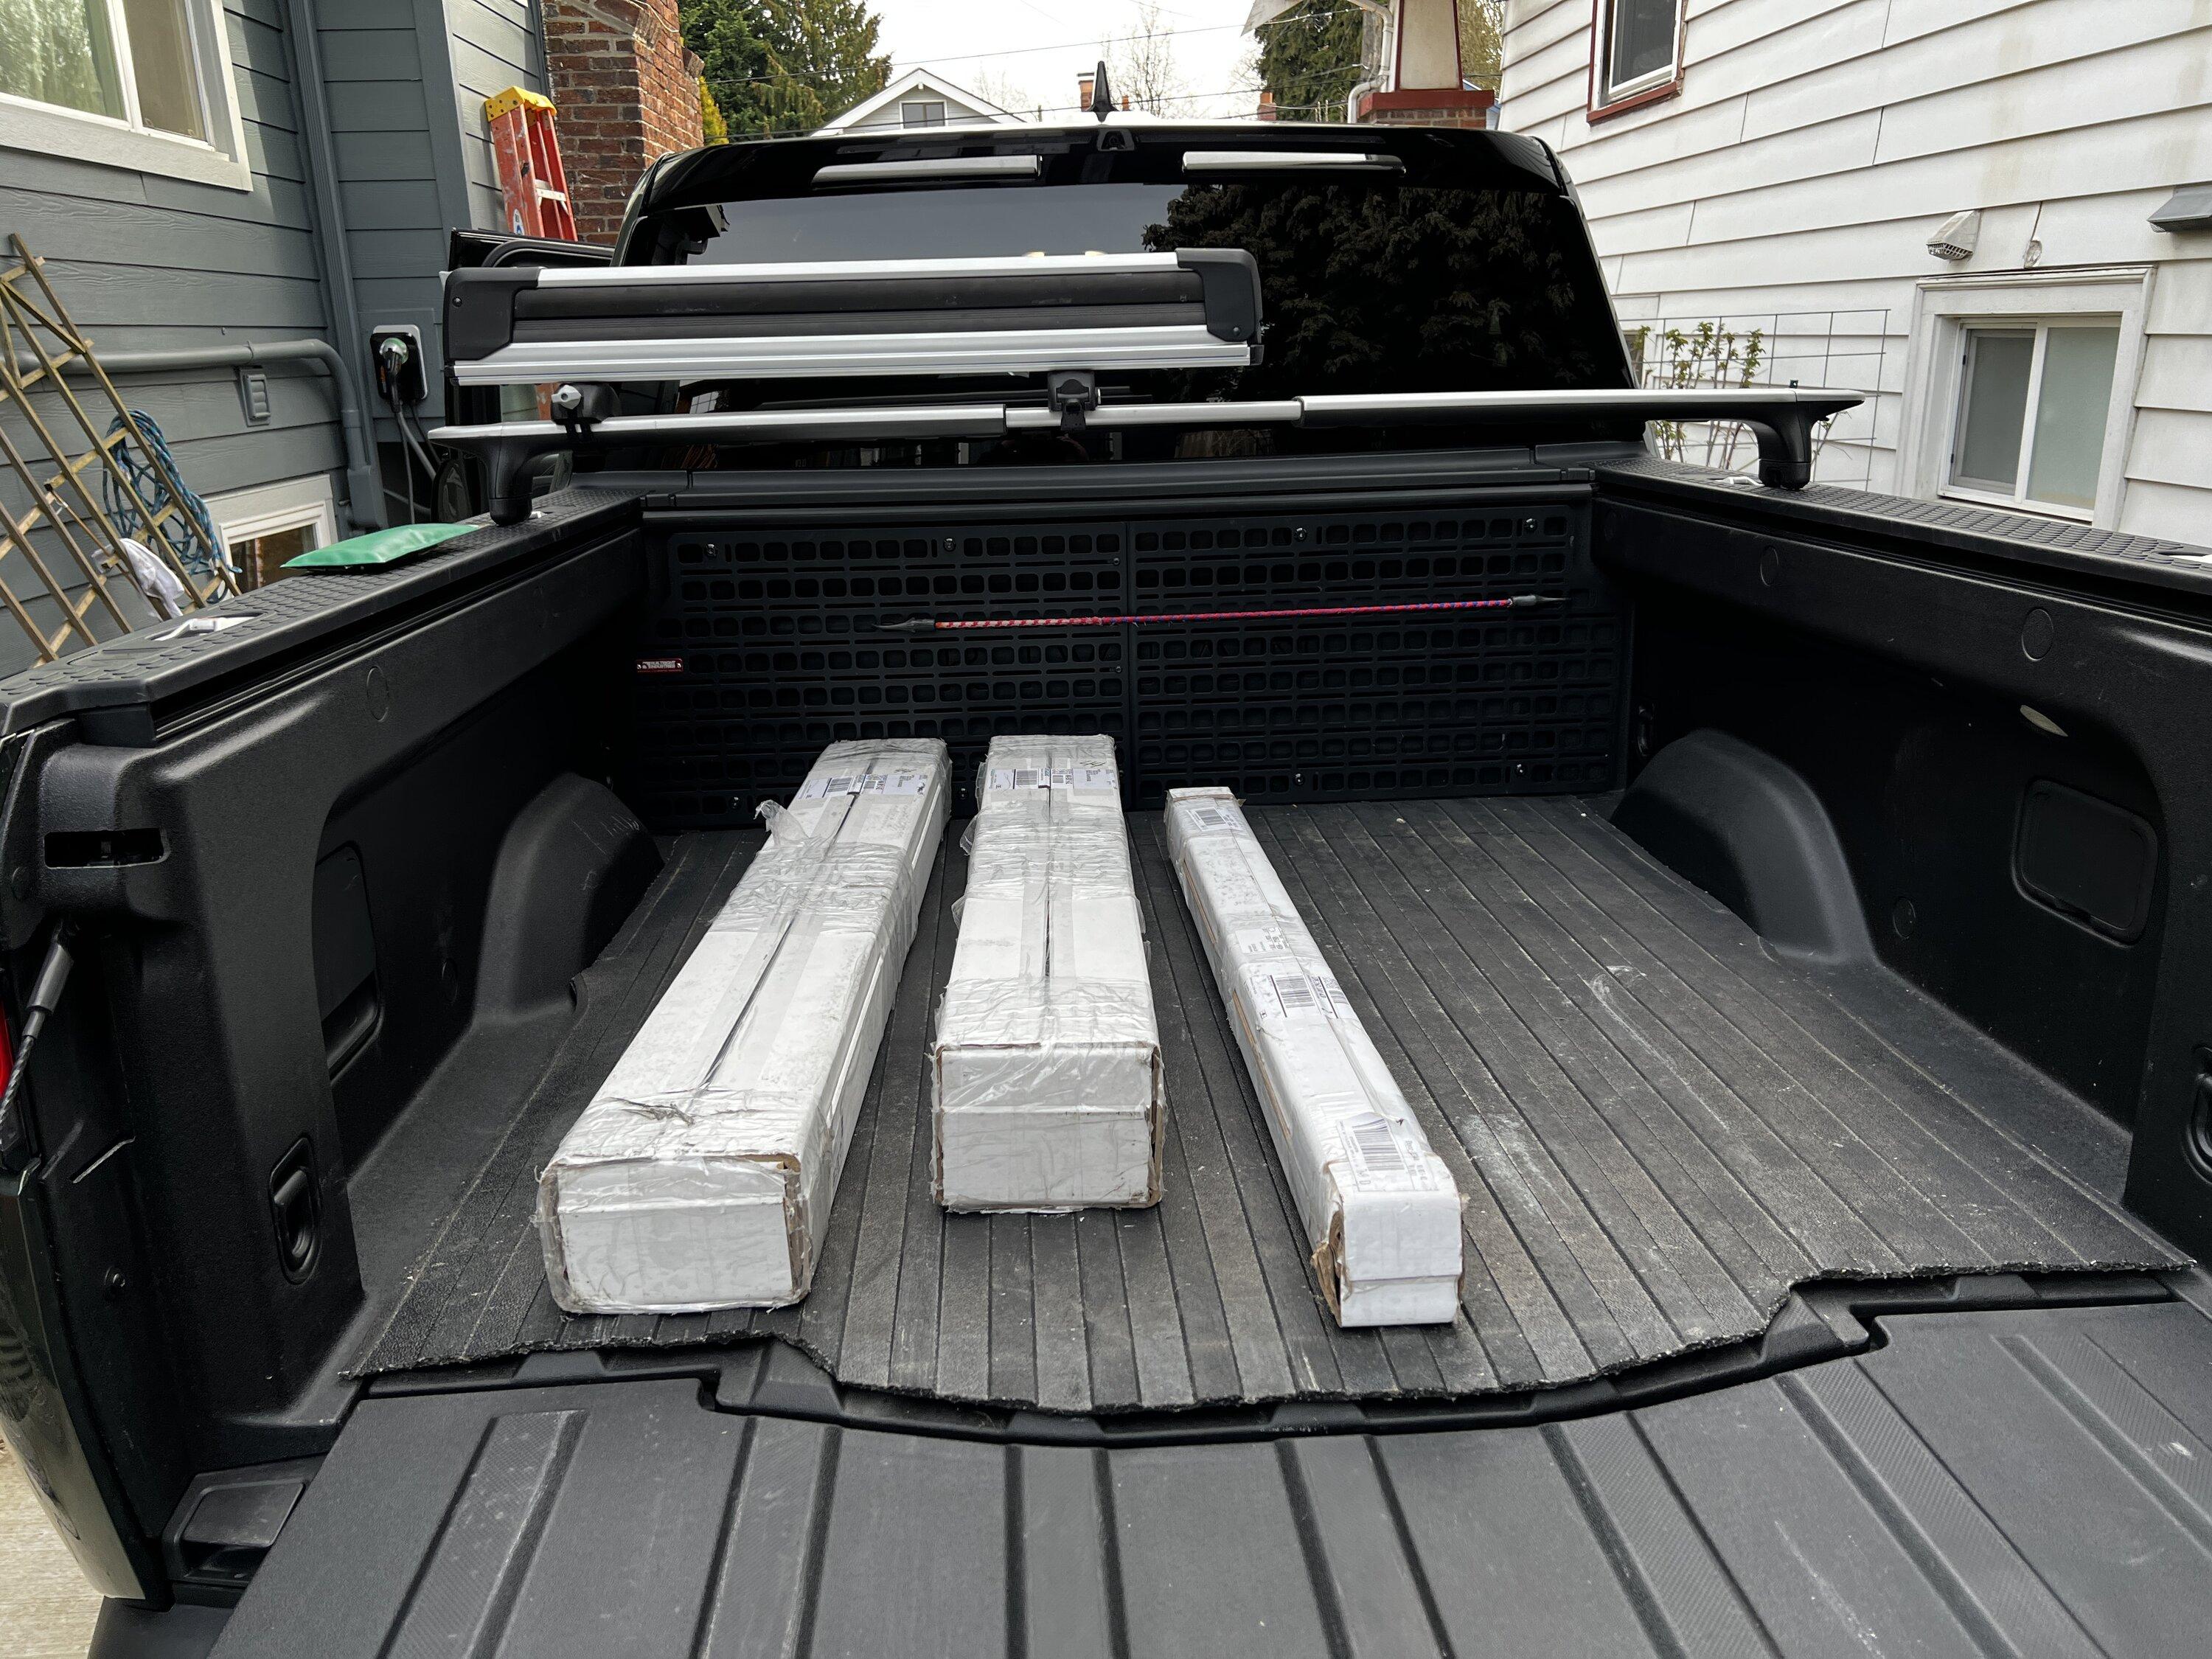
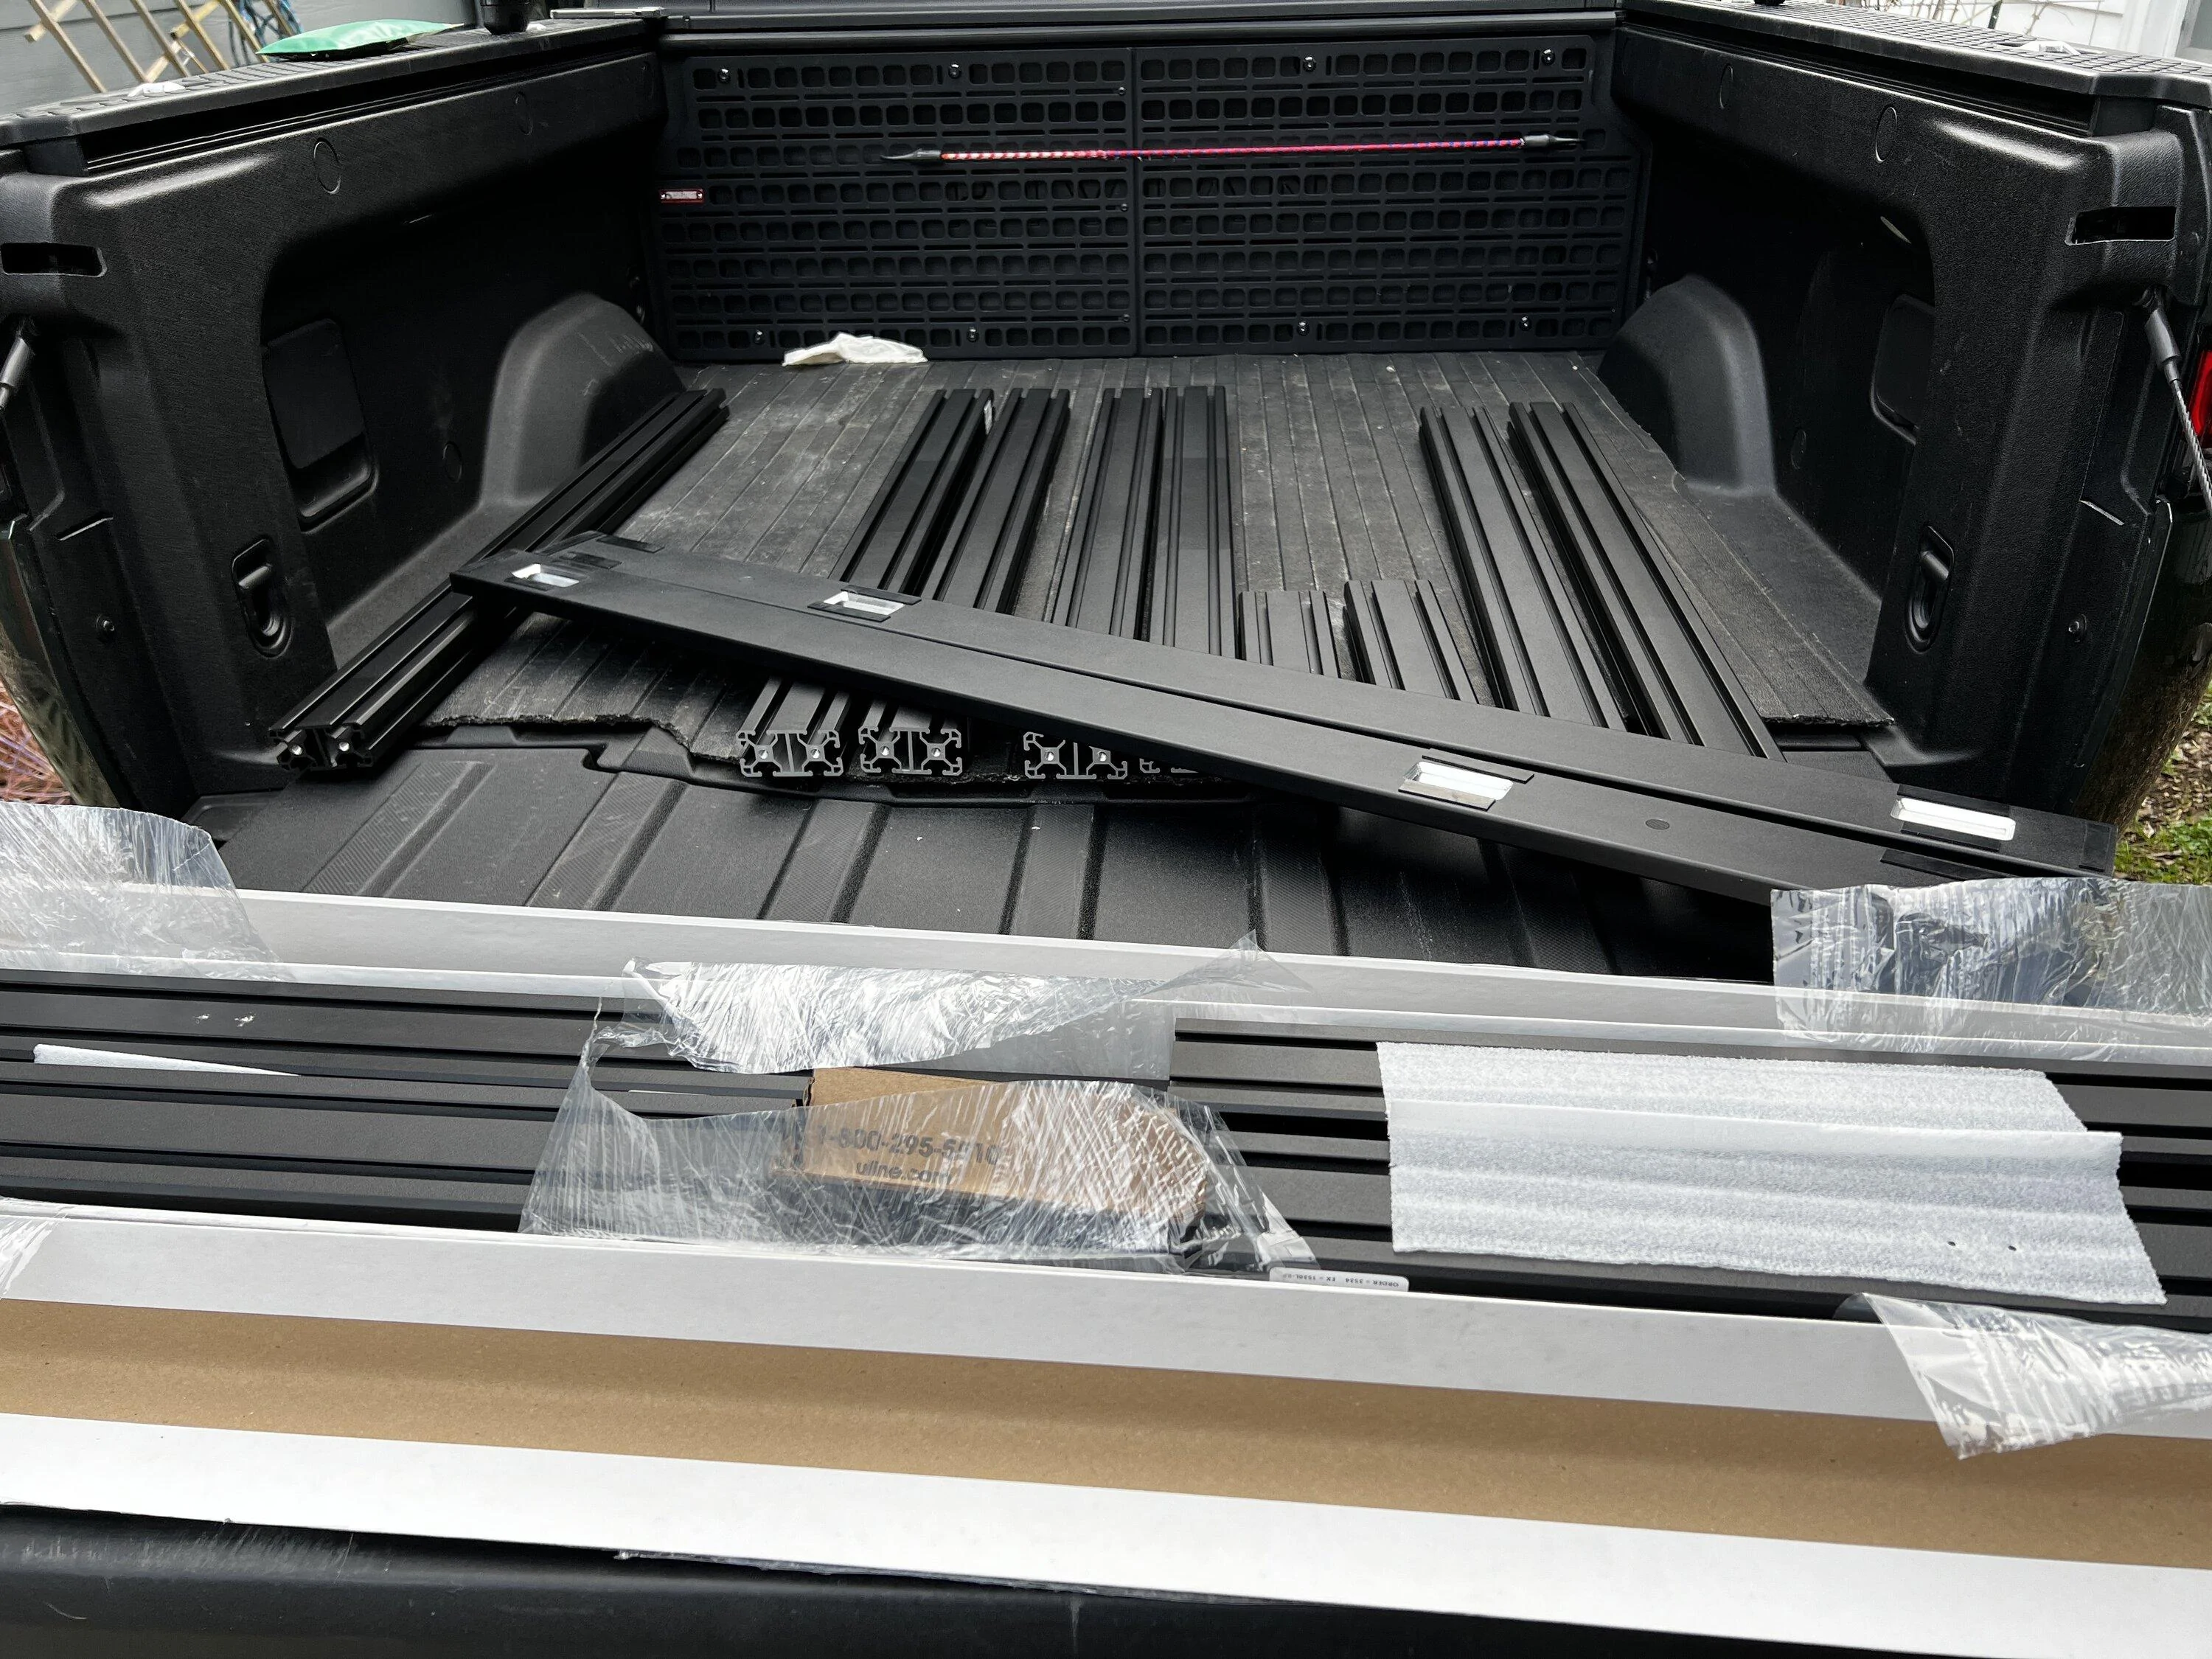
The bars were delivered separately (which they said would happen) and everything was very well packaged. No damage.


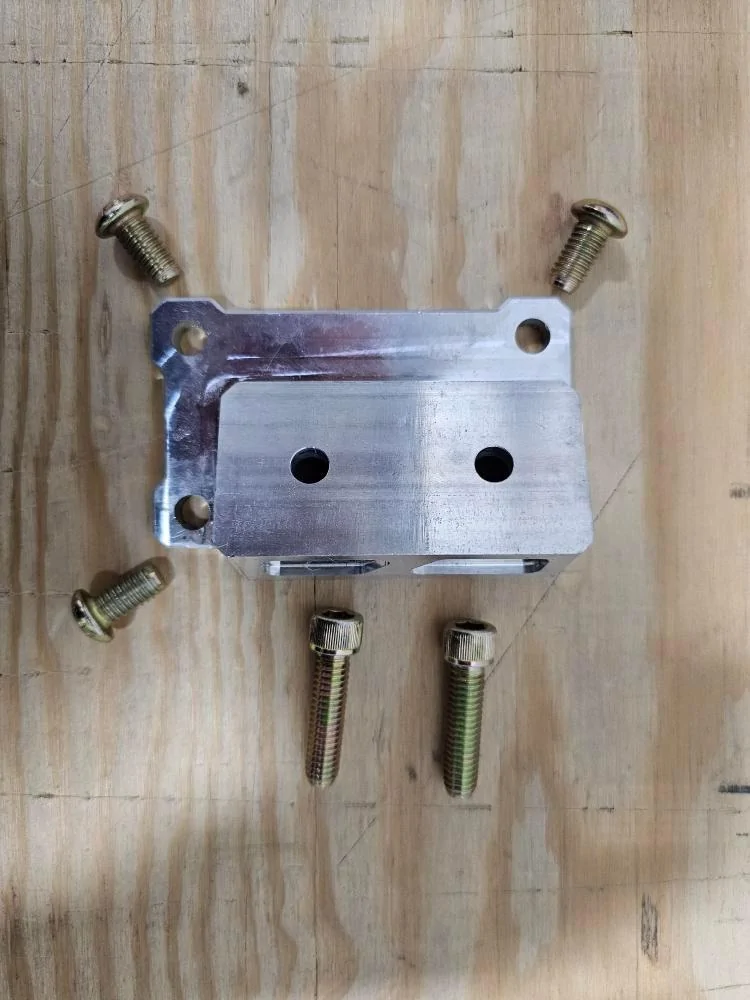
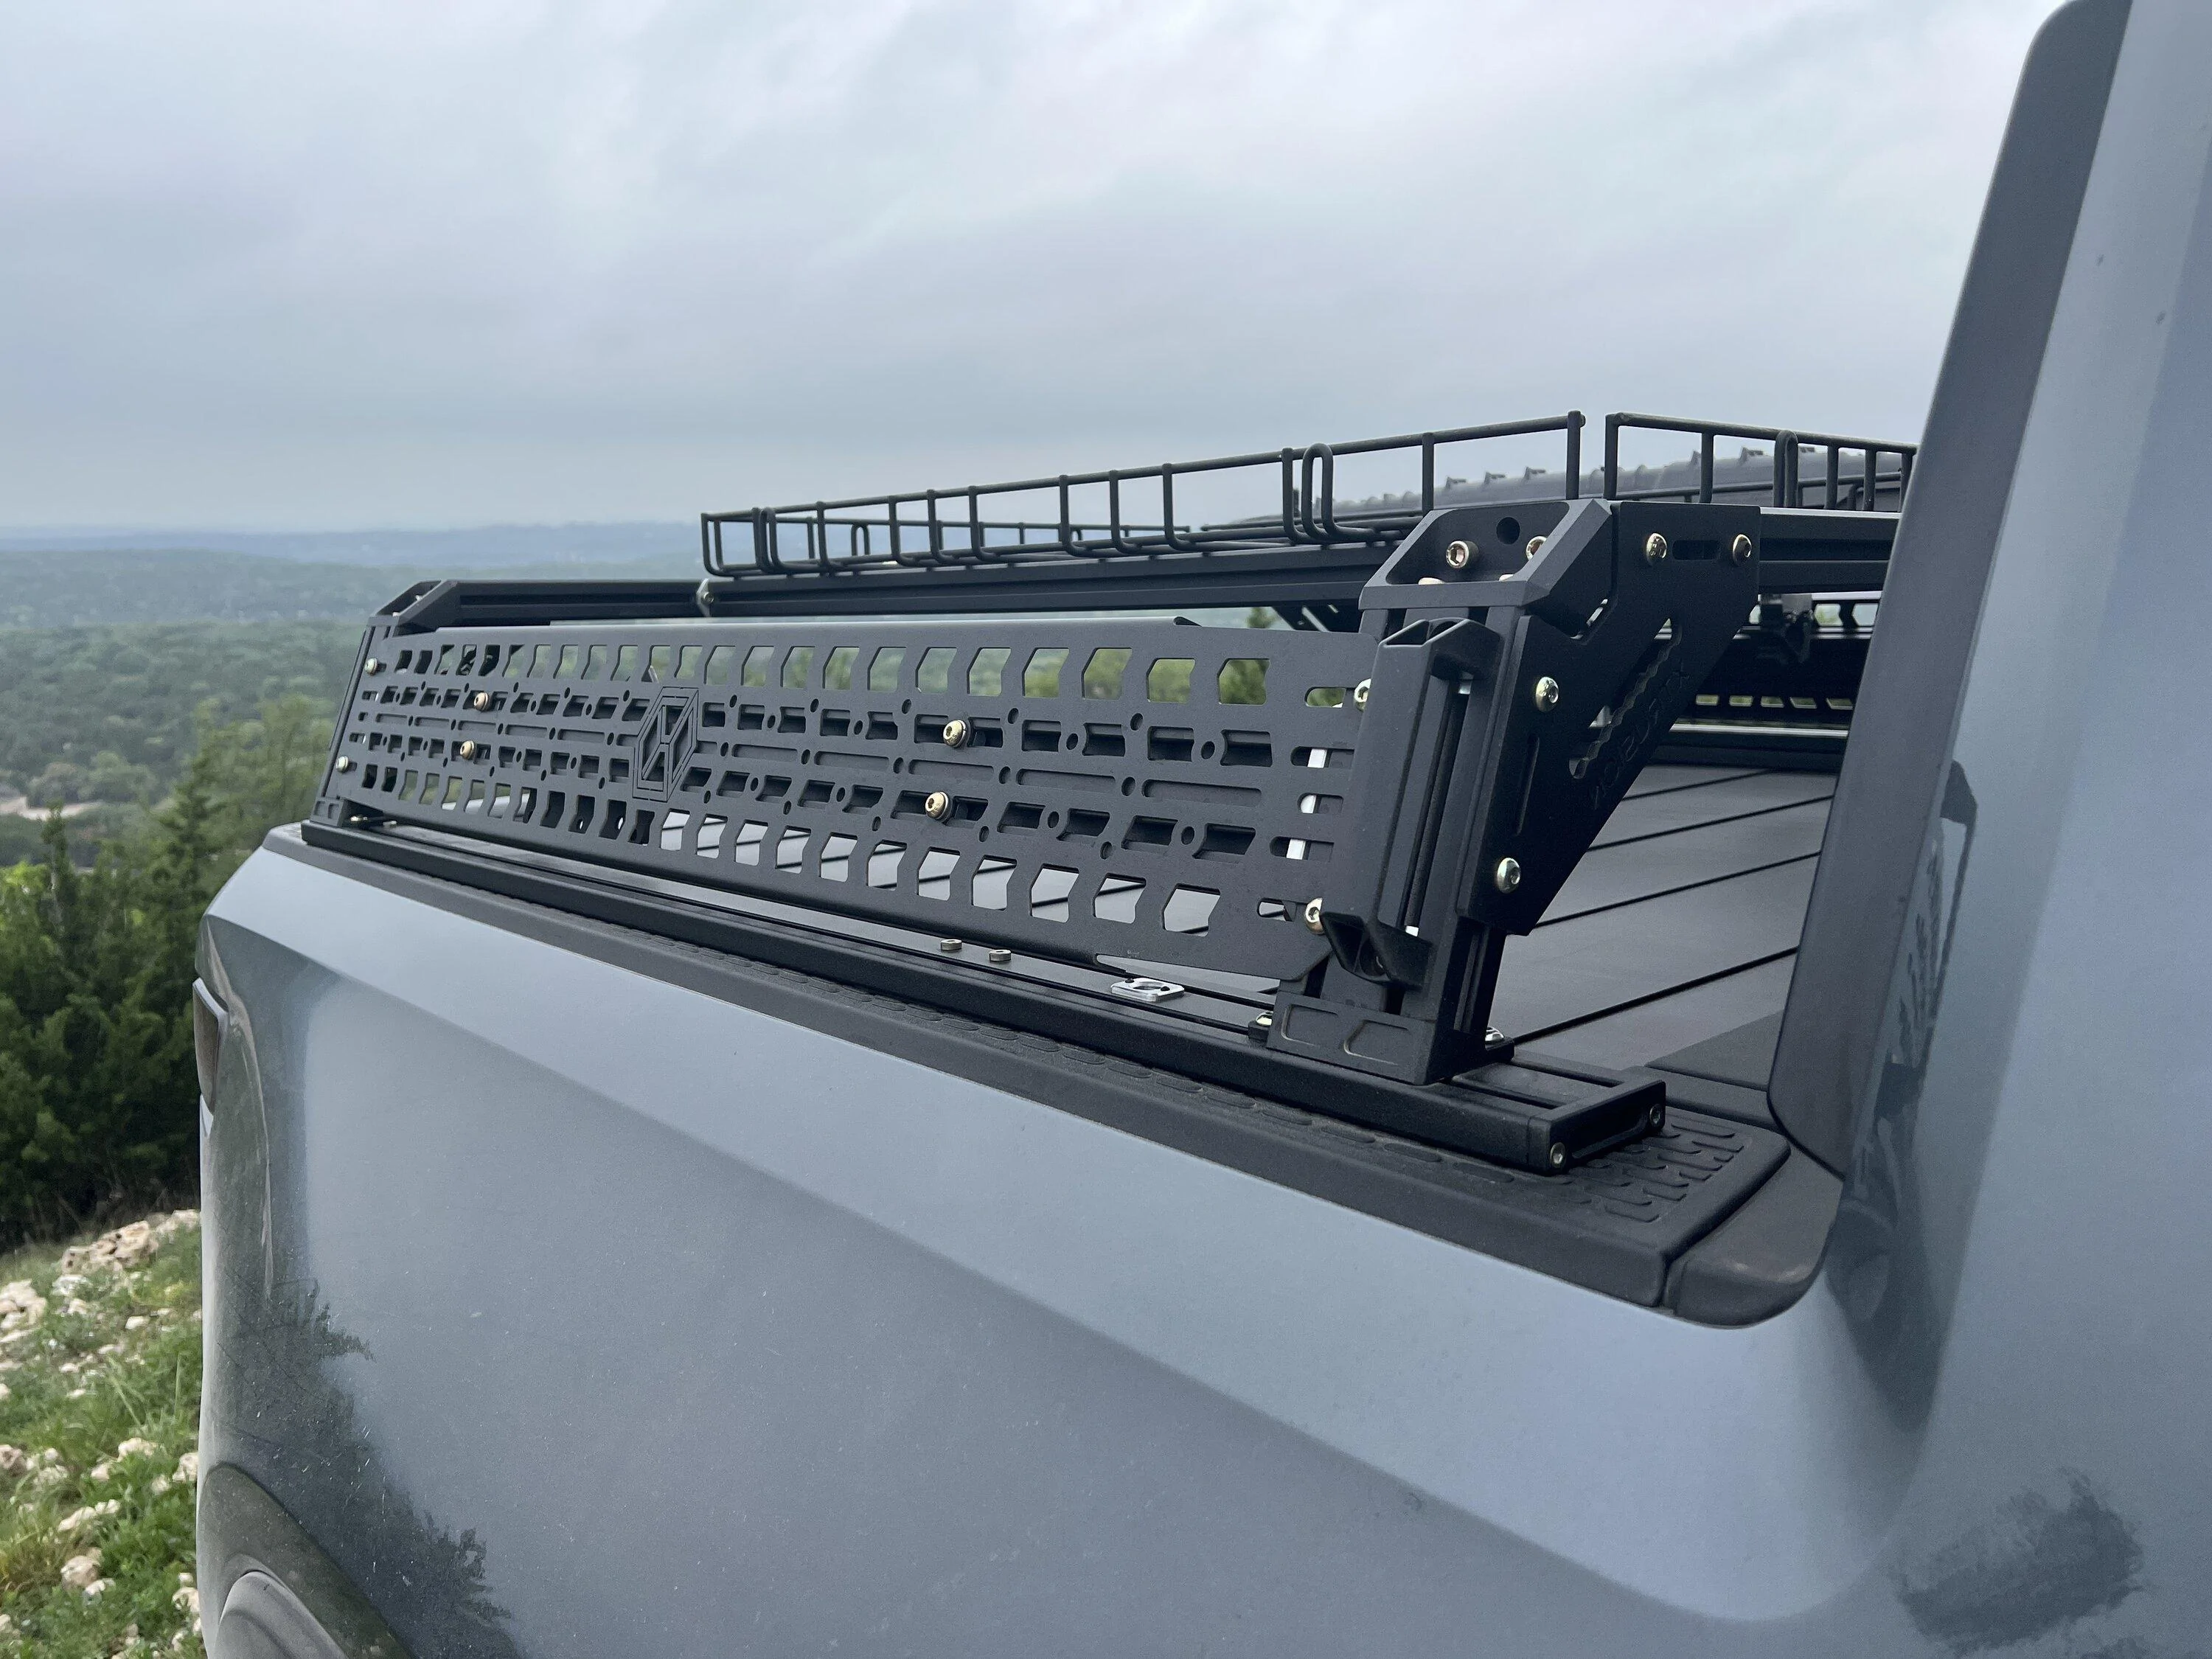
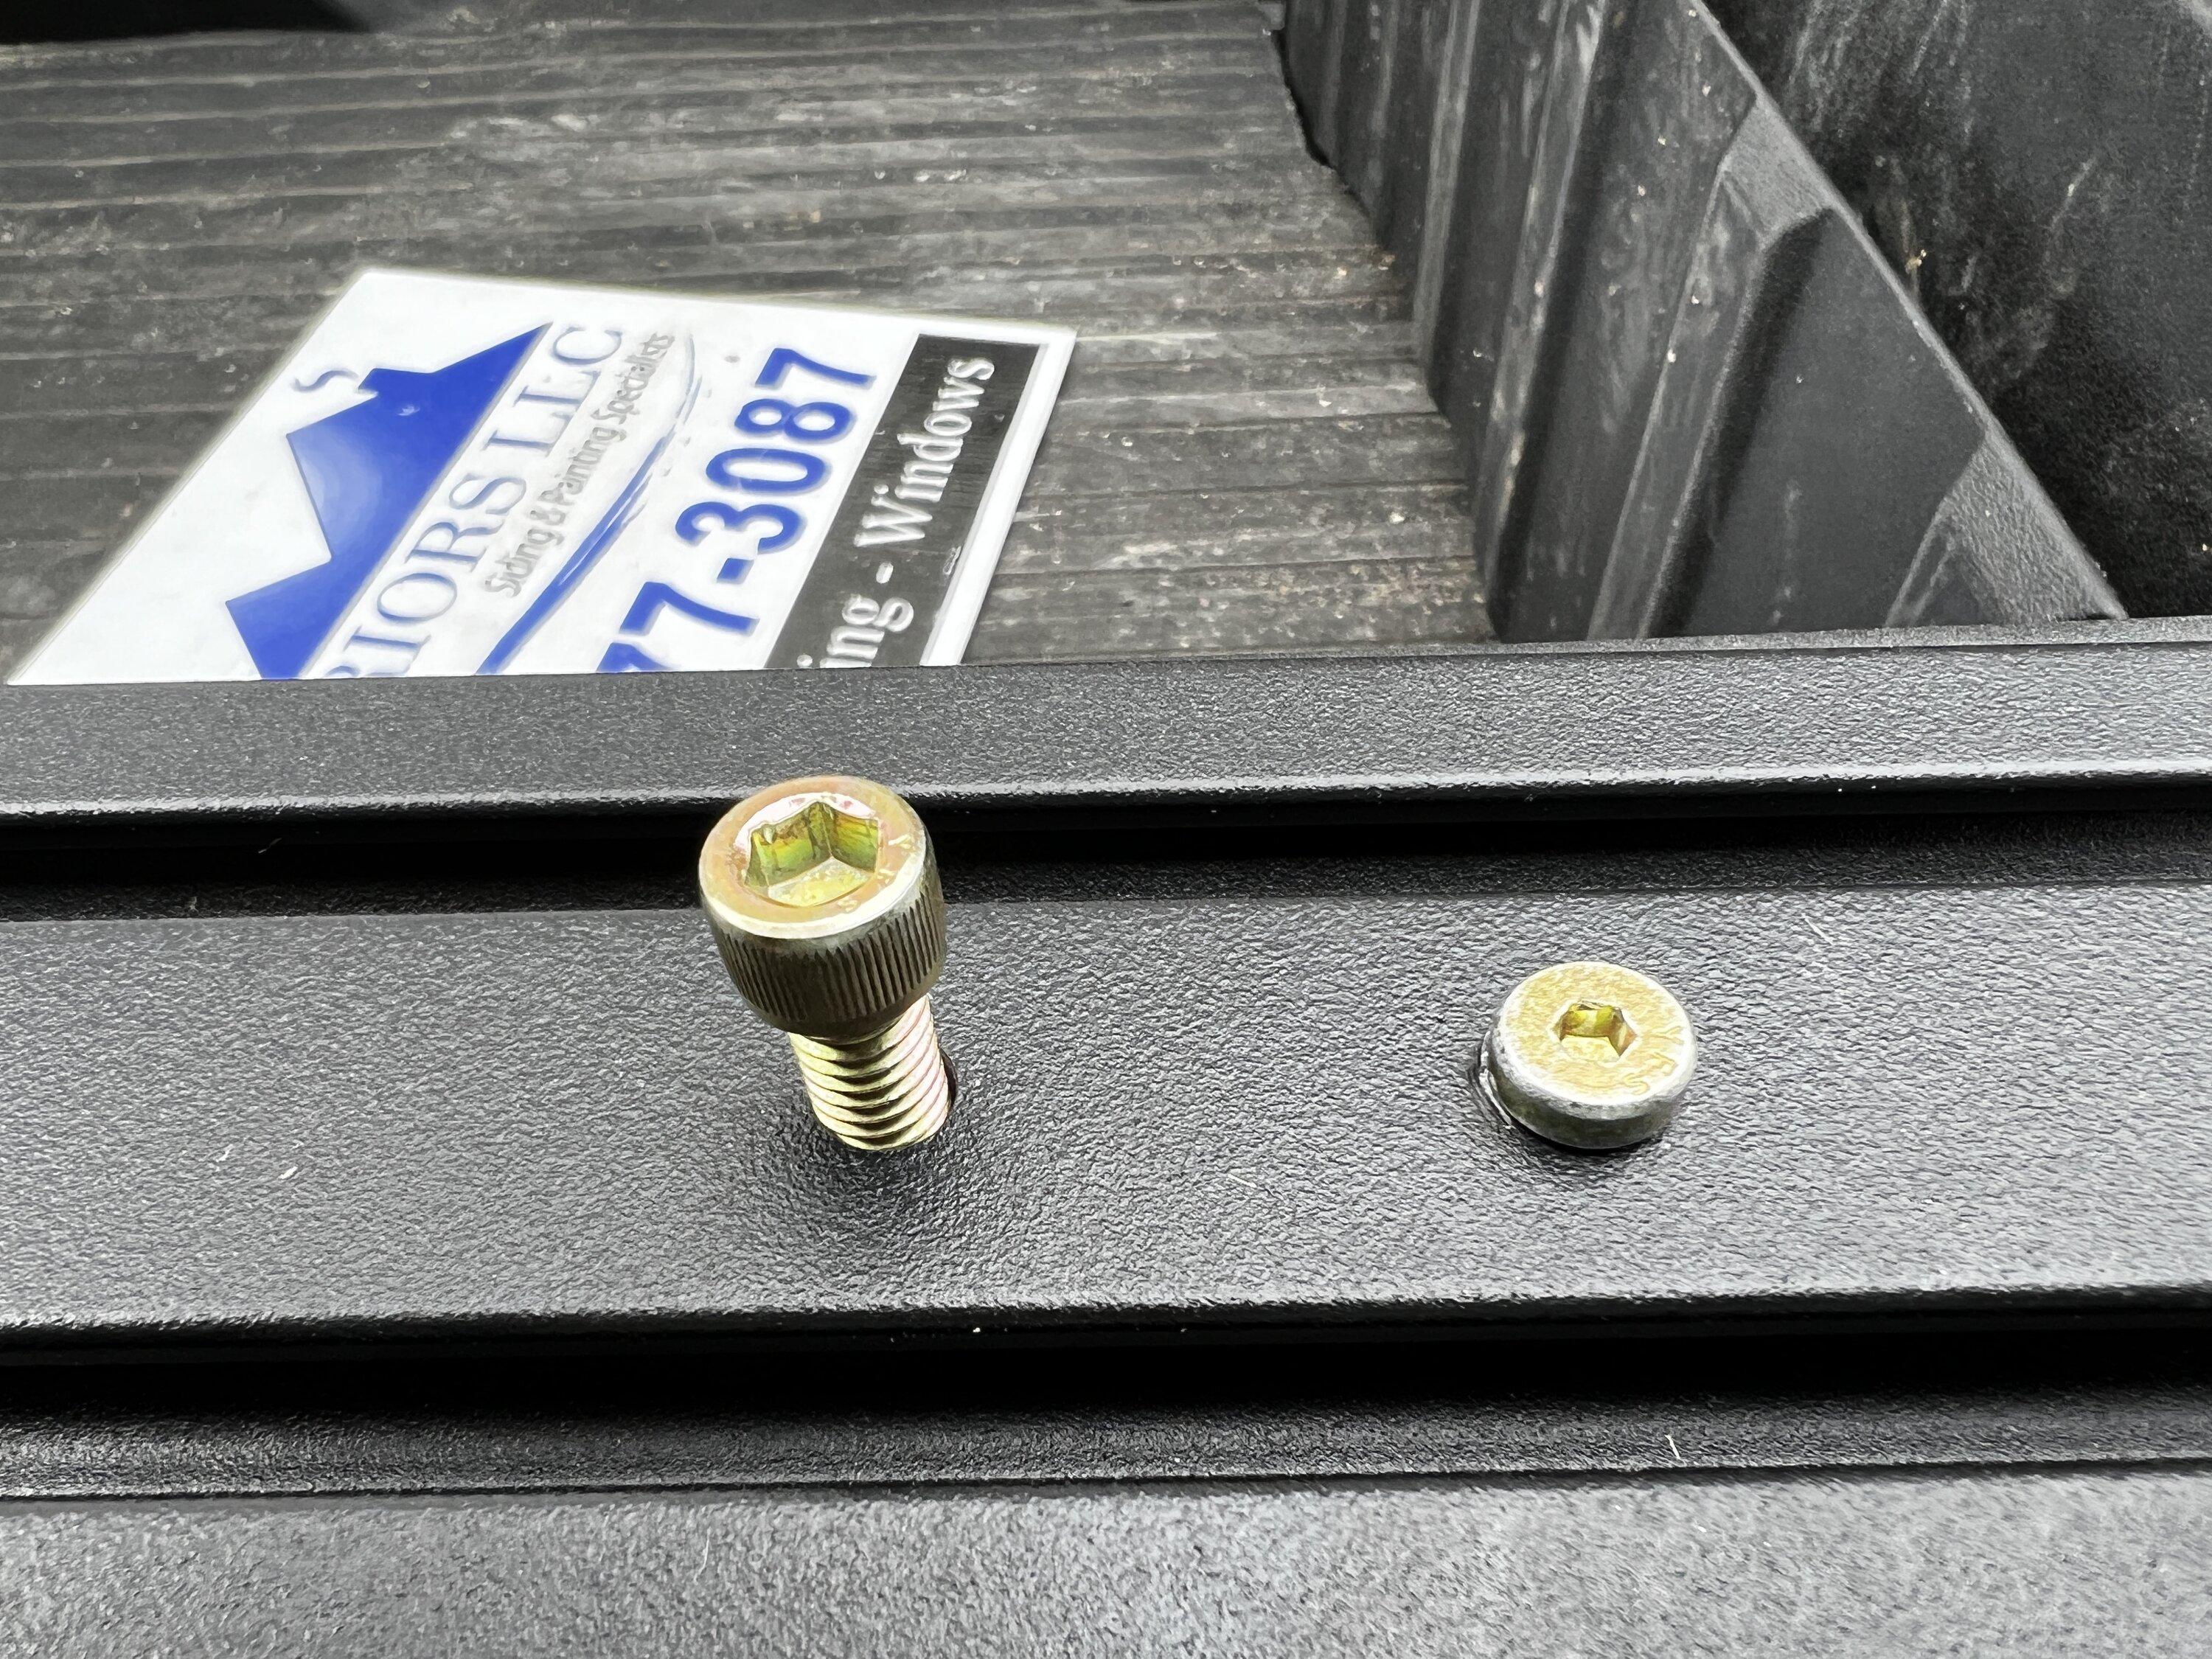
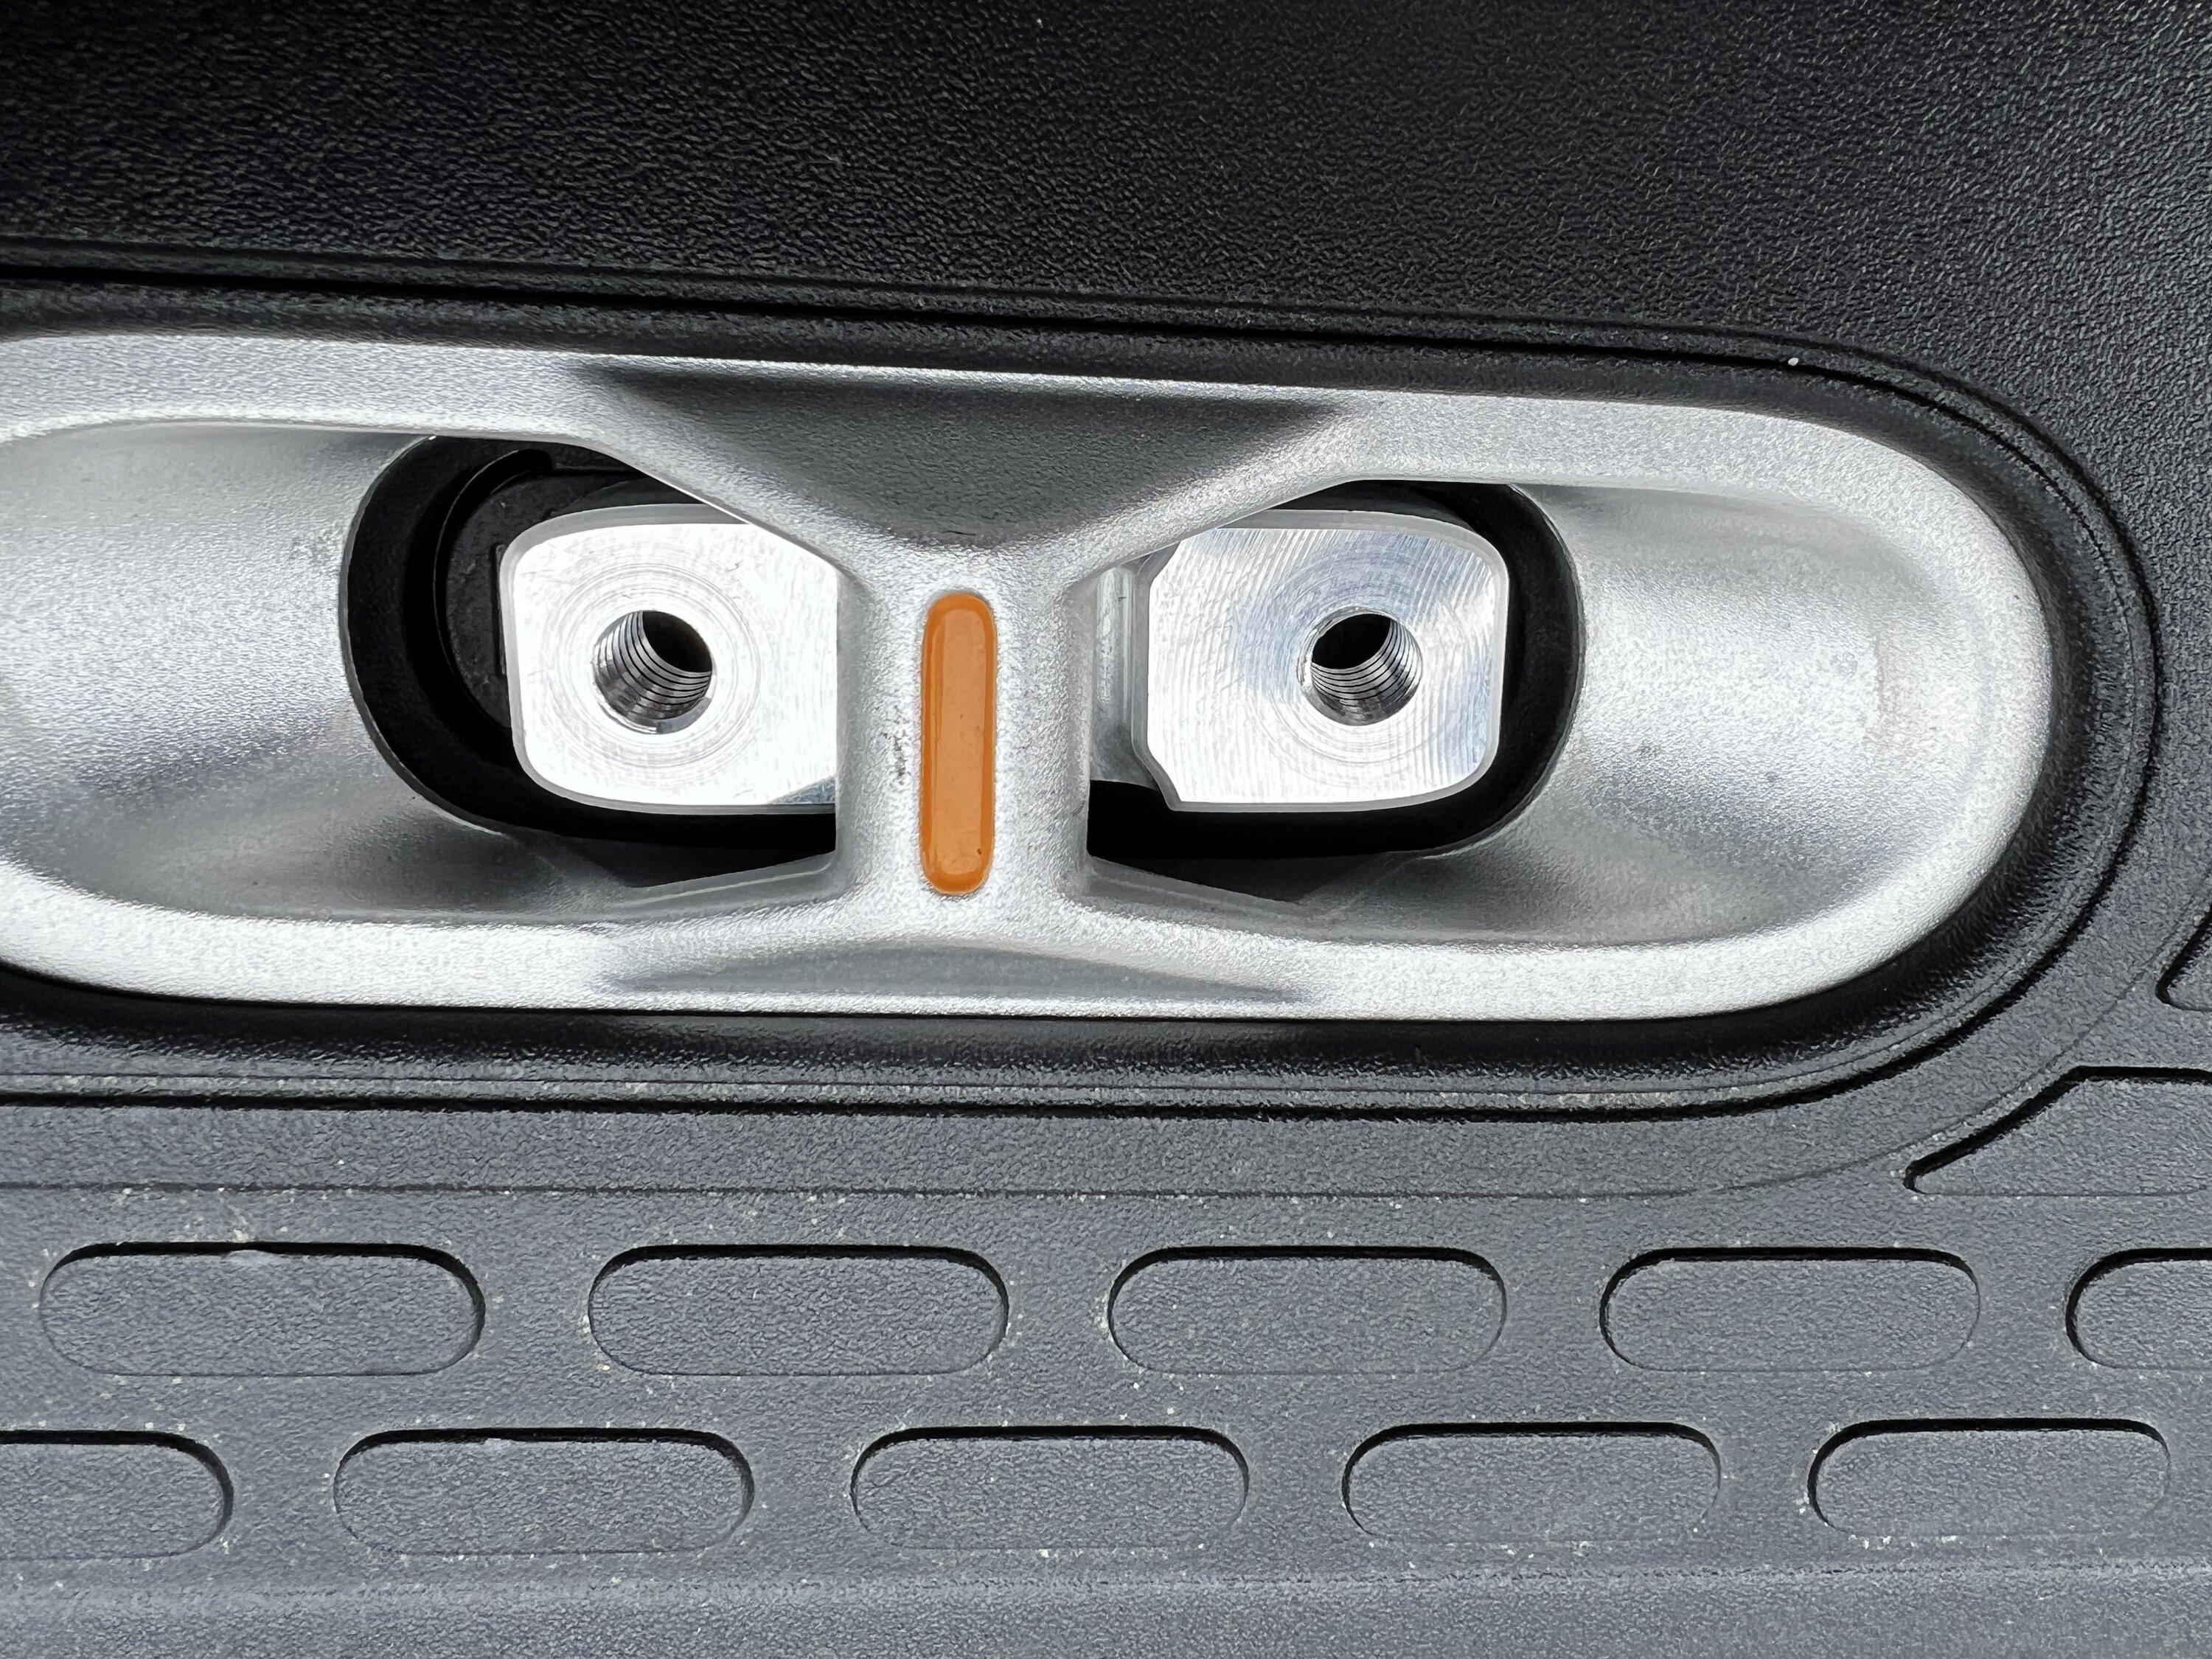
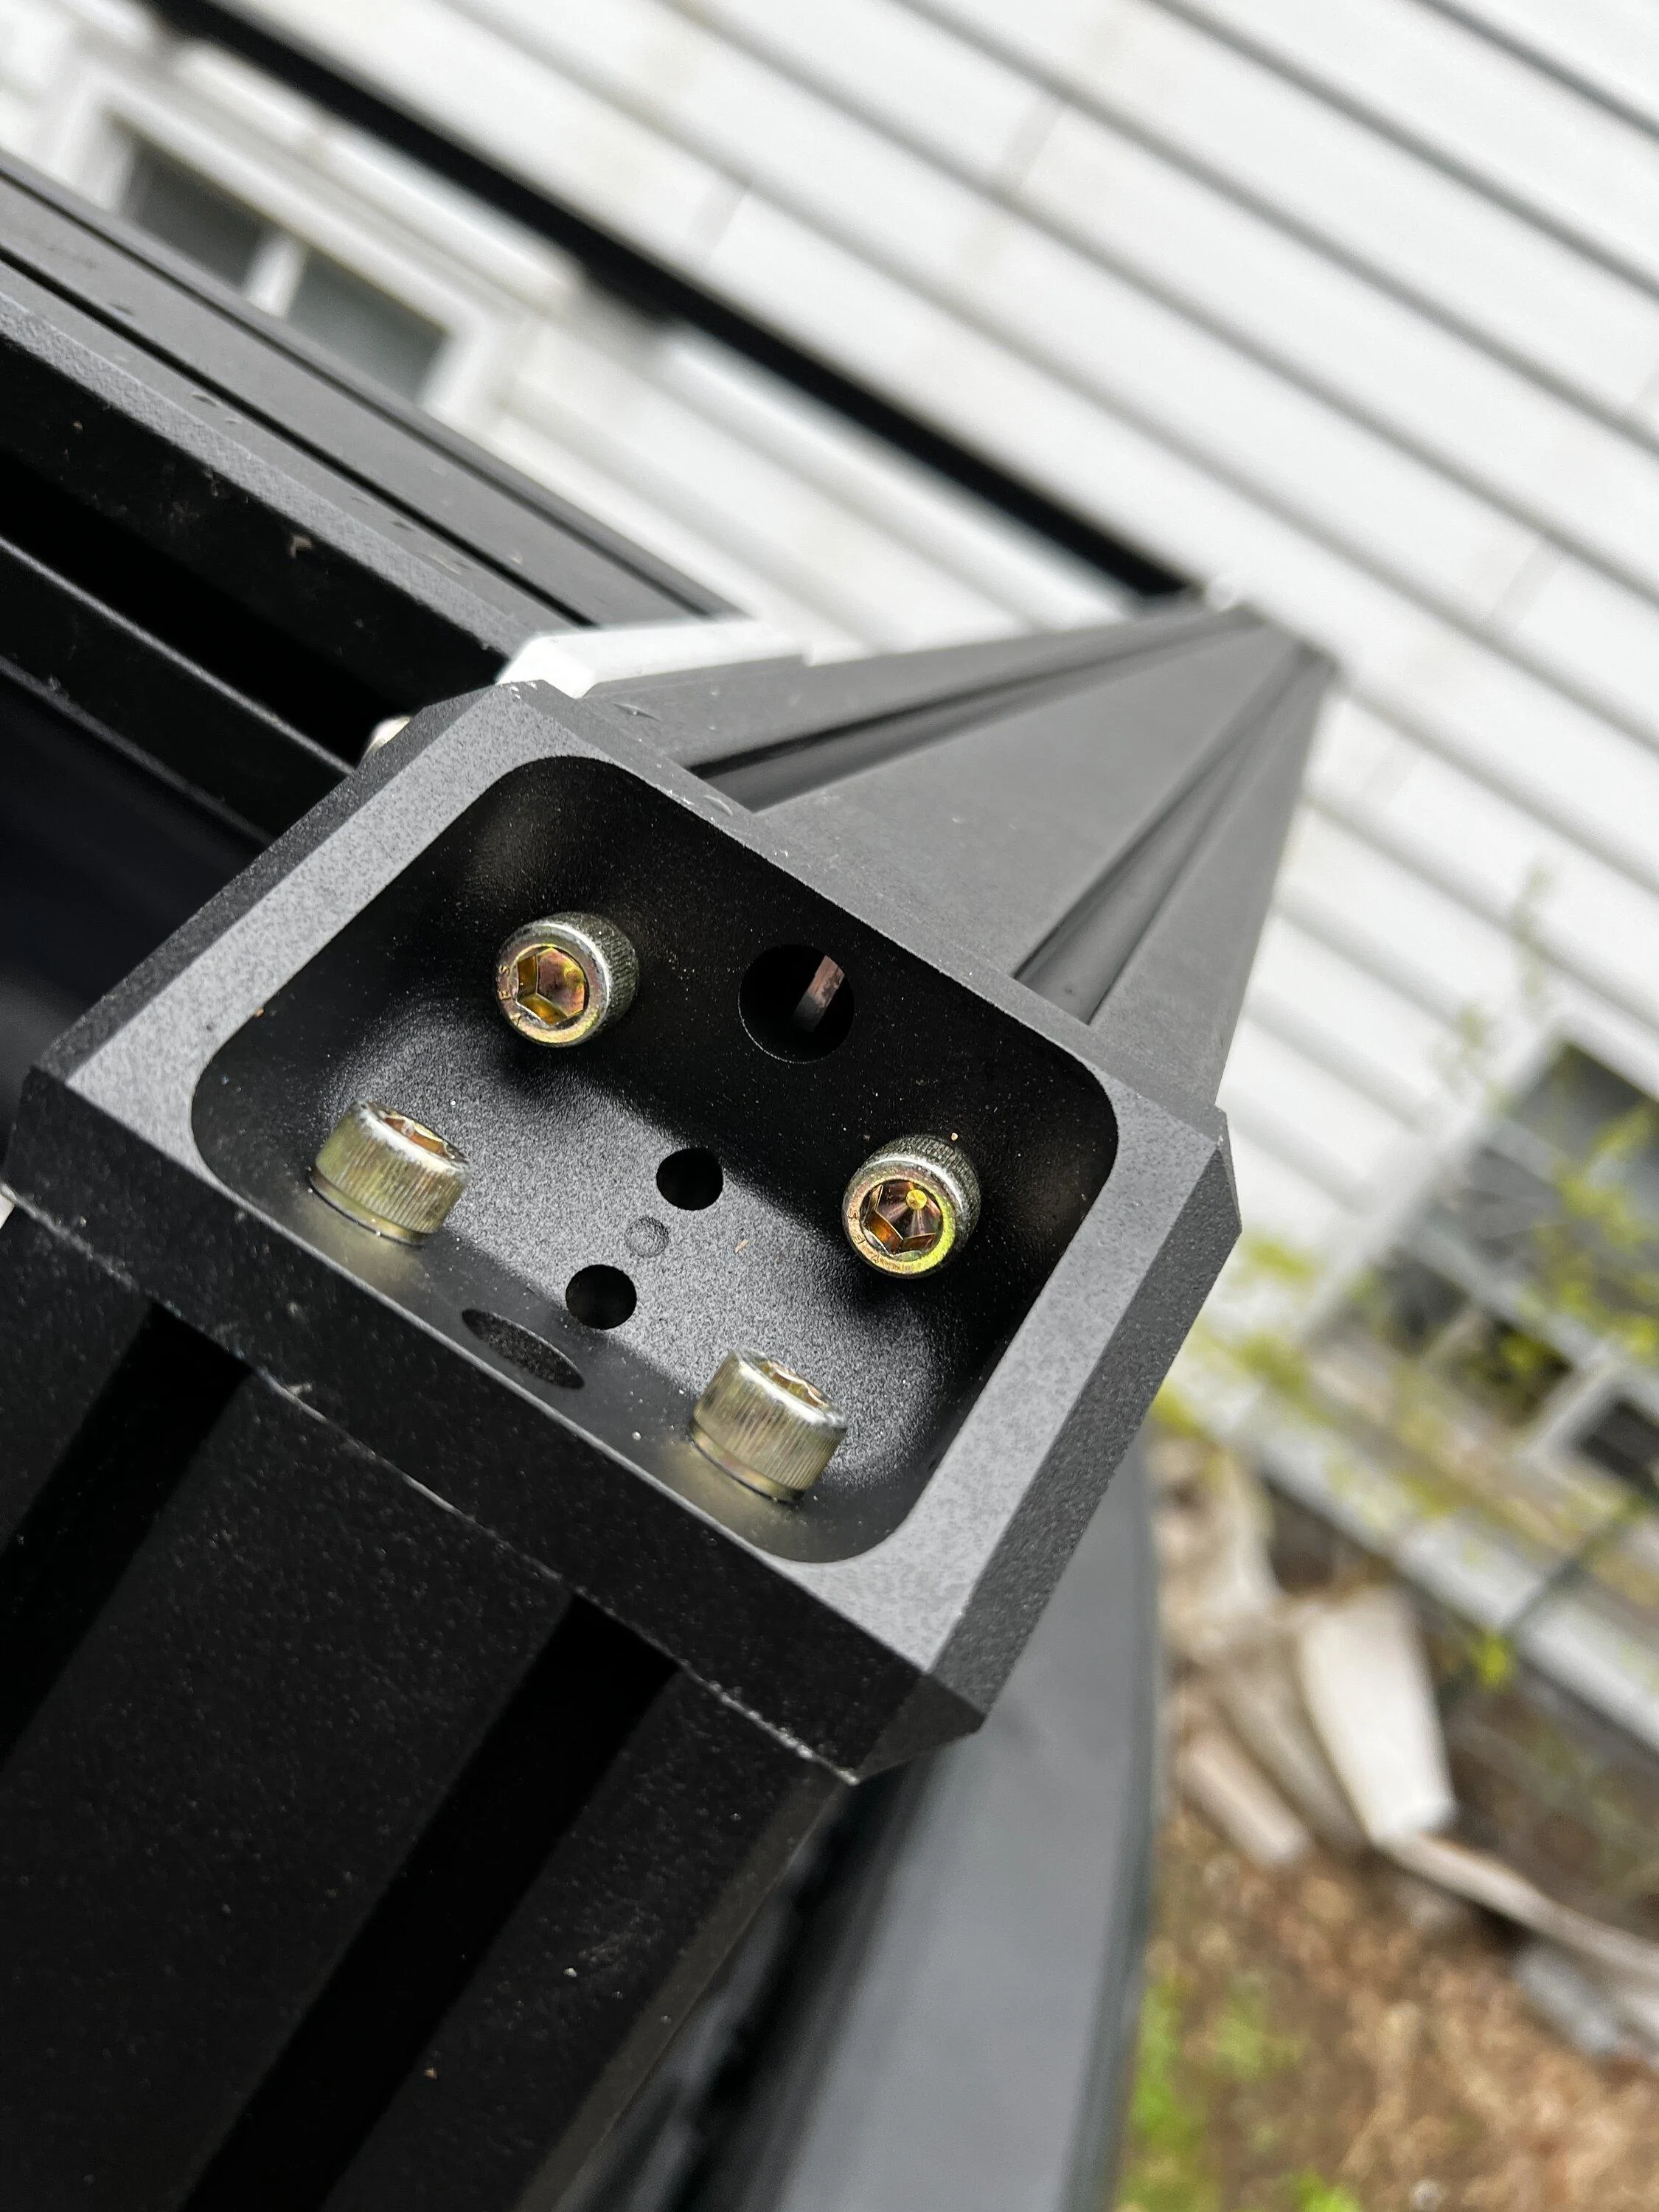
The R1T specific rail connector uses the factory attachment point (accessory port), much like the DCE connector. Two flush mount bolts connect to each port to secure the rails. Tip - it took me a while to figure this out but there is a large bolt (shown below) that will reach the attachment point piece - the flush mount bolts do not. So, I used the large bolt to grab the attachment point piece and bring it up so that the the flush mount could grab it. Pretty clever of XO.
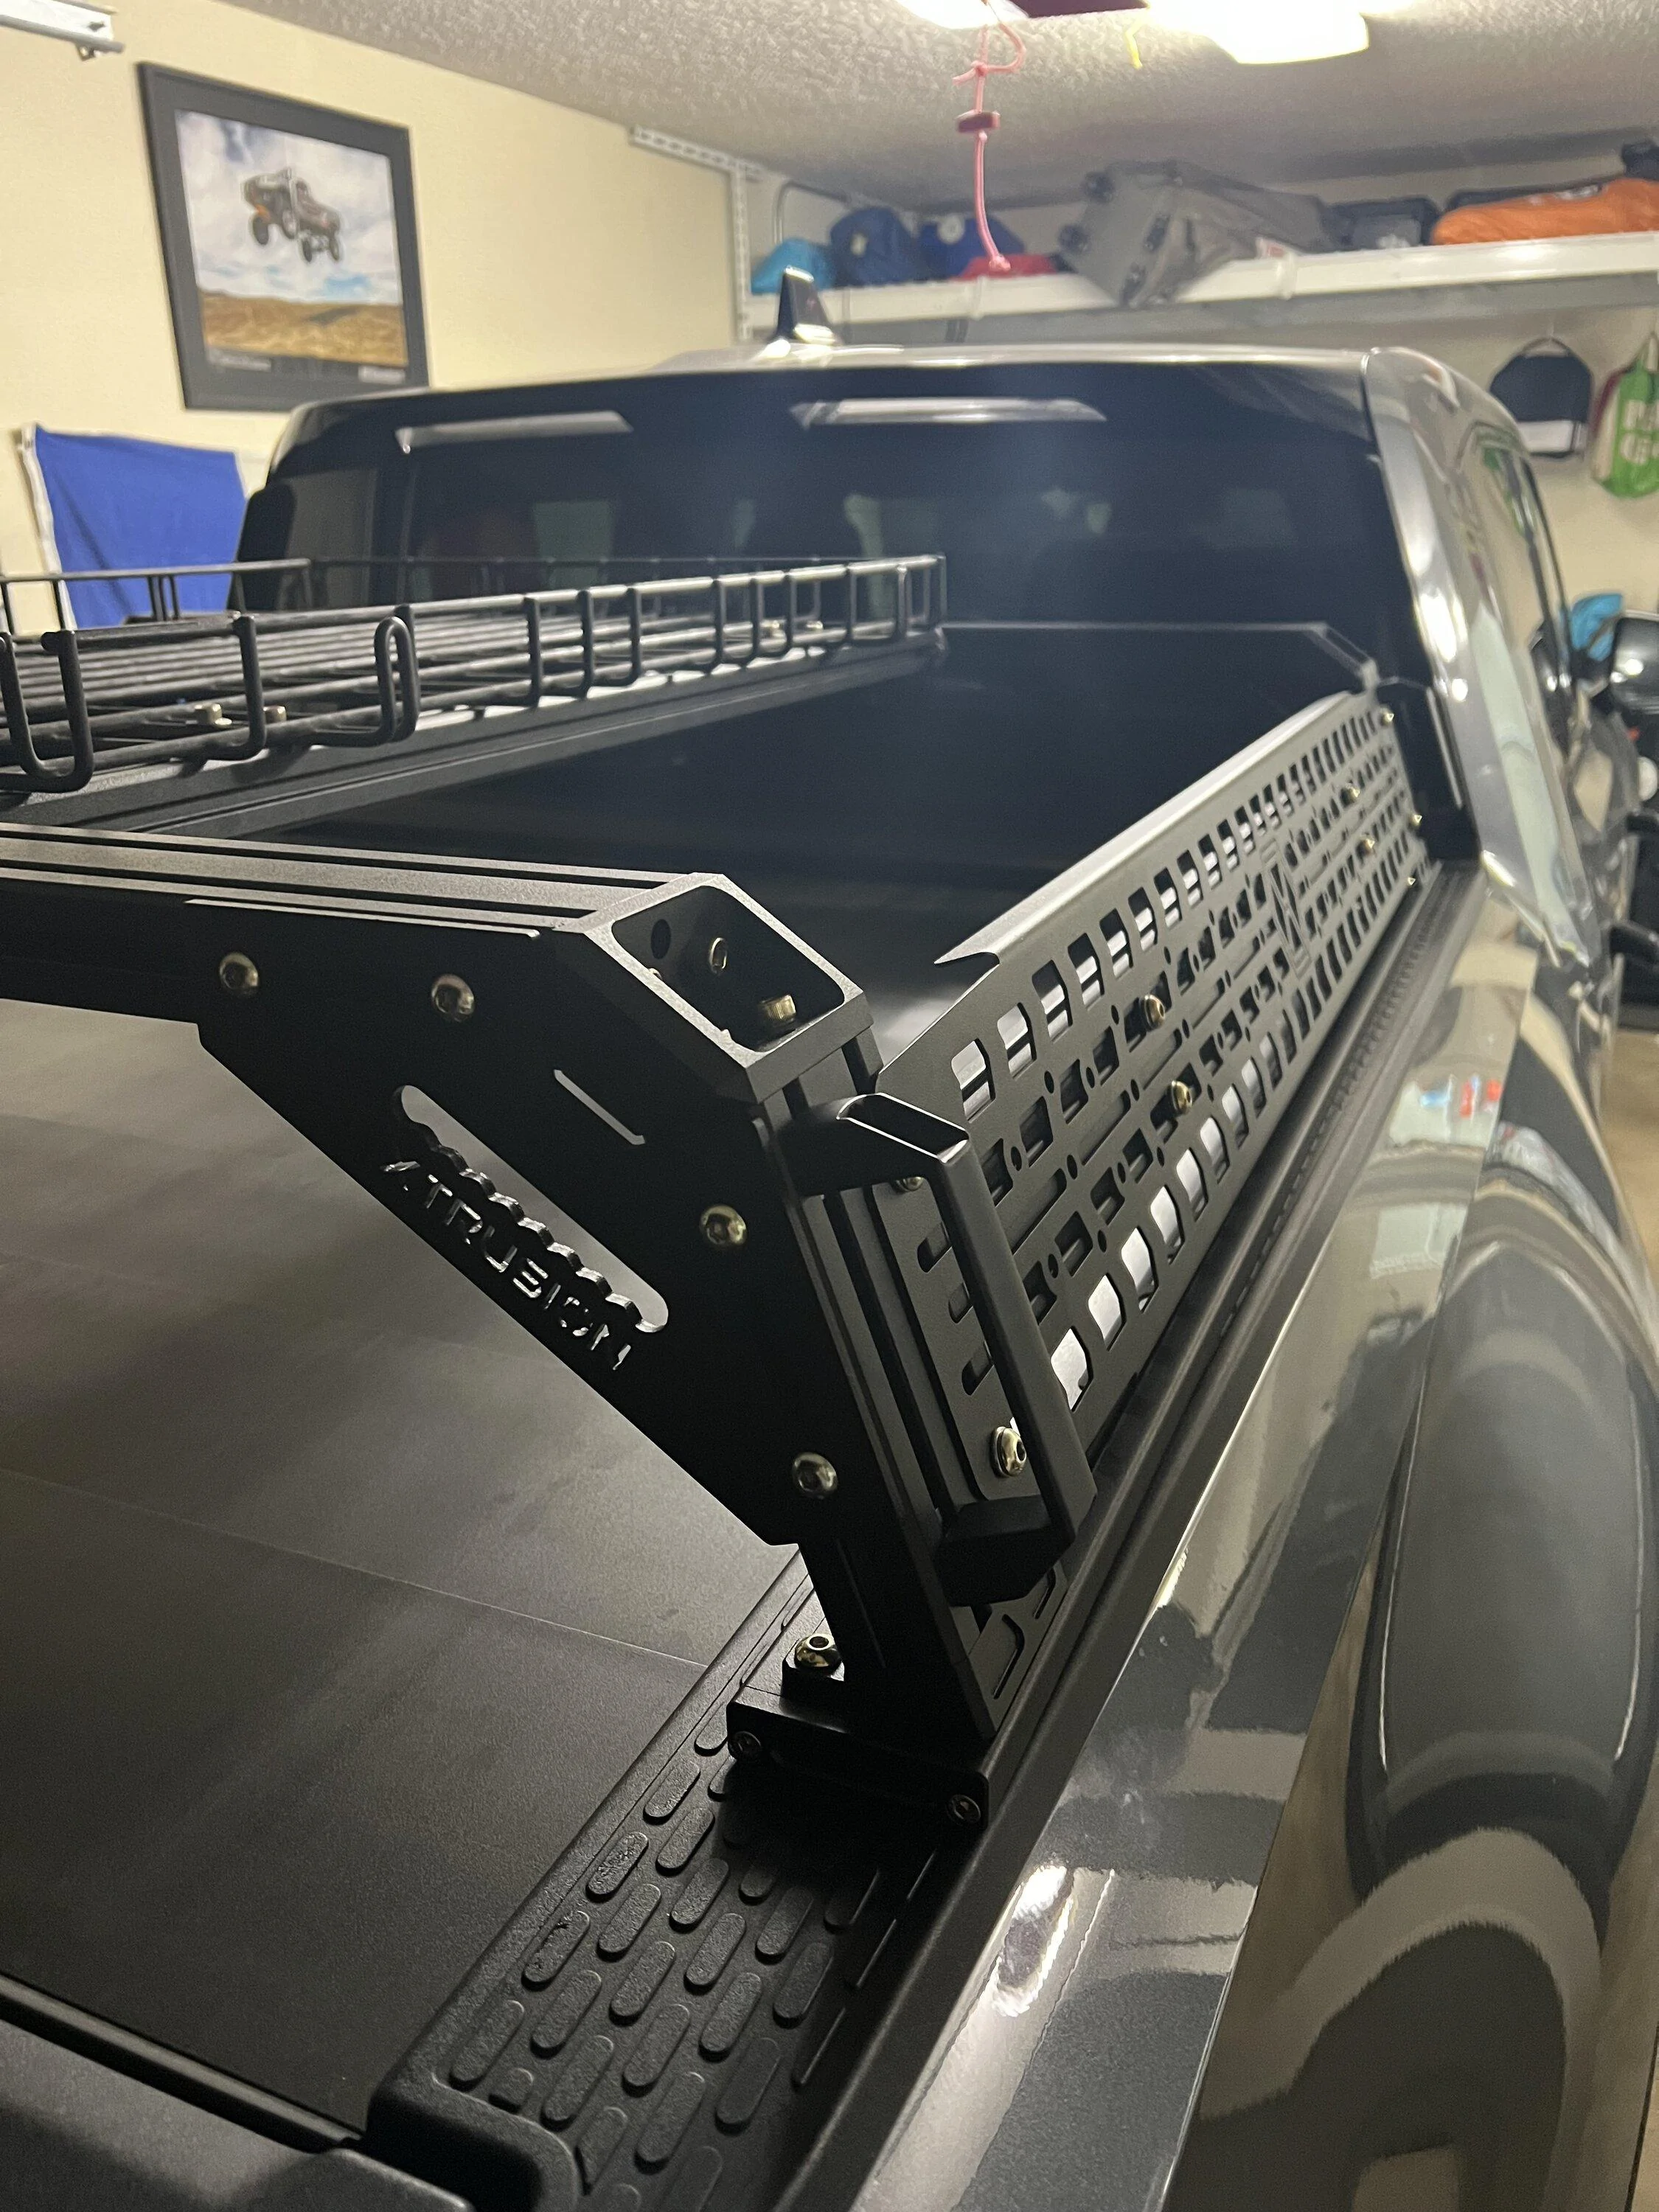
As the rack is square and the rail of the R1T is not, the rail connectors are flush to the outside of the rail. There is a rubberized button over the gear tunnel release - I cannot make this work unless I use a tool to push down hard and am concerned about tearing the rubber (I am going to ask XO about this). EDIT: XO responded immediately and let me know there is a screw assembly under the button. Using a 1.5mm allen I was able to access the screw and adjust it. It works brilliantly now.
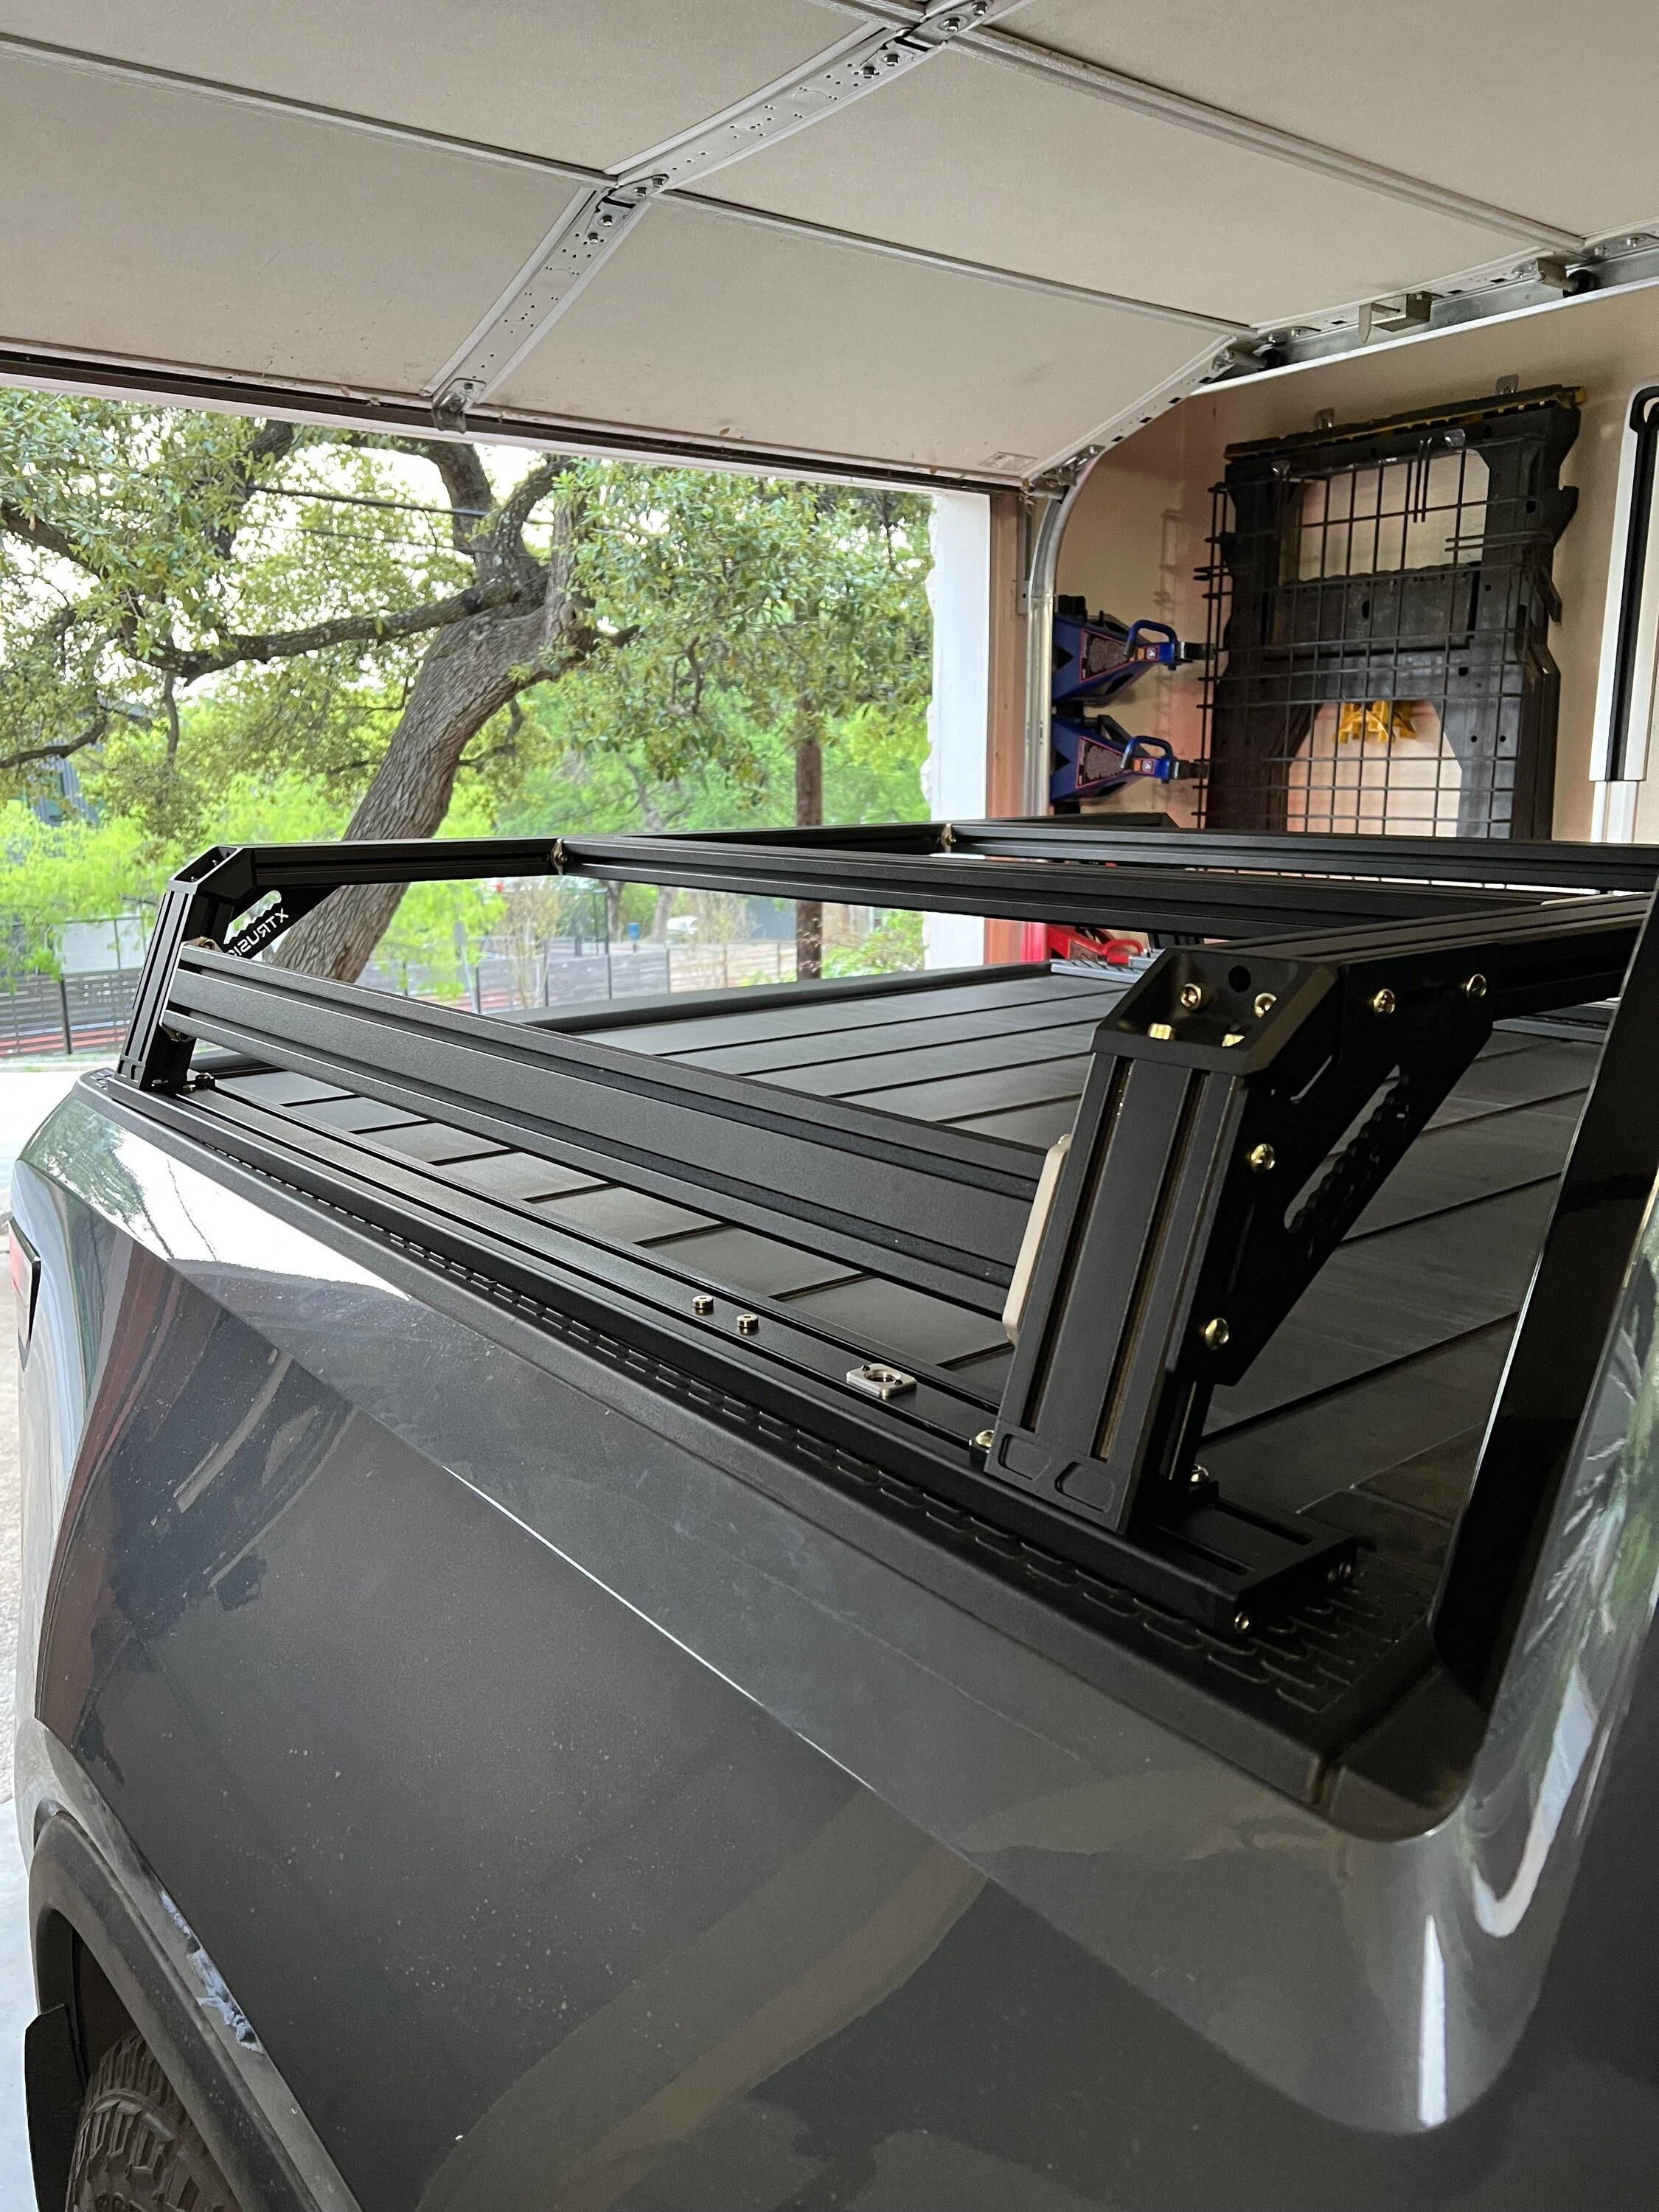
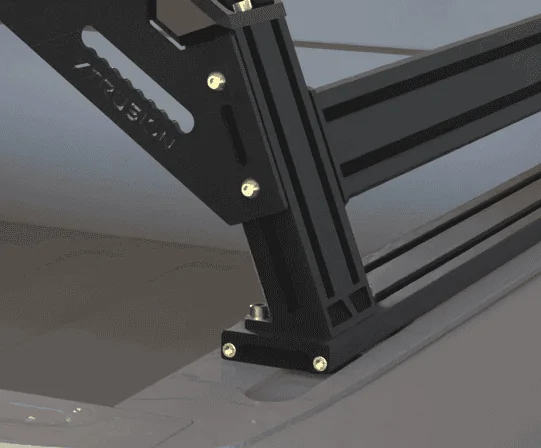
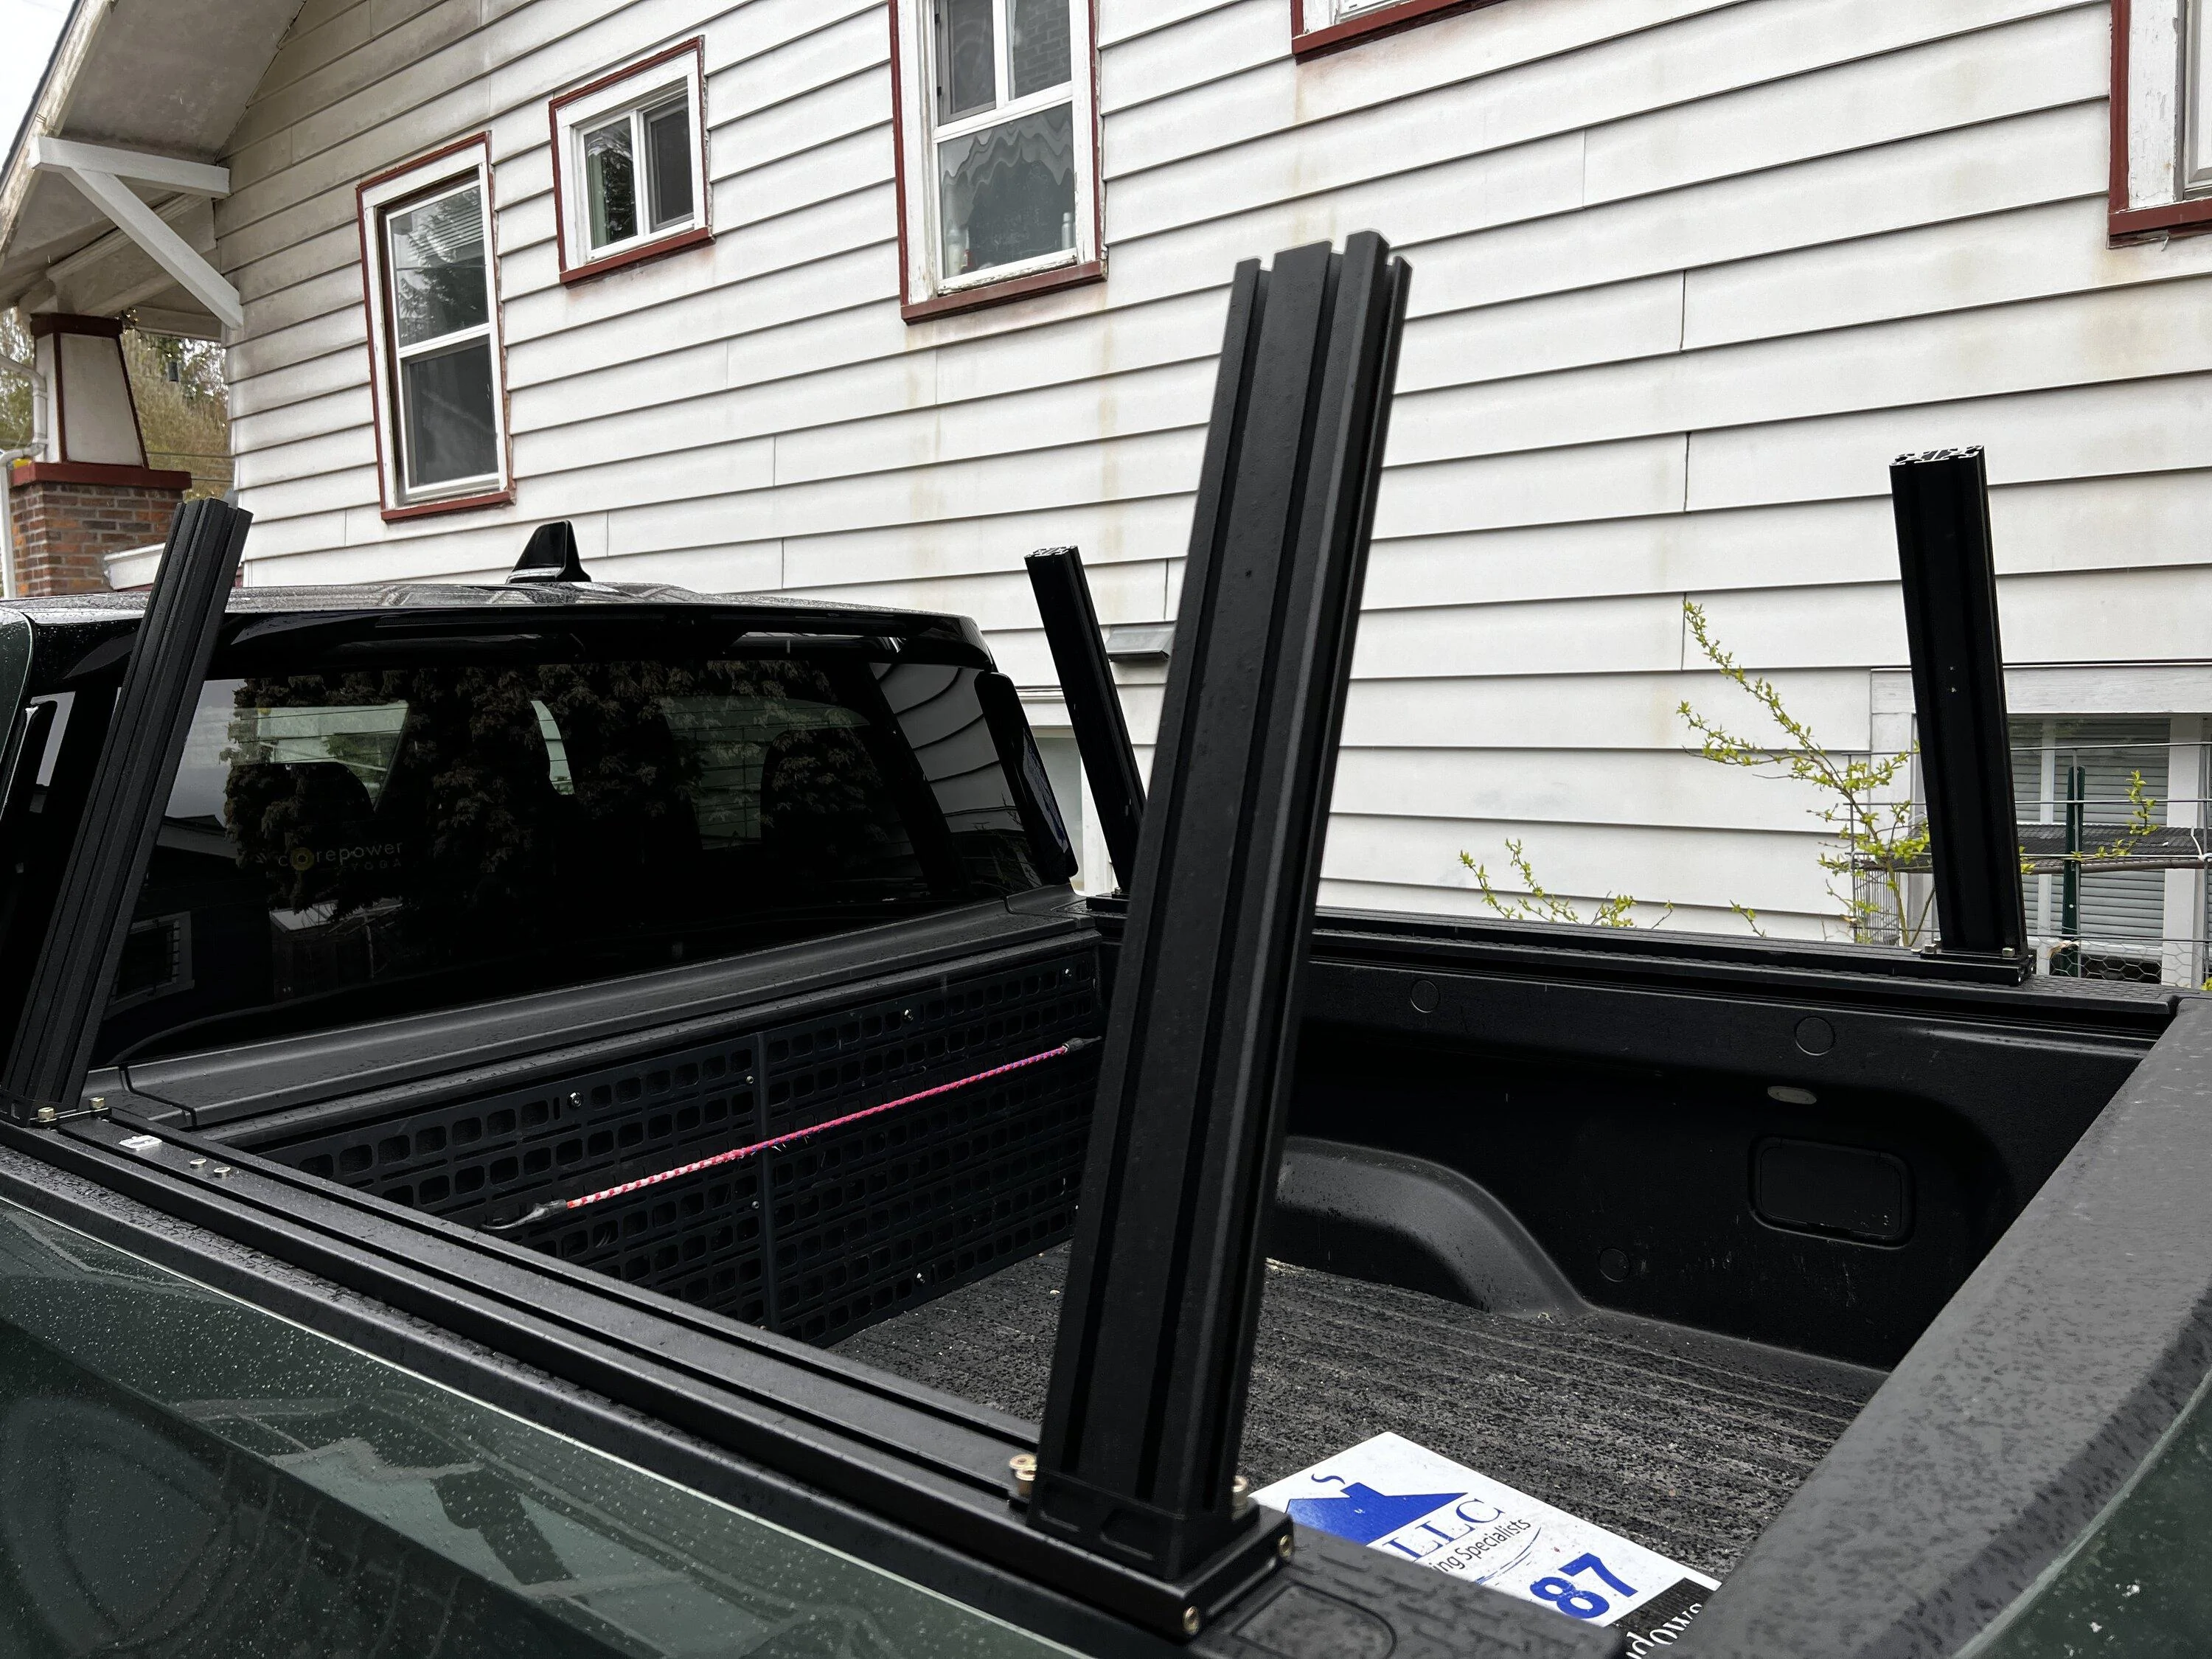
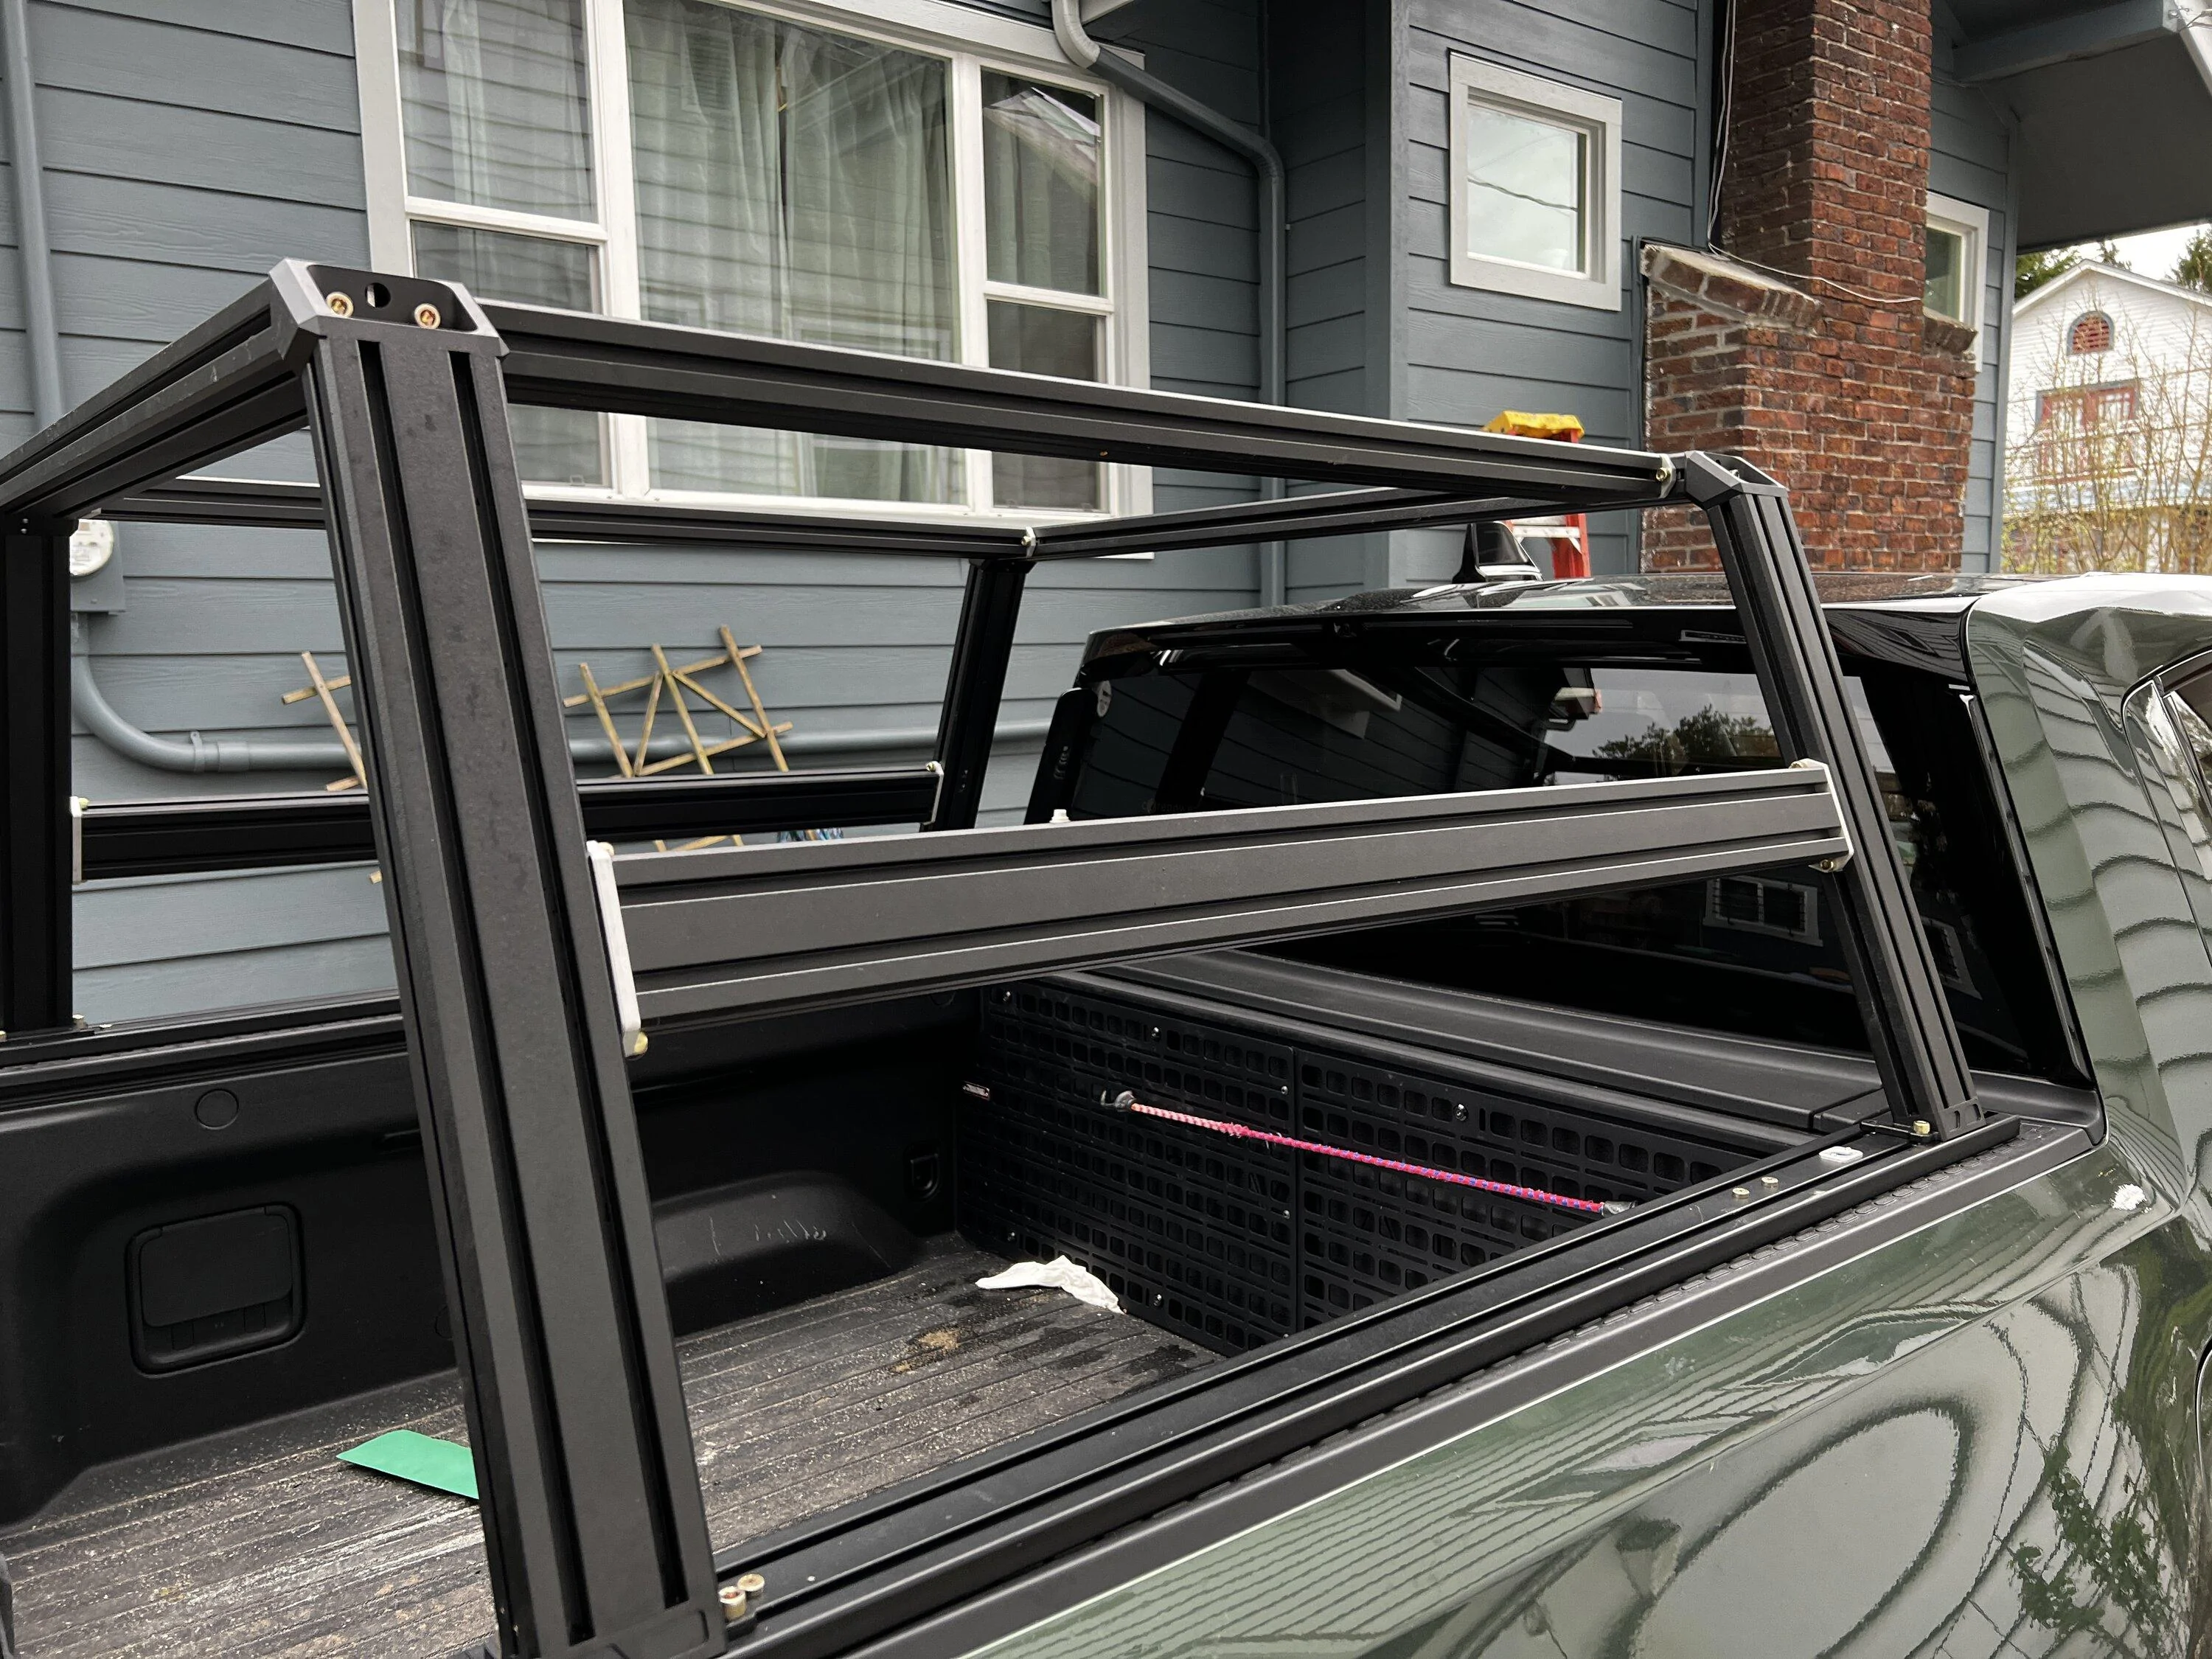
The feet of the uprights attach to the uprights and then bolted to the rail connector. Important lesson - you should pre-thread the three bolts that connect to the rail connector before bolting the feet to the uprights otherwise they are very hard to access. The feet are a nice design - there is a cutout for one of the flush bolts that attach the rail connector at the back of the rail. This gives about a 1/2" of play in the placement of the rear upright - pushing it all the way back ensures the position of the right and left uprights. The feet also create the angle for the uprights.
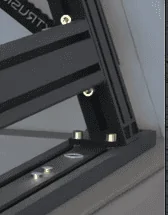
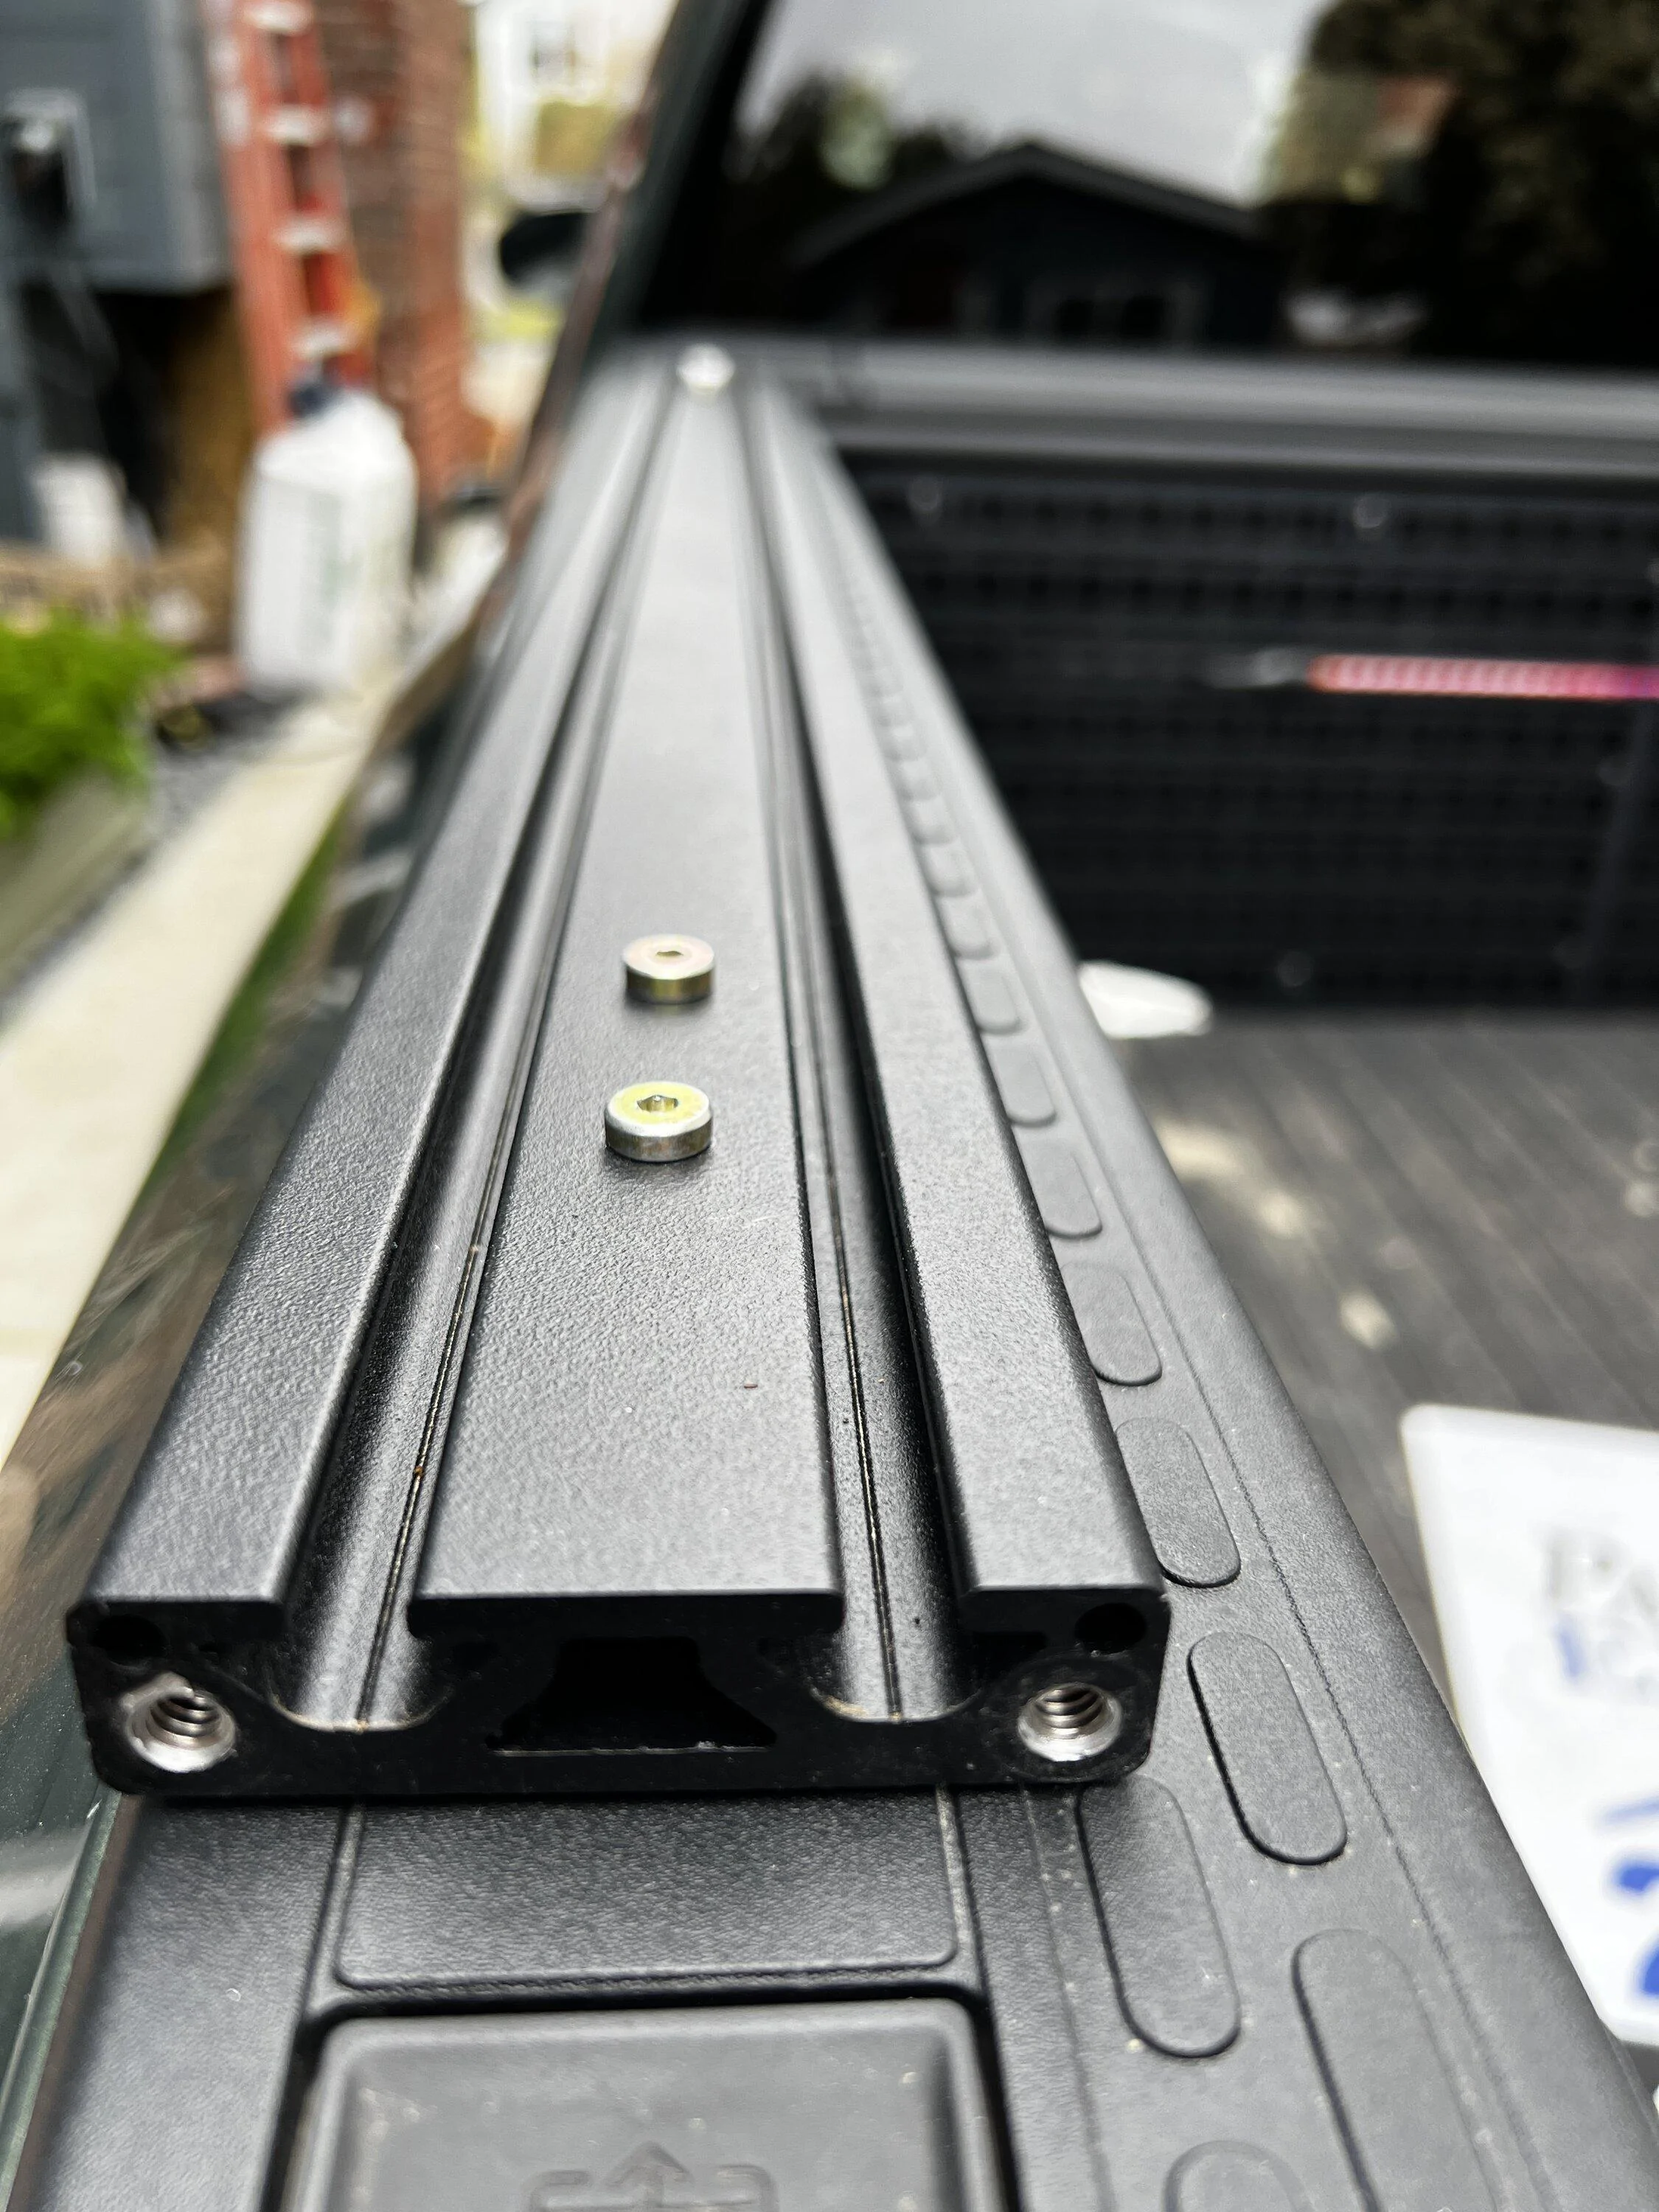
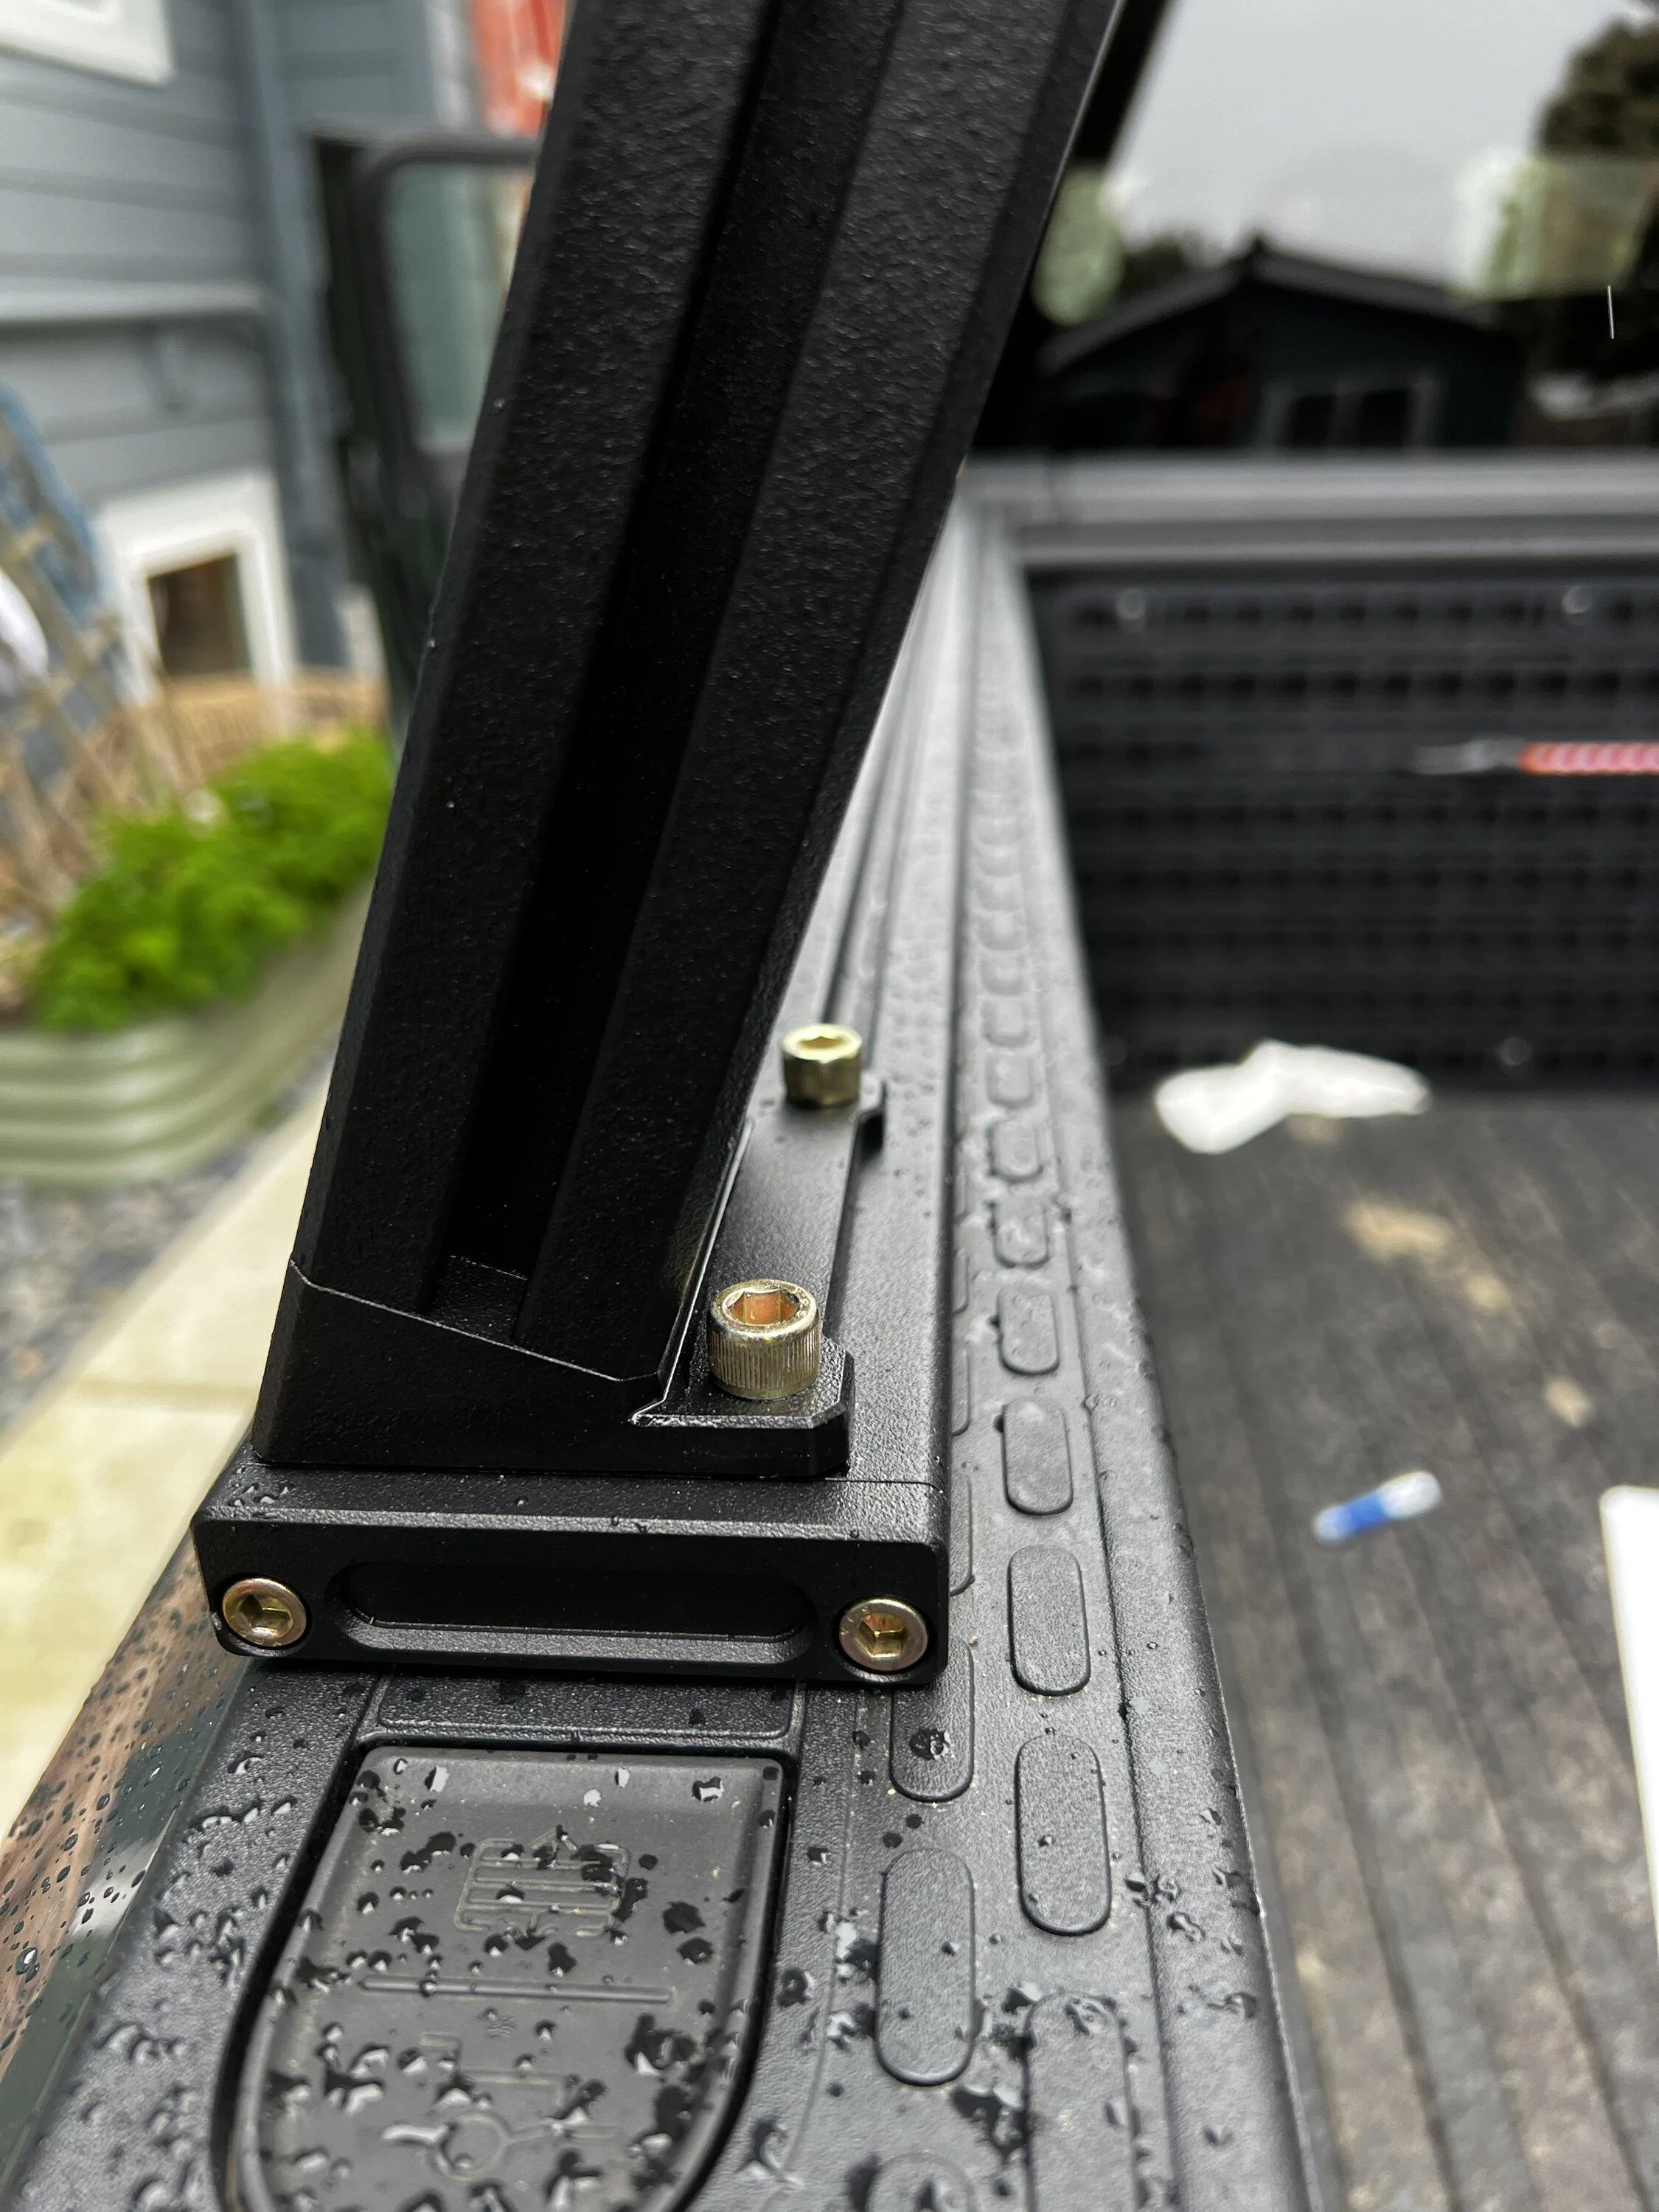
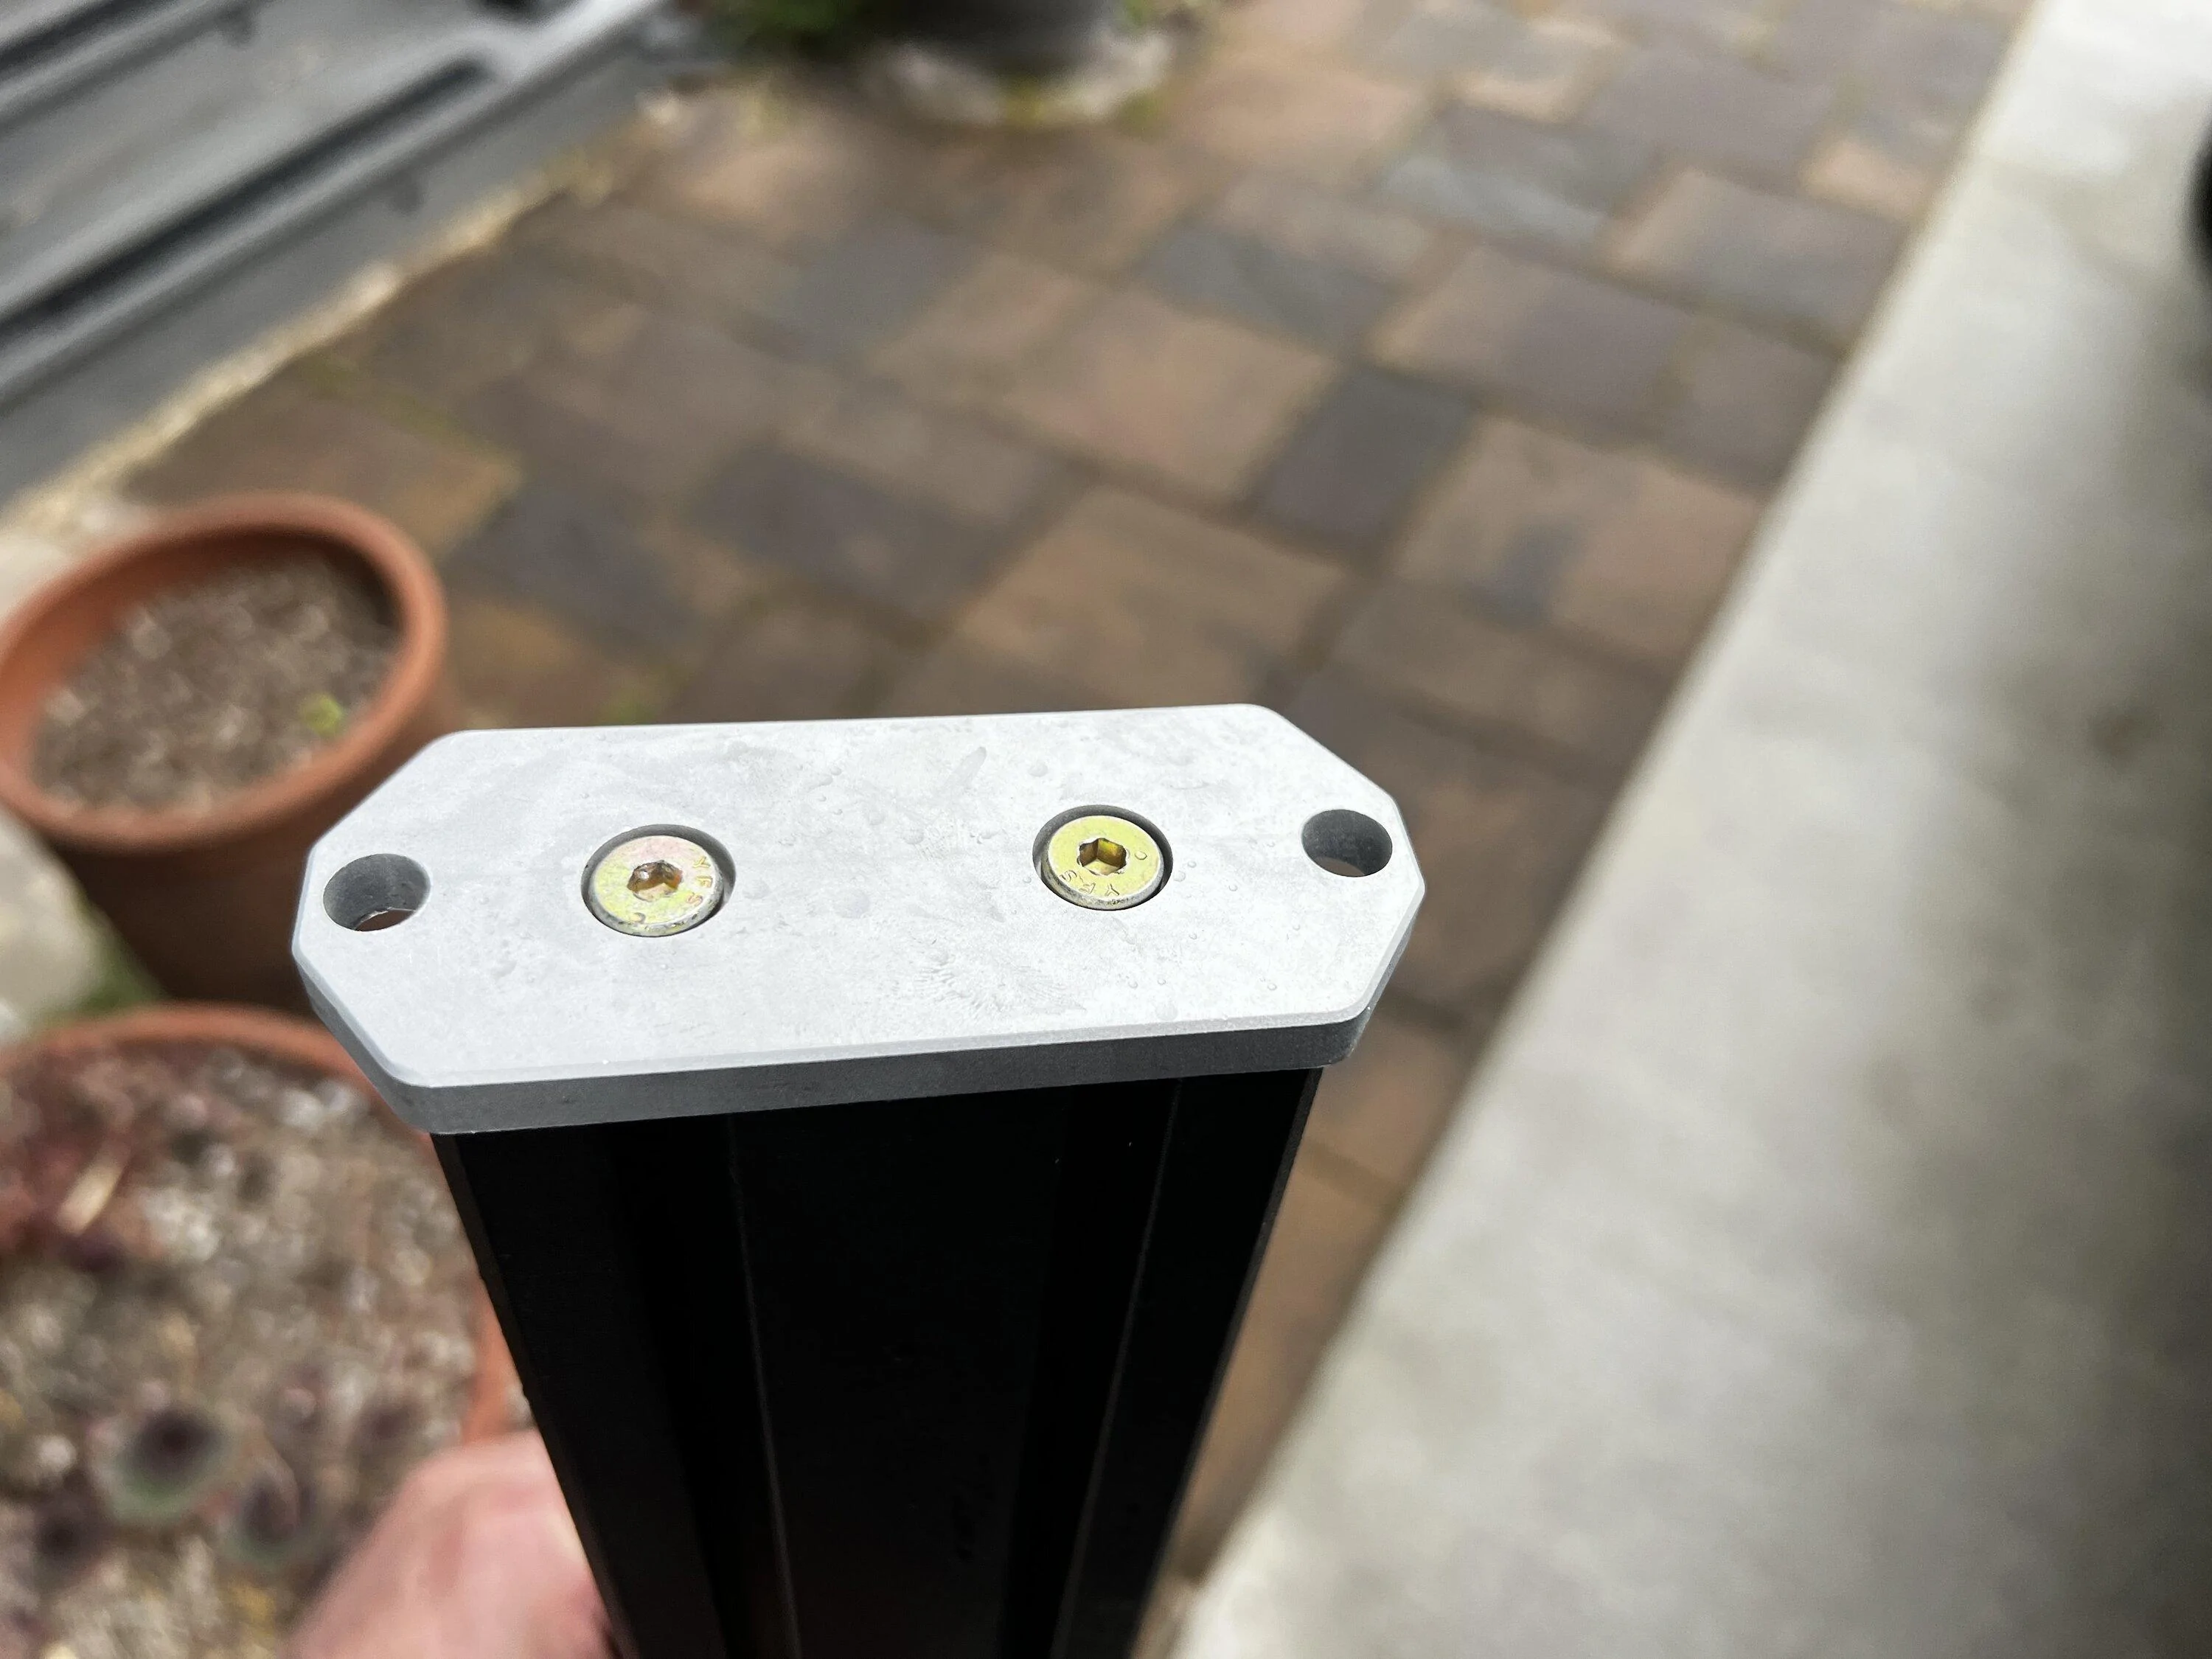
I should mention here that most of the connection points in this rack use a drop-in T-nuts with threaded holes. They are very easy to put into any t-track and then the bolts go into the holes. This is what makes this rack so configurable.
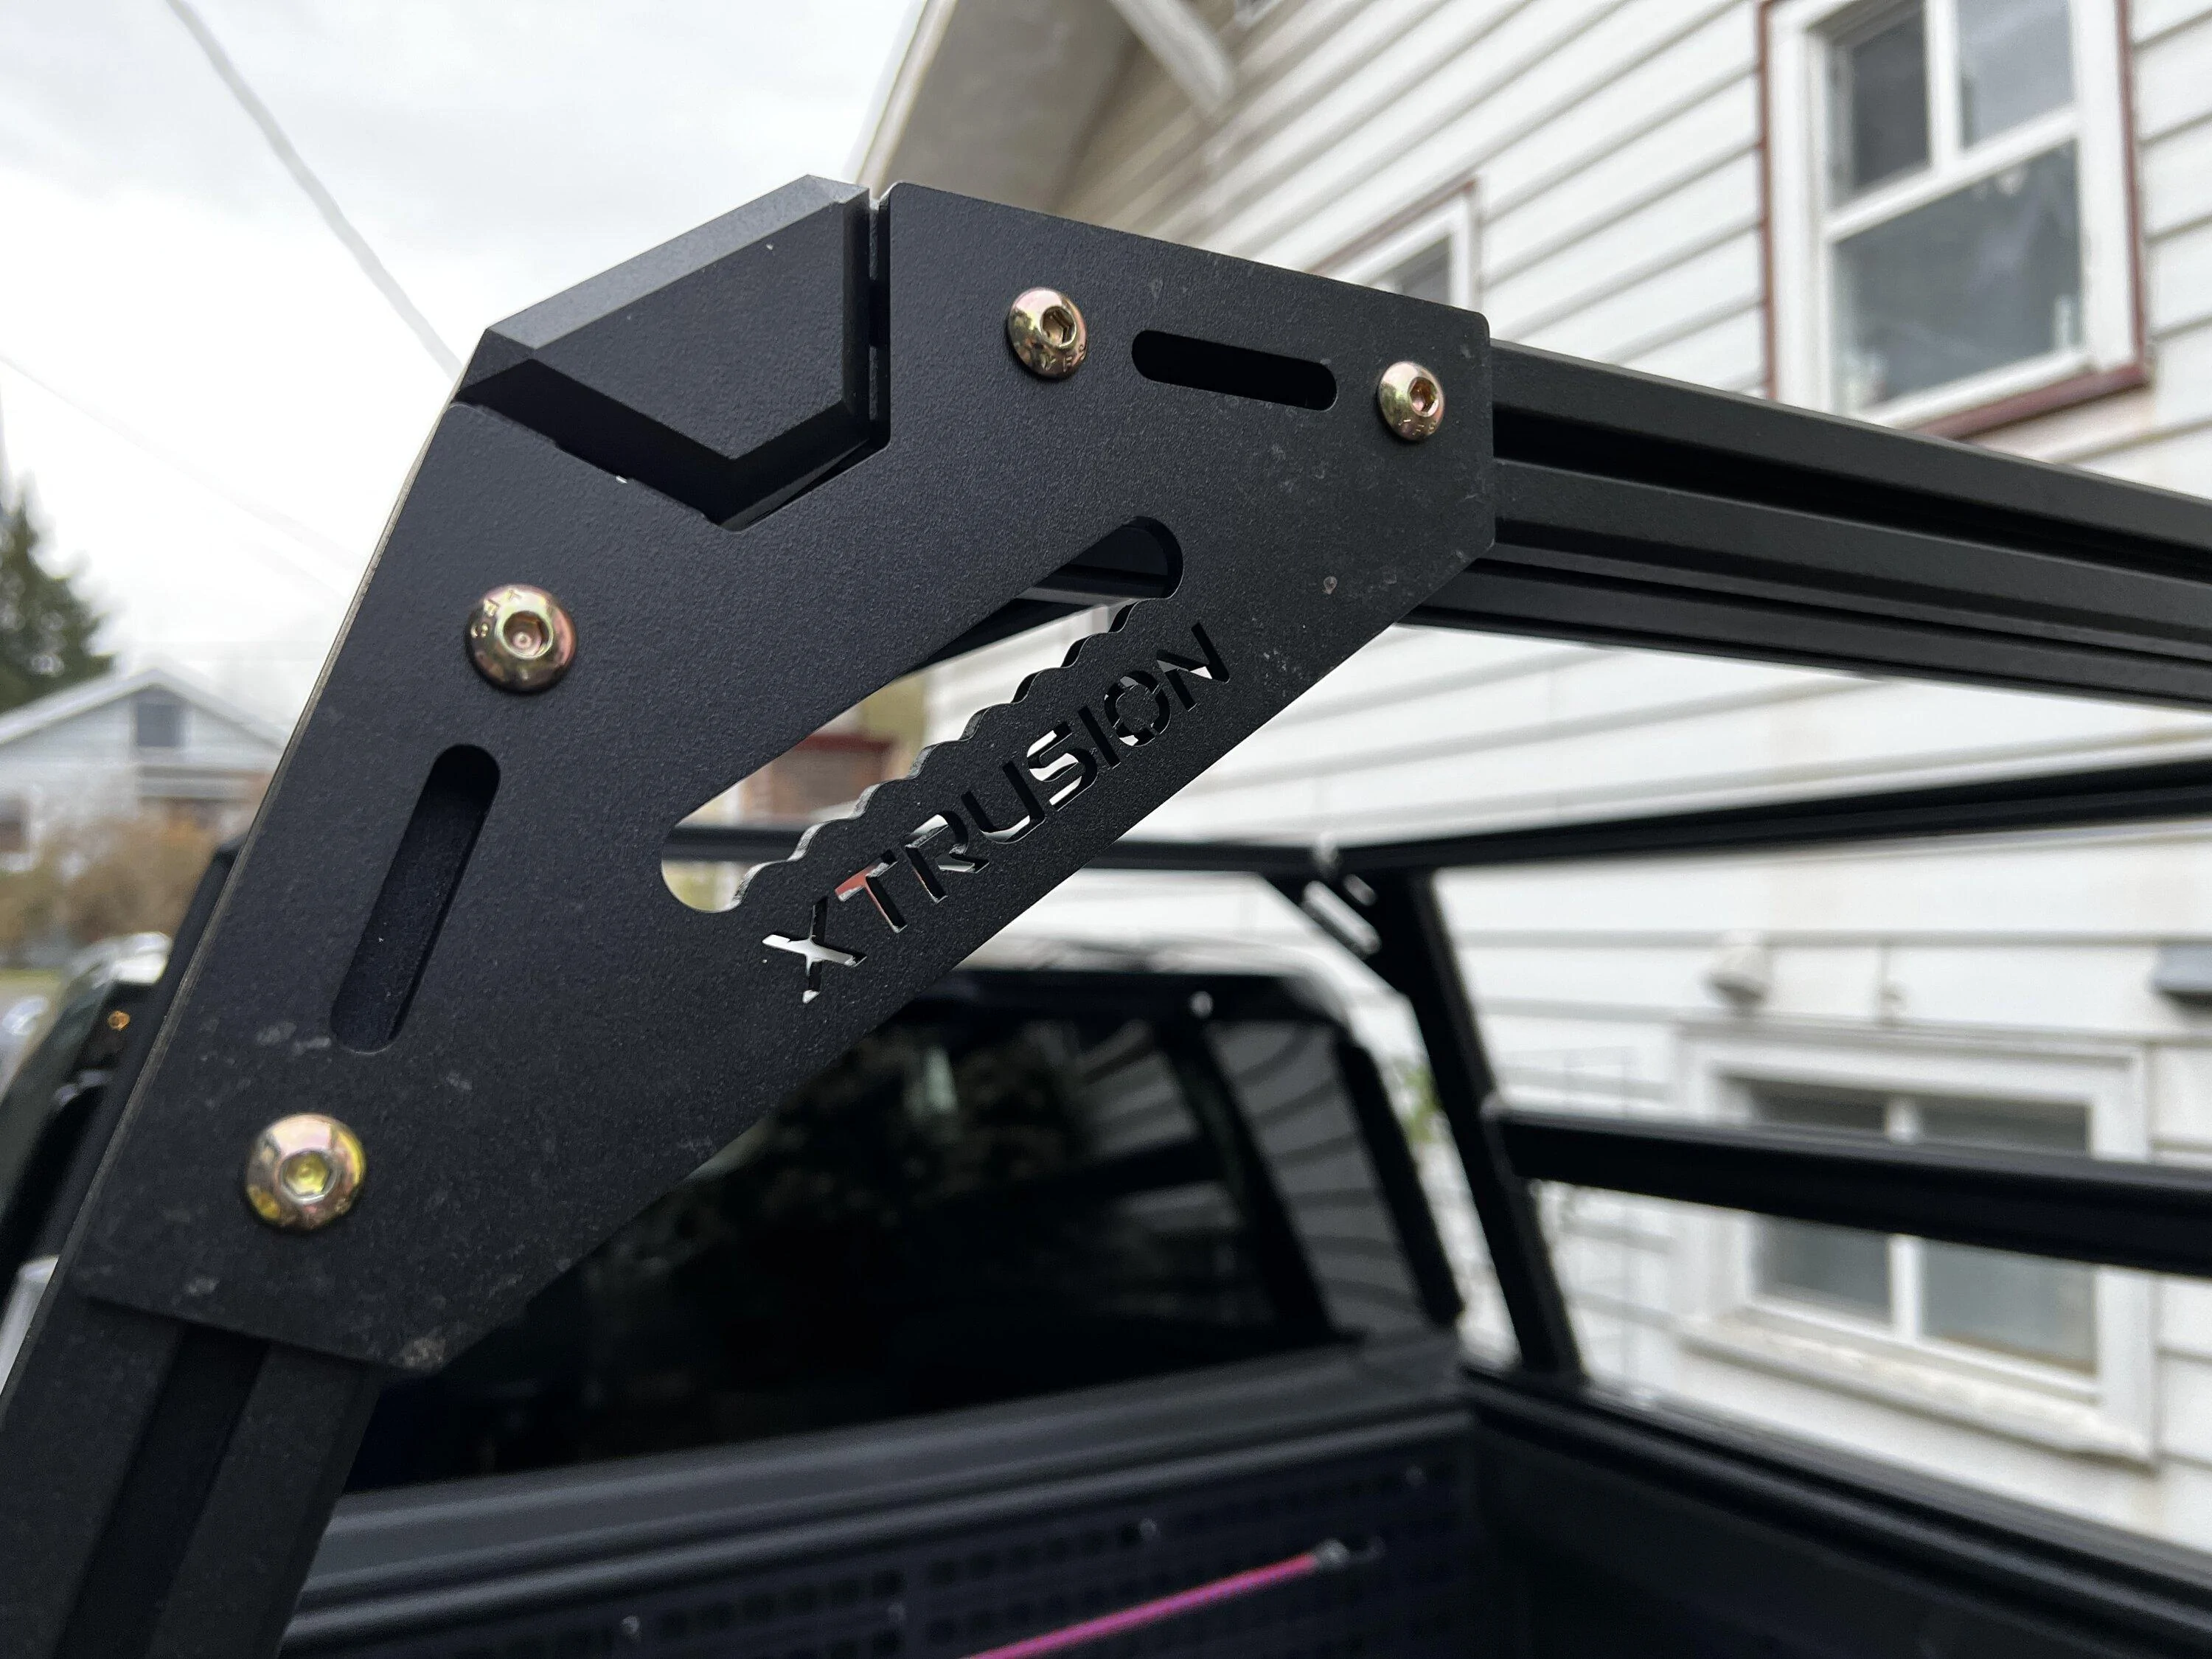
Once the uprights were in place, I connected the corner angles to the top crossbars and then connected them to the uprights. A note here about the bolts - there are three kinds of hand-start bolts (they can be twisted in by hand and then tightened with an Allen wrench) that I received. There are short ones and then ones that are about 11/4" and then slightly larger ones that are used on the AXS gate (and the same as the one used above to grab the attachment point piece.) The larger ones will not work in the XTR1 rack but they are easy to mistake.
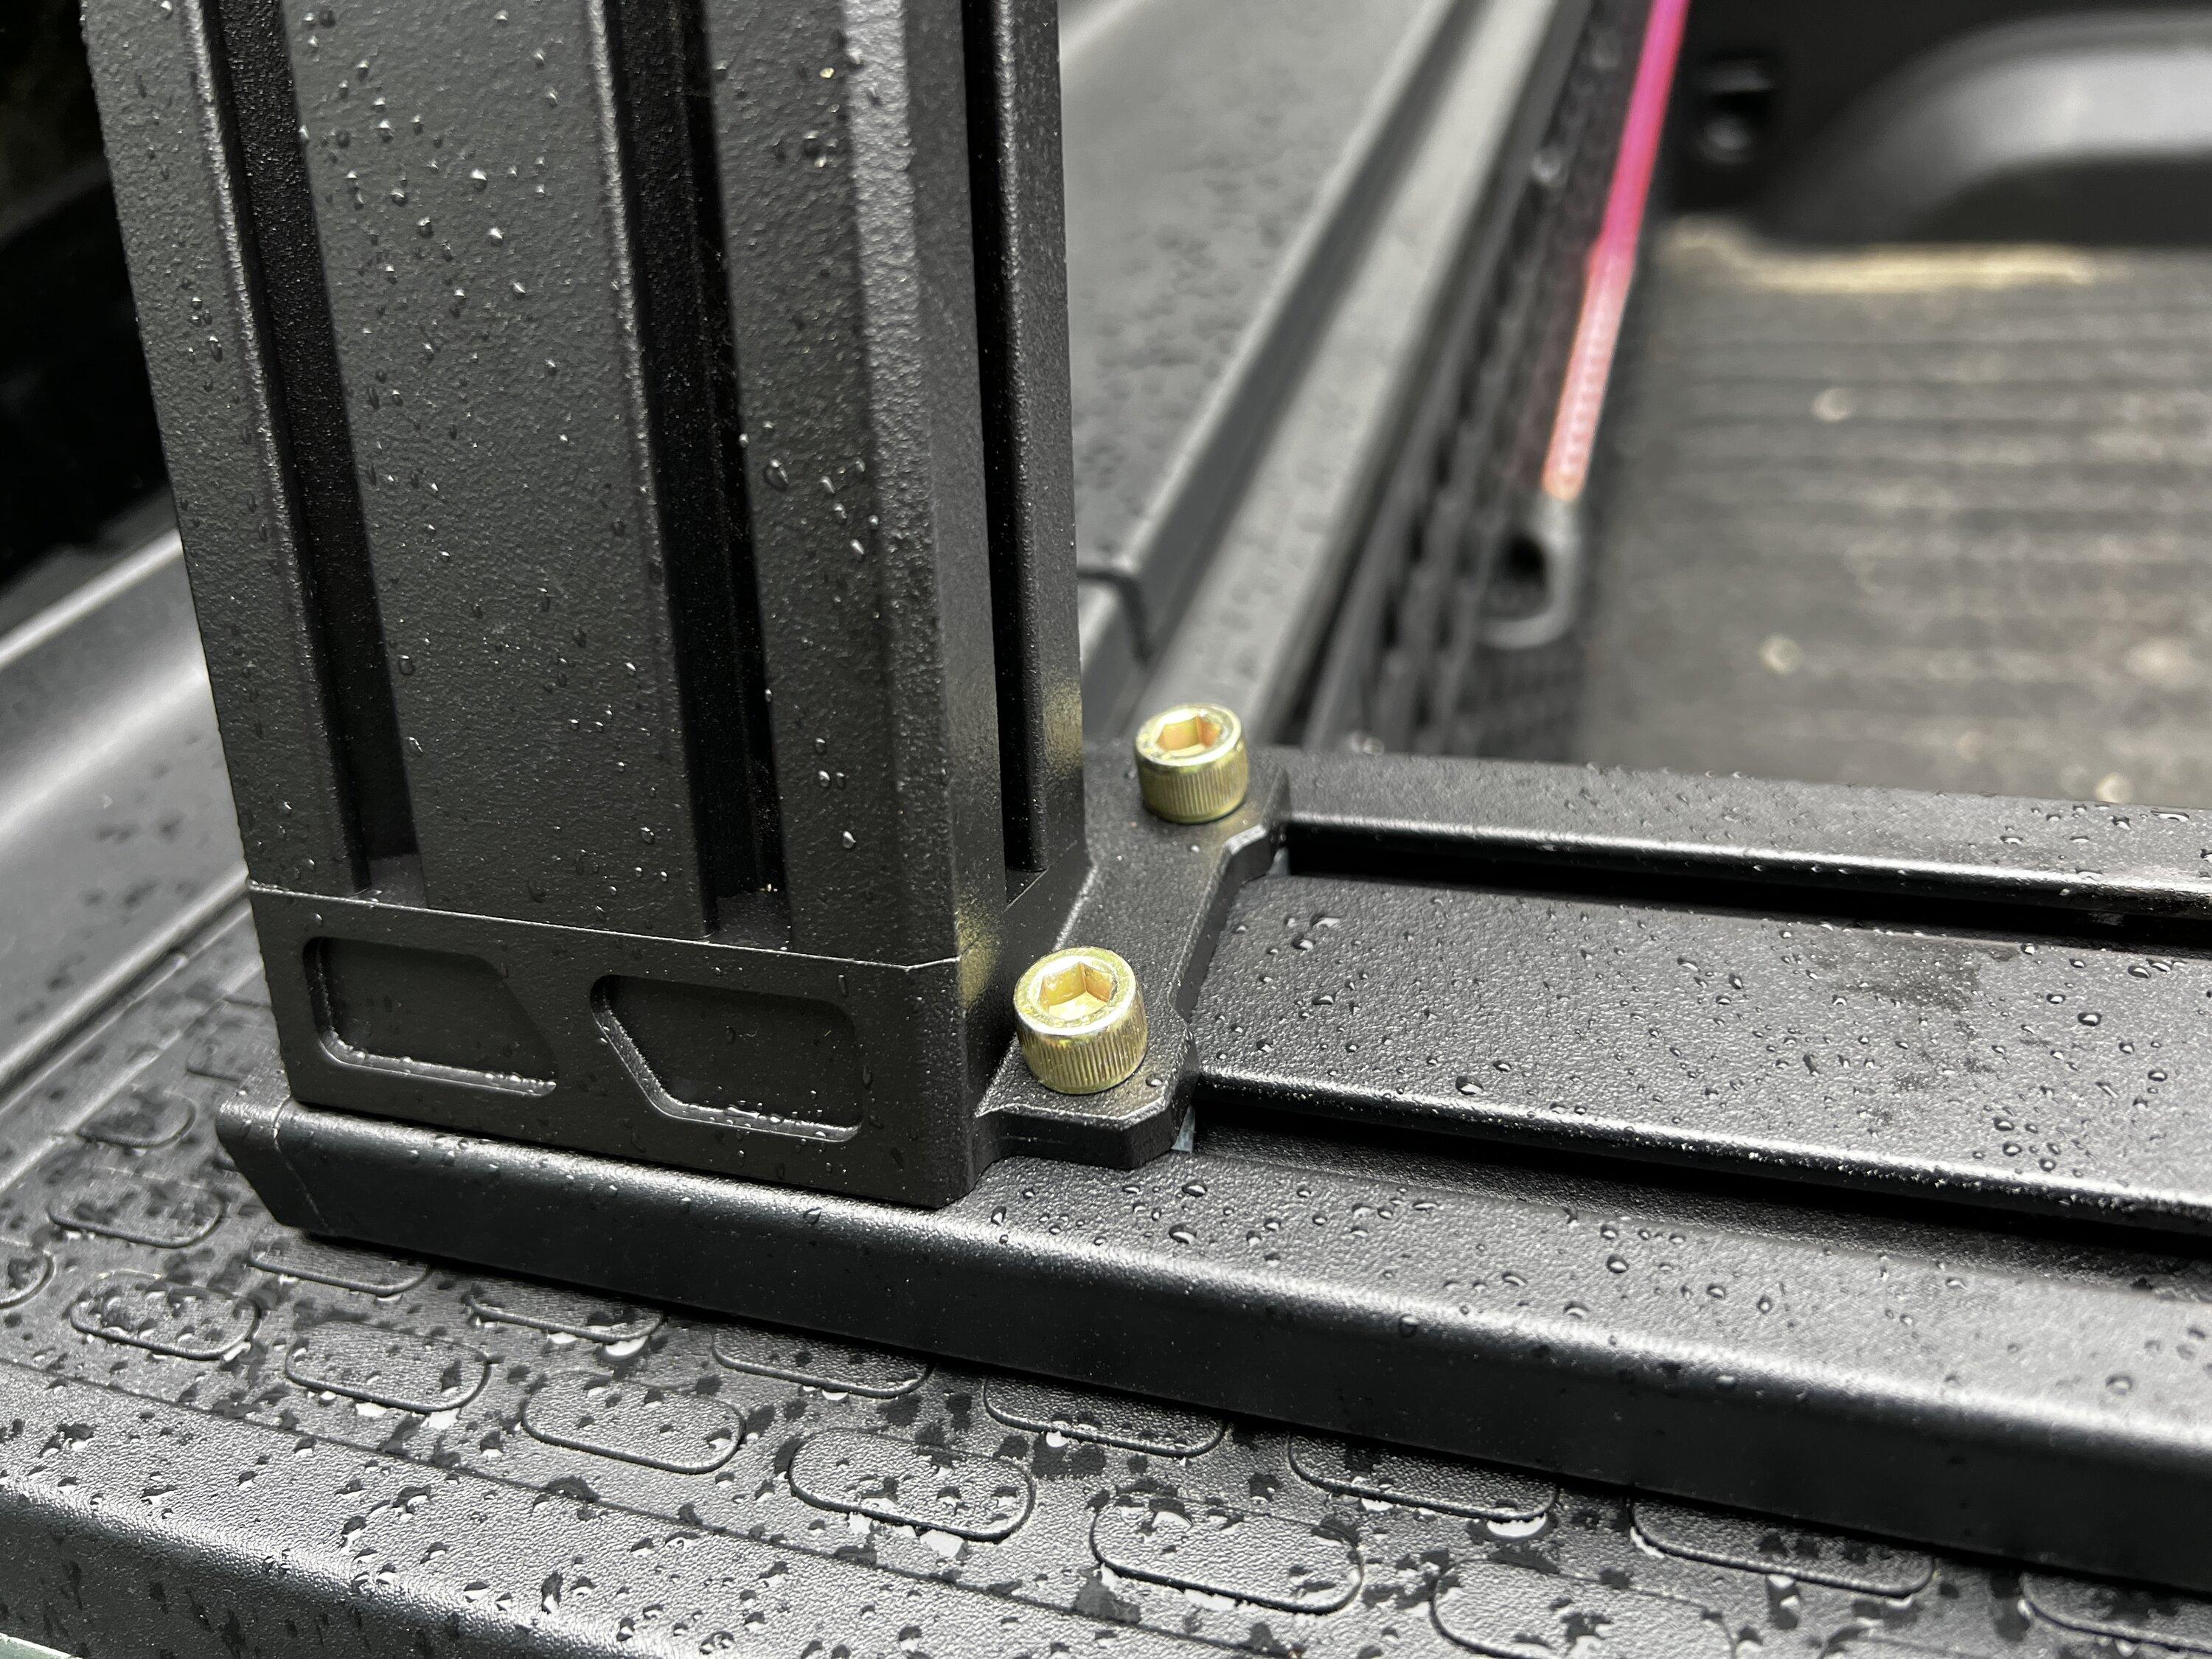
The crossbars that run parallel to the truck are very easy to connect. These end pieces bolt on to the bars on both sides with recessed flush mount bolts and then get bolted on to the t-track. As such, they can be positioned anywhere.
End product is really nice - as I said, very happy with the product. The rack is completely level with the factory bars when placed on roof.
Hopefully this is helpful.
I do not work for Pacific Exteriors - I use that cardboard to protect the tailgate when I drag stuff over it. They did do a nice job on my siding though.
I do not know the range effect but am not worried - I am running 21s and very happy with my range.
Happy to try to answer any other questions.
All that being said - this rack is extremely well engineered and there are many really nice details. If one is zen, the parts all make sense. And the rack is rock solid - really happy that I will be able to finally carry 16' kayaks.
The bars were delivered separately (which they said would happen) and everything was very well packaged. No damage.

The R1T specific rail connector uses the factory attachment point (accessory port), much like the DCE connector. Two flush mount bolts connect to each port to secure the rails. Tip - it took me a while to figure this out but there is a large bolt (shown below) that will reach the attachment point piece - the flush mount bolts do not. So, I used the large bolt to grab the attachment point piece and bring it up so that the the flush mount could grab it. Pretty clever of XO.
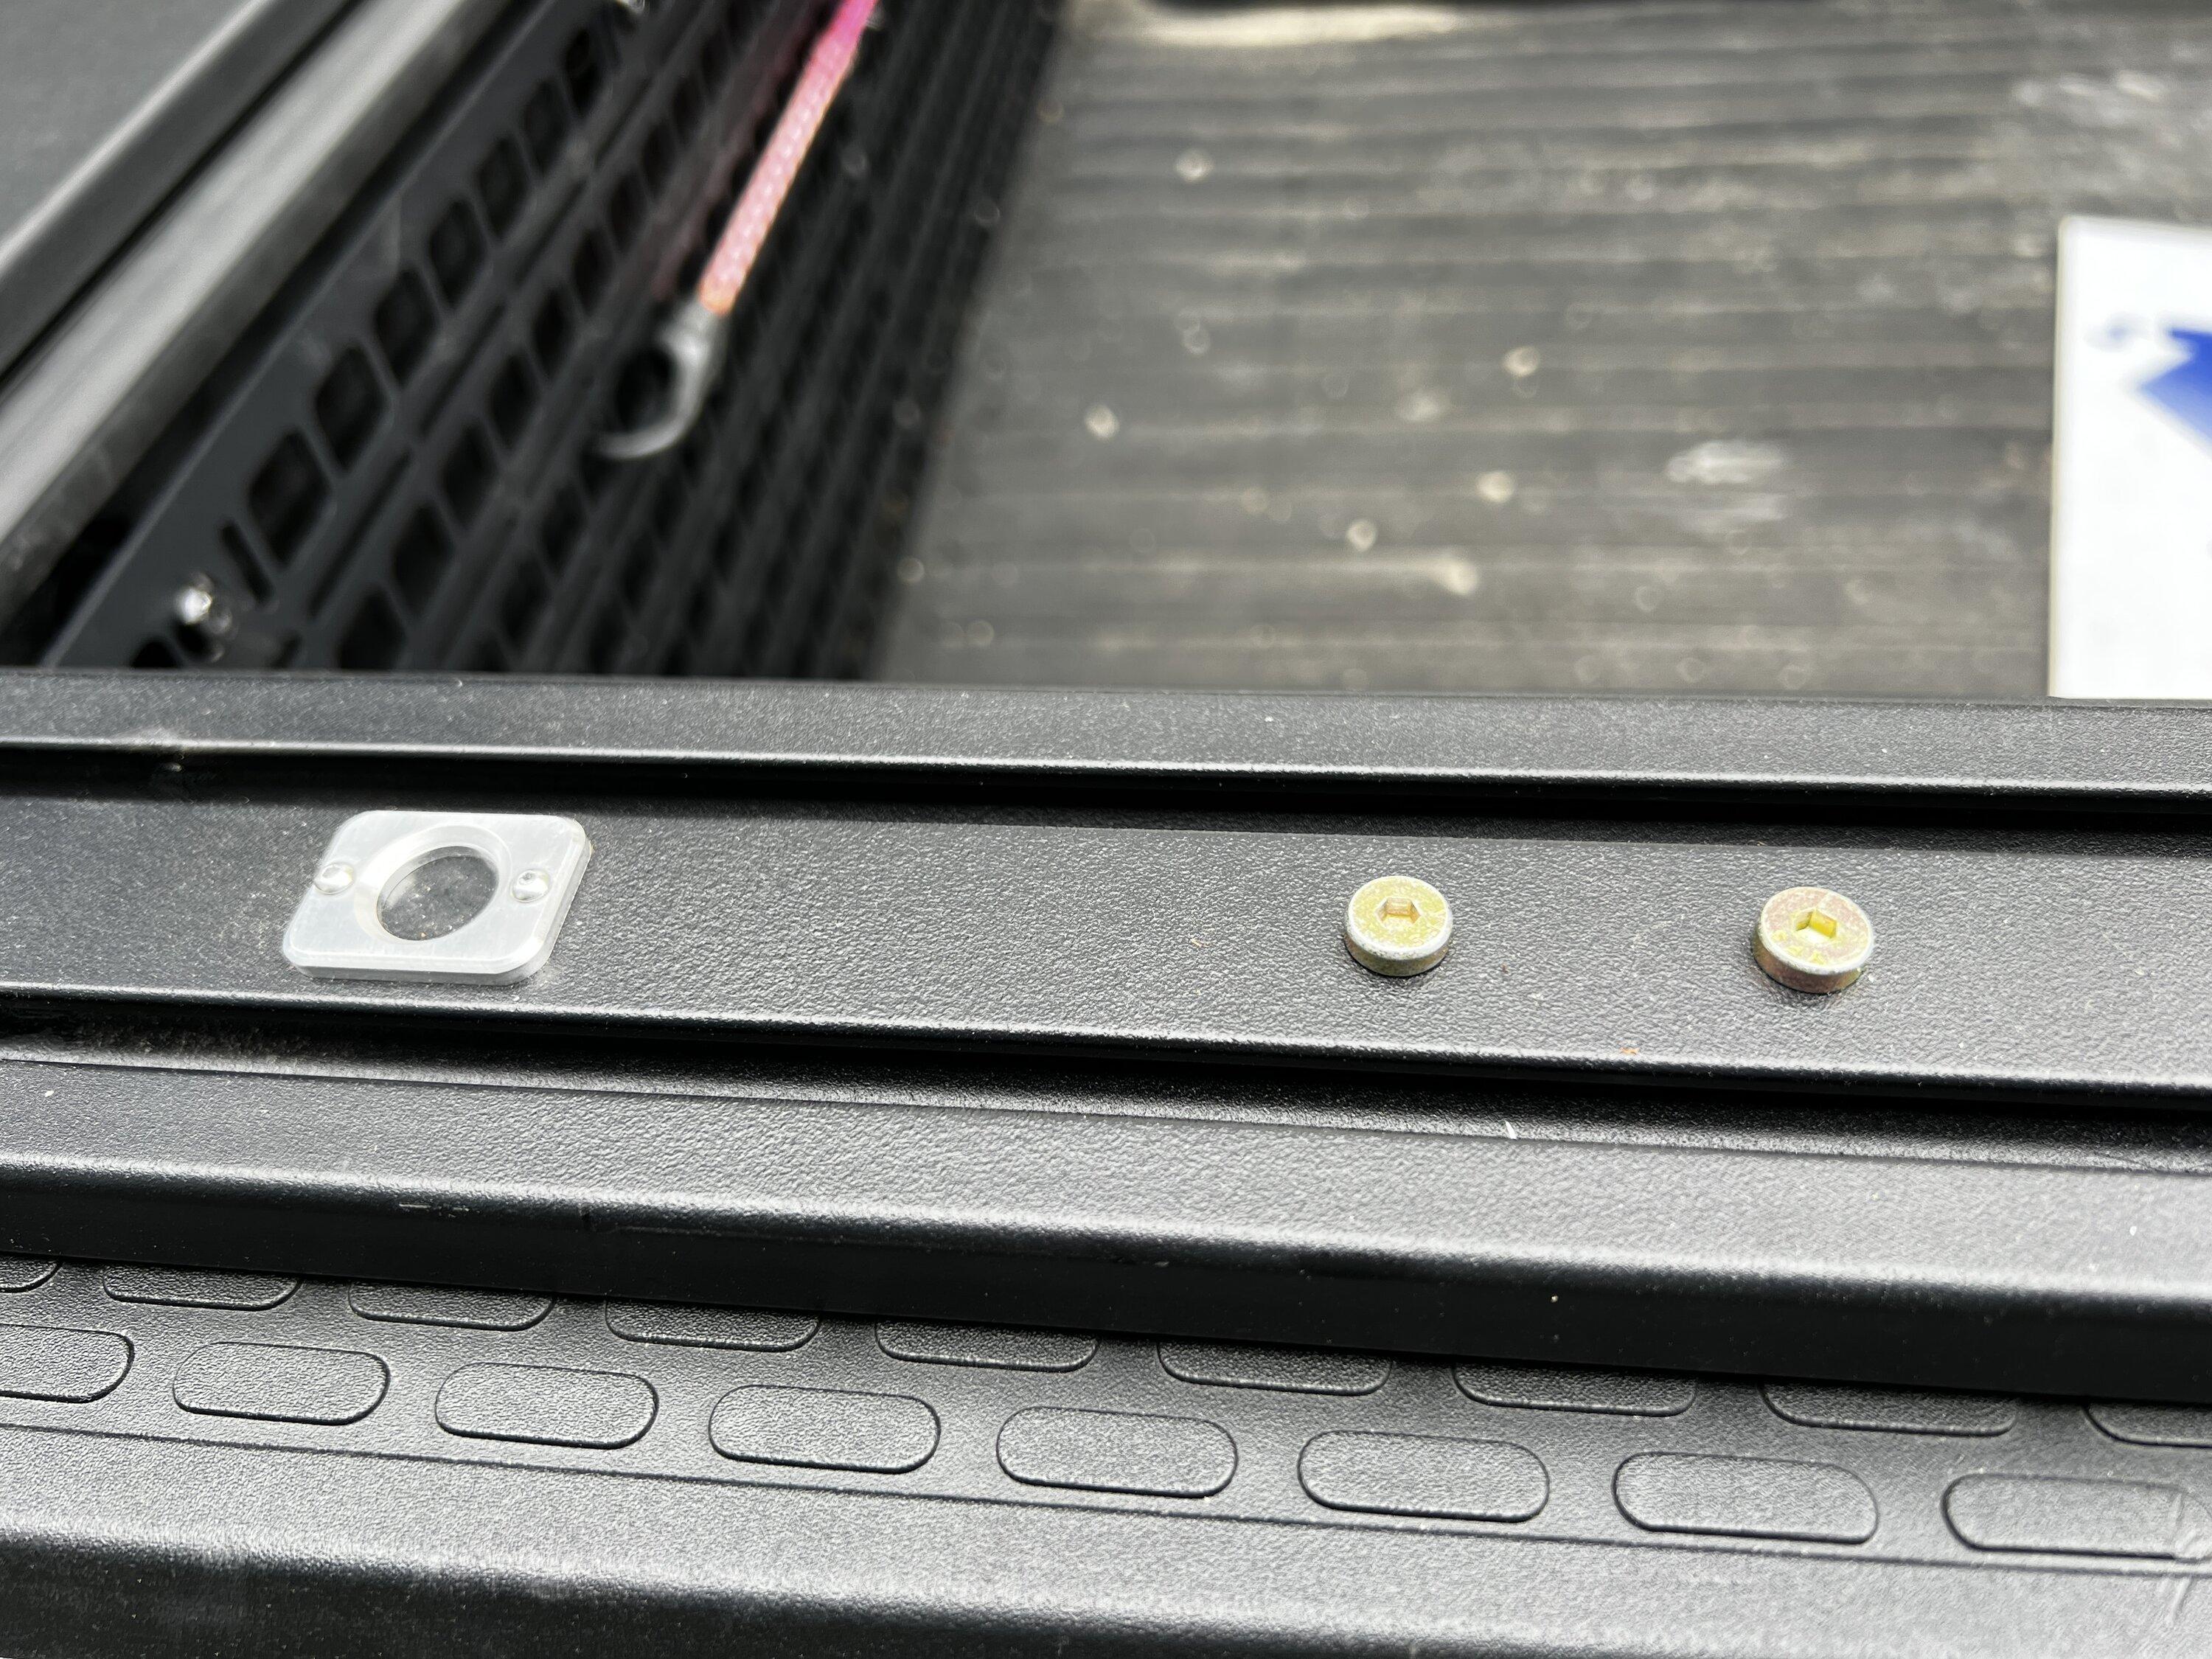
As the rack is square and the rail of the R1T is not, the rail connectors are flush to the outside of the rail. There is a rubberized button over the gear tunnel release - I cannot make this work unless I use a tool to push down hard and am concerned about tearing the rubber (I am going to ask XO about this). EDIT: XO responded immediately and let me know there is a screw assembly under the button. Using a 1.5mm allen I was able to access the screw and adjust it. It works brilliantly now.
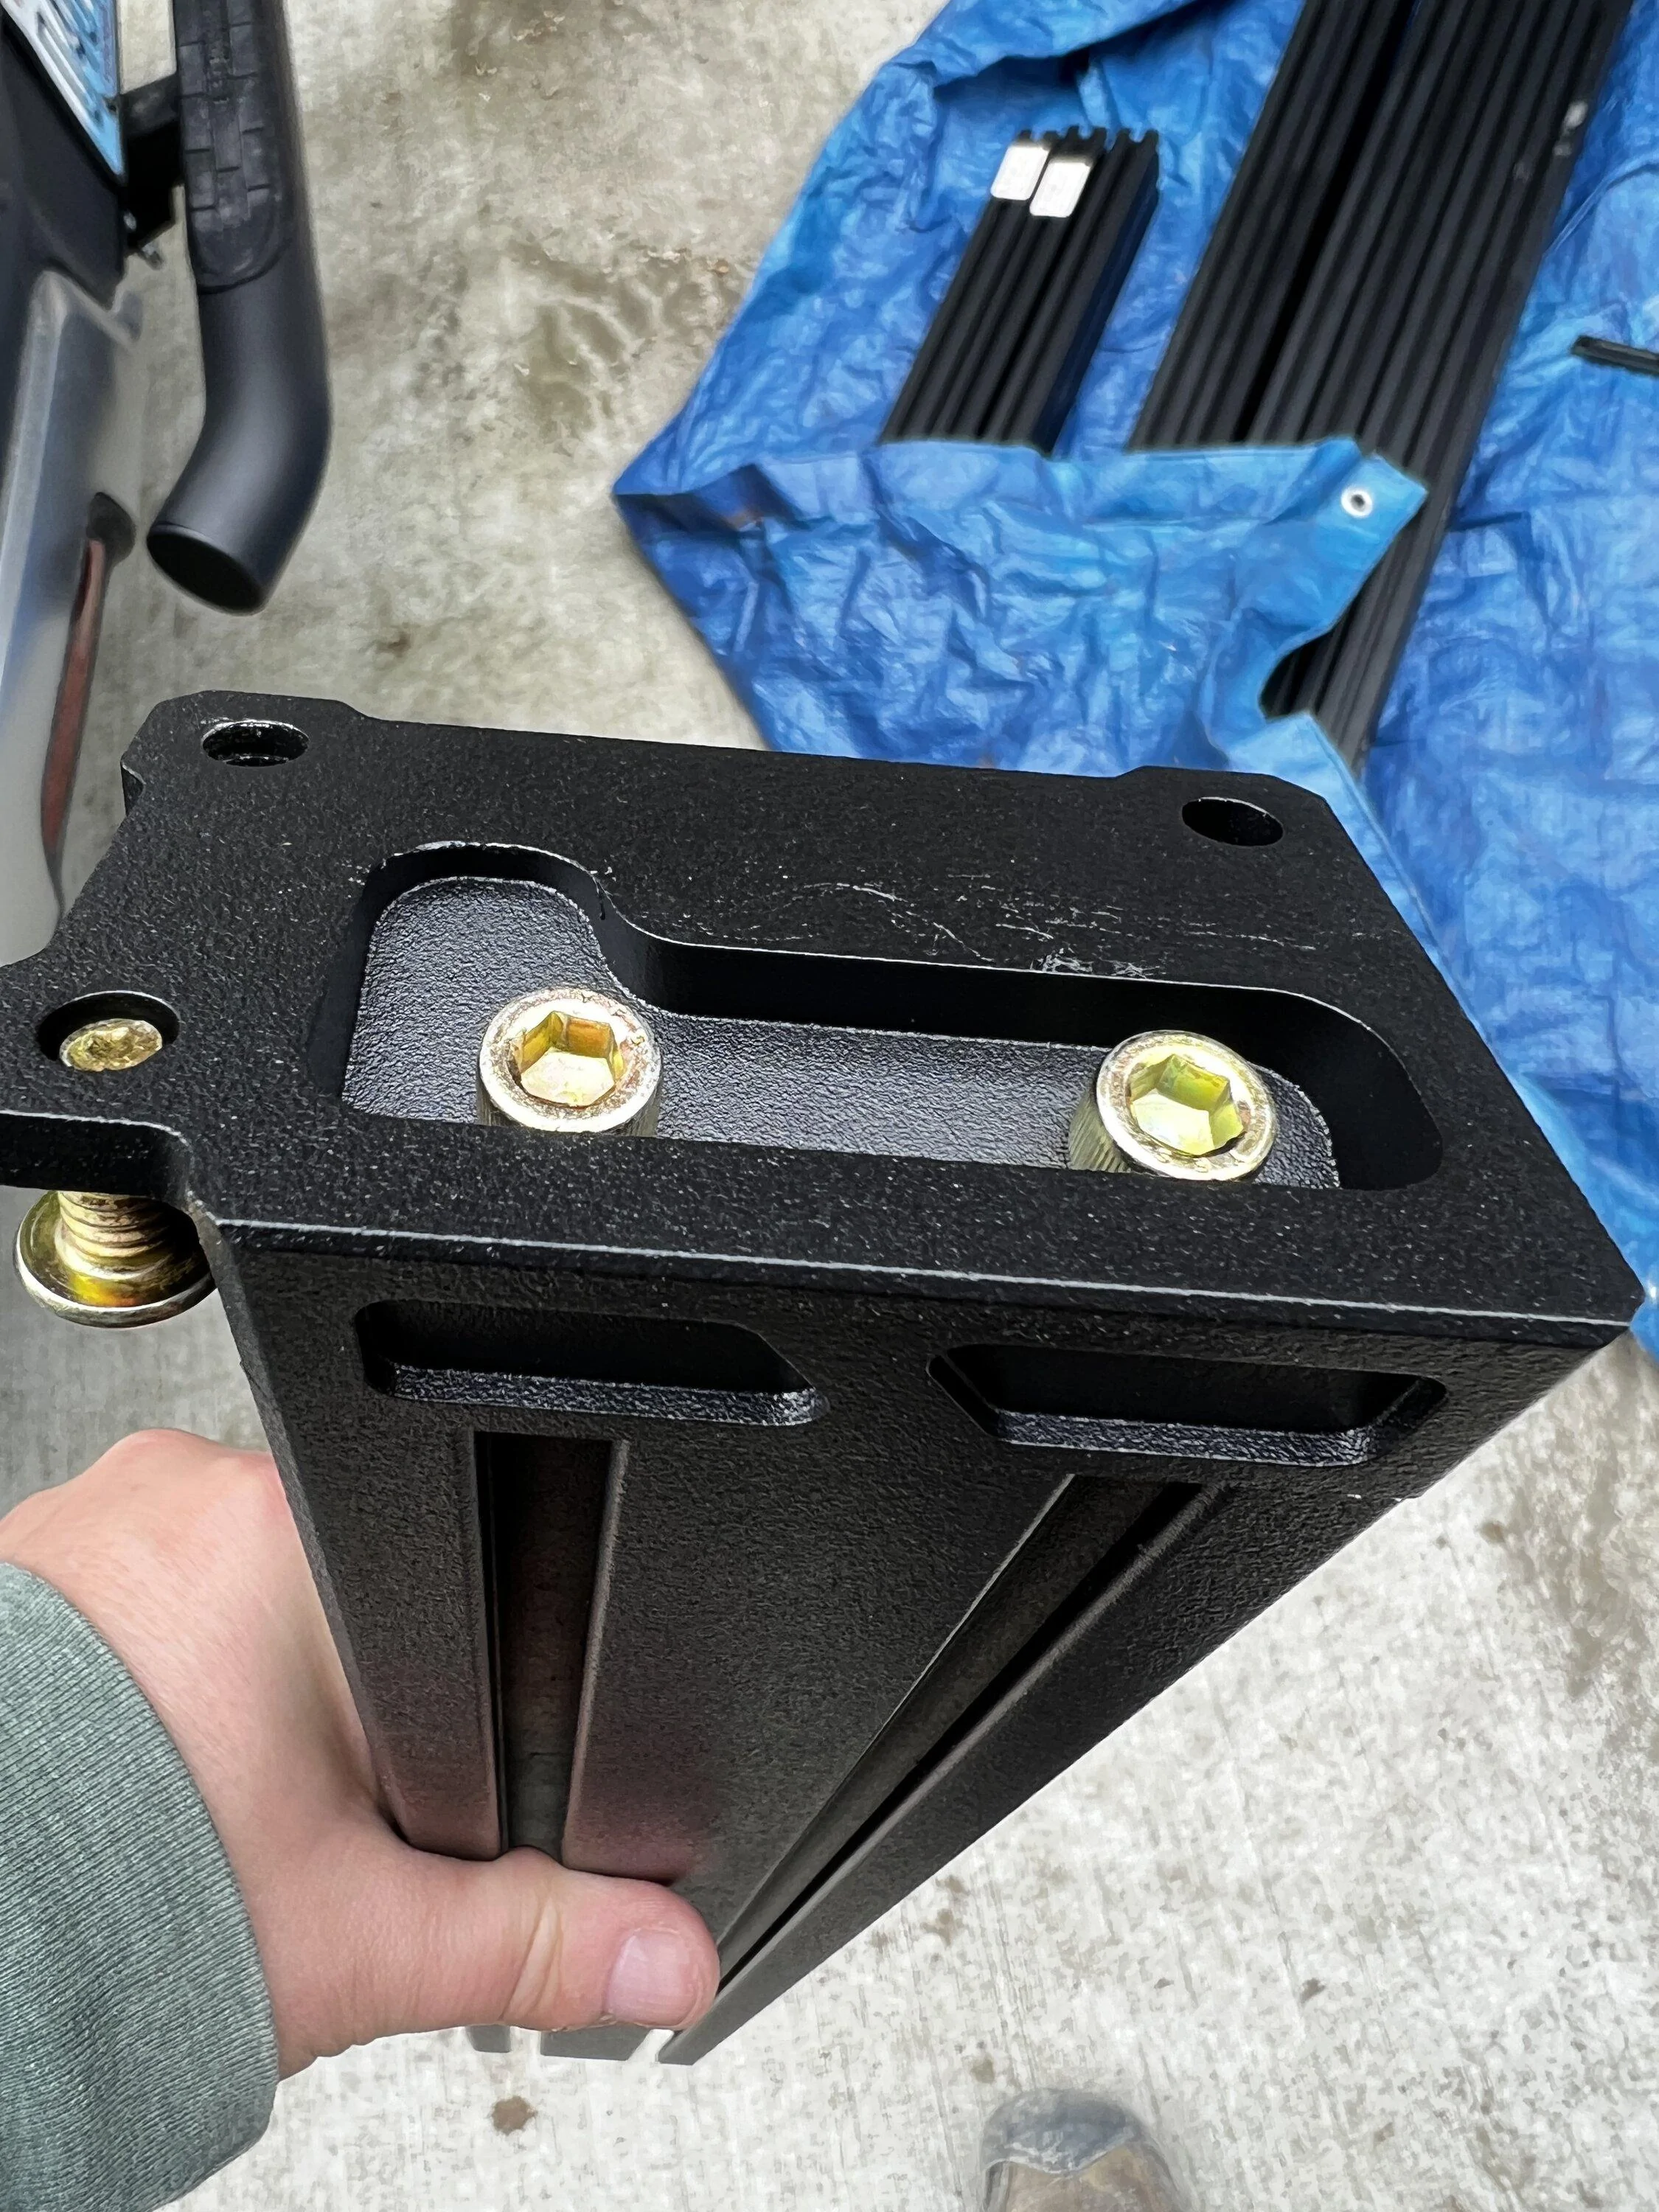
The feet of the uprights attach to the uprights and then bolted to the rail connector. Important lesson - you should pre-thread the three bolts that connect to the rail connector before bolting the feet to the uprights otherwise they are very hard to access. The feet are a nice design - there is a cutout for one of the flush bolts that attach the rail connector at the back of the rail. This gives about a 1/2" of play in the placement of the rear upright - pushing it all the way back ensures the position of the right and left uprights. The feet also create the angle for the uprights.
I should mention here that most of the connection points in this rack use a drop-in T-nuts with threaded holes. They are very easy to put into any t-track and then the bolts go into the holes. This is what makes this rack so configurable.
Once the uprights were in place, I connected the corner angles to the top crossbars and then connected them to the uprights. A note here about the bolts - there are three kinds of hand-start bolts (they can be twisted in by hand and then tightened with an Allen wrench) that I received. There are short ones and then ones that are about 11/4" and then slightly larger ones that are used on the AXS gate (and the same as the one used above to grab the attachment point piece.) The larger ones will not work in the XTR1 rack but they are easy to mistake.
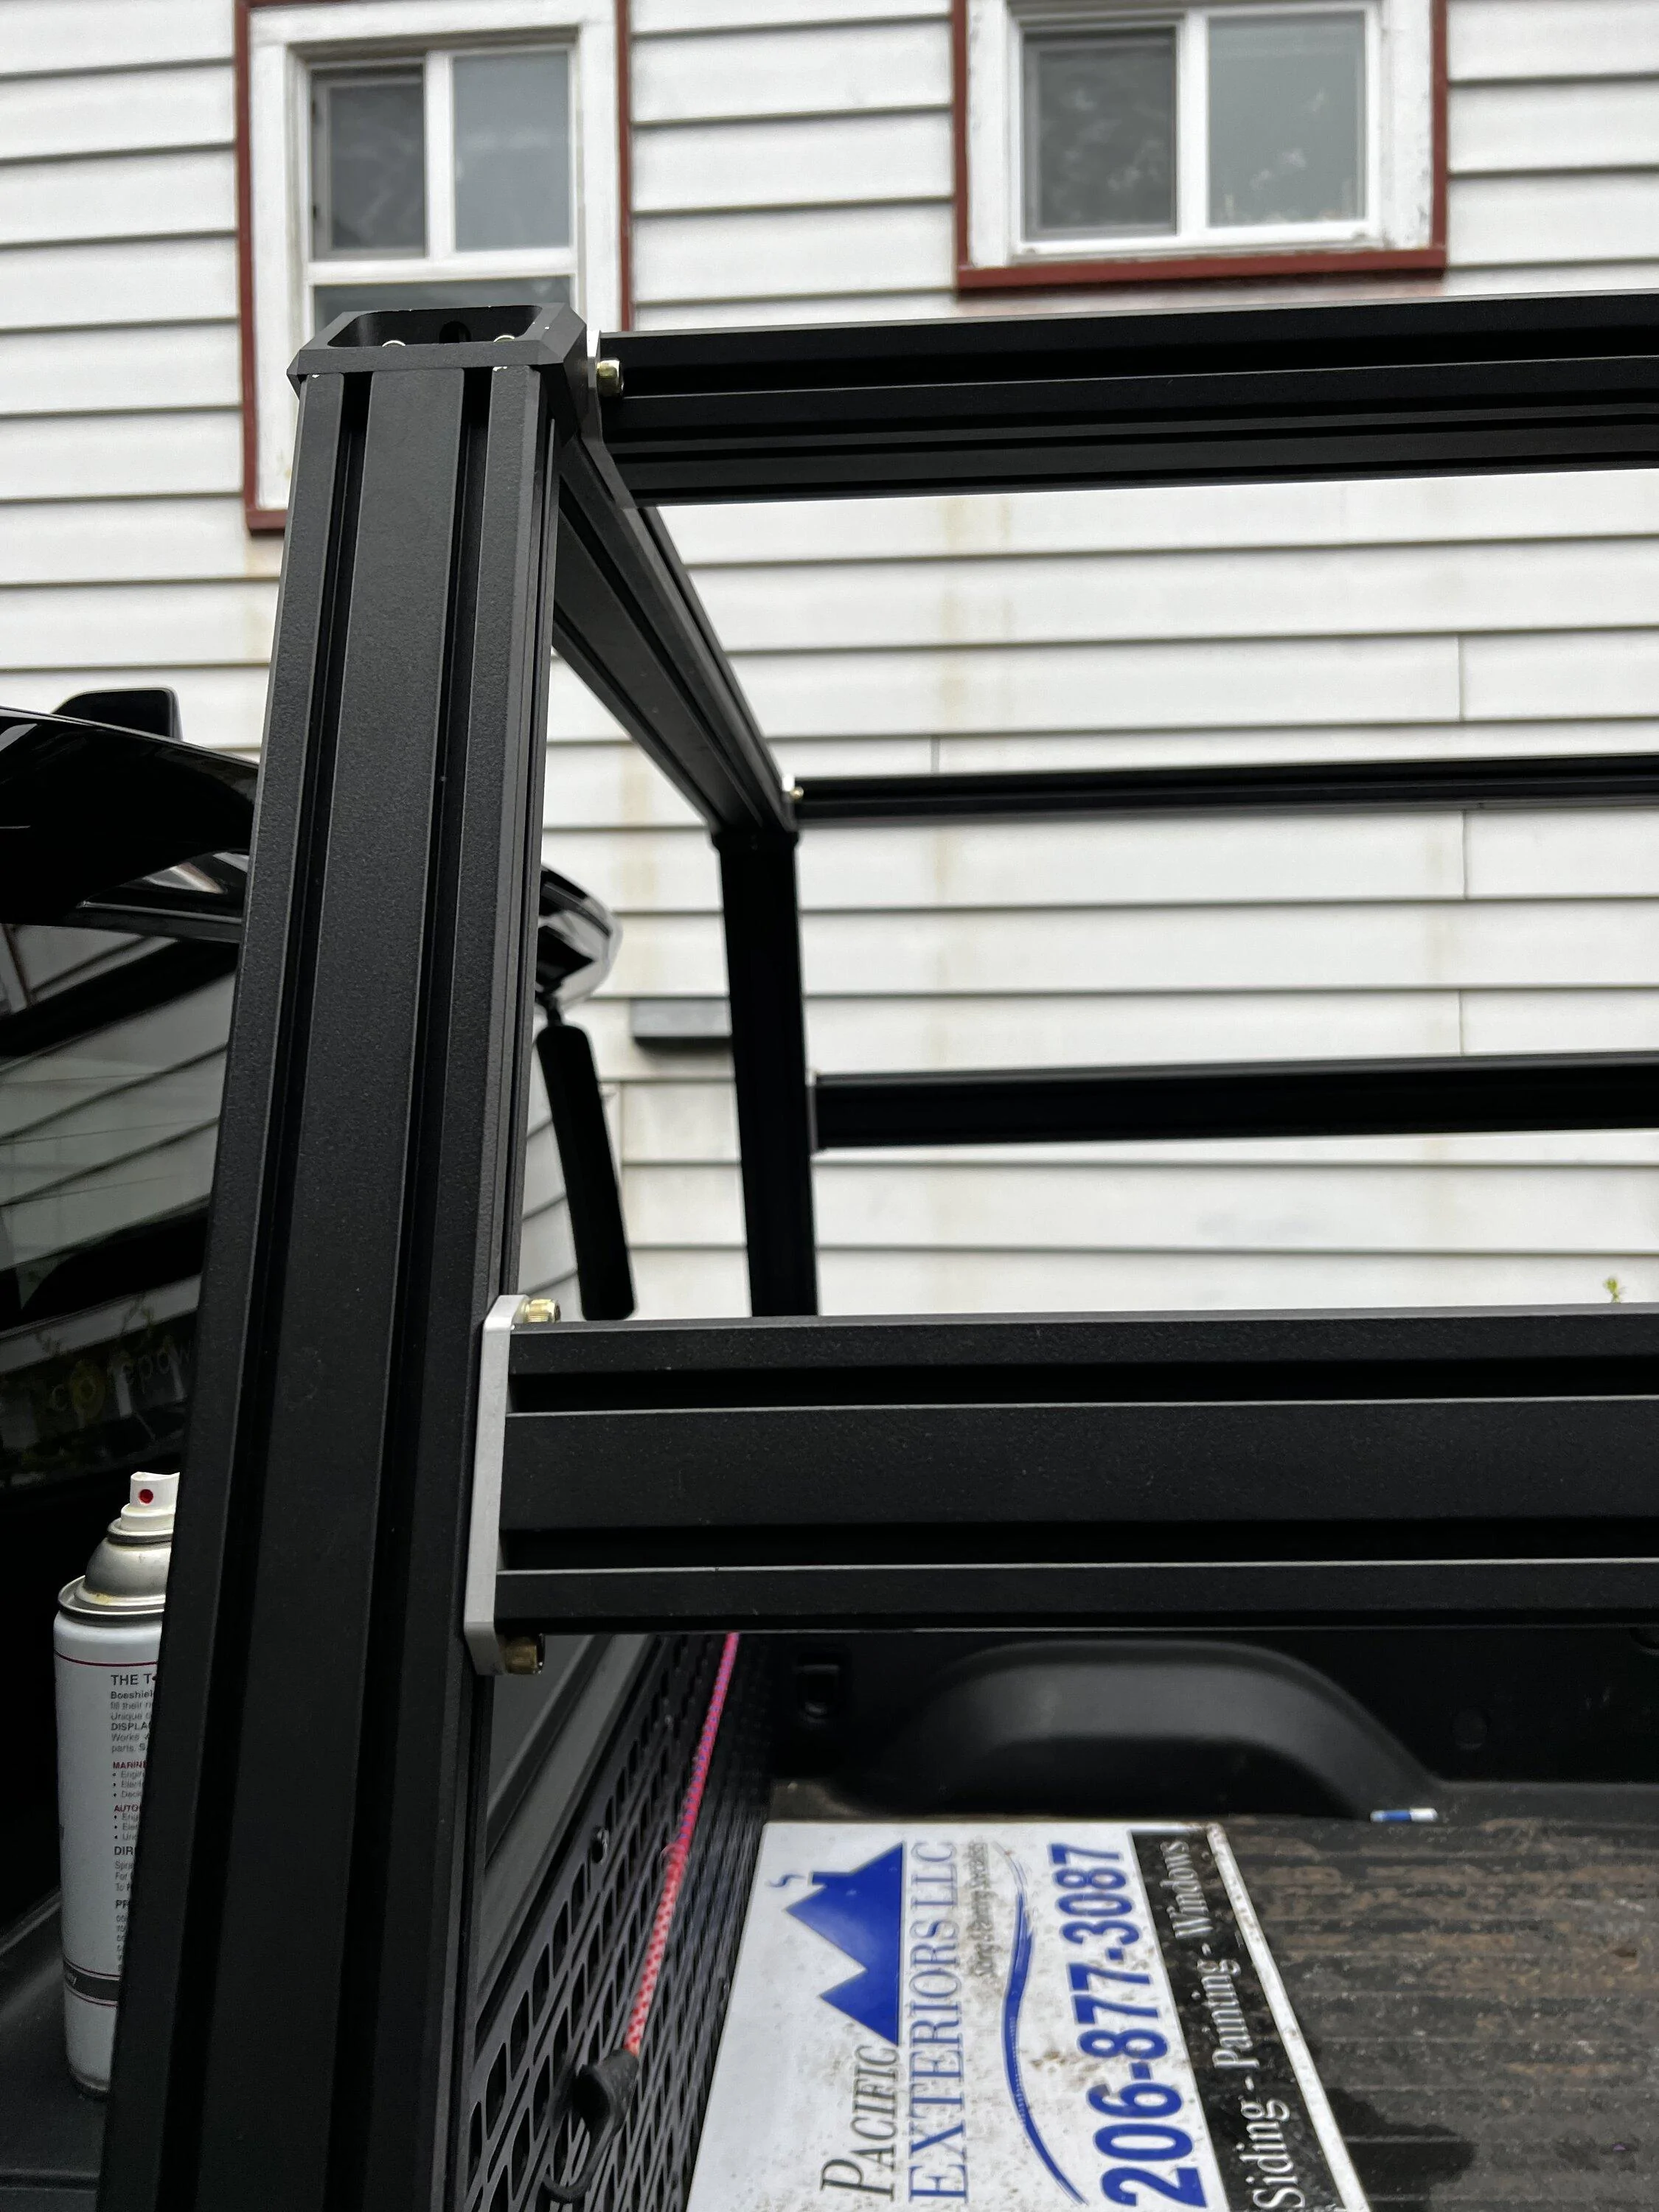
The crossbars that run parallel to the truck are very easy to connect. These end pieces bolt on to the bars on both sides with recessed flush mount bolts and then get bolted on to the t-track. As such, they can be positioned anywhere.
End product is really nice - as I said, very happy with the product. The rack is completely level with the factory bars when placed on roof.
Hopefully this is helpful.
I do not work for Pacific Exteriors - I use that cardboard to protect the tailgate when I drag stuff over it. They did do a nice job on my siding though.
I do not know the range effect but am not worried - I am running 21s and very happy with my range.
Happy to try to answer any other questions.
Sponsored
Last edited: