Sponsored

Rivian R1S Running Board Install - Help me understand plastic hole cutting

BrayBay

Well-Known Member
First Name
Paul
Joined
Aug 22, 2021
Threads
29
Messages
339
Reaction score
625
Location
Texas
Vehicles
Launch Edition R1S - Forest Green/Forest Edge
Clubs
 
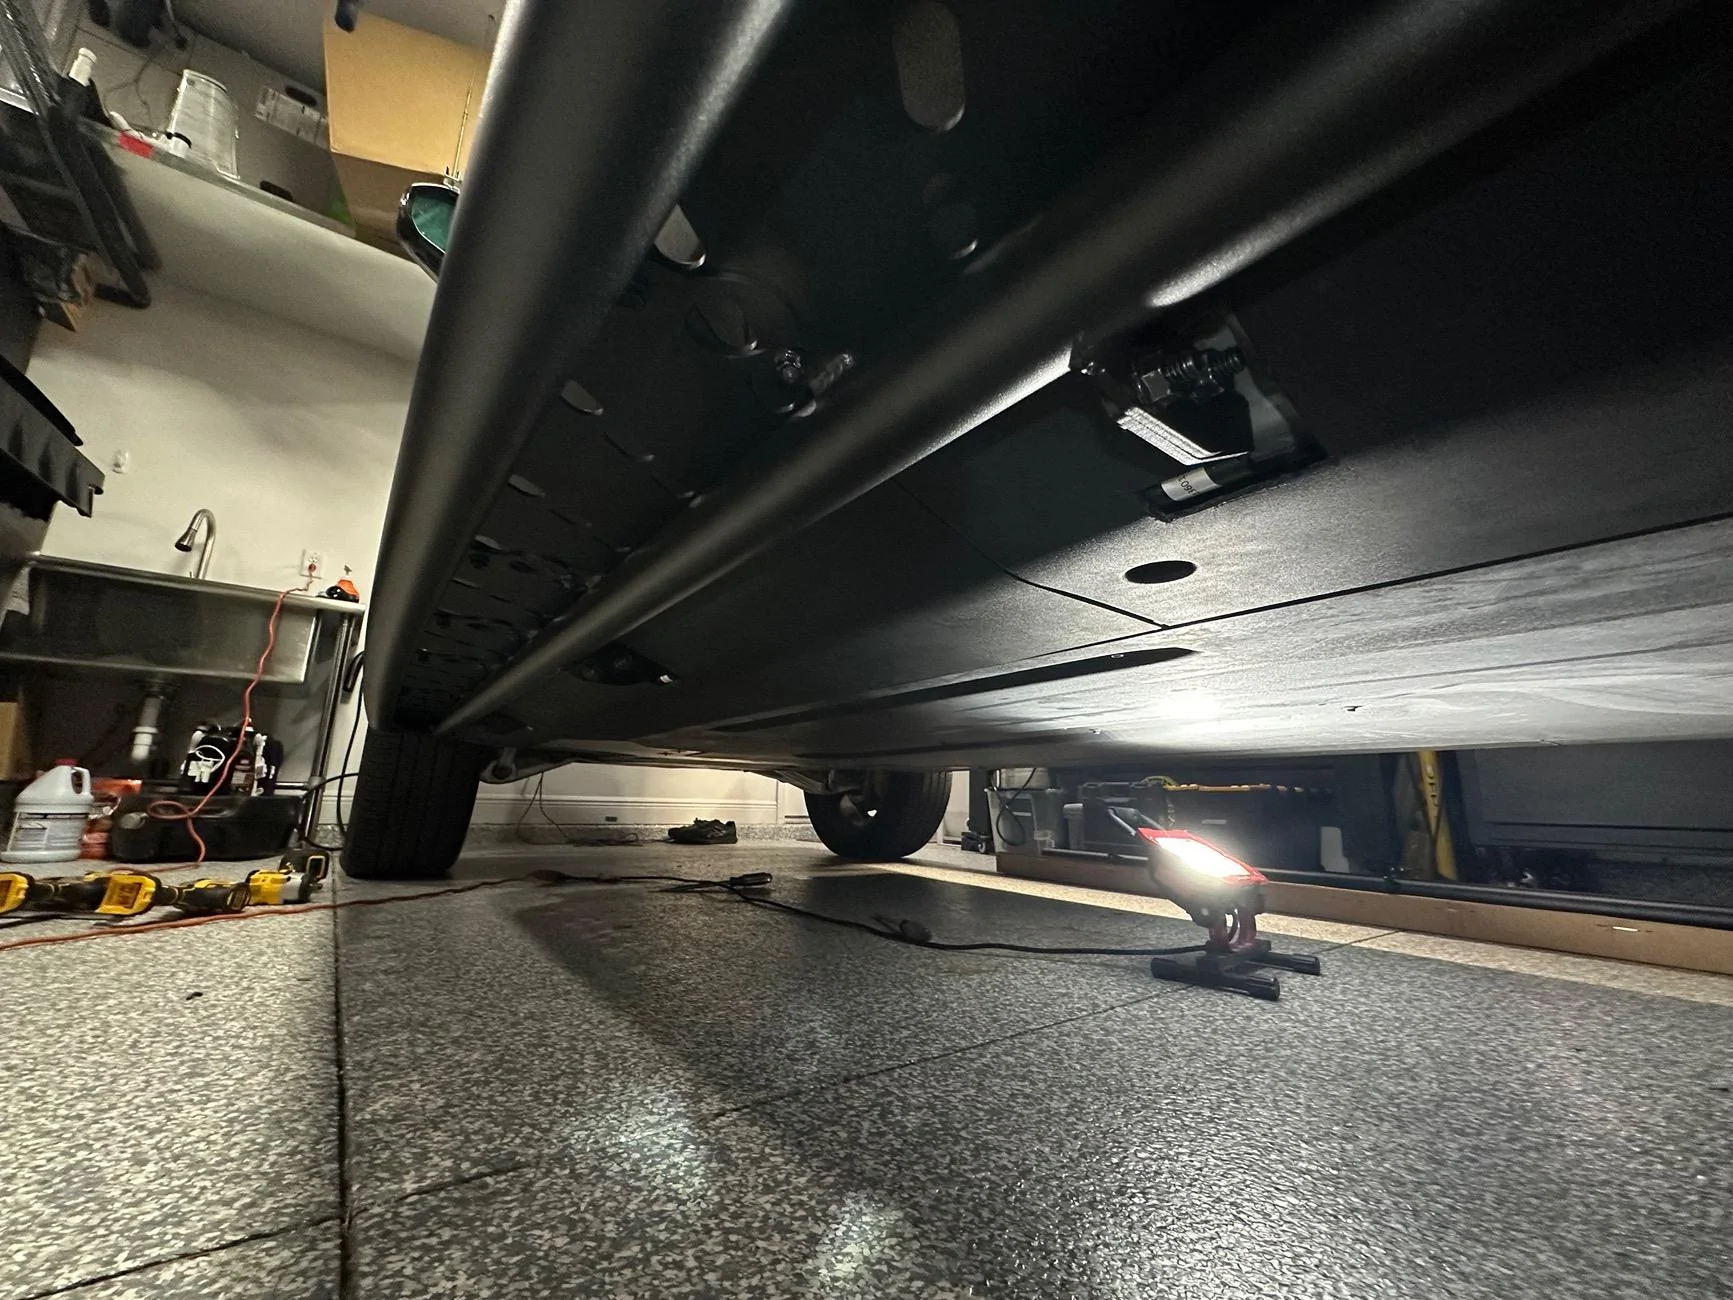
Just recently ordered some running boards, the EVSportline RMaxx ones. Initially I was going just going to take all the plastic panels off, but other forum members convinced me that would be easy enough to keep them on and seal them with Gorilla tape.

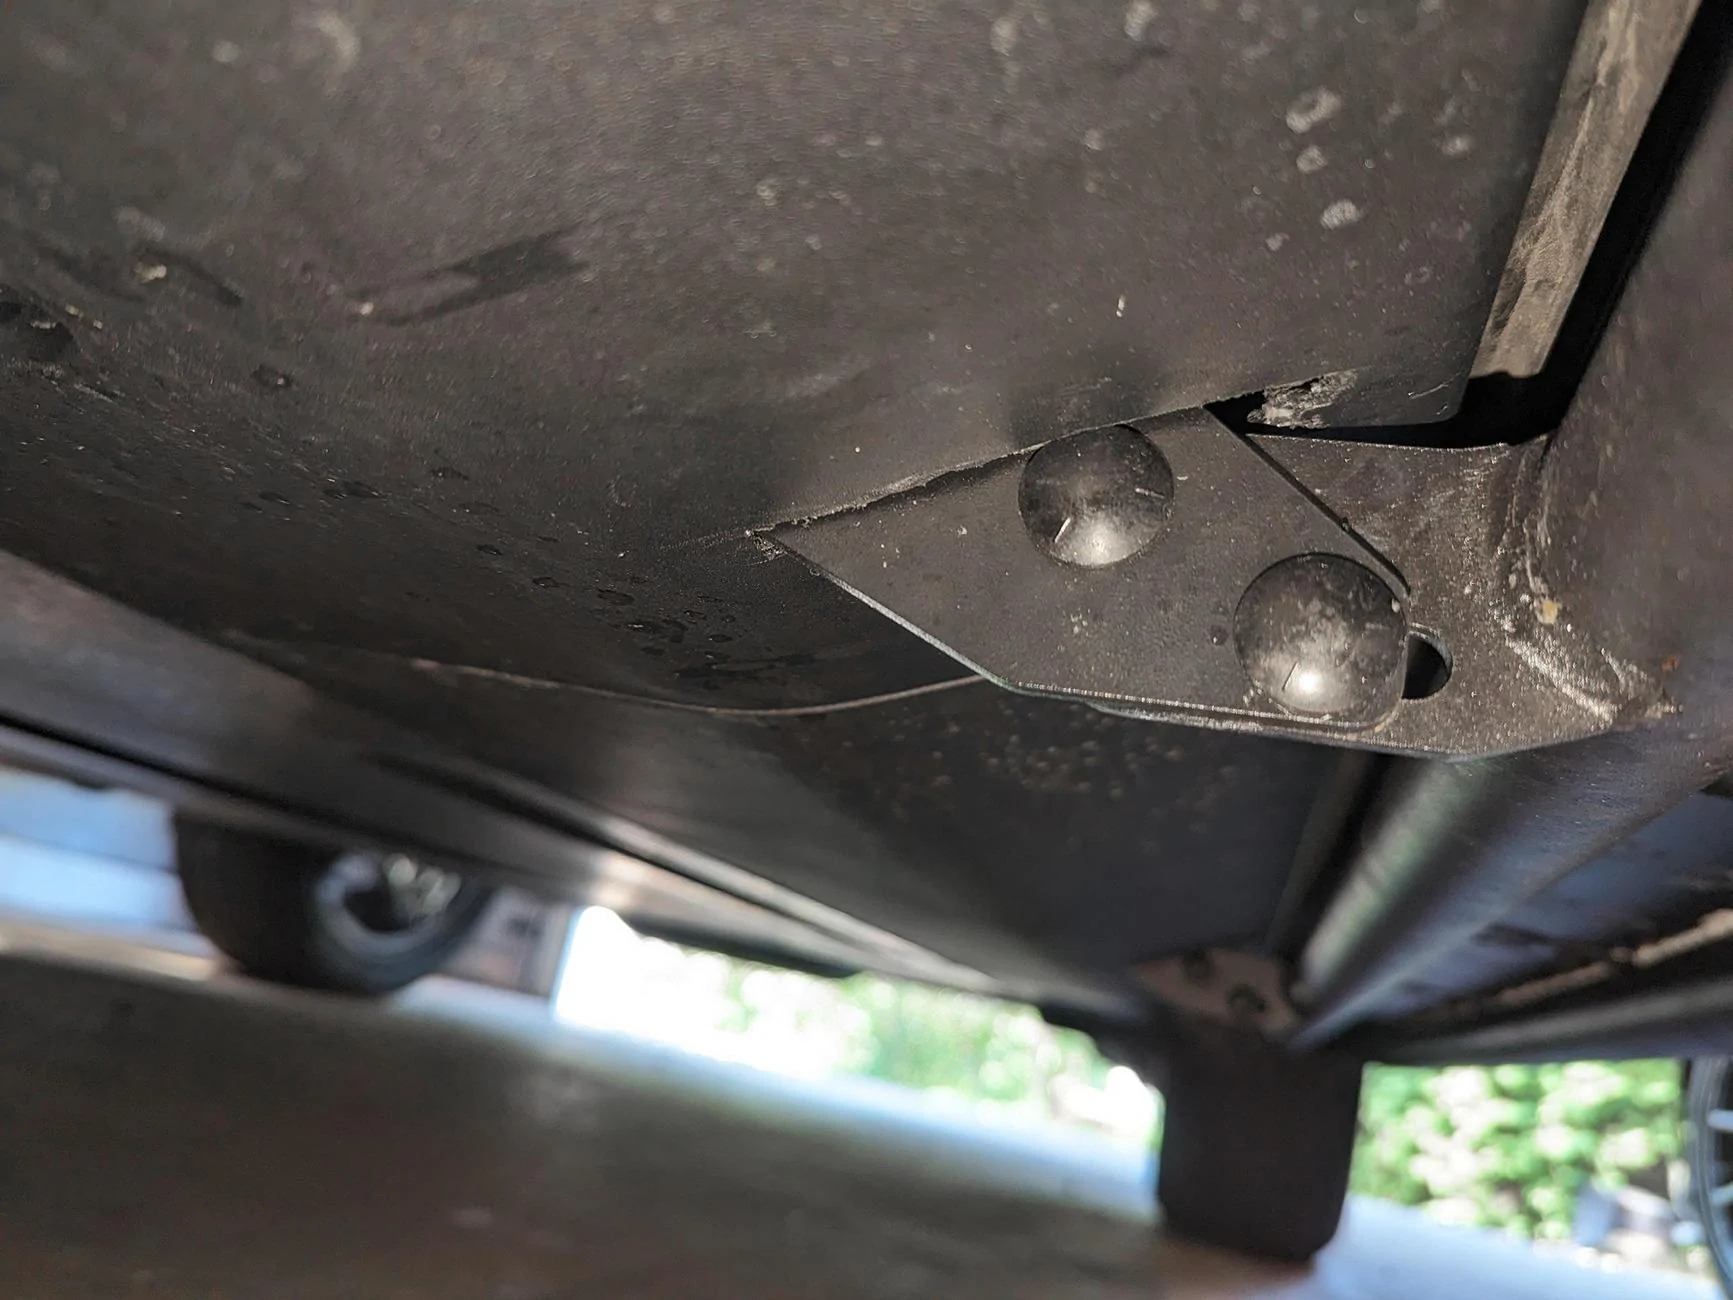
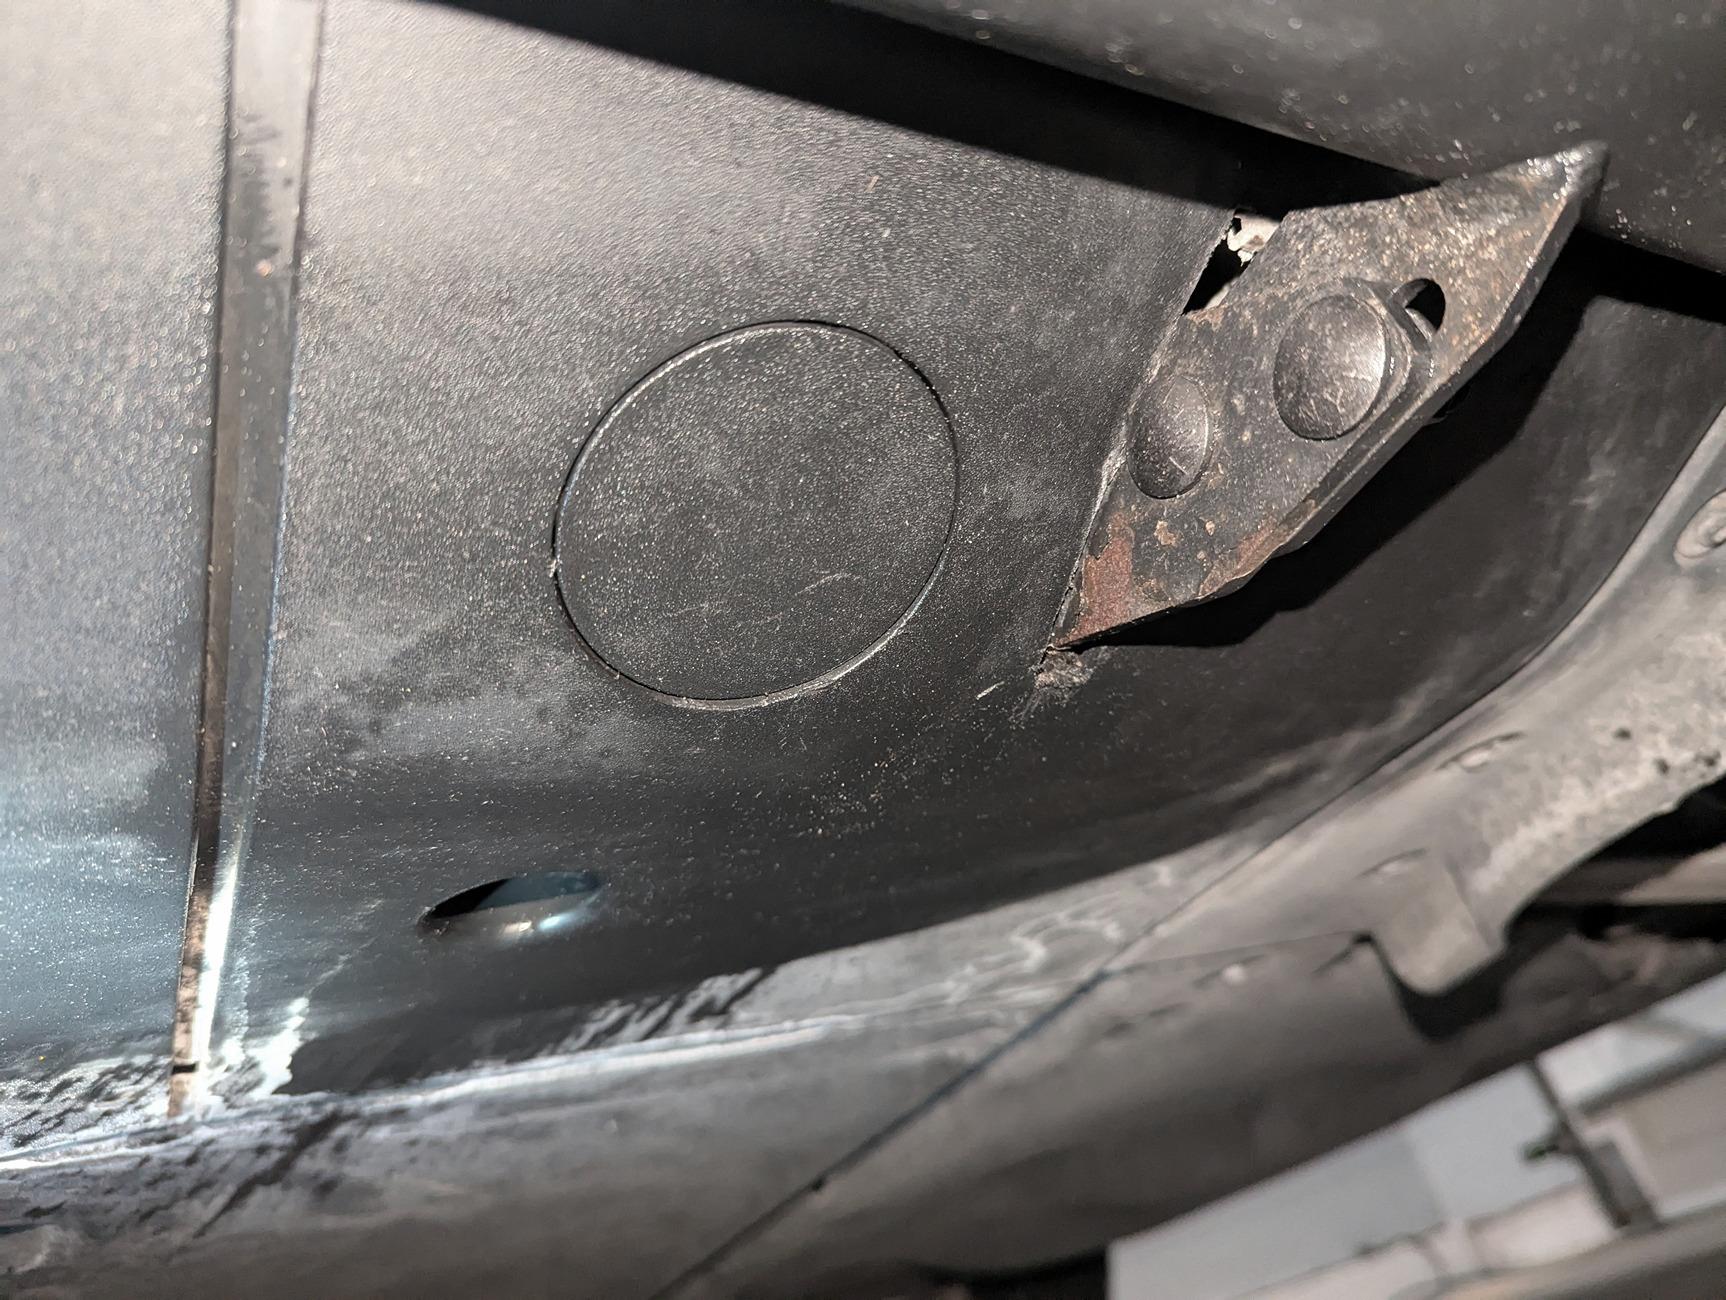
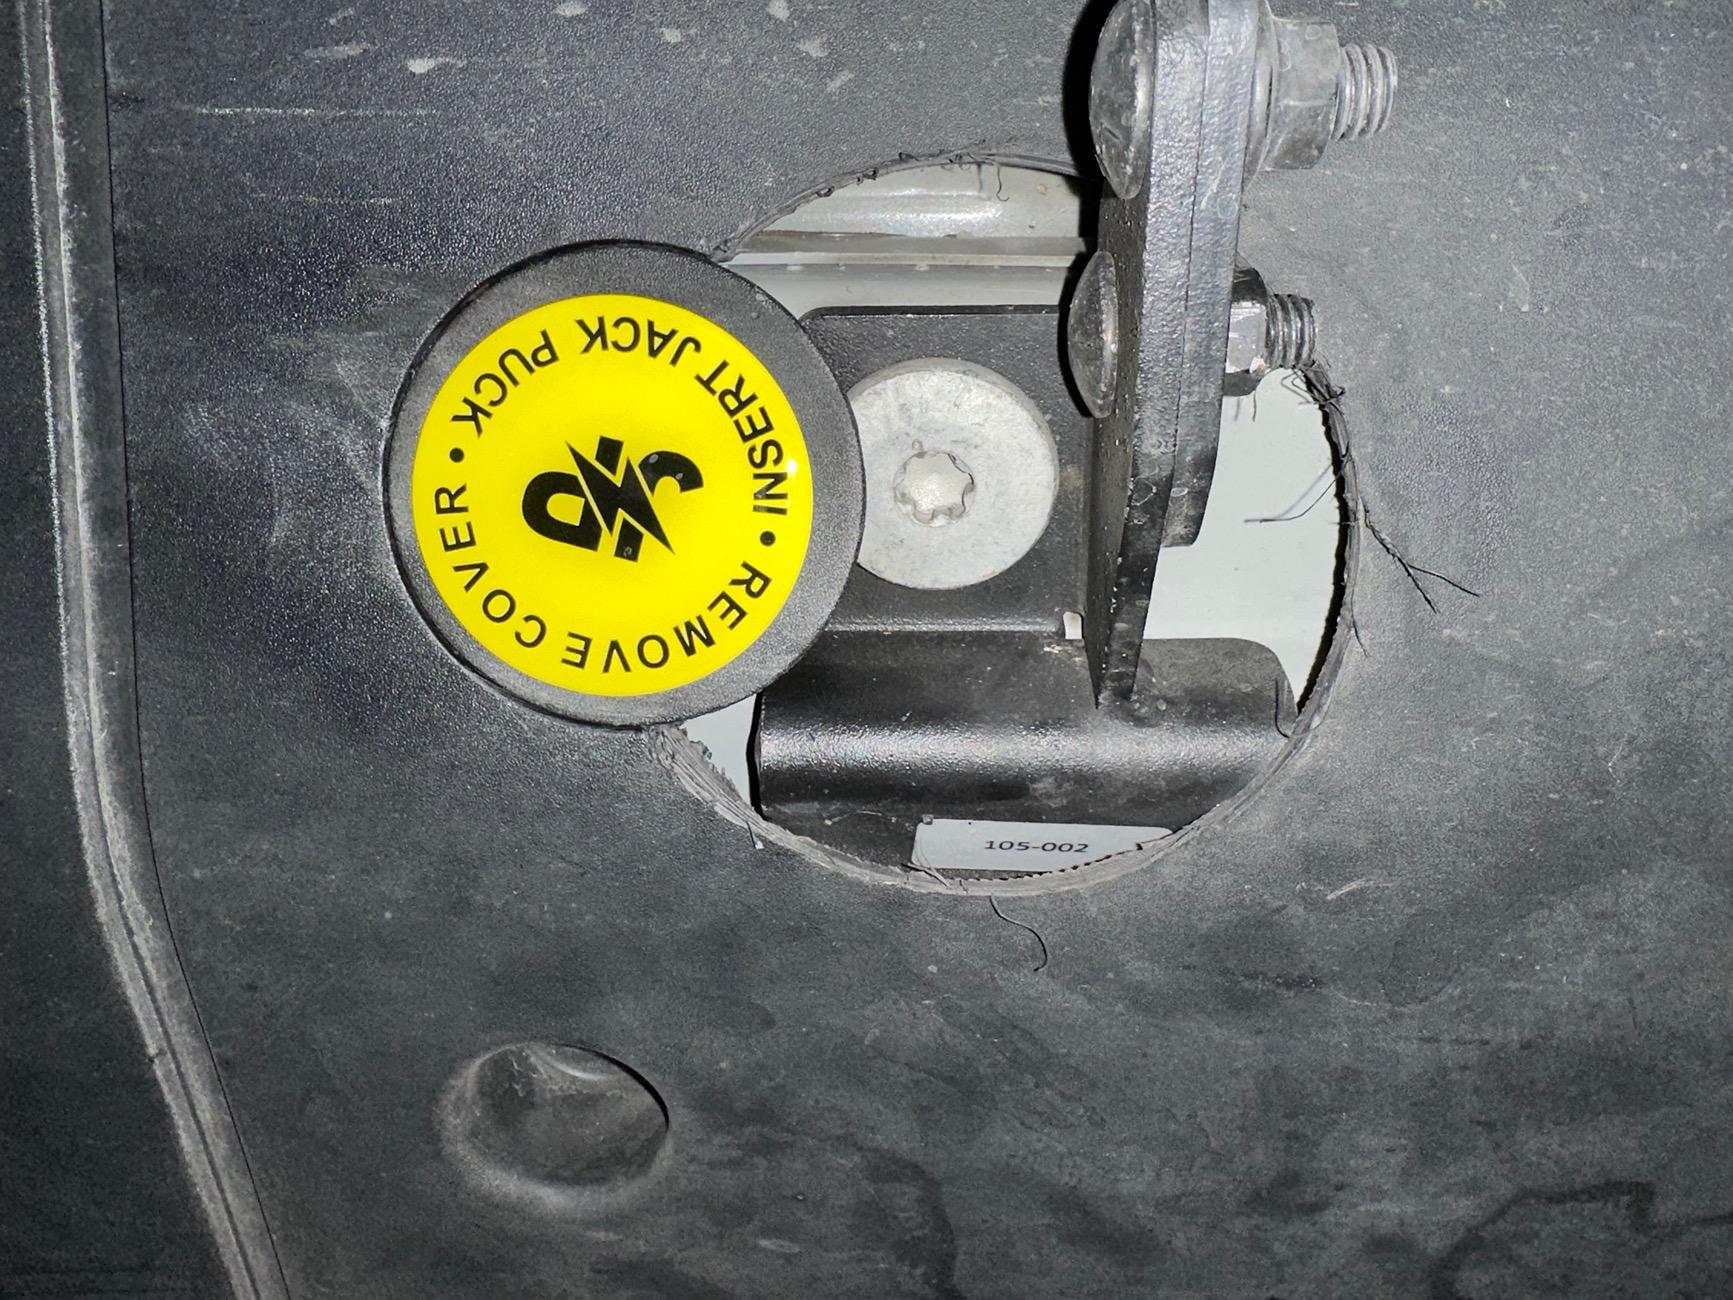
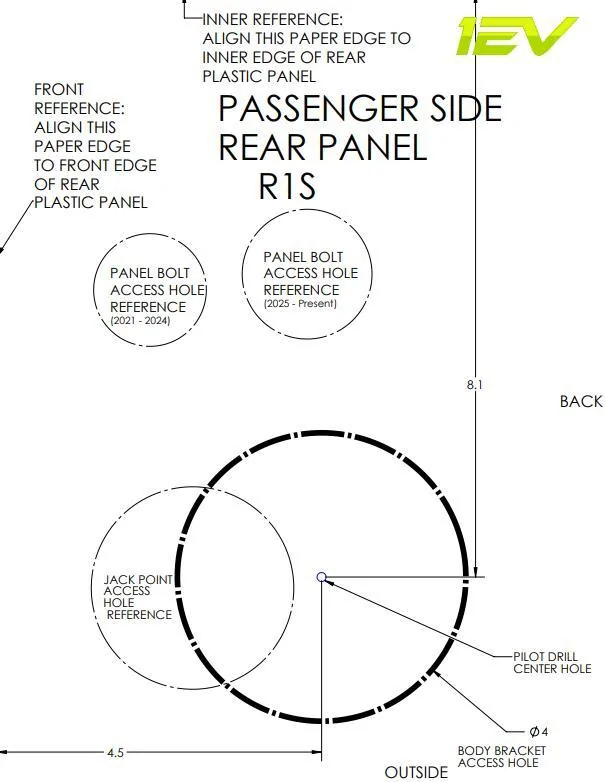
One of the install details that confuses me the most is the hole cutting, specifically for R1S. When looking at the cutting template, the rear panels for driver and passenger side shows the circle hole overlapping the jack point access hole. How does actually look like in real life? Every guide and photo I've searched for has no R1S as an example, its always the R1T that doesn't have this overlap detail.

How did everyone else that have this running board deal with this detail on the R1S? Looks like my alternative are to go my initial plan with removing the panels completely, or trying the L-shape cuts.

Rivian R1T R1S Rivian R1S Running Board Install - Help me understand plastic hole cutting 1738426903545-9c
Sponsored


sub

Well-Known Member
Joined
Jul 23, 2021
Threads
33
Messages
1,872
Reaction score
3,304
Location
USA
Vehicles
Rivian R1S, Tesla Model 3
I didn't use the templates. I installed the brackets first and then held the panel up to see where it contacted the bracket and carved out a slot in that location. I then tried to install the panel and took note where I needed to remove a bit more material. Repeat until I got it on.

I am sure a big circle would have taken a lot less time but it wasn't that hard.

Rivian R1T R1S Rivian R1S Running Board Install - Help me understand plastic hole cutting PXL_20230823_172841766
 
OP
OP
BrayBay

BrayBay

Well-Known Member
First Name
Paul
Joined
Aug 22, 2021
Threads
29
Messages
339
Reaction score
625
Location
Texas
Vehicles
Launch Edition R1S - Forest Green/Forest Edge
Clubs
 
I didn't use the templates. I installed the brackets first and then held the panel up to see where it contacted the bracket and carved out a slot in that location. I then tried to install the panel and took note where I needed to remove a bit more material. Repeat until I got it on.

I am sure a big circle would have taken a lot less time but it wasn't that hard.

PXL_20230823_172841766.jpg
This is great. I'm guessing by doing the cuts by eye, the jack puck covers were uninterrupted?
 

sub

Well-Known Member
Joined
Jul 23, 2021
Threads
33
Messages
1,872
Reaction score
3,304
Location
USA
Vehicles
Rivian R1S, Tesla Model 3
This is great. I'm guessing by doing the cuts by eye, the jack puck covers were uninterrupted?
Correct. It didn't interfere with the jack puck covers.
 

sub

Well-Known Member
Joined
Jul 23, 2021
Threads
33
Messages
1,872
Reaction score
3,304
Location
USA
Vehicles
Rivian R1S, Tesla Model 3
This is great. I'm guessing by doing the cuts by eye, the jack puck covers were uninterrupted?
Here is a picture showing how much space is between the bracket and the jack puck cover.


Rivian R1T R1S Rivian R1S Running Board Install - Help me understand plastic hole cutting PXL_20250202_020134918
 

Sponsored

SANZC02

Well-Known Member
First Name
Bob
Joined
Feb 11, 2021
Threads
50
Messages
7,396
Reaction score
12,677
Location
California
Vehicles
Tesla Model S, LE - R1S
Occupation
Retired
My rear holes cut into the jack puck holes but the covers still work.
 
OP
OP
BrayBay

BrayBay

Well-Known Member
First Name
Paul
Joined
Aug 22, 2021
Threads
29
Messages
339
Reaction score
625
Location
Texas
Vehicles
Launch Edition R1S - Forest Green/Forest Edge
Clubs
 
Here is a picture showing how much space is between the bracket and the jack puck cover.


PXL_20250202_020134918.jpg
This helps immensely. Thanks for taking the time to get a photo. Guess I'll do it by eye then. Worst case, I'll just toss the plastic panels.

My rear holes cut into the jack puck holes but the covers still work.
I suppose I lack a good imagination. How do the jack puck covers work if you cut a hole into the jack puck areas?
 

SANZC02

Well-Known Member
First Name
Bob
Joined
Feb 11, 2021
Threads
50
Messages
7,396
Reaction score
12,677
Location
California
Vehicles
Tesla Model S, LE - R1S
Occupation
Retired
This helps immensely. Thanks for taking the time to get a photo. Guess I'll do it by eye then. Worst case, I'll just toss the plastic panels.


I suppose I lack a good imagination. How do the jack puck covers work if you cut a hole into the jack puck areas?
Here is a picture, I have some 6 inch tape I was going to use to cover the hole just have not found a need to use it.

Rivian R1T R1S Rivian R1S Running Board Install - Help me understand plastic hole cutting IMG_0441
 

iansriv

Well-Known Member
Joined
Feb 12, 2022
Threads
20
Messages
2,792
Reaction score
3,801
Location
US
Vehicles
R1S
I'm very good at destroying things. If you need someone for demolition-I'm your man. I researched the install and took a bloody week; at the end of which I chucked the plastic panels. Save yourself a lot of frustration and get rid of the plastic panel and just install the running boards. No one, except for a fellow Rivian owner, will get down there to see how nice and clean it is.
 

TampaR1T

Well-Known Member
First Name
Paul
Joined
May 21, 2024
Threads
1
Messages
56
Reaction score
38
Location
Land O'Lakes, FL
Vehicles
2023 Rivian R1T Quad Motor
There are templates for the slots as well (click the first link for the R1S templates and scroll down past the circle templates), but I made sure to measure and mark the panels before cutting to make sure they lined up properly on my R1T templates...and if I remember correctly there was a panel that was a hair off...
https://cdn.shopify.com/s/files/1/0...ates_R1S-all-years_100920204.pdf?v=1730139939

Here's a link to the page with more detailed videos are instructions...
https://evsportline.com/blogs/news/rmaxx-running-board-install-instructions

Apparently you can now just buy an aluminum bolt-on cover if you like...

https://evsportline.com/collections...rmaxx-running-board-bolt-on-aero-cover-plates

Rivian R1T R1S Rivian R1S Running Board Install - Help me understand plastic hole cutting IMG_1572
 
Last edited:

Sponsored

OP
OP
BrayBay

BrayBay

Well-Known Member
First Name
Paul
Joined
Aug 22, 2021
Threads
29
Messages
339
Reaction score
625
Location
Texas
Vehicles
Launch Edition R1S - Forest Green/Forest Edge
Clubs
 

ElGuano

Well-Known Member
Joined
Oct 9, 2024
Threads
47
Messages
849
Reaction score
1,192
Location
Cali
Vehicles
R1T Trimax - Storm Blue, Driftwood, Sport Dark
I had no idea these existed! Looks nice, I might end up picking this option instead. Appreciate the share.
They're brand new, I think they're probably a month or so out from shipping. Honestly, a pretty good price too, if you're looking to keep the plastic panels in good shape.
 

Tlohrenz

Well-Known Member
First Name
Tim
Joined
Jun 16, 2024
Threads
17
Messages
75
Reaction score
52
Location
Golden, CO
Vehicles
2023 Rivian R1T
Occupation
Retired
I went with the EVSportline RMaxx Rock Sliders because A, I didn't want to cut into the plastic and B, the heavy gauge steel running board connects to about 8 frame bolts and you can jack the Rivian from the boards. The rock slides came with a steel plate to replace the plastic covers similar to the aluminum one.
 

WhidbeyIsland

Well-Known Member
First Name
Jon
Joined
Mar 16, 2022
Threads
2
Messages
197
Reaction score
171
Location
Langley, WA
Vehicles
2023 R1T & 2026 Lexus NX350
Occupation
Retired!
When I installed my EV running boards i did two things..

1) I used the 'slot' templates, not the 'circle' templates to reduce the chance of impacting the puck access covers;
2) I did not use the paper templates themselves as the measuring tool, I used the decimal inch measurements noted on each template, measuring from the appropriate edge. I found that trying to use the paper itself was too inaccurate. I did need to slightly trim a few of the slots (I used a saber saw with a wood blade to cut the slots) when fitting them back on, but overall, these two techniques worked out very well.

I will say, removing the plastic panels was by far, the most difficult task of the project. Once they were off, everything went very well. Also, mark each panel as they come off with a permanent marker (inside..) they can get confusing as to which one goes where when it comes time to mark & cut them...
Sponsored


Top