shrink
Well-Known Member
- Joined
- Feb 16, 2021
- Threads
- 102
- Messages
- 1,387
- Reaction score
- 2,710
- Location
- Phoenix, AZ and Kailua-Kona, HI
- Vehicles
- '23 R1S Quad x 2; '26 Gen 2 R1T Quad Launch; '25 Ioniq 5; '24 Jeep Cherokee
- Thread starter
- #1
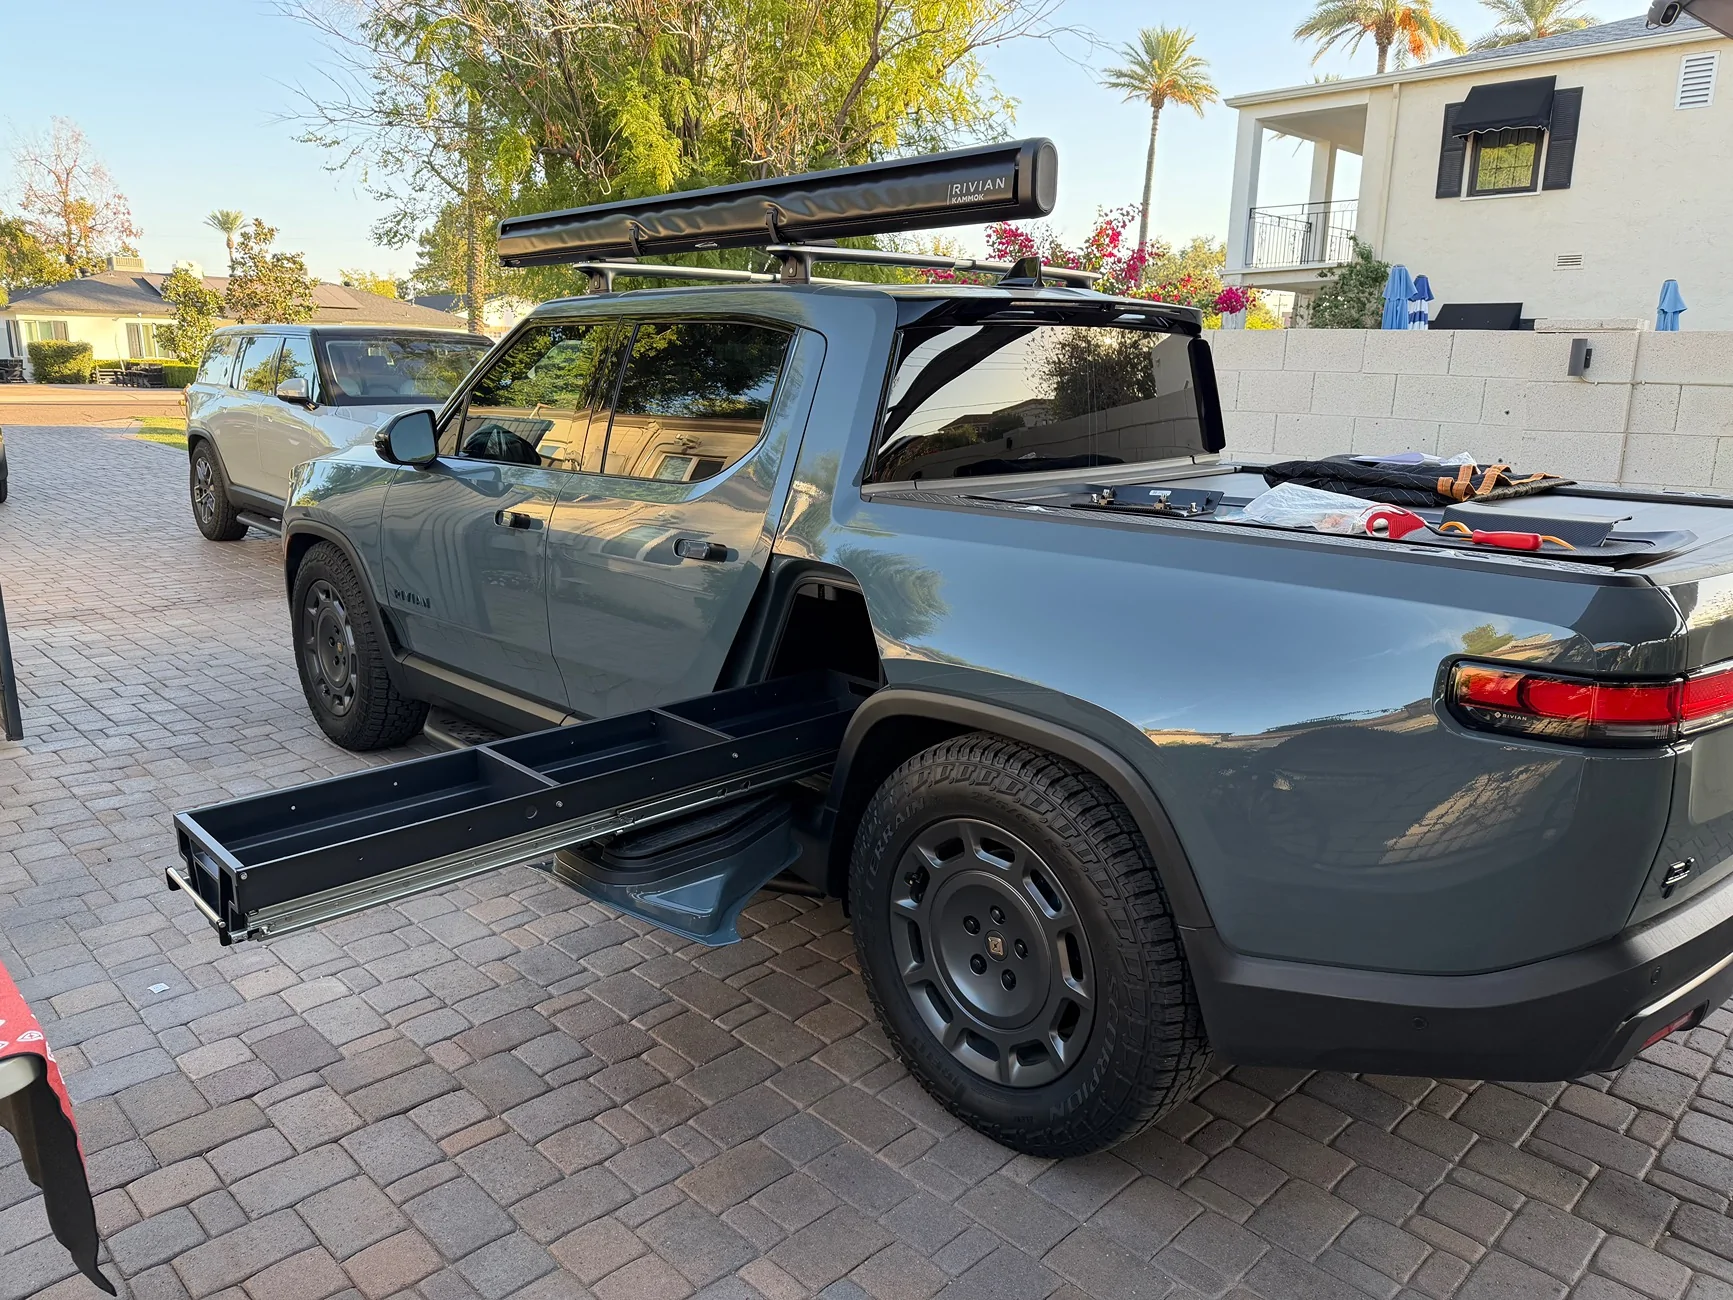
After many, many delays, I was FINALLY able to get the @BoxGods/Rivian Aftermarket Group Gear Tunnel Slide Out Utility Tray installed over the weekend.
I was a little worried with the slight Gear Tunnel volume reduction in Gen 2 that it might not fit, but this was installed in my Gen 2 Quad so it DOES fit! Whew.
It's a VERY impressive product. The designer, Gene, is very meticulous and thoughtful. The slide is robust (weighs about 110 lbs.!) and will make the gear tunnel so much more useful for me.
Pics are below, but I'm going to make a few installation notes for others who are about to install this. Installation was pretty easy and only took about an hour. Hardest part is loading the unit into the gear tunnel. Once it's in there, repositioning is easy and you only need to install a few bolts (which I actually screwed up but will discuss below).
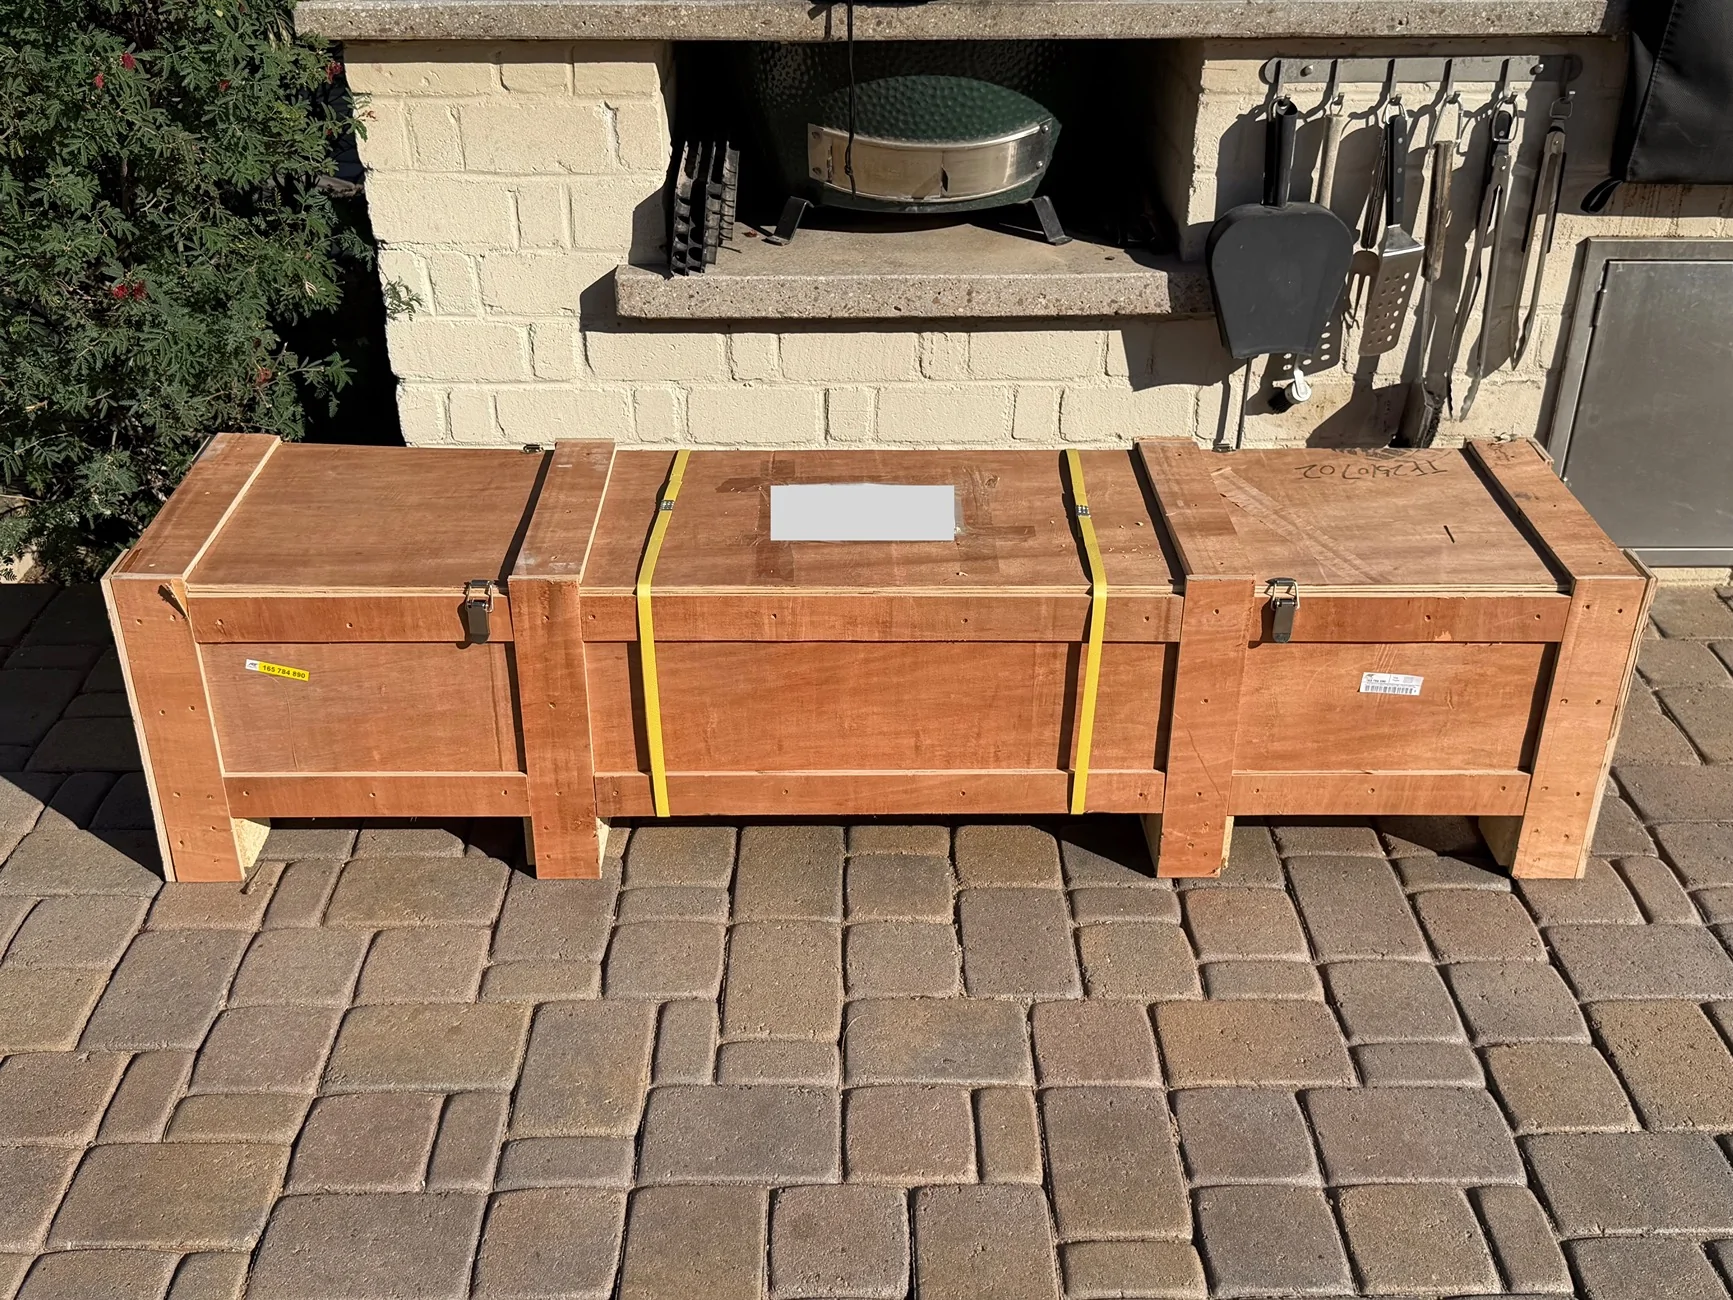
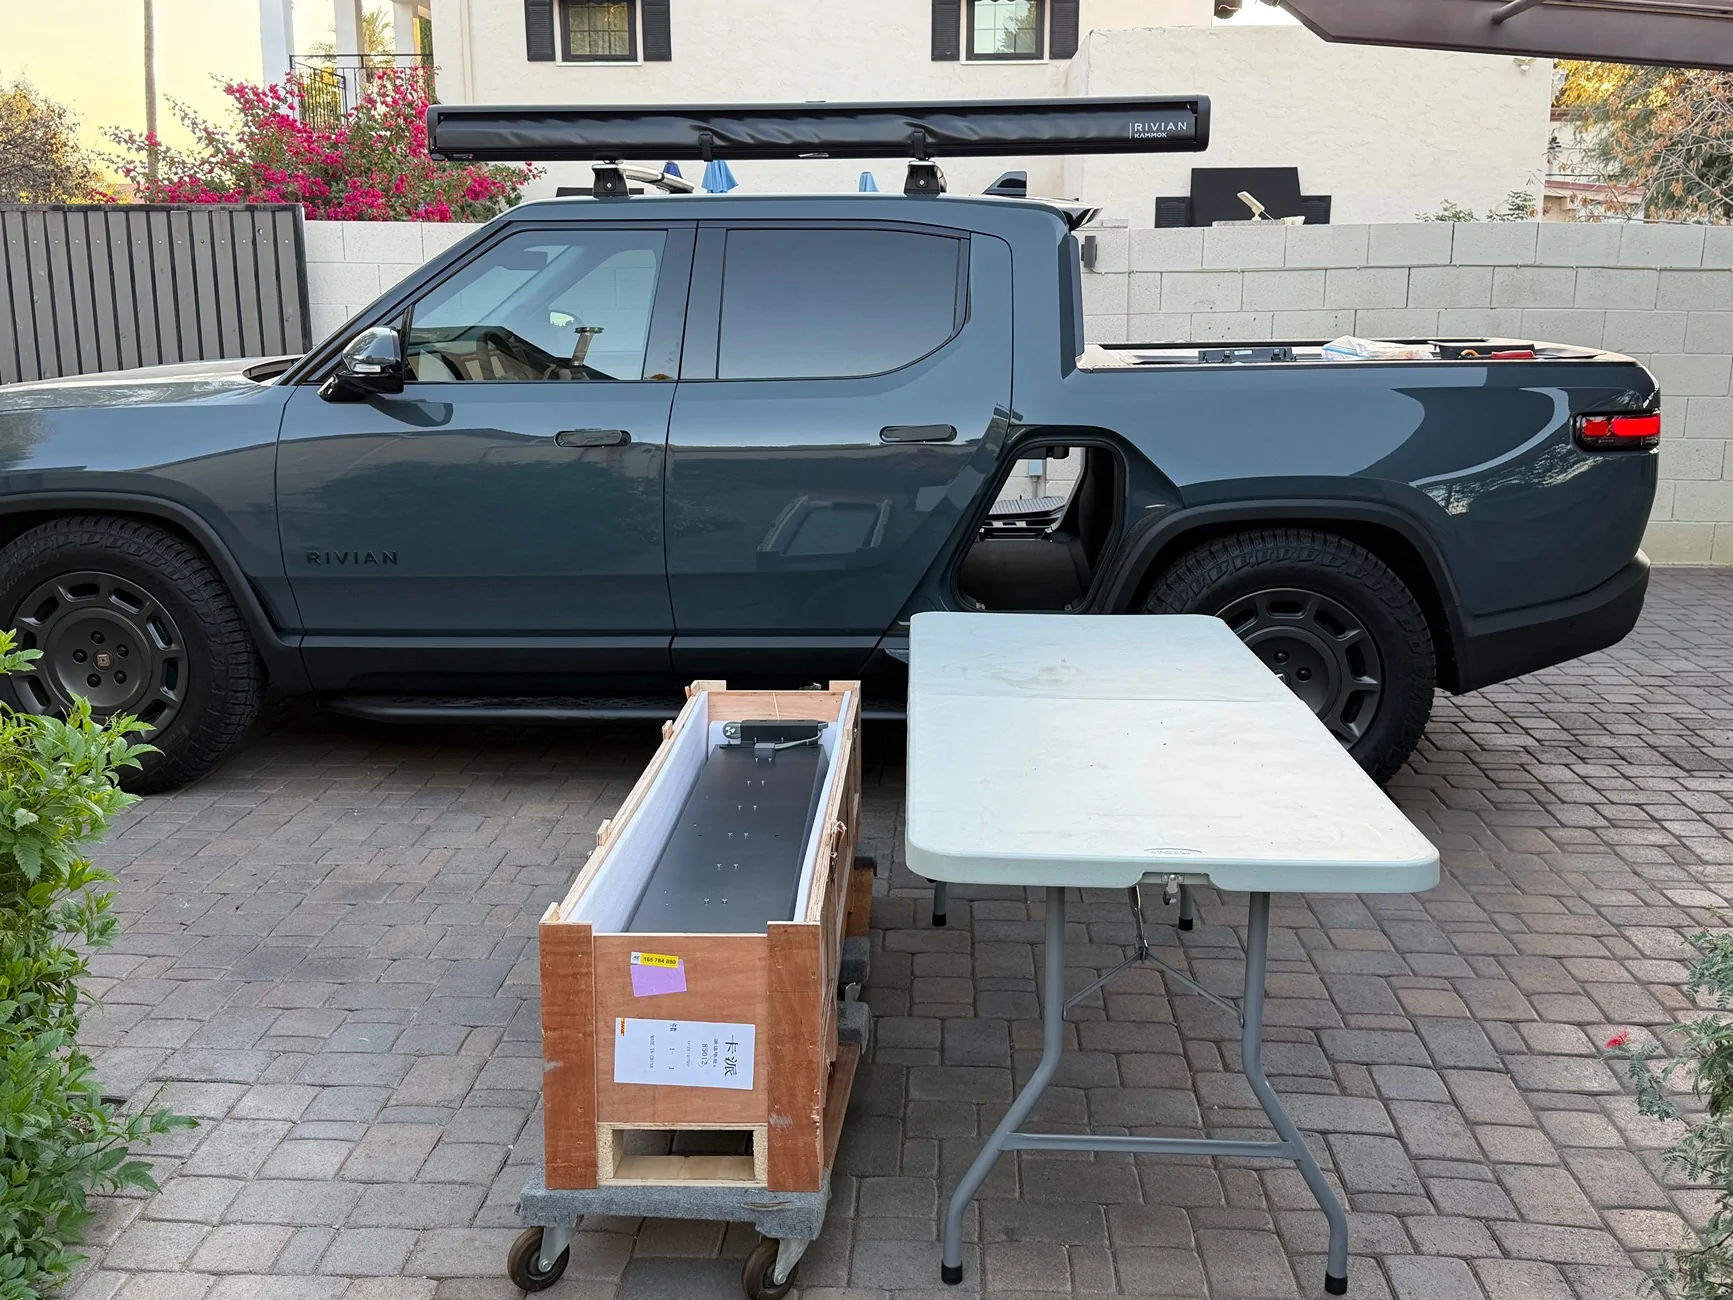
Unboxing
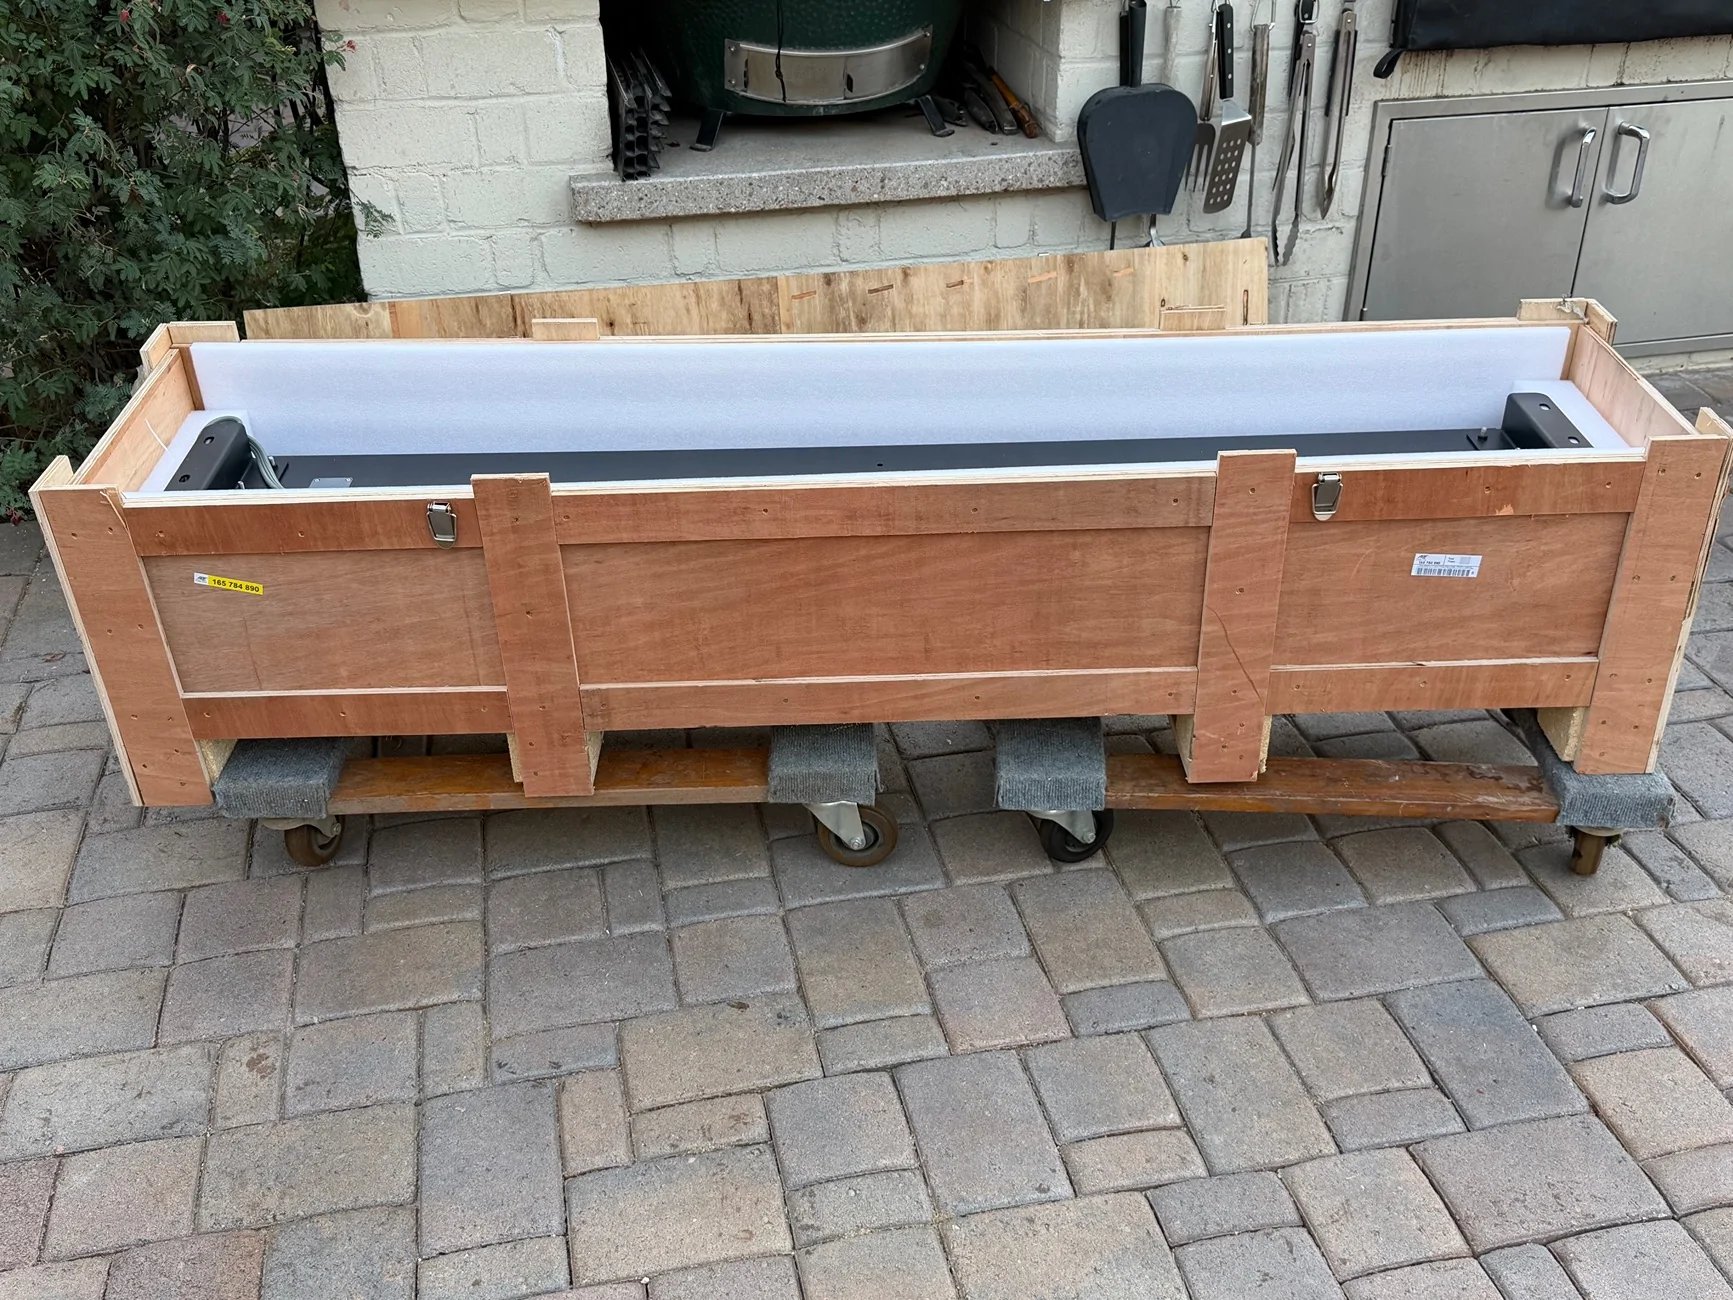
It arrived via freight in this coffin-like container and as expected very well packed.


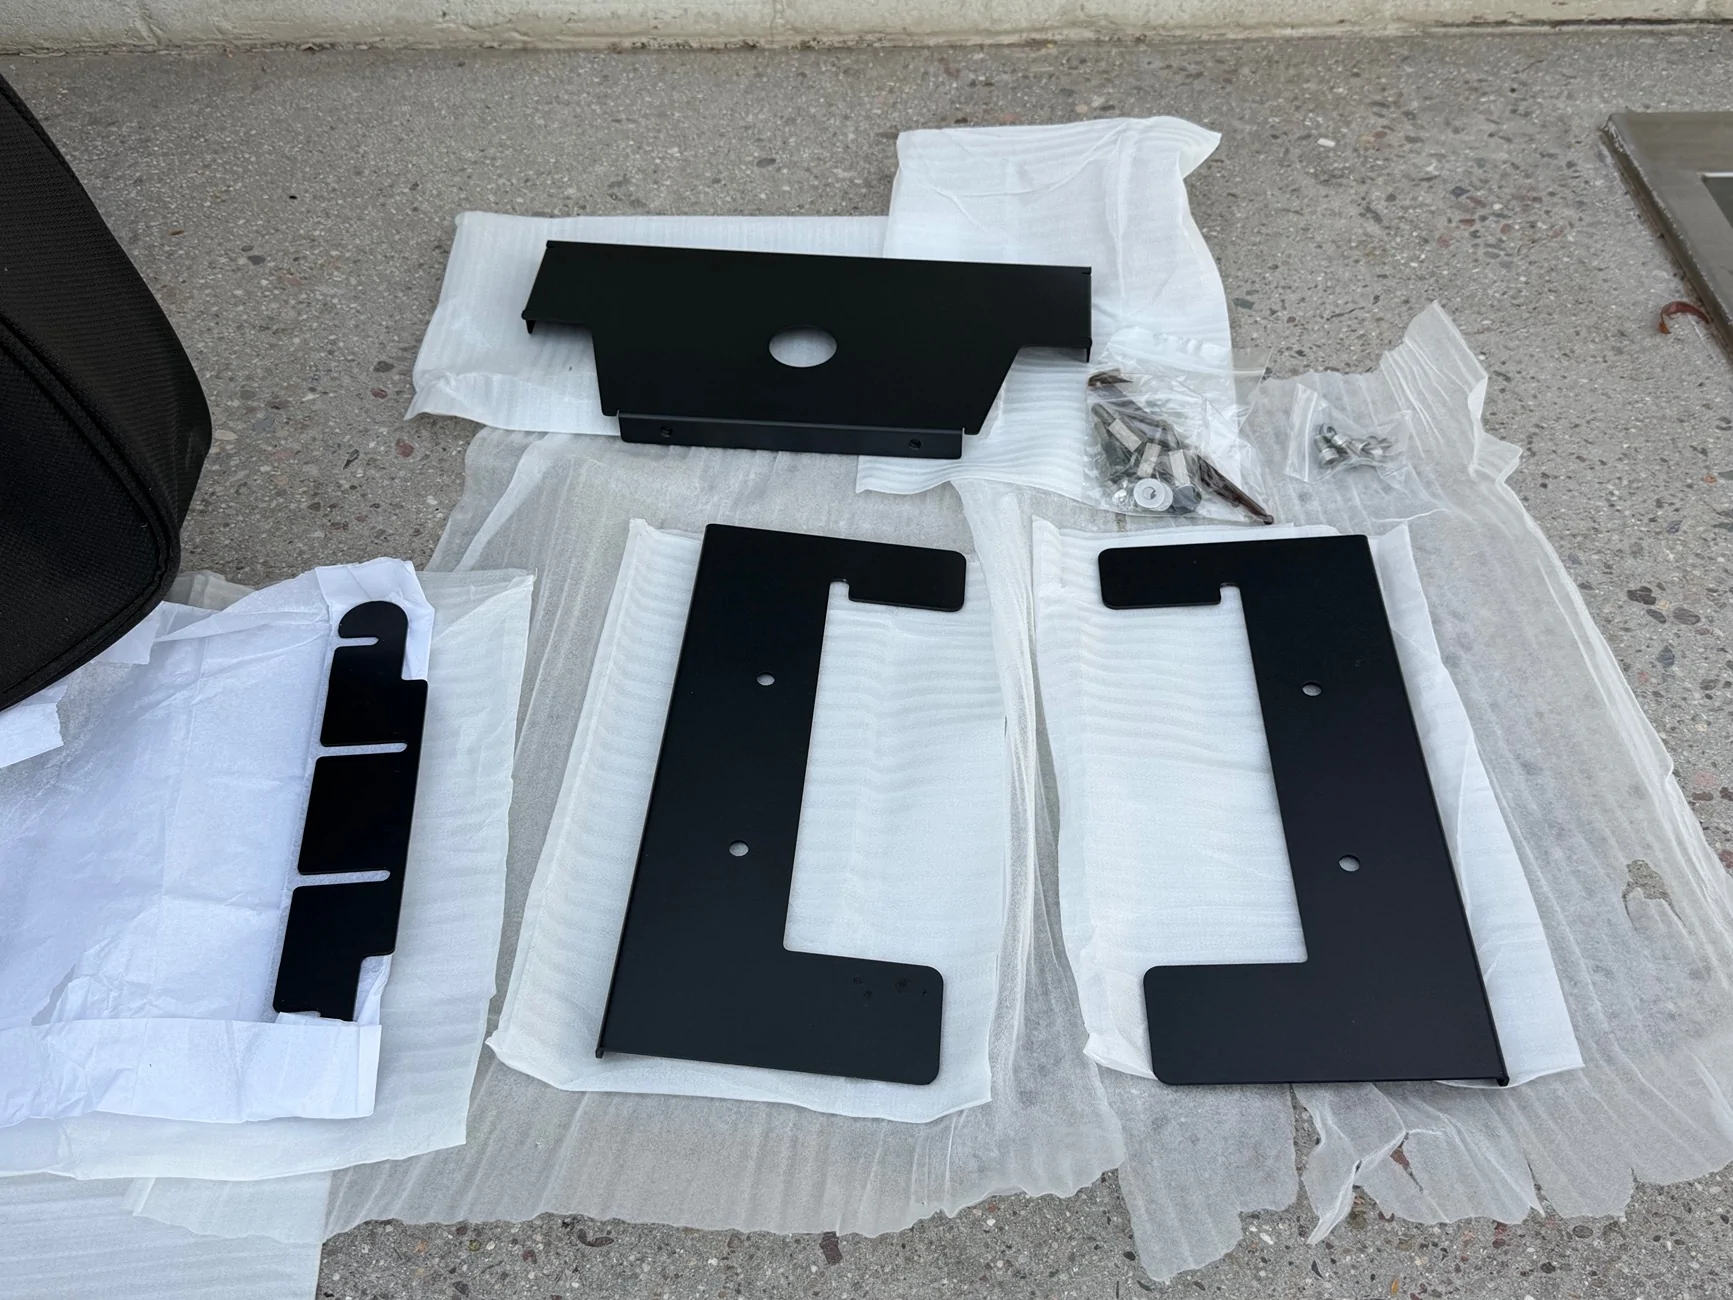
Comes with a hardware packet, shims to provide extra latch clearance if necessary (I didn't need them), and cover panels. At the top is an extra divider, which I ordered, but don't think I'll need.
Installation Notes
The provided installation instructions are pretty clear and straightforward, but my supplemental notes are as follows:
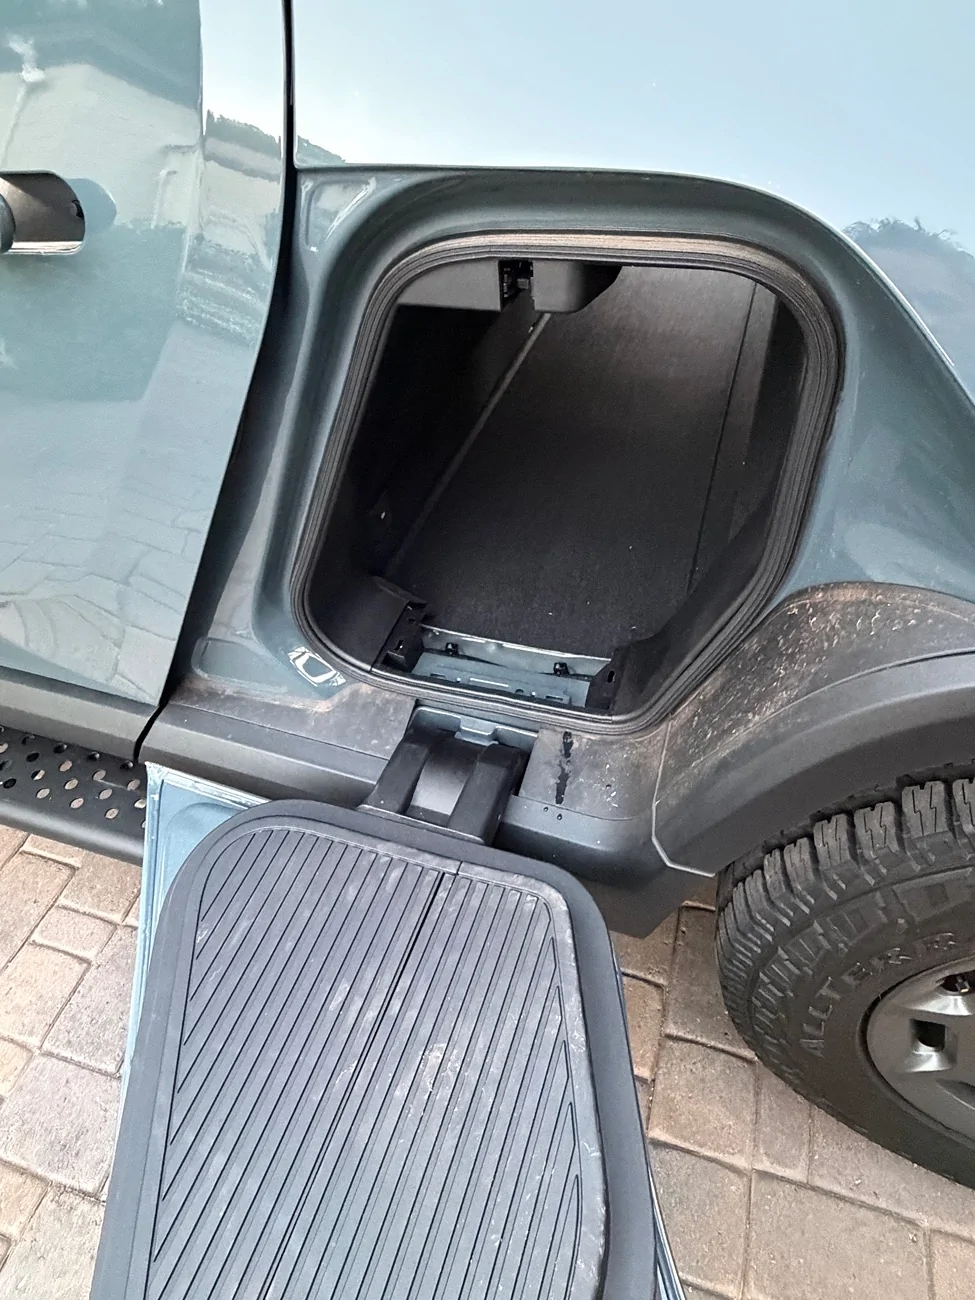
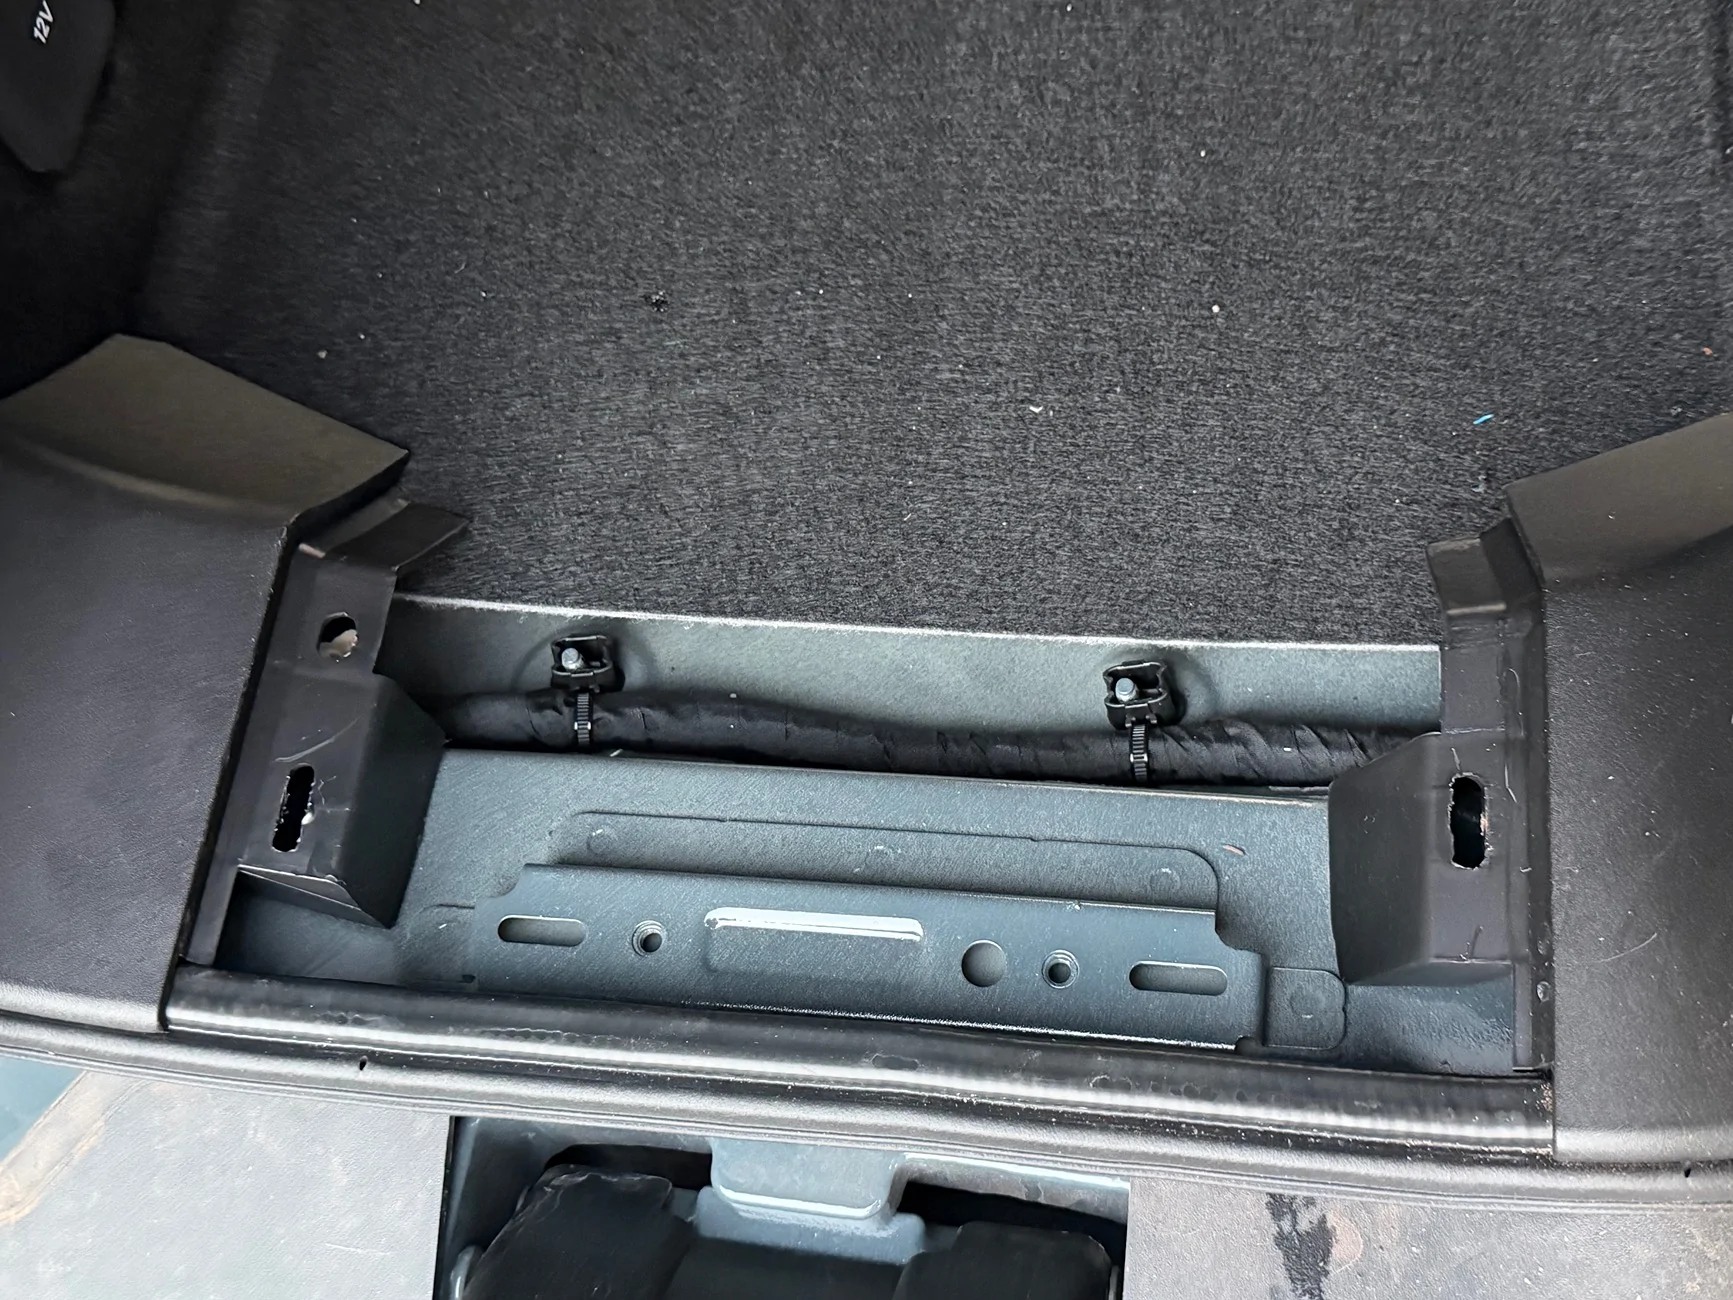
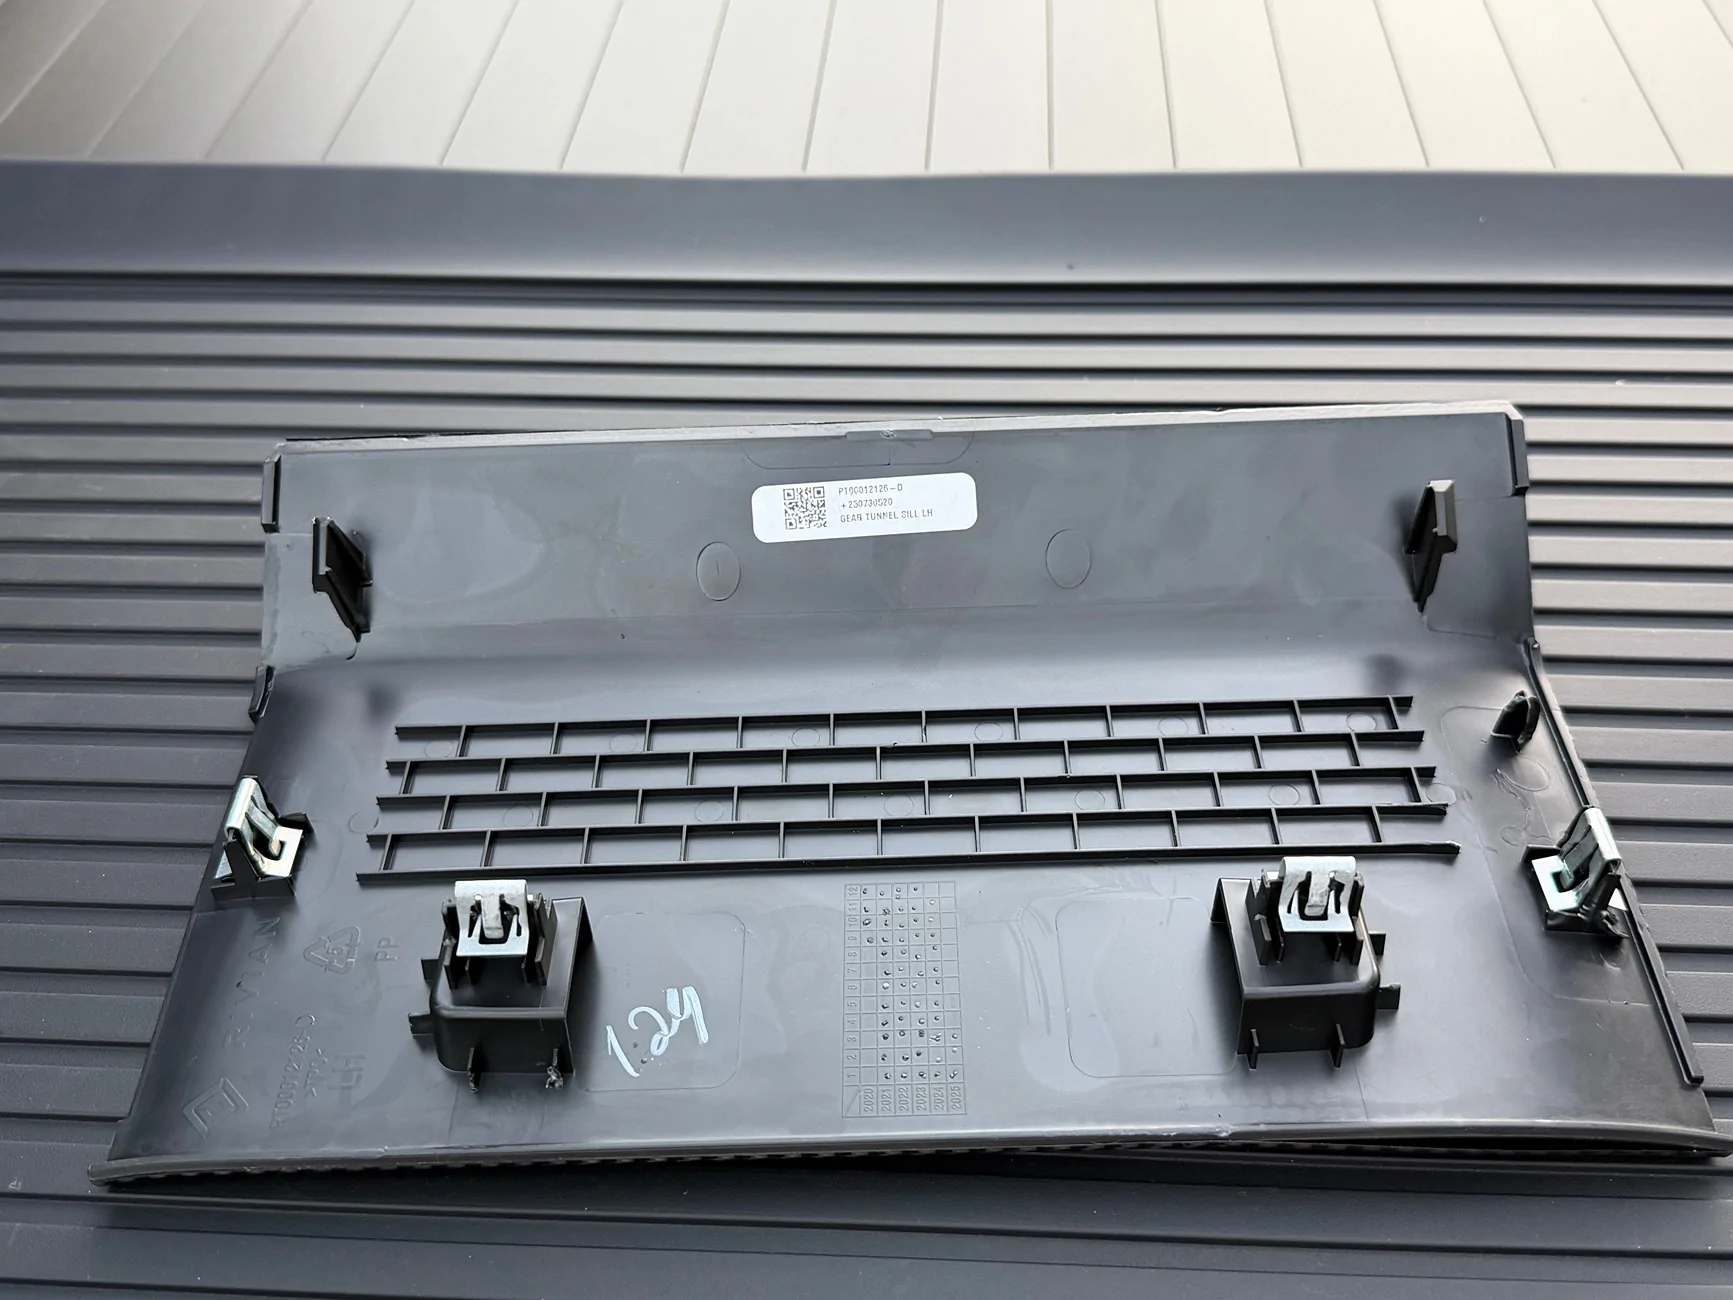
- I used pry tools like these to remove the bottom gear tunnel trim. The instructions say use a screwdriver but pry tools are much more effective. There are 4 metal clips as pictured below.
I put the crate/coffin on furniture dolly's and rolled it into position next to a folding table. Be sure you have the tray in the correct position (i.e., front facing front, rear facing rear, etc). The instructions are pretty clear on how to identify what side is what, but another way way to tell is the plug/extension cord goes on passenger side.
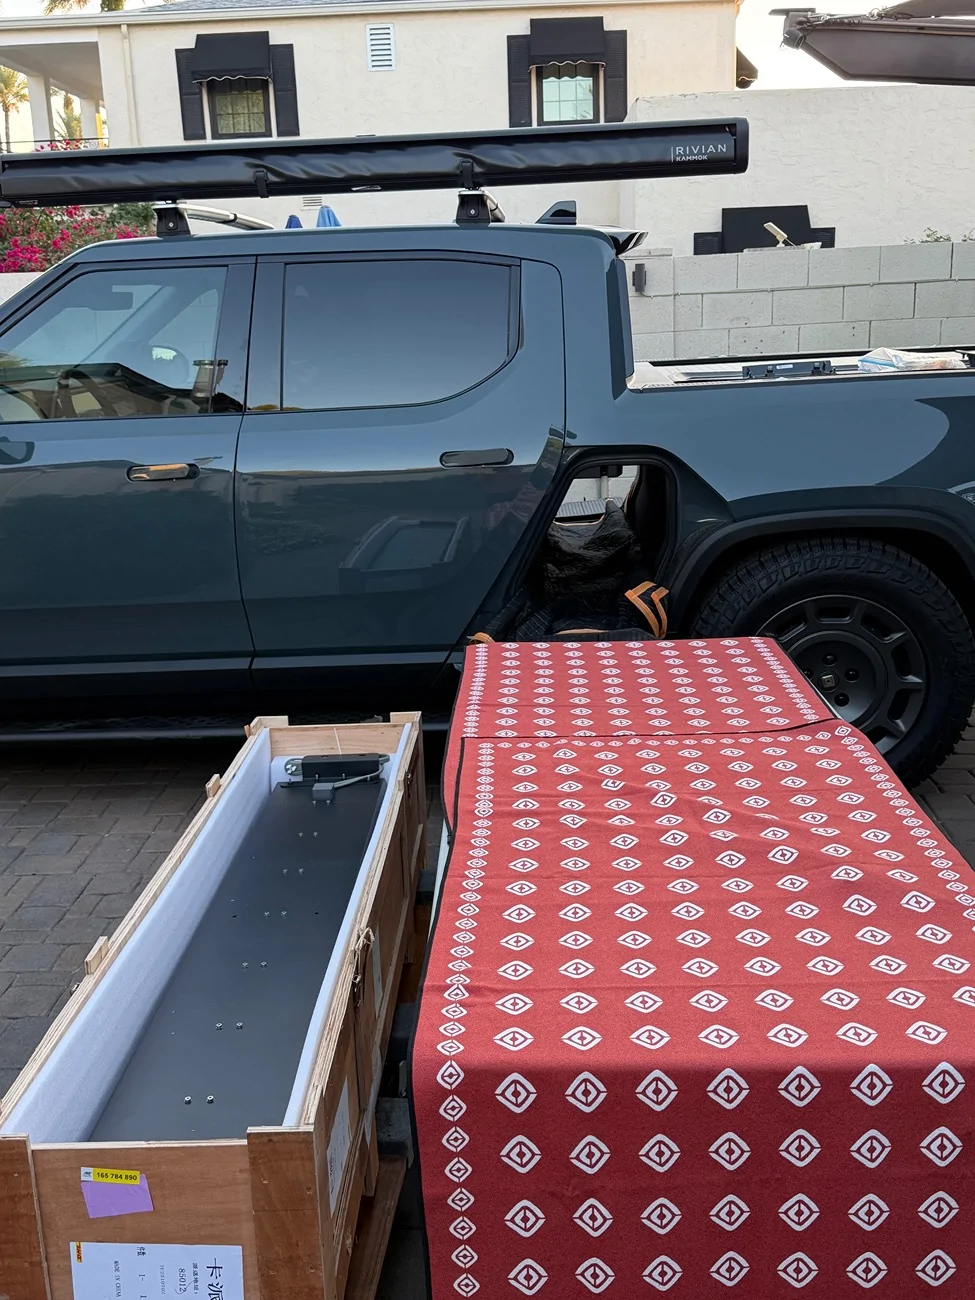
I put some old school Rivian towels on top of the folding table, took the tray out of the crate and put it on top of the table in the proper orientation for loading into the driver's side gear tunnel door.
As outlined in the instructions, I laid a moving blanket along the length of the gear tunnel:
I must admit, I was at this point, planning on being an idiot and trying to load this beast into the gear tunnel myself. I was actually able to lift it out the crate and onto the table by myself. Being overconfident at this point, I was going to try to load part of the tray into the gear tunnel and then slide the tray on the moving blanket and towels to the edge of the table and then lifting/pushing myself the rest of the way.
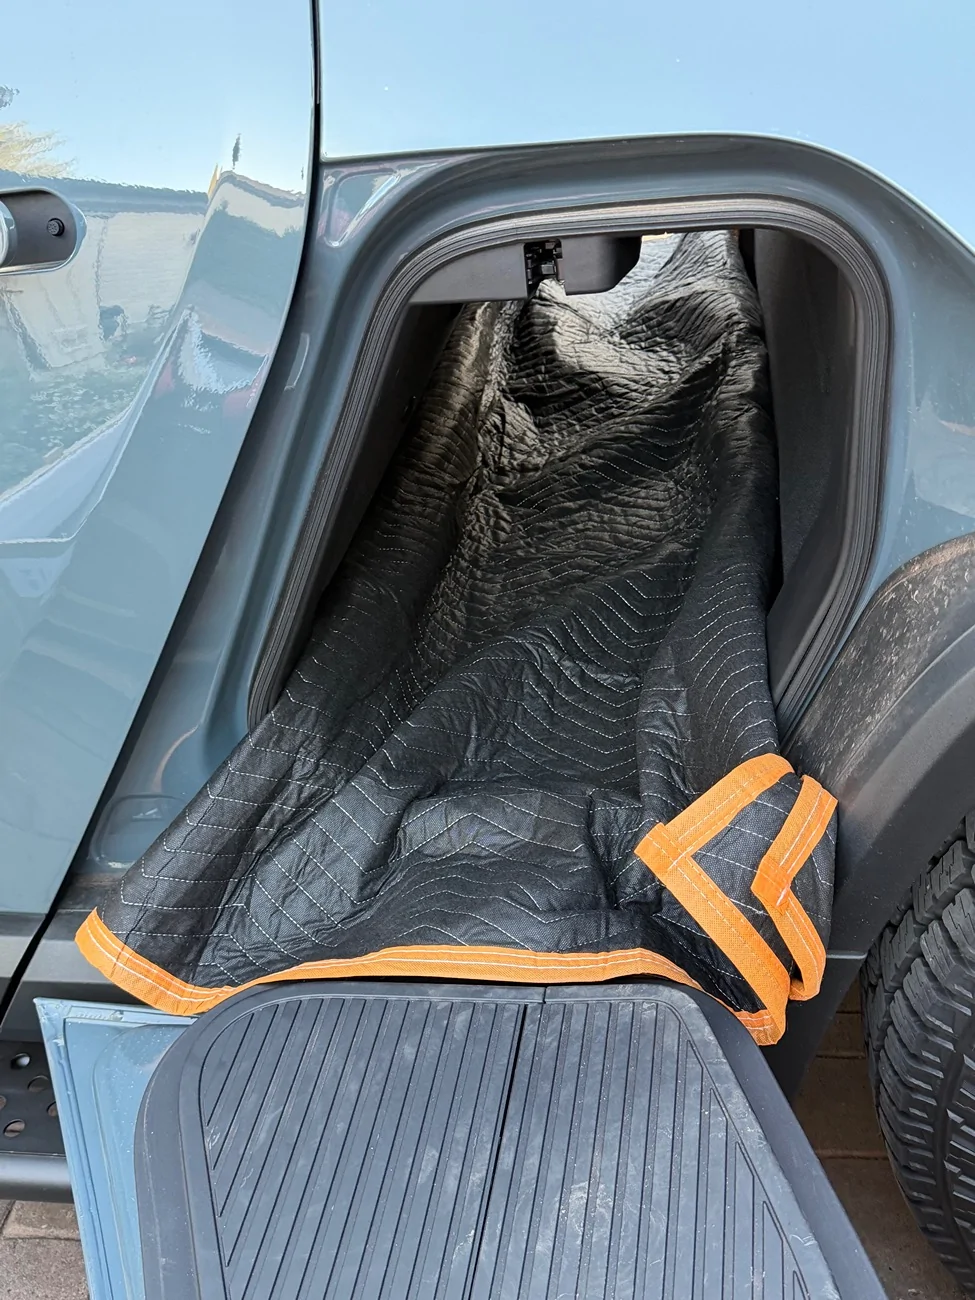
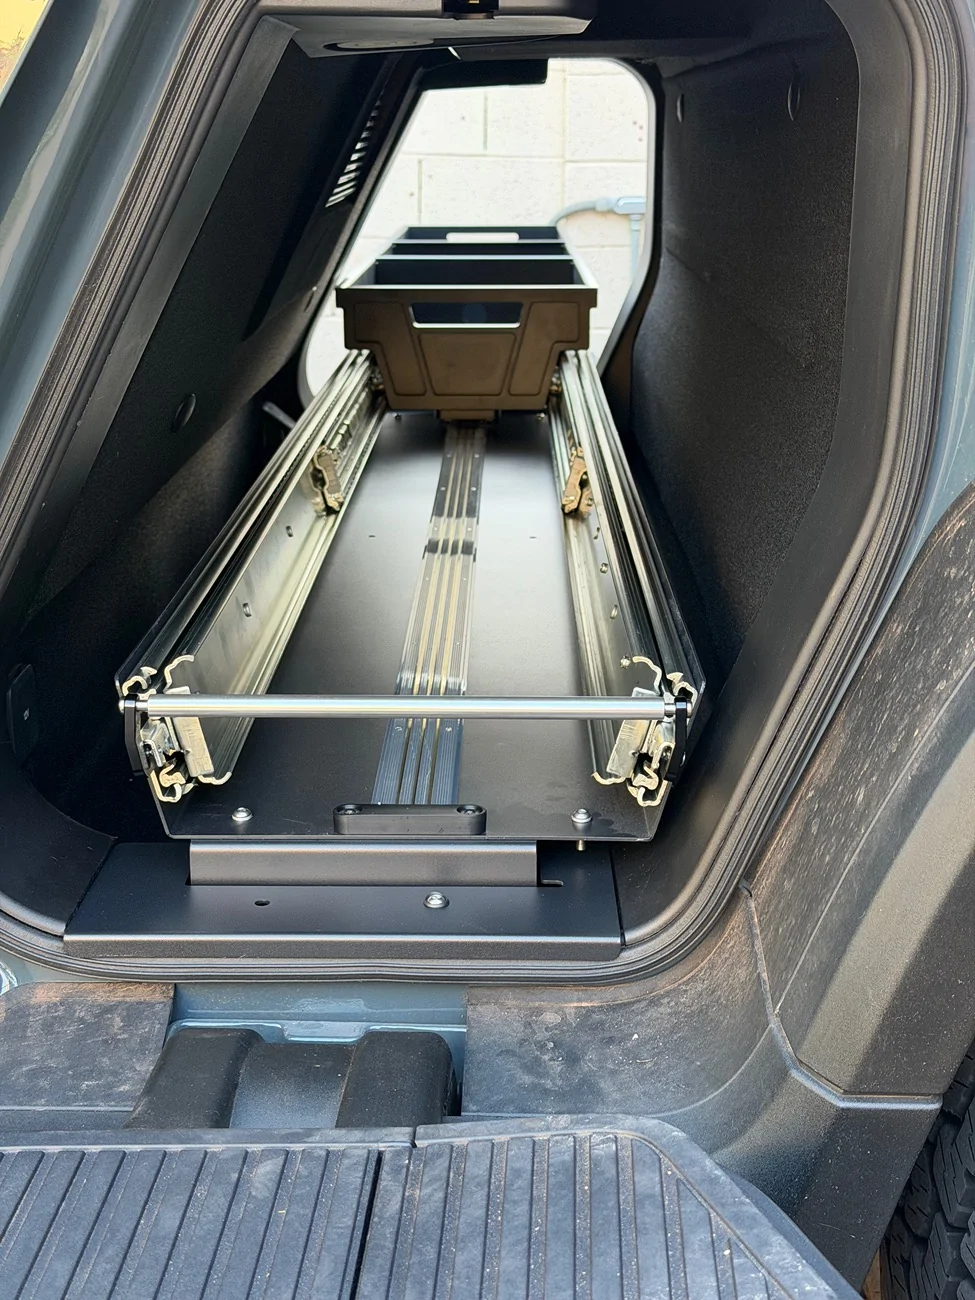
Thankfully, my neighbor walked by and asked if I needed help and I put him to work. He used a moving strap (recommended in the instructions) and the built in handle to lift the driver's side end, while I used the built in handle to load the passenger side over the lip and into the tunnel onto the moving blanket. My neighbor rested his end of the tray on the table while I went to the other side. We synchronized me pulling the blanket and him lifting and loading the driver's side end into the tunnel. He was able to maneuver around the table and open gear tunnel door and load the thing. He then came to the passenger side to pull the blanket out while I lifted the tray. The lifting and loading honestly took just a few seconds once things were in motion.
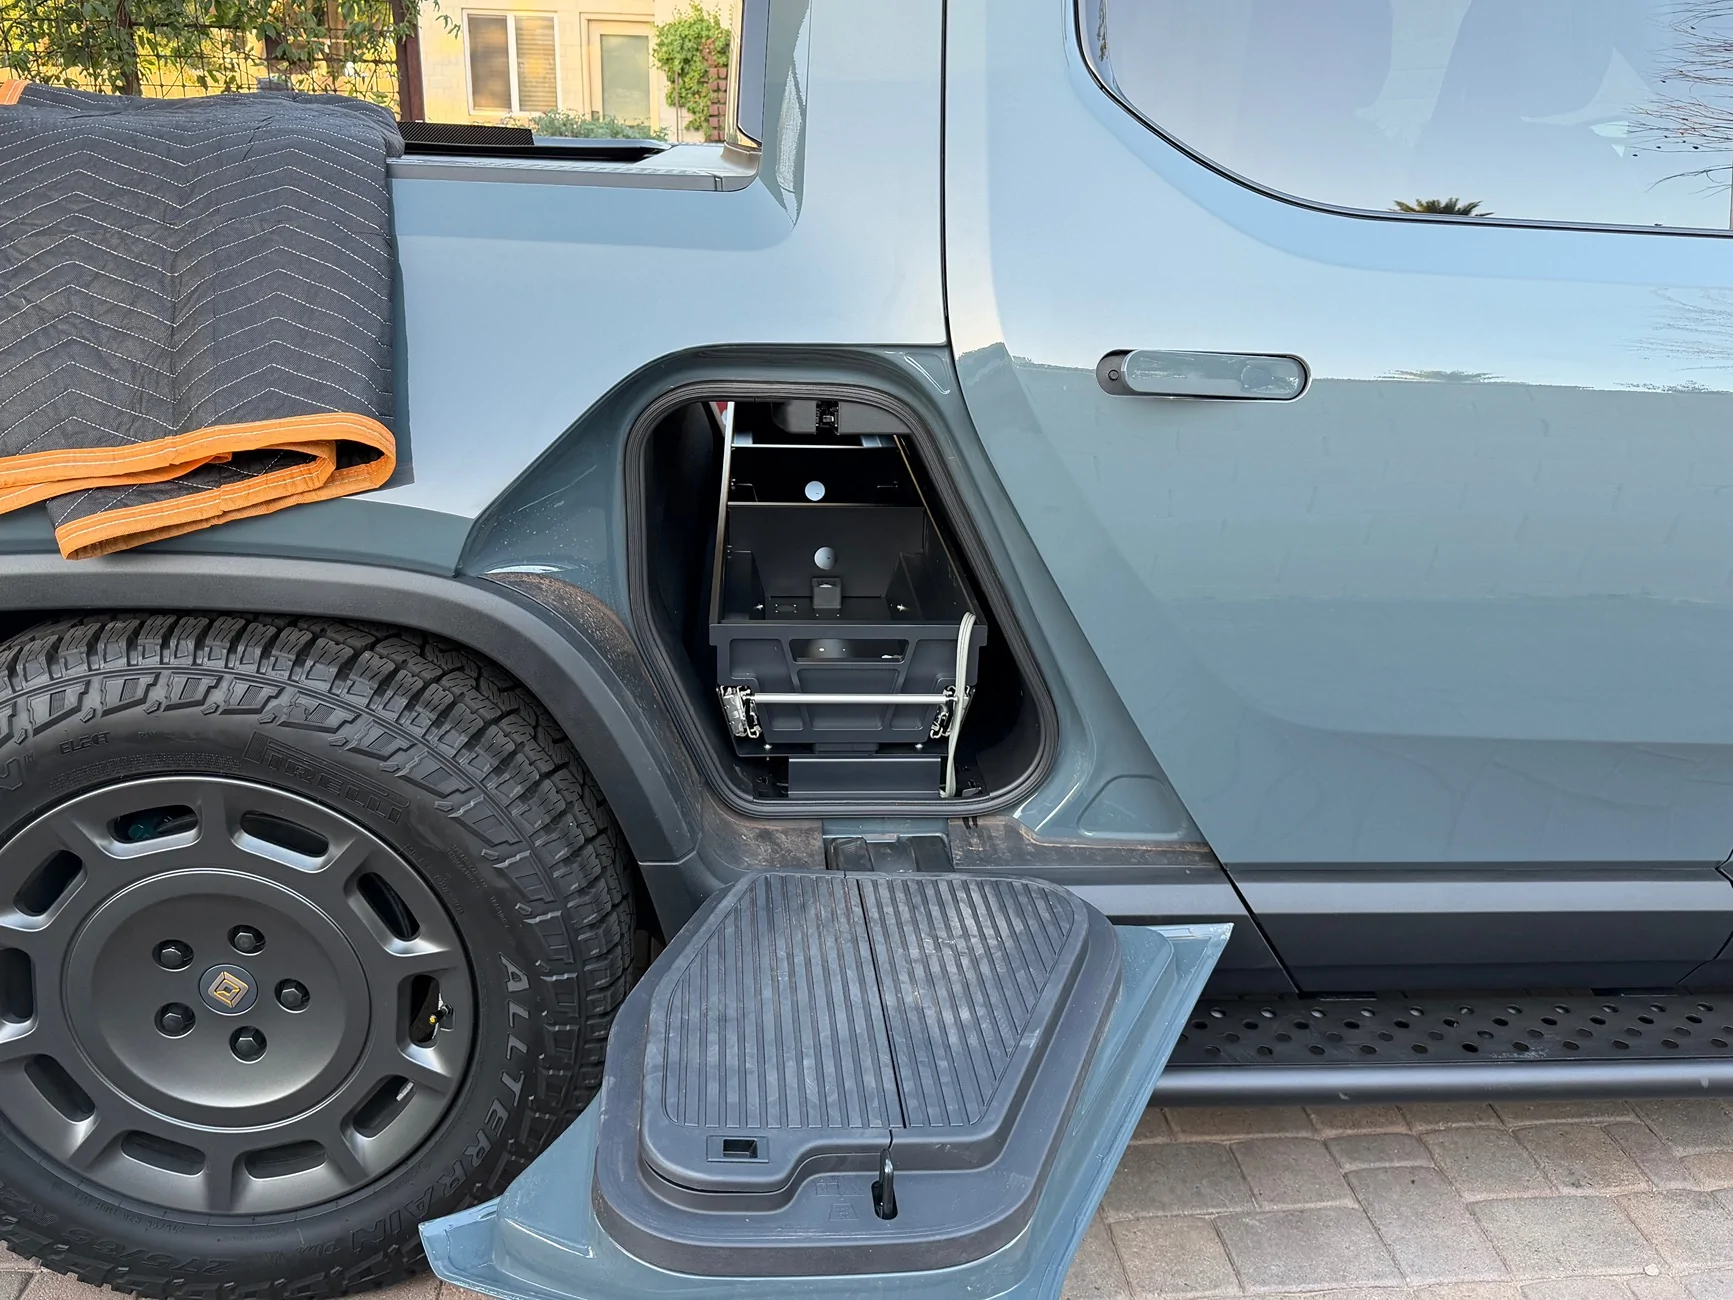
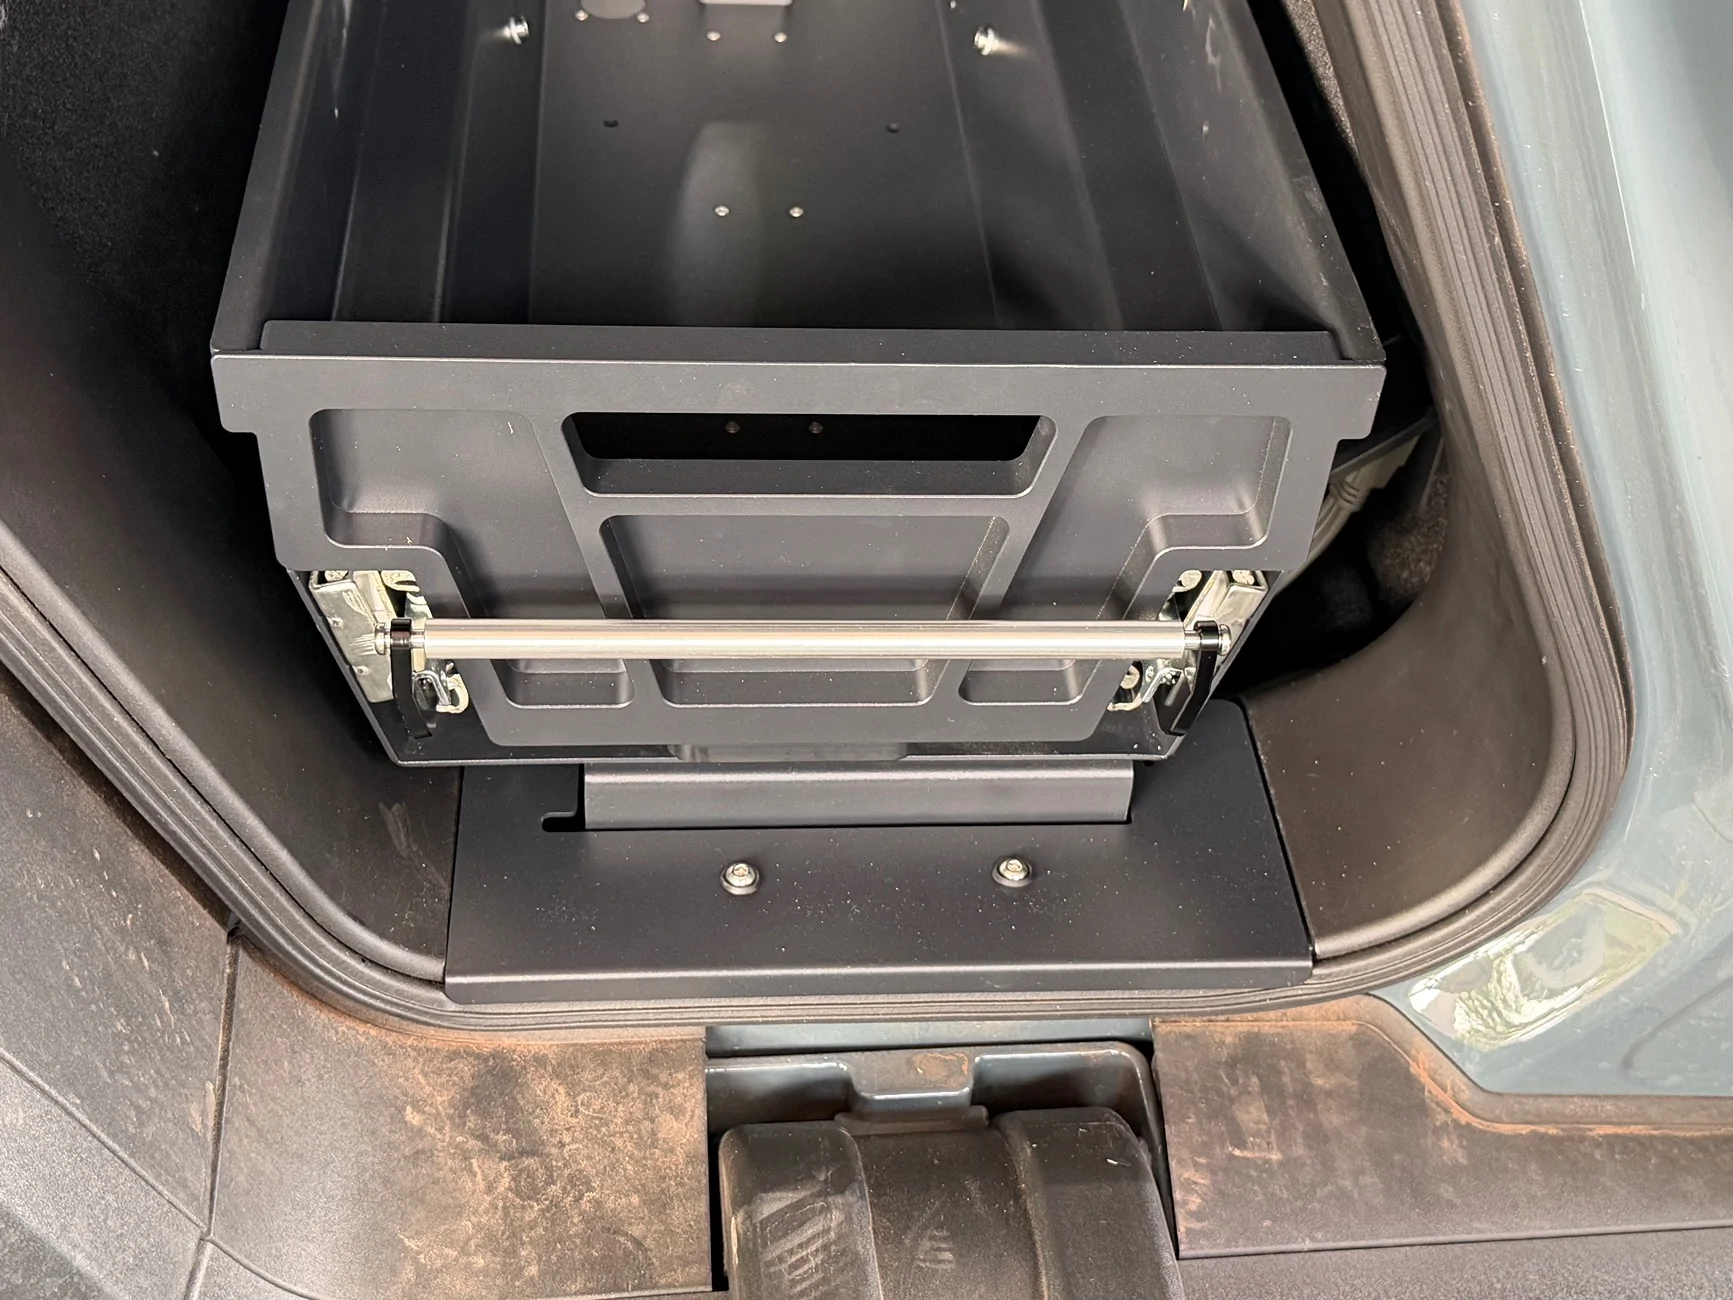
Some pics just after loading. You can see in the second picture the power cord is obviously not yet plugged in. I did tape it down to the bottom of the slide while loading.
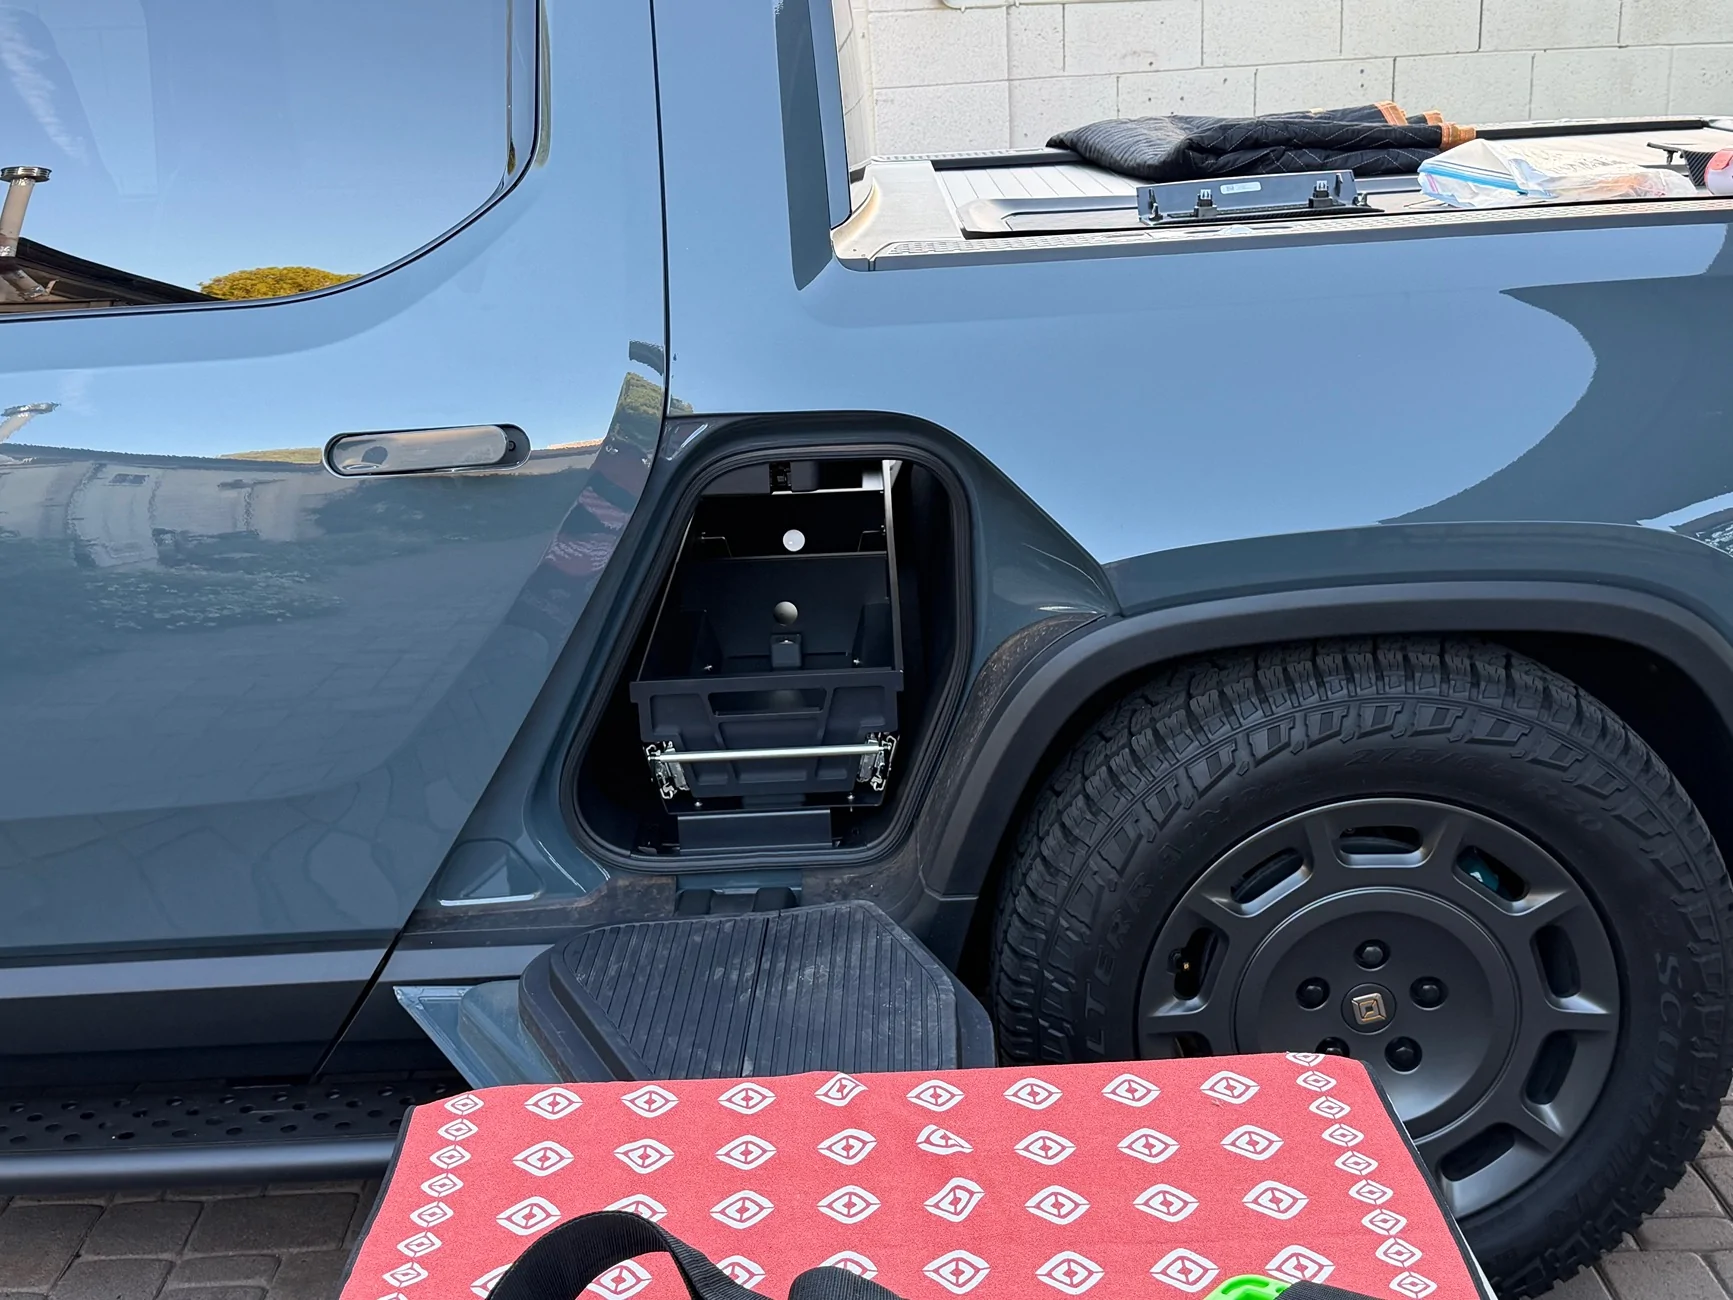
From here, it's just installing 4 bolts. The instructions say use a 10 mm socket, but I ended up using a 12 mm socket. Word of caution: I stupidly overtightened and broke one of the bolts, so be careful.
The broken bolt came out with vise grips. I bought an M6 x 20 bolt from the local hardware store to secure in the meantime and found a replacement part, which I'll install after delivery.
Temporary replacement bolt on the left
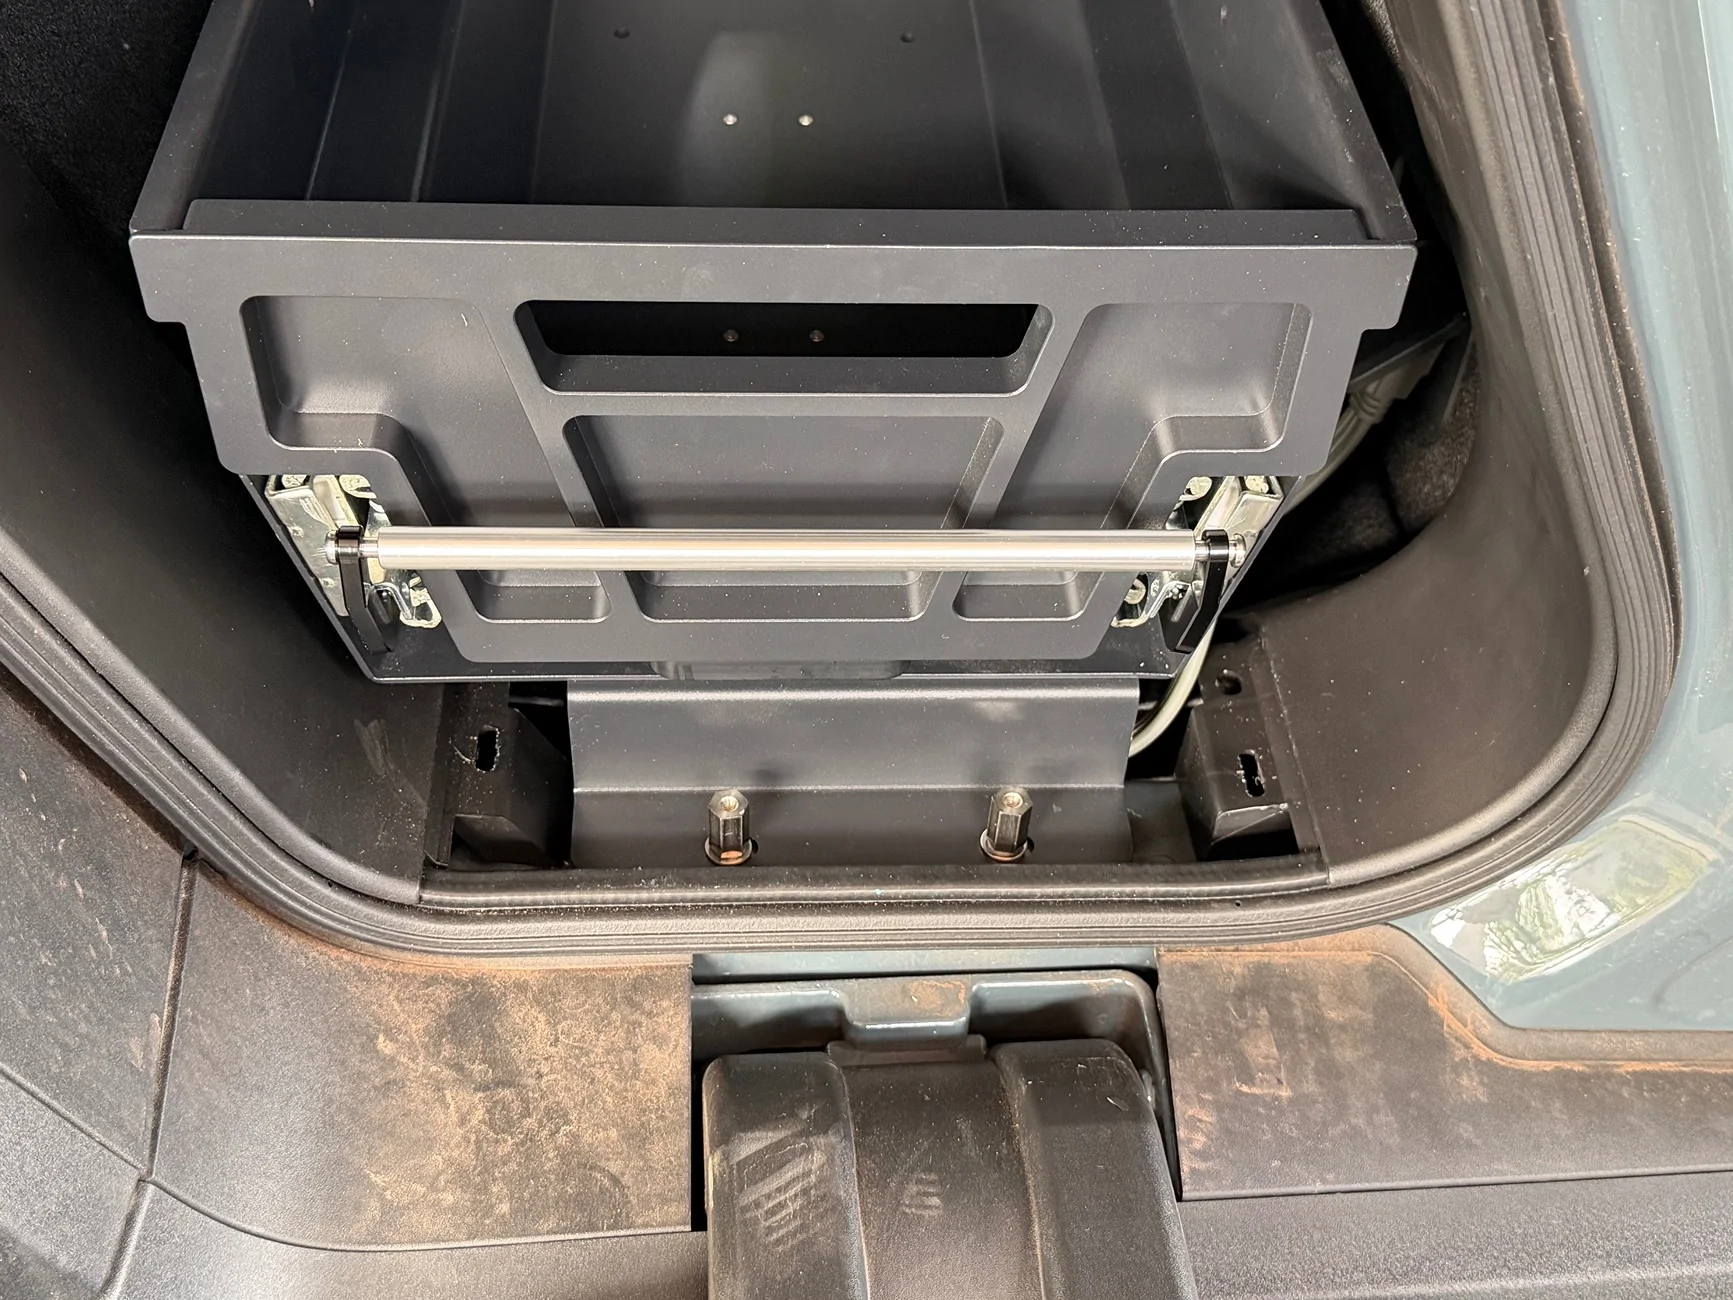
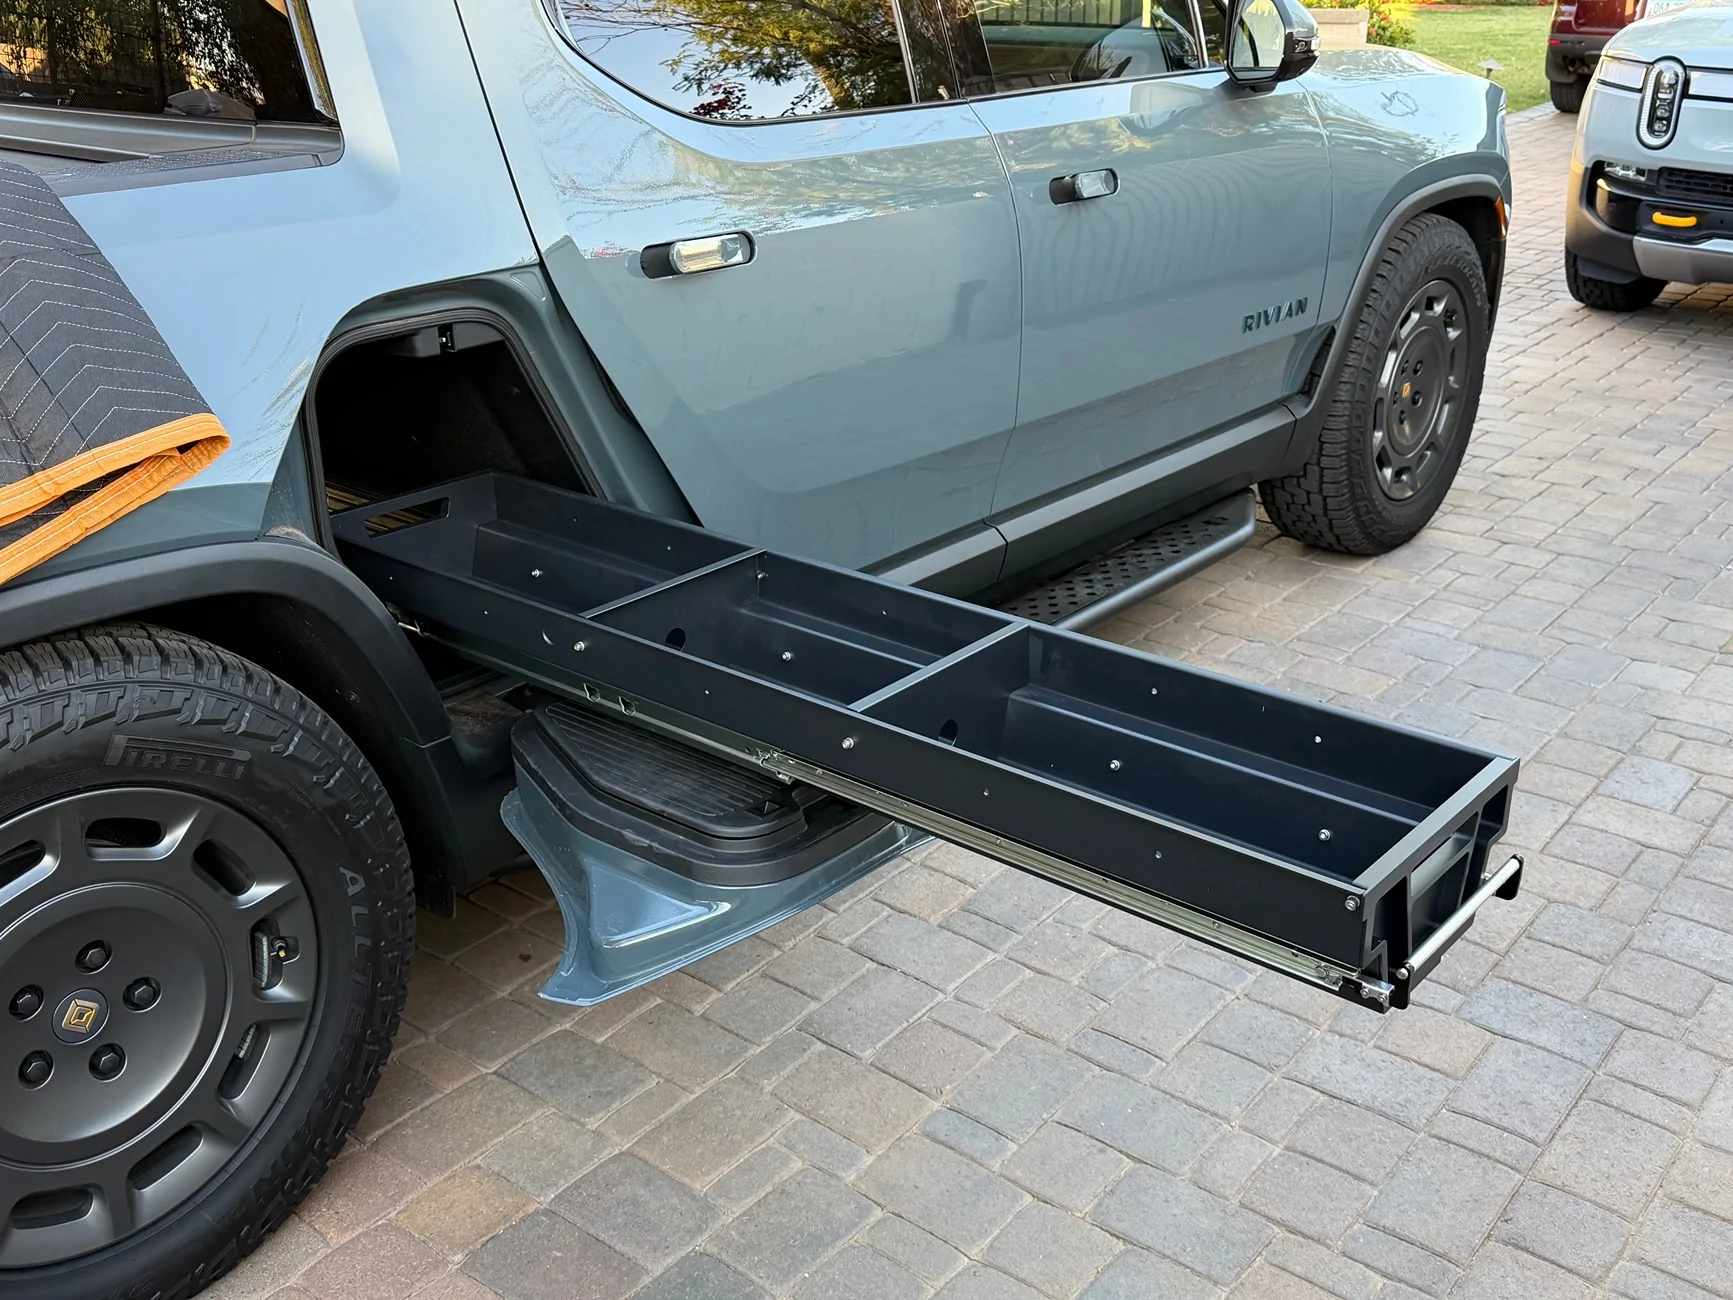
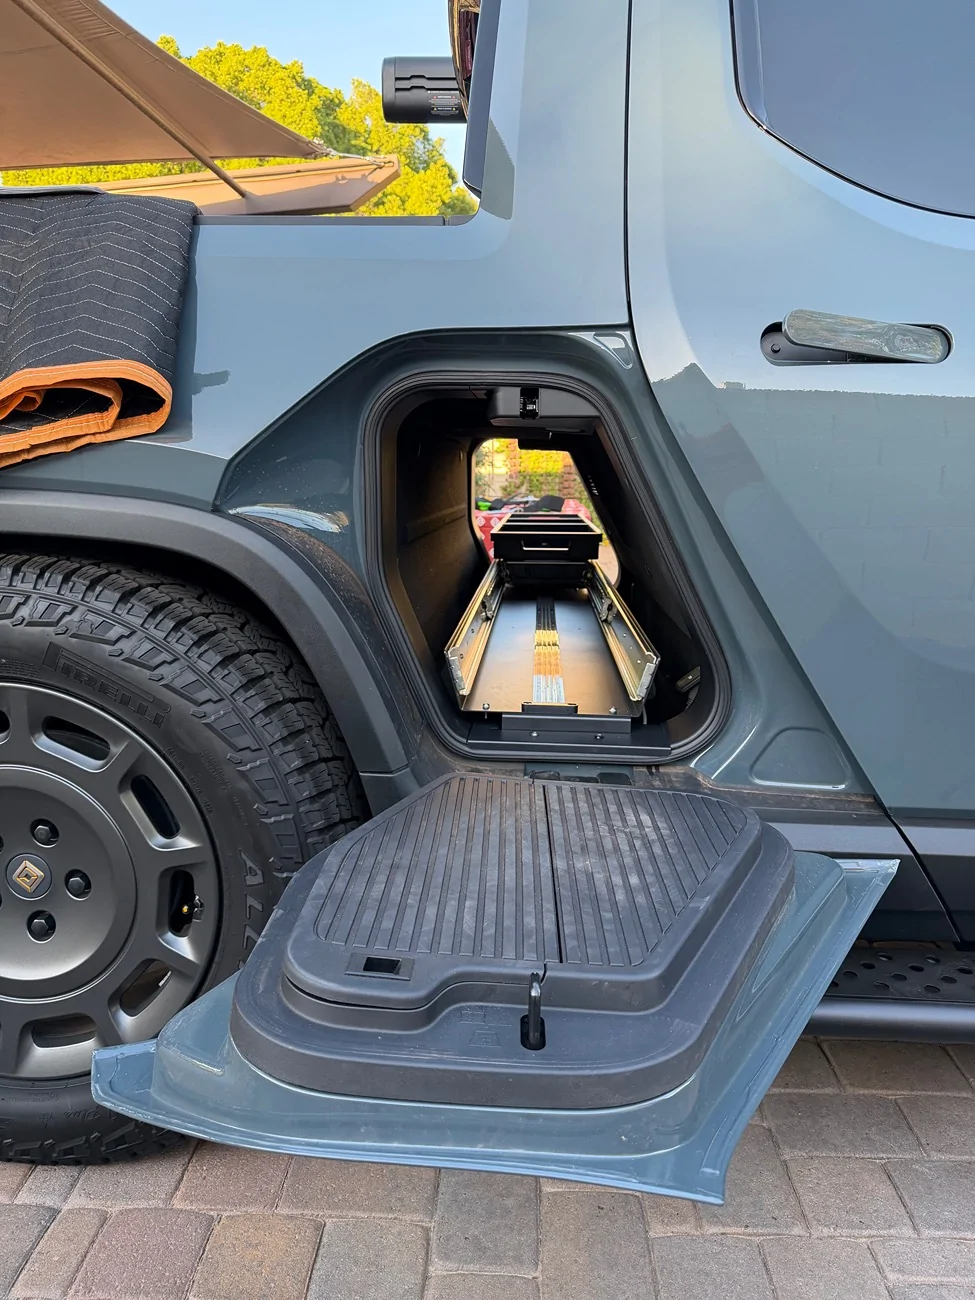
Installed without the option cover plates:
With cover plates:
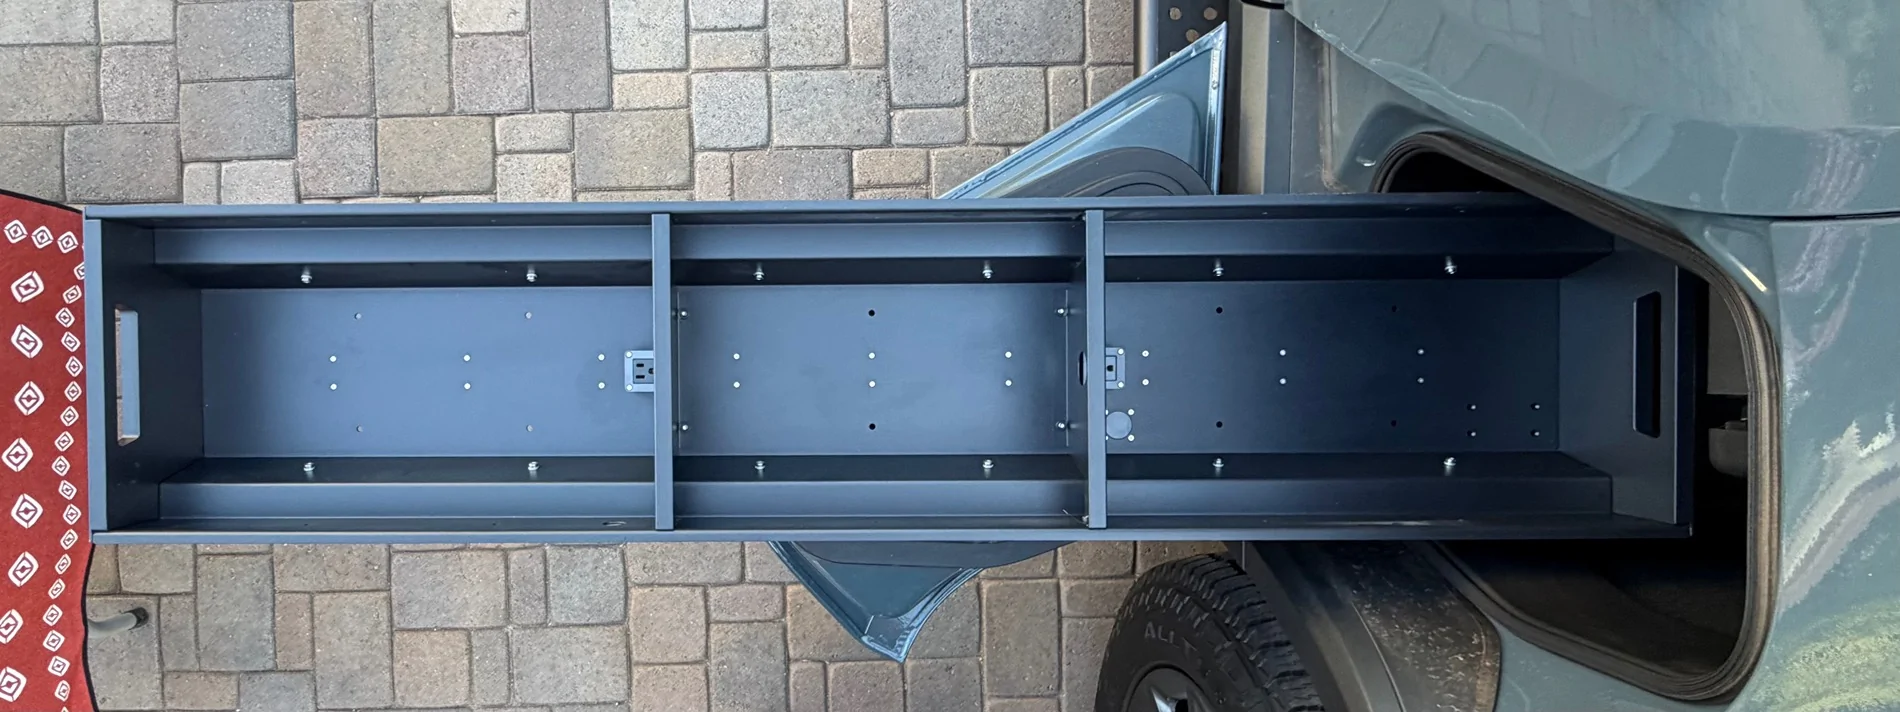
Opens from both sides. Two outlets included. Two dividers included. Dividers can be removed and/or repositioned.

Great product and good luck to those about to install! I remember preordering way back in 2021 a $1500 option for a Rivian gear tunnel slide. I understand killing the camp kitchen option but I don't know why Rivian killed the OEM gear tunnel slide option. Regardless, I'm ecstatic to have the @BoxGods one.
An integrated camp kitchen will be available with this slide. I haven't ordered it as I don't have much of a need for one but it looks rather incredible.
I was a little worried with the slight Gear Tunnel volume reduction in Gen 2 that it might not fit, but this was installed in my Gen 2 Quad so it DOES fit! Whew.
It's a VERY impressive product. The designer, Gene, is very meticulous and thoughtful. The slide is robust (weighs about 110 lbs.!) and will make the gear tunnel so much more useful for me.
Pics are below, but I'm going to make a few installation notes for others who are about to install this. Installation was pretty easy and only took about an hour. Hardest part is loading the unit into the gear tunnel. Once it's in there, repositioning is easy and you only need to install a few bolts (which I actually screwed up but will discuss below).
Unboxing
It arrived via freight in this coffin-like container and as expected very well packed.
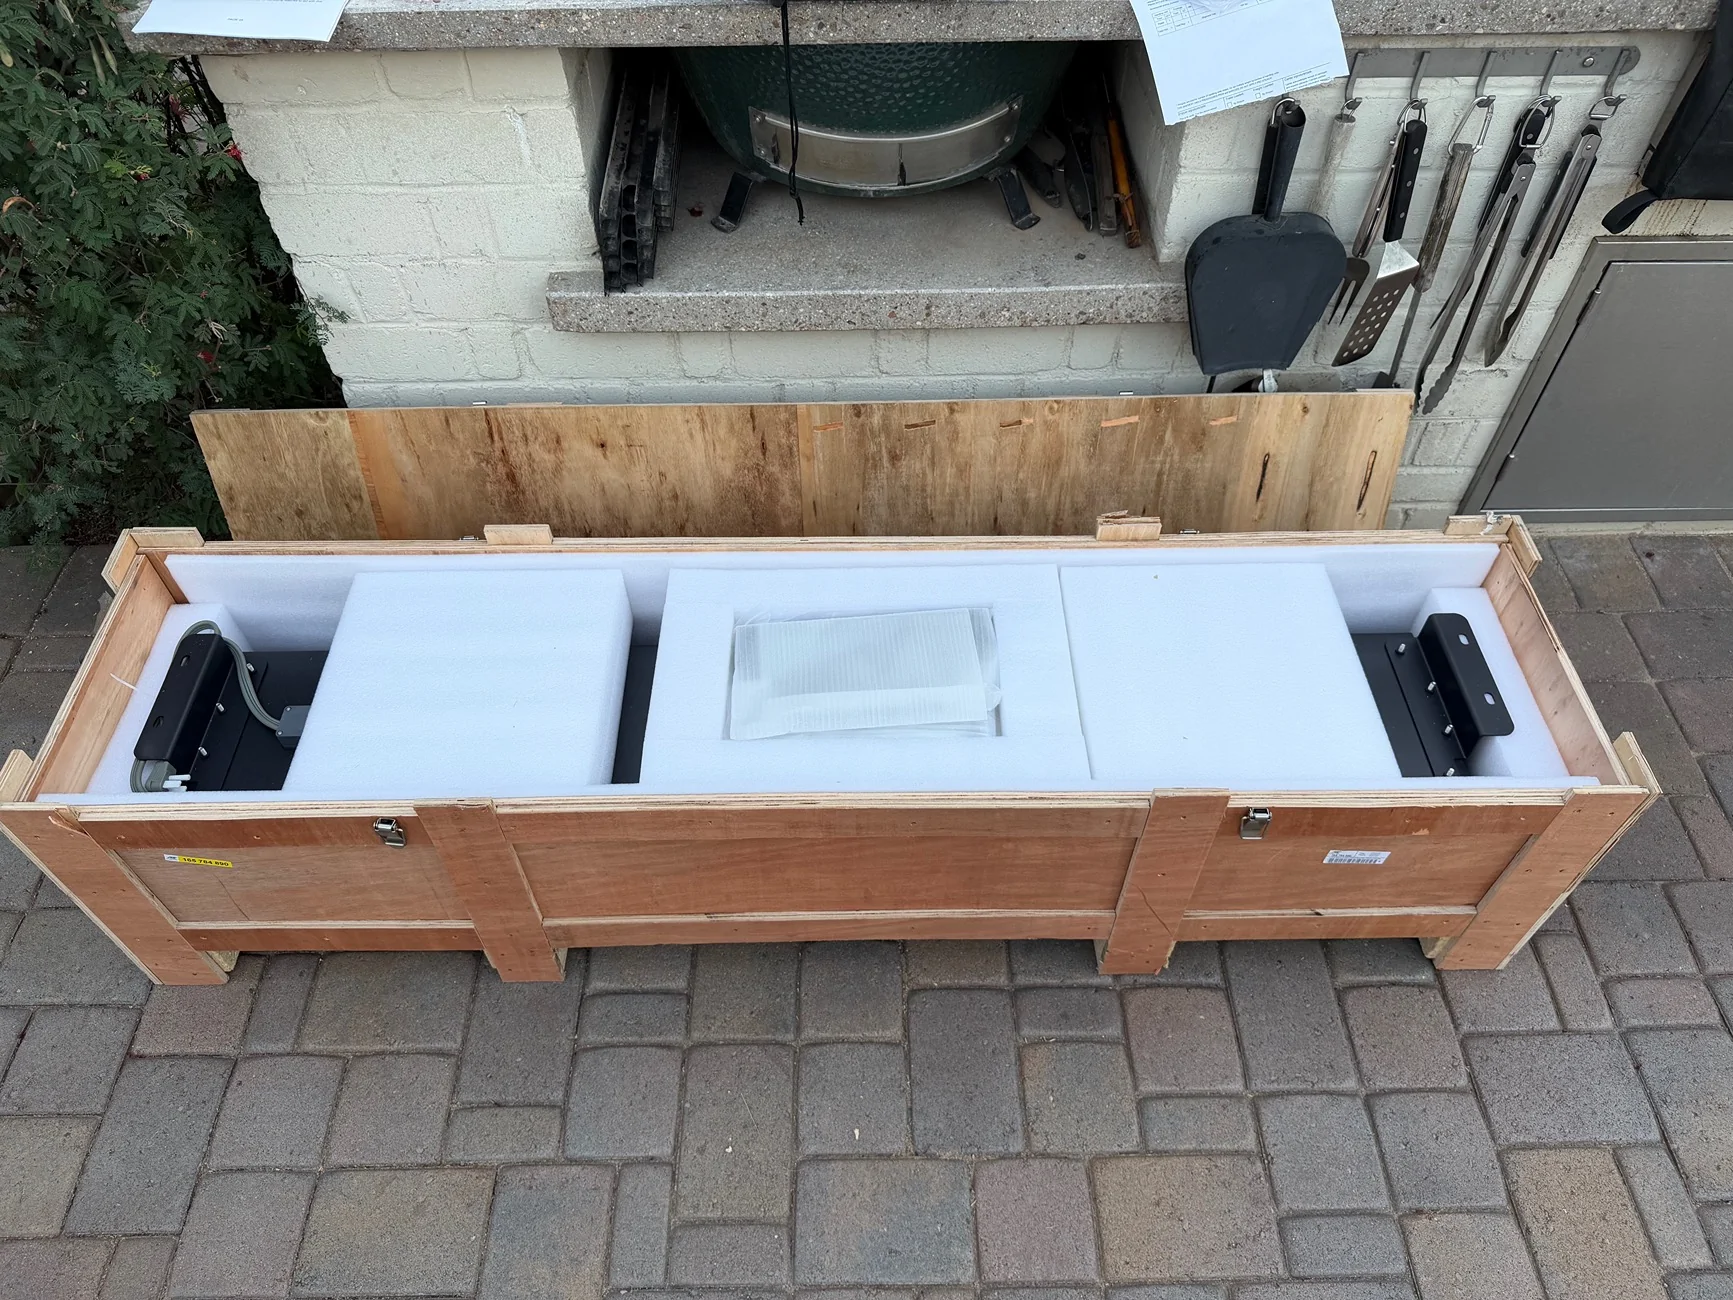
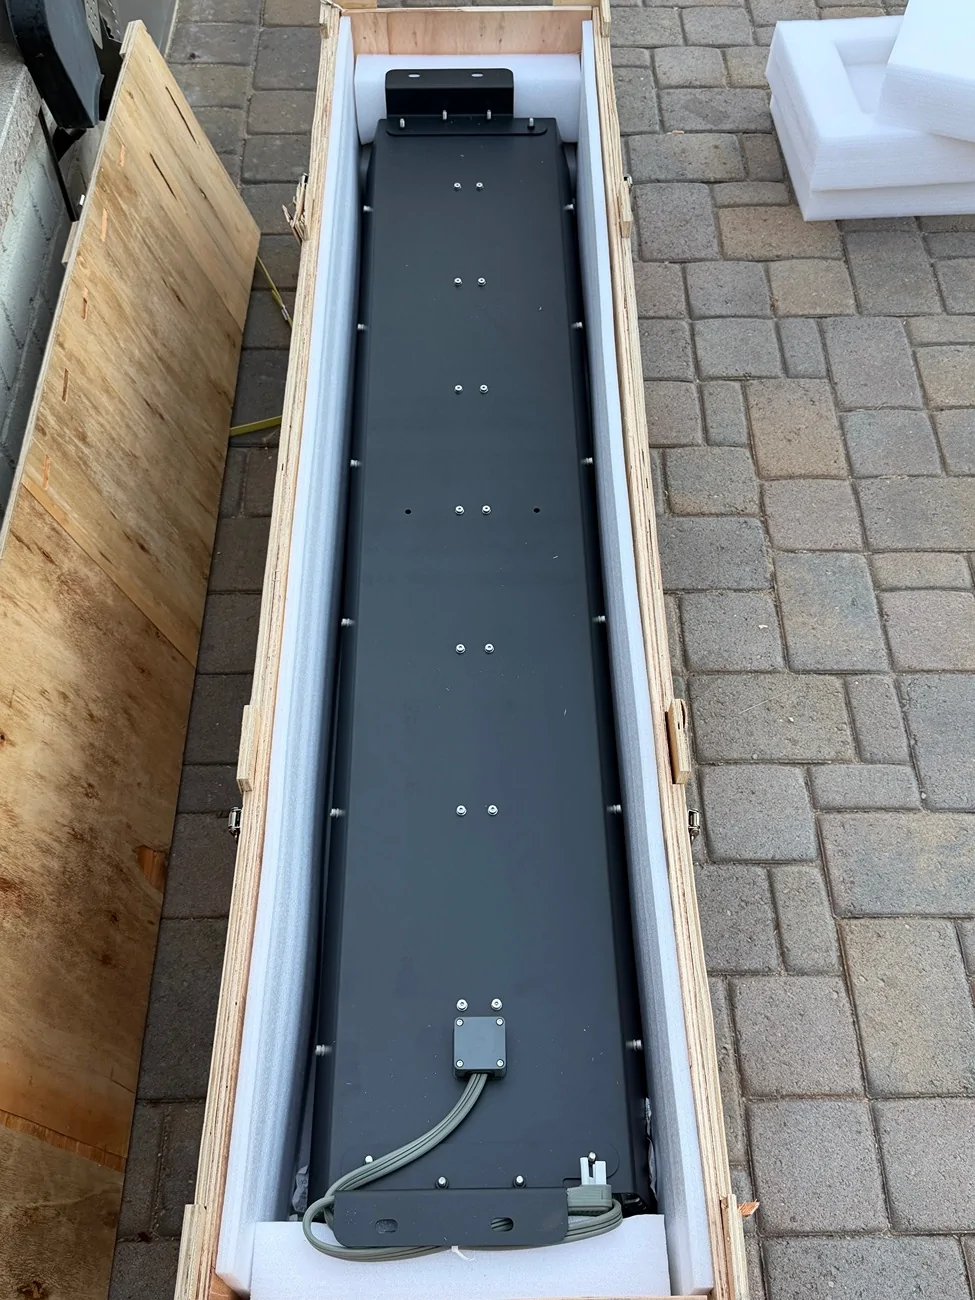
Comes with a hardware packet, shims to provide extra latch clearance if necessary (I didn't need them), and cover panels. At the top is an extra divider, which I ordered, but don't think I'll need.
Installation Notes
The provided installation instructions are pretty clear and straightforward, but my supplemental notes are as follows:
- I used pry tools like these to remove the bottom gear tunnel trim. The instructions say use a screwdriver but pry tools are much more effective. There are 4 metal clips as pictured below.
I put the crate/coffin on furniture dolly's and rolled it into position next to a folding table. Be sure you have the tray in the correct position (i.e., front facing front, rear facing rear, etc). The instructions are pretty clear on how to identify what side is what, but another way way to tell is the plug/extension cord goes on passenger side.
I put some old school Rivian towels on top of the folding table, took the tray out of the crate and put it on top of the table in the proper orientation for loading into the driver's side gear tunnel door.
As outlined in the instructions, I laid a moving blanket along the length of the gear tunnel:
I must admit, I was at this point, planning on being an idiot and trying to load this beast into the gear tunnel myself. I was actually able to lift it out the crate and onto the table by myself. Being overconfident at this point, I was going to try to load part of the tray into the gear tunnel and then slide the tray on the moving blanket and towels to the edge of the table and then lifting/pushing myself the rest of the way.
Thankfully, my neighbor walked by and asked if I needed help and I put him to work. He used a moving strap (recommended in the instructions) and the built in handle to lift the driver's side end, while I used the built in handle to load the passenger side over the lip and into the tunnel onto the moving blanket. My neighbor rested his end of the tray on the table while I went to the other side. We synchronized me pulling the blanket and him lifting and loading the driver's side end into the tunnel. He was able to maneuver around the table and open gear tunnel door and load the thing. He then came to the passenger side to pull the blanket out while I lifted the tray. The lifting and loading honestly took just a few seconds once things were in motion.
Some pics just after loading. You can see in the second picture the power cord is obviously not yet plugged in. I did tape it down to the bottom of the slide while loading.
From here, it's just installing 4 bolts. The instructions say use a 10 mm socket, but I ended up using a 12 mm socket. Word of caution: I stupidly overtightened and broke one of the bolts, so be careful.
The broken bolt came out with vise grips. I bought an M6 x 20 bolt from the local hardware store to secure in the meantime and found a replacement part, which I'll install after delivery.
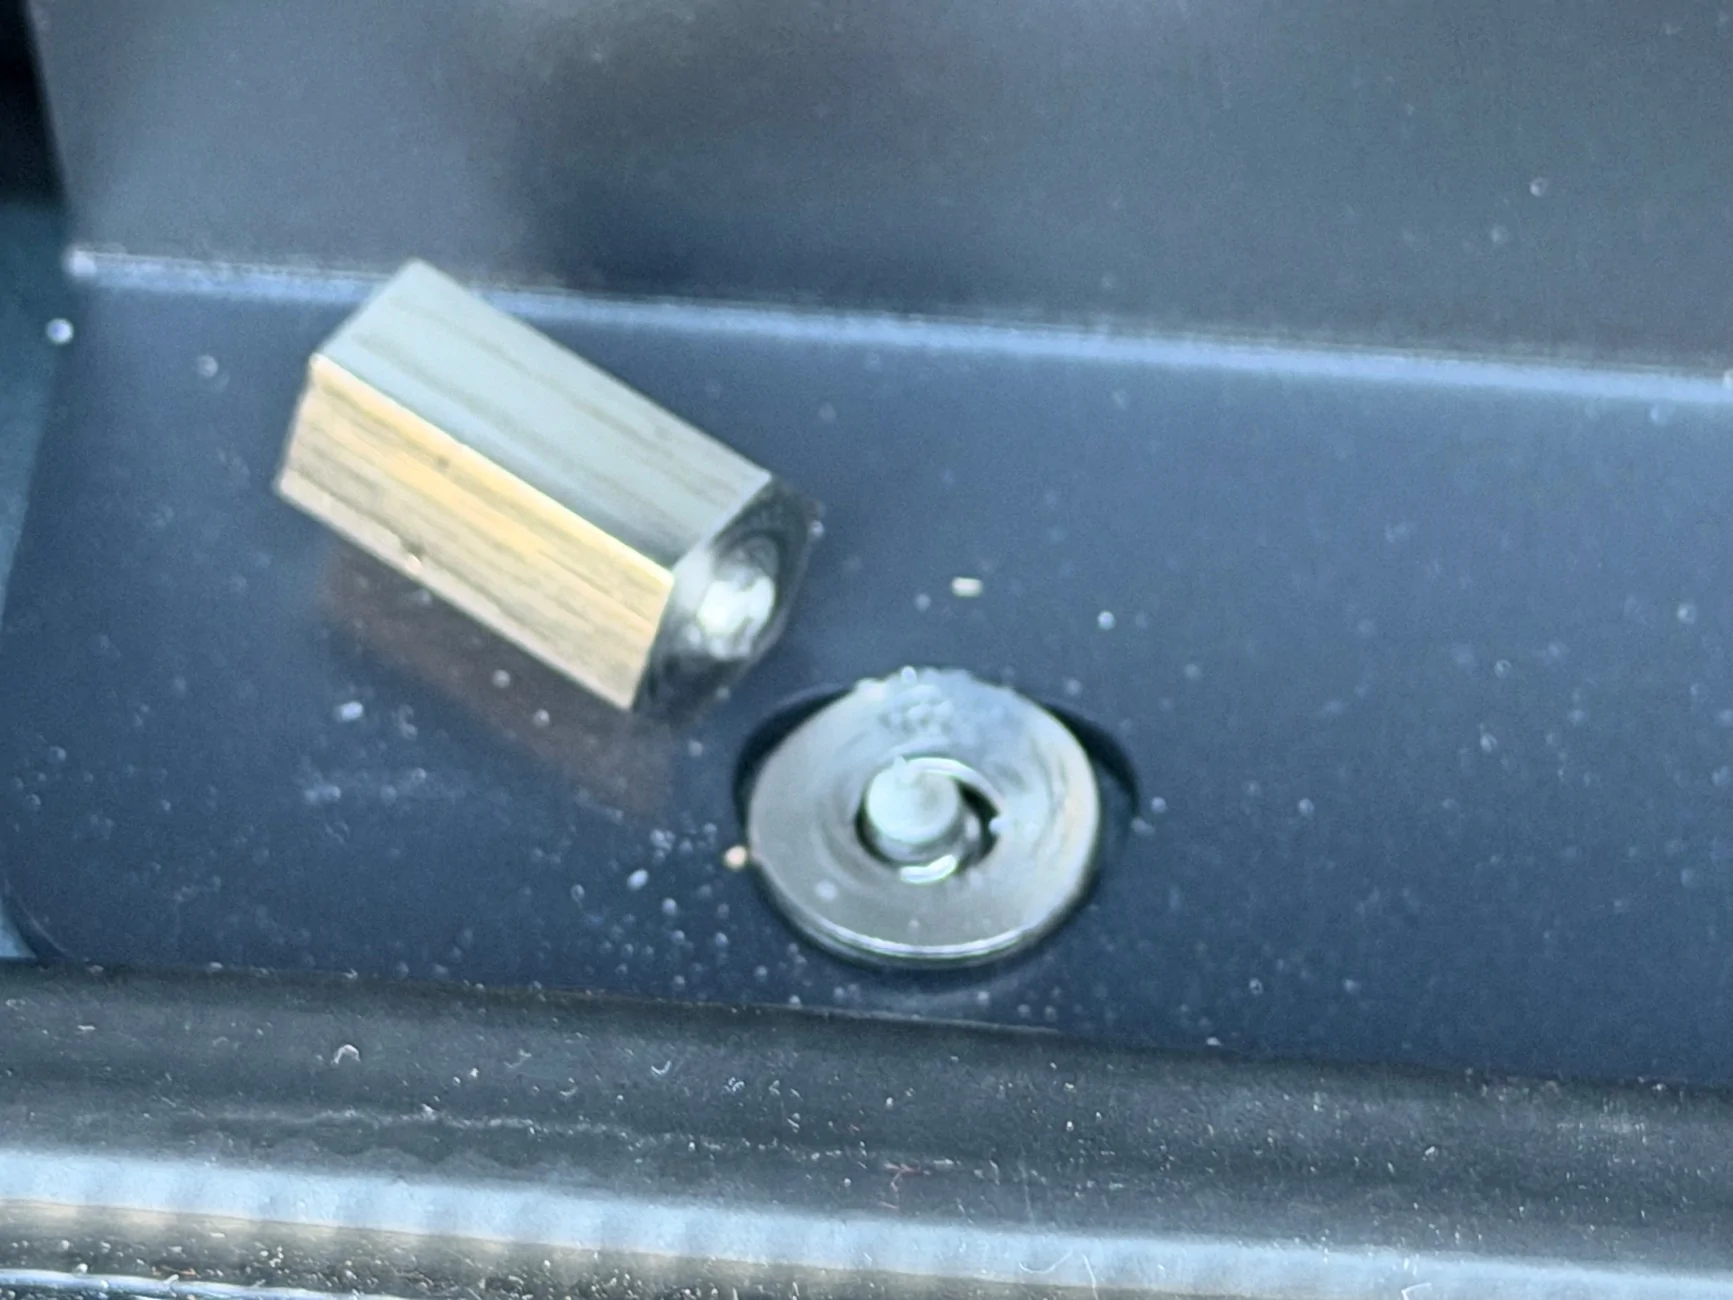
Temporary replacement bolt on the left
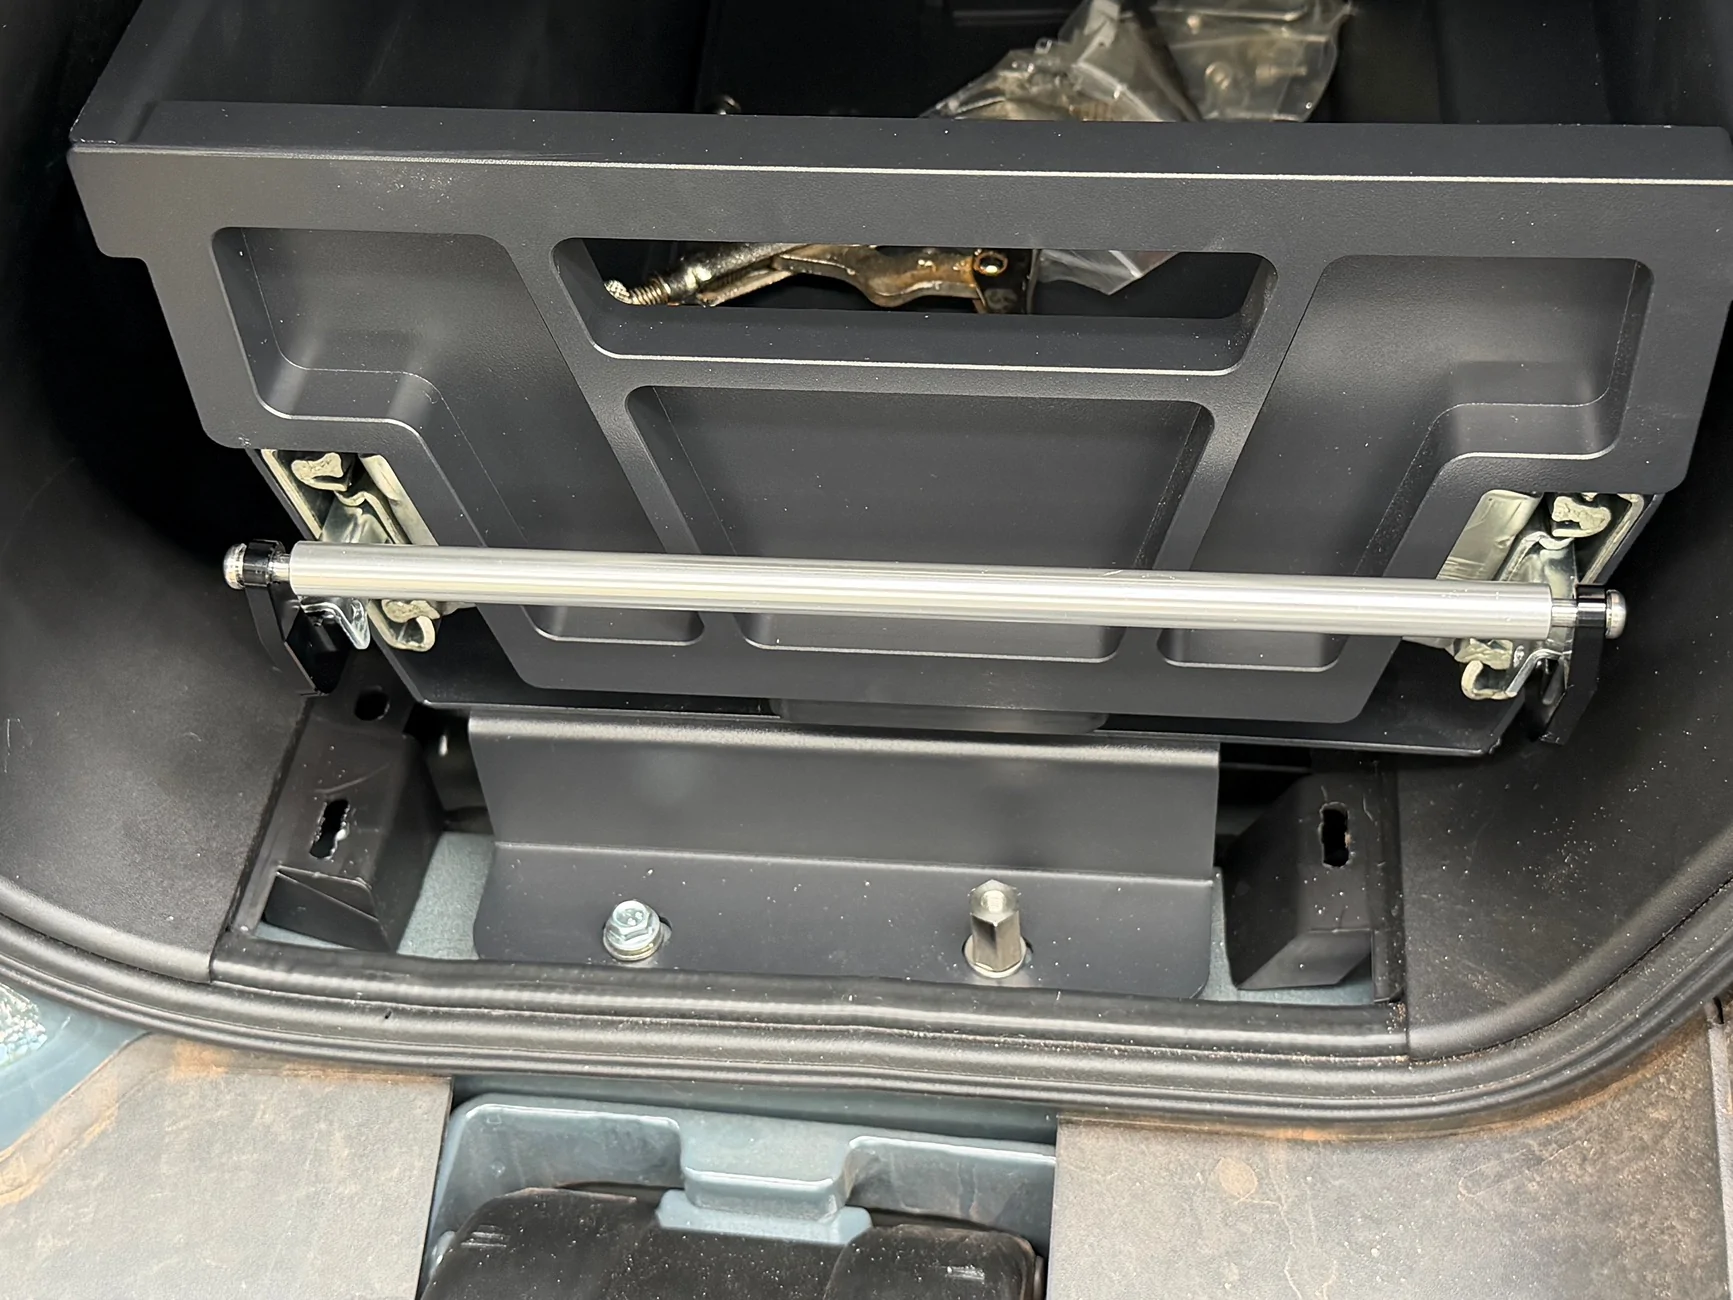
Installed without the option cover plates:
With cover plates:
Opens from both sides. Two outlets included. Two dividers included. Dividers can be removed and/or repositioned.
Great product and good luck to those about to install! I remember preordering way back in 2021 a $1500 option for a Rivian gear tunnel slide. I understand killing the camp kitchen option but I don't know why Rivian killed the OEM gear tunnel slide option. Regardless, I'm ecstatic to have the @BoxGods one.
An integrated camp kitchen will be available with this slide. I haven't ordered it as I don't have much of a need for one but it looks rather incredible.
Sponsored

") where did you post the instructions by the way? Might be too late as I’ve basically figured it out since it’s super simple but want to make sure.
where did you post the instructions by the way? Might be too late as I’ve basically figured it out since it’s super simple but want to make sure.