alanjohnwilliams
Member
- Thread starter
- #1
Here is my live google doc writeup.
Thanks to everyone who has shared their mods online, it made it immensely easy to tackle my own mods.
Sulley R1T Mods
General Inspiration
Switch Pro 9100 Install
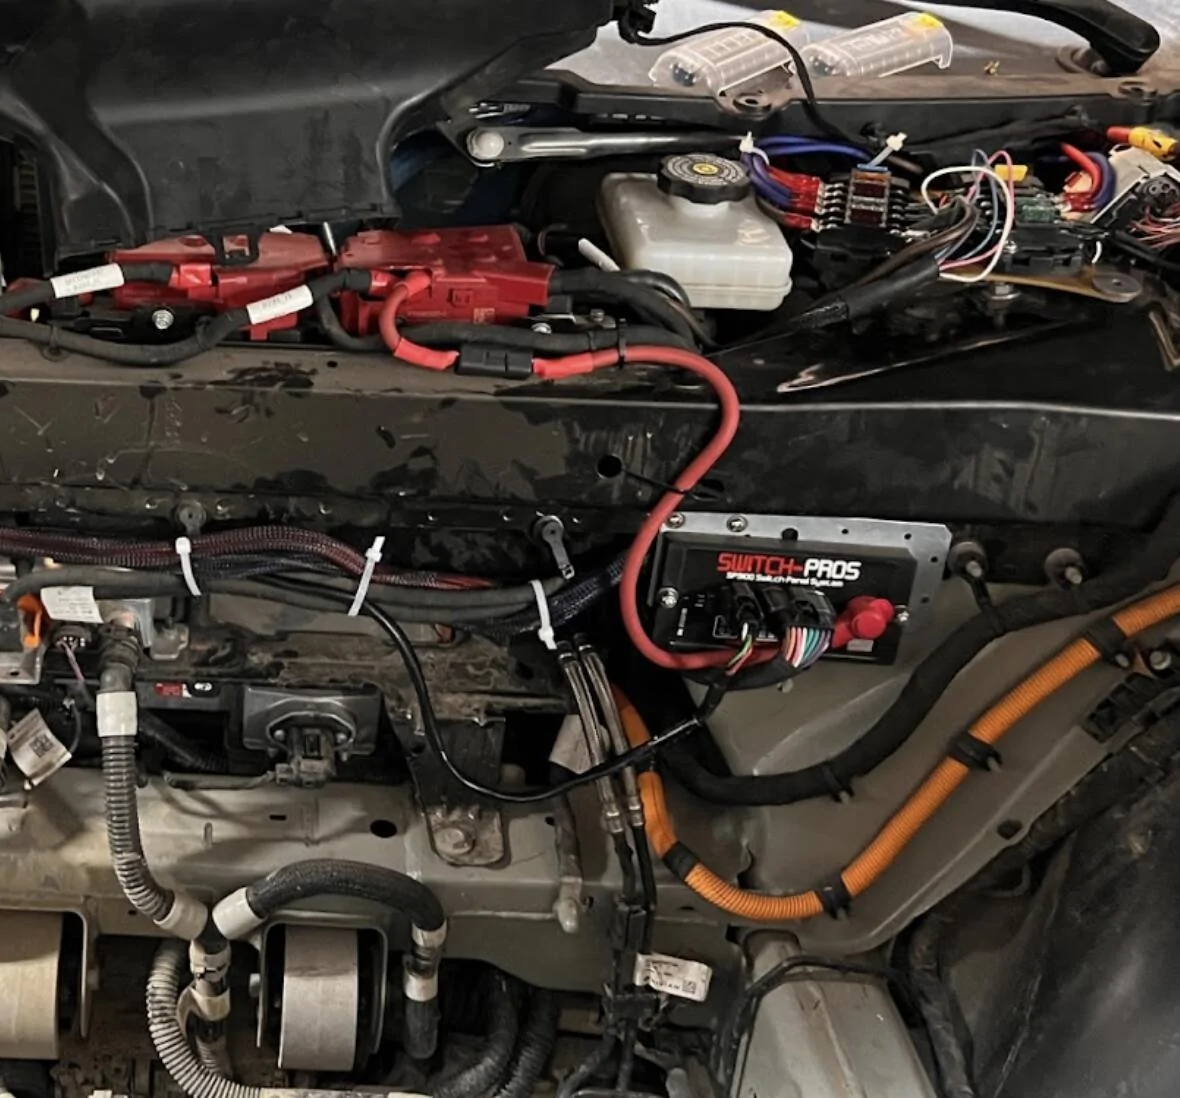
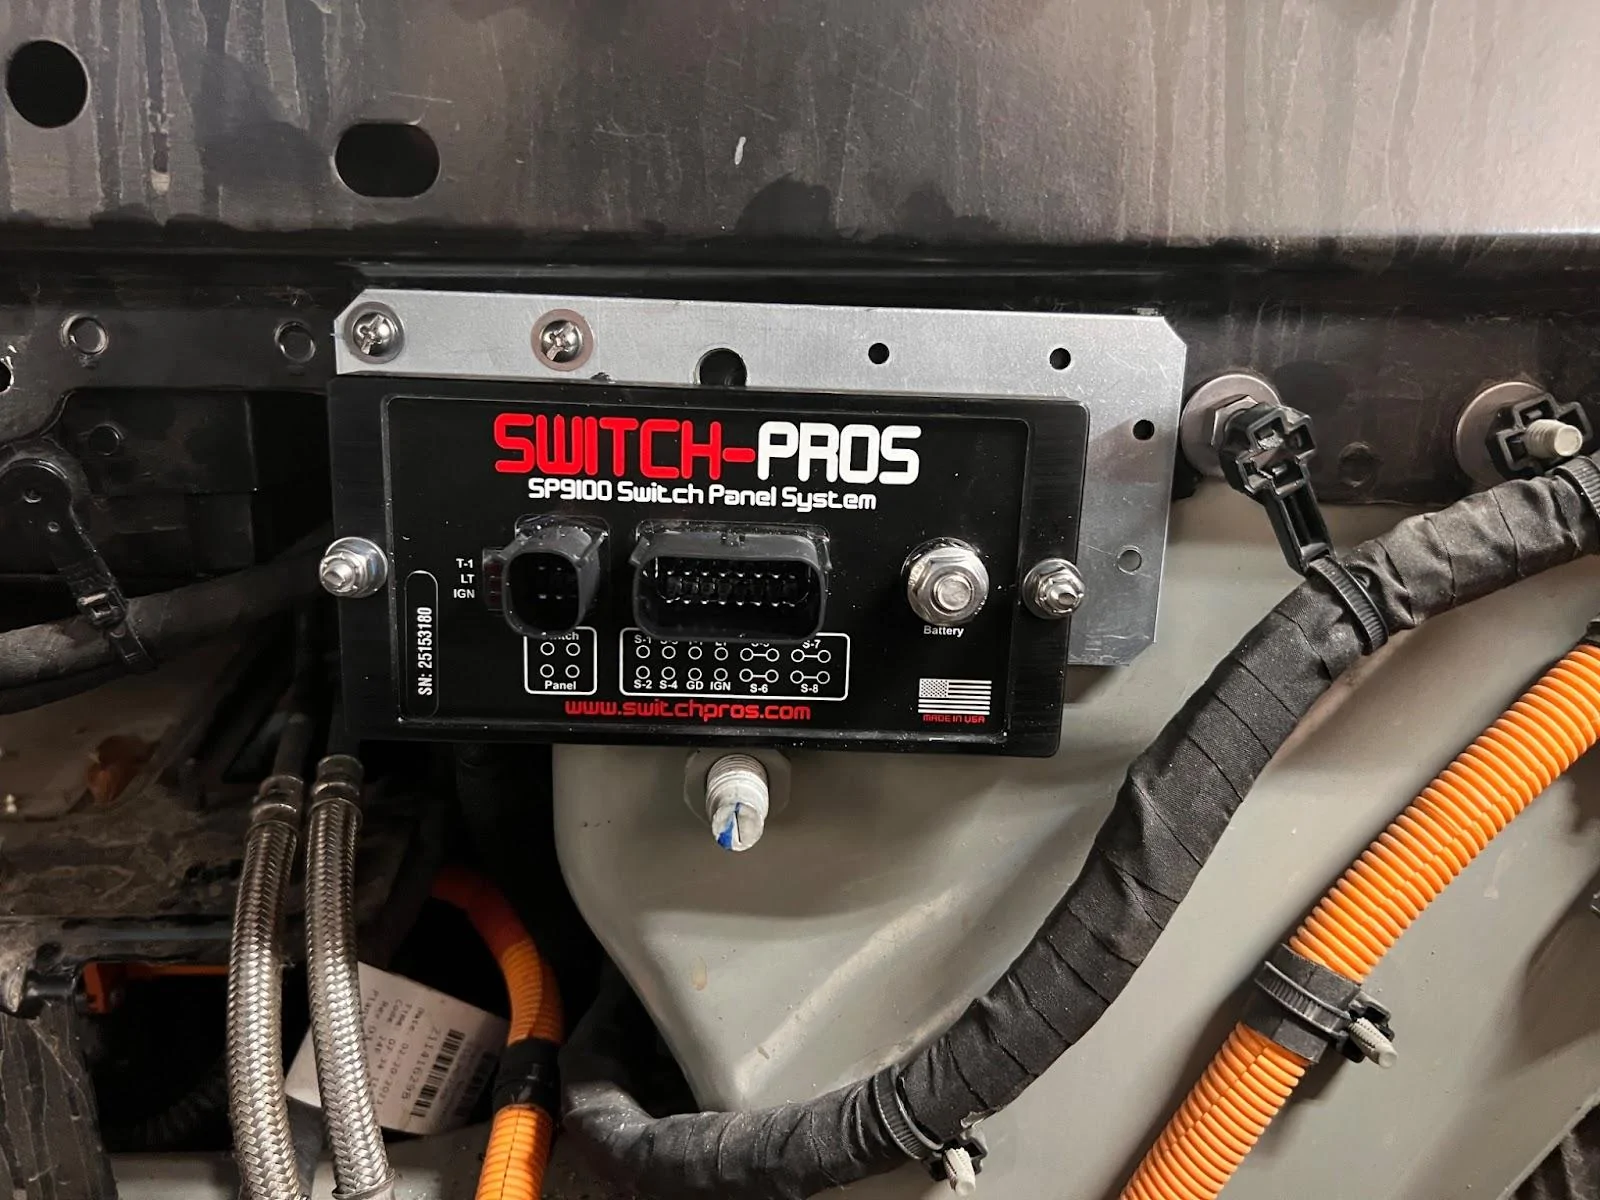
I wanted better control of power for various mods and considered the Garmin Power Switch and the Switch Pros 9100. I ended up opting for the Switch Pros largely because of the solid state design and I wanted a physical switch panel. The Switch Pro shouldn’t be mounted face up where water could collect and the Switch Pro is a bit bigger than the Garmin Power Switch, so this proved to be a bit more of a challenge to mount. I ended up mounting below the 12v batteries. This area is accessed by removing the frunk.

I mounted the Switch Pro to a framing plate from home depot and then mounted the framing plate to a lip on the frame. This involved drilling at least 1 hole (maybe two) in the lip of the frame.

There is potential for the two harnesses coming out of the Switch Pro to rub on the frunk tub, so I wrapped those with extra electrical tape for protection (not shown).
This figure shows where I connected the Switch Pro to the 12V positive and negative leads.

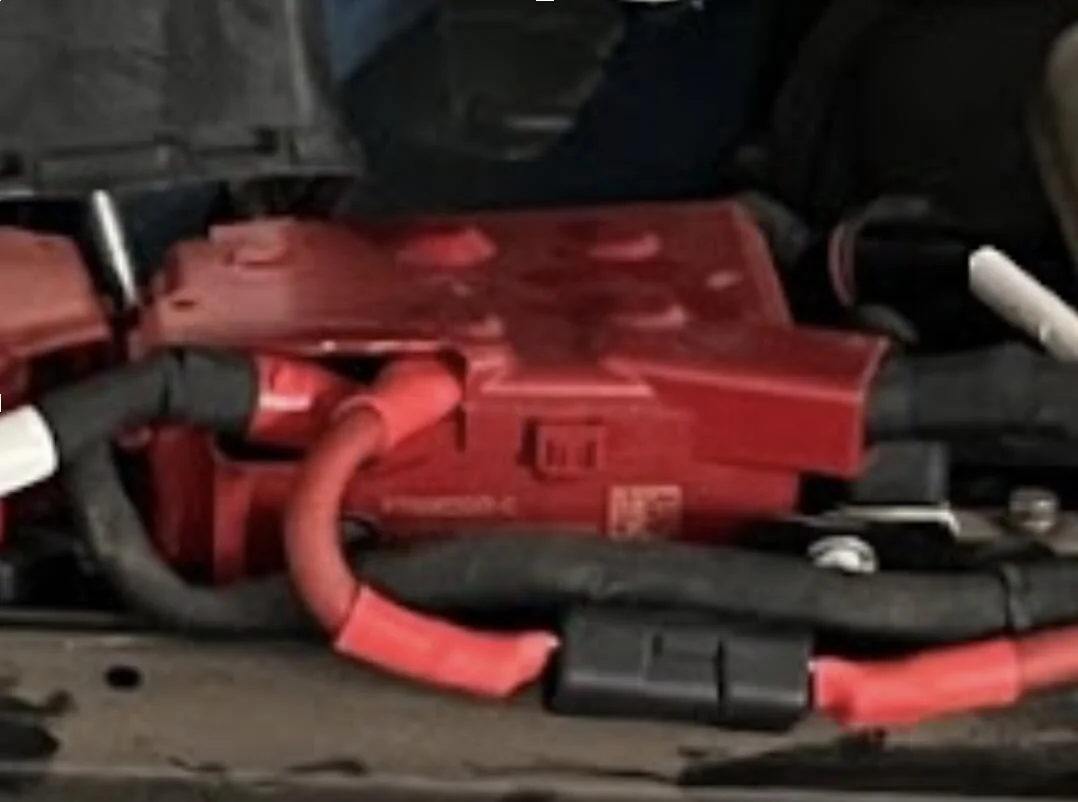
Some cutting of the red 12v batter cover was required to accommodate the extra 12V lead running to the Switch Pro.

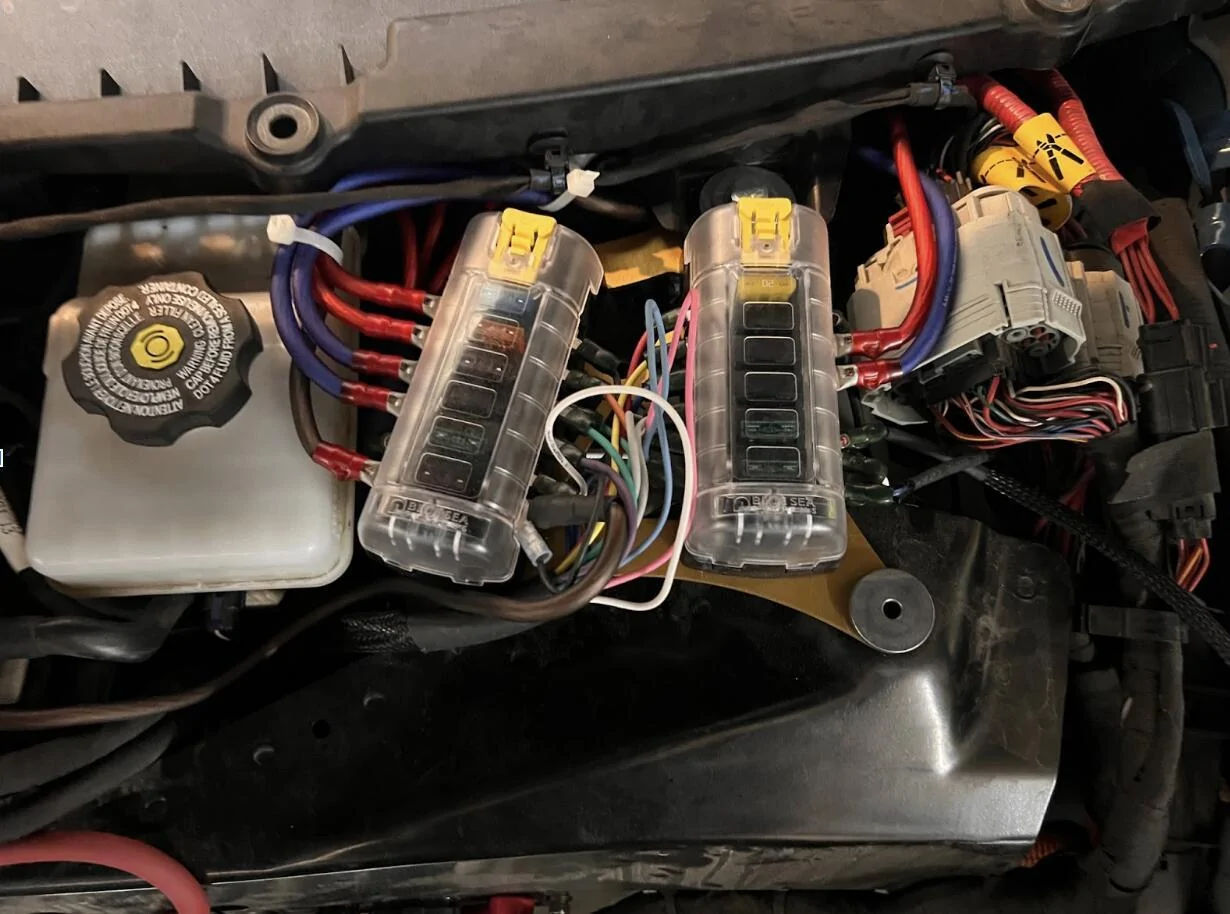
I ran the main output/trigger harness up to a set of Blue Sea Fuse Blocks mounted up top using a mounting bracket from k3g.

I tied the pink (Trigger 1) and white (Trigger 2) wires into the 12v lead intended for the frunk 12v outlets. In doing so, those triggers get fired when the truck is unlocked and/or doors opened; essentially when the truck wakes up.
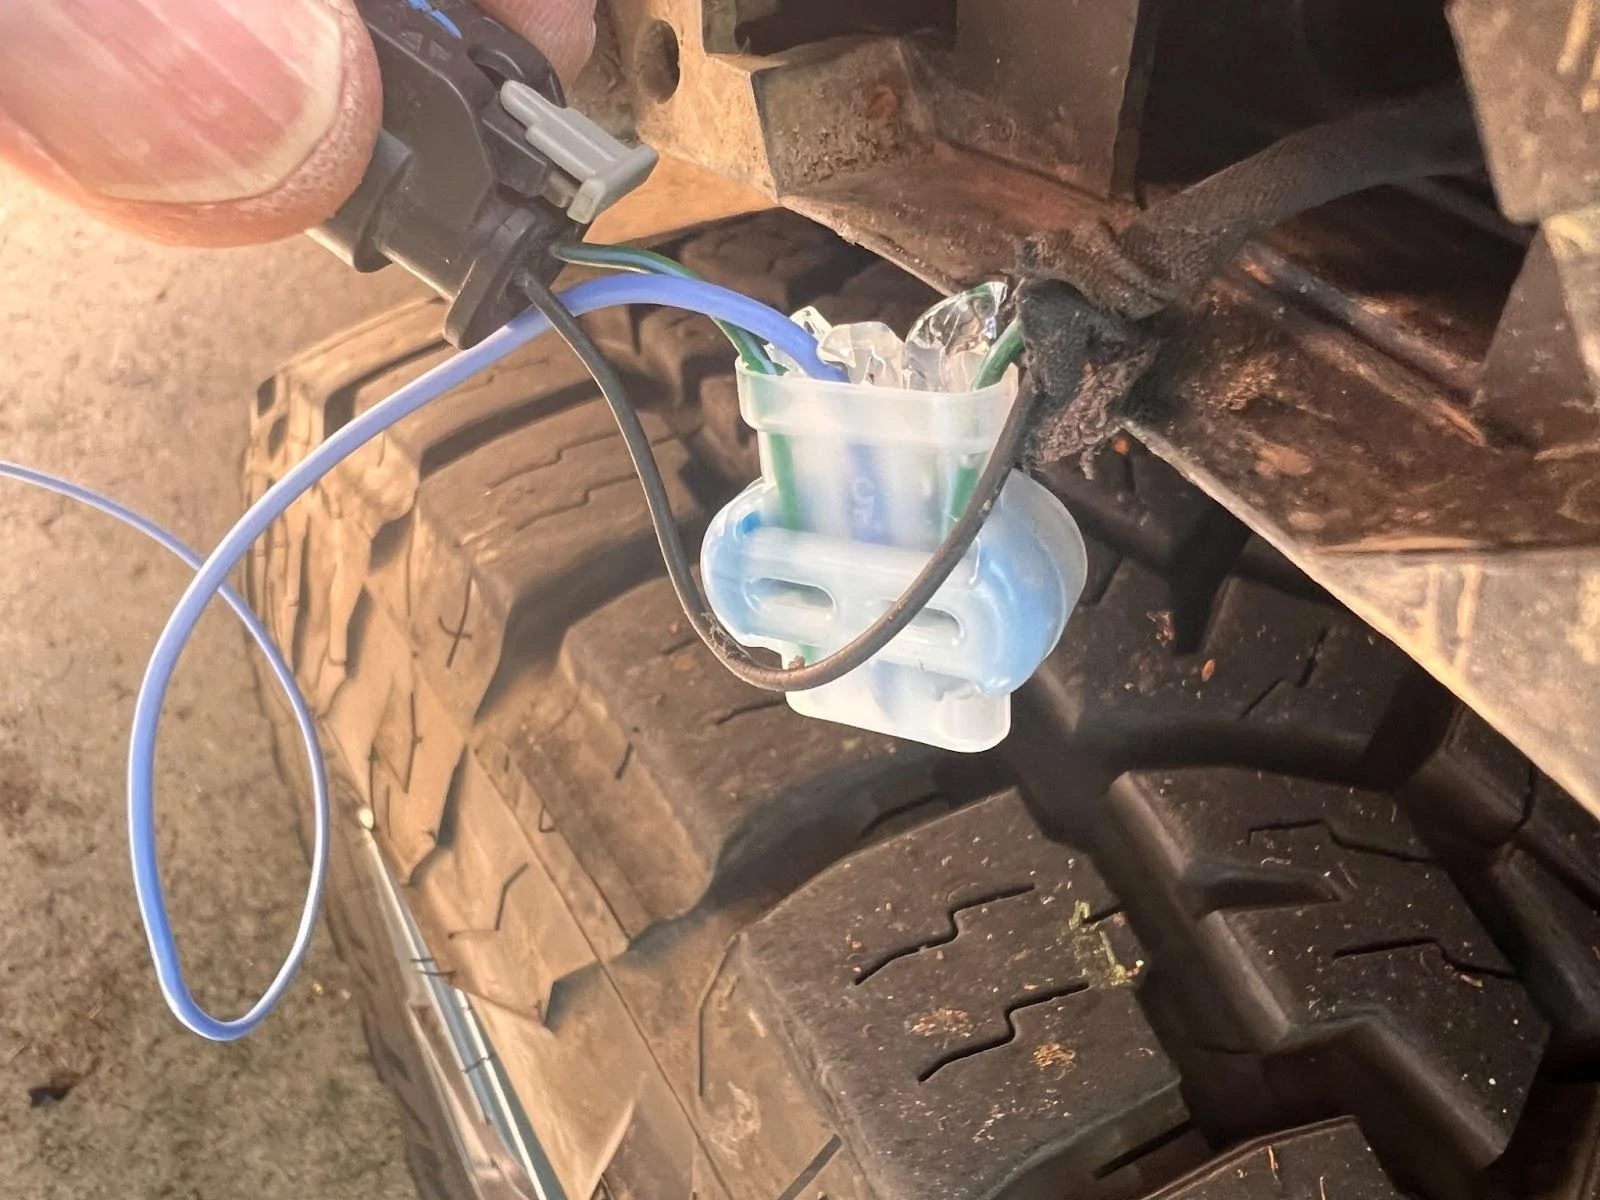
I tied the blue ignition trigger into the marker light in the front driver side wheel well. This trigger is fired when the brake pedal is pushed to “turn the truck on”.

I fished a new wire from the opening at the wheel well up into the frunk using a coat hanger. I then used a water proof splice to connect the new blue trigger wire to the green positive 12v lead.
Important that your splice is able to fit up into the small hole where the wires come out.
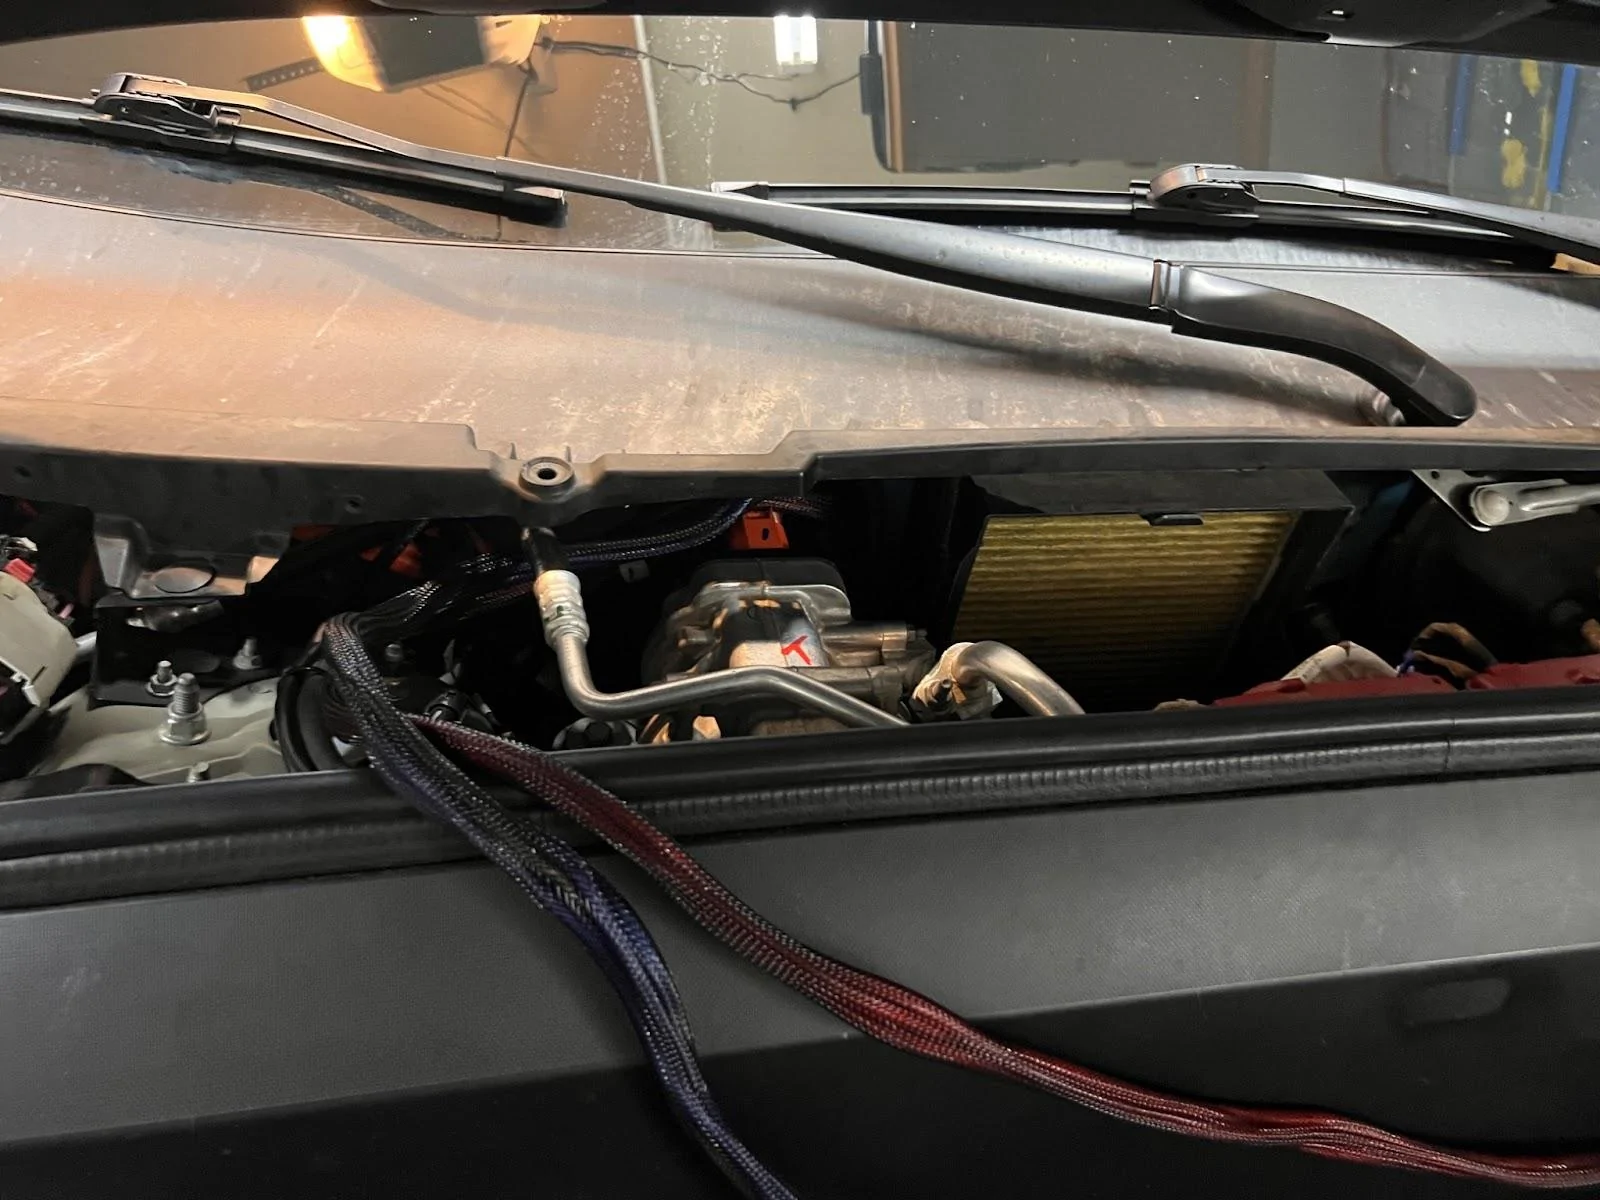
The Switch Pro panel harness was fished through the firewall and into the cab. I was running the Switch Pro panel harness along with 7 other 8AWG wires, so I ended up cutting out a chunk of the firewall grommet to make room for all those wires.

I then fished a 4 wire bundle (1 black and 3 blue wires) and a 3 wire bundle (3 red wires) through the firewall and into the cab. These were 8AWG wires (to support further extensions of these lines into the bed of the truck). I found it easiest to fish pulling line from the frunk into the cab with a coat hanger. I then used the pulling wire to pull the wire bundles from the cab into the frunk. Here is a view from the passenger foot well.
Three were connected to 20A switches on the Switch Pro via the Blue Sea Fuse Boxes in the frunk, three were connected to 35A switches on the Switch Pro via the Blue Sea Fuse Boxes in the frunk, and one was connected to the battery ground/negative in the frunk. In the compartment above the passenger footwell, I attached the 6 power leads to Blue Sea Fuse Box and the battery negative to a grounding block (not shown). Mounting of the the fuse box and the grounding block is TBD as part of my GMRS radio install.
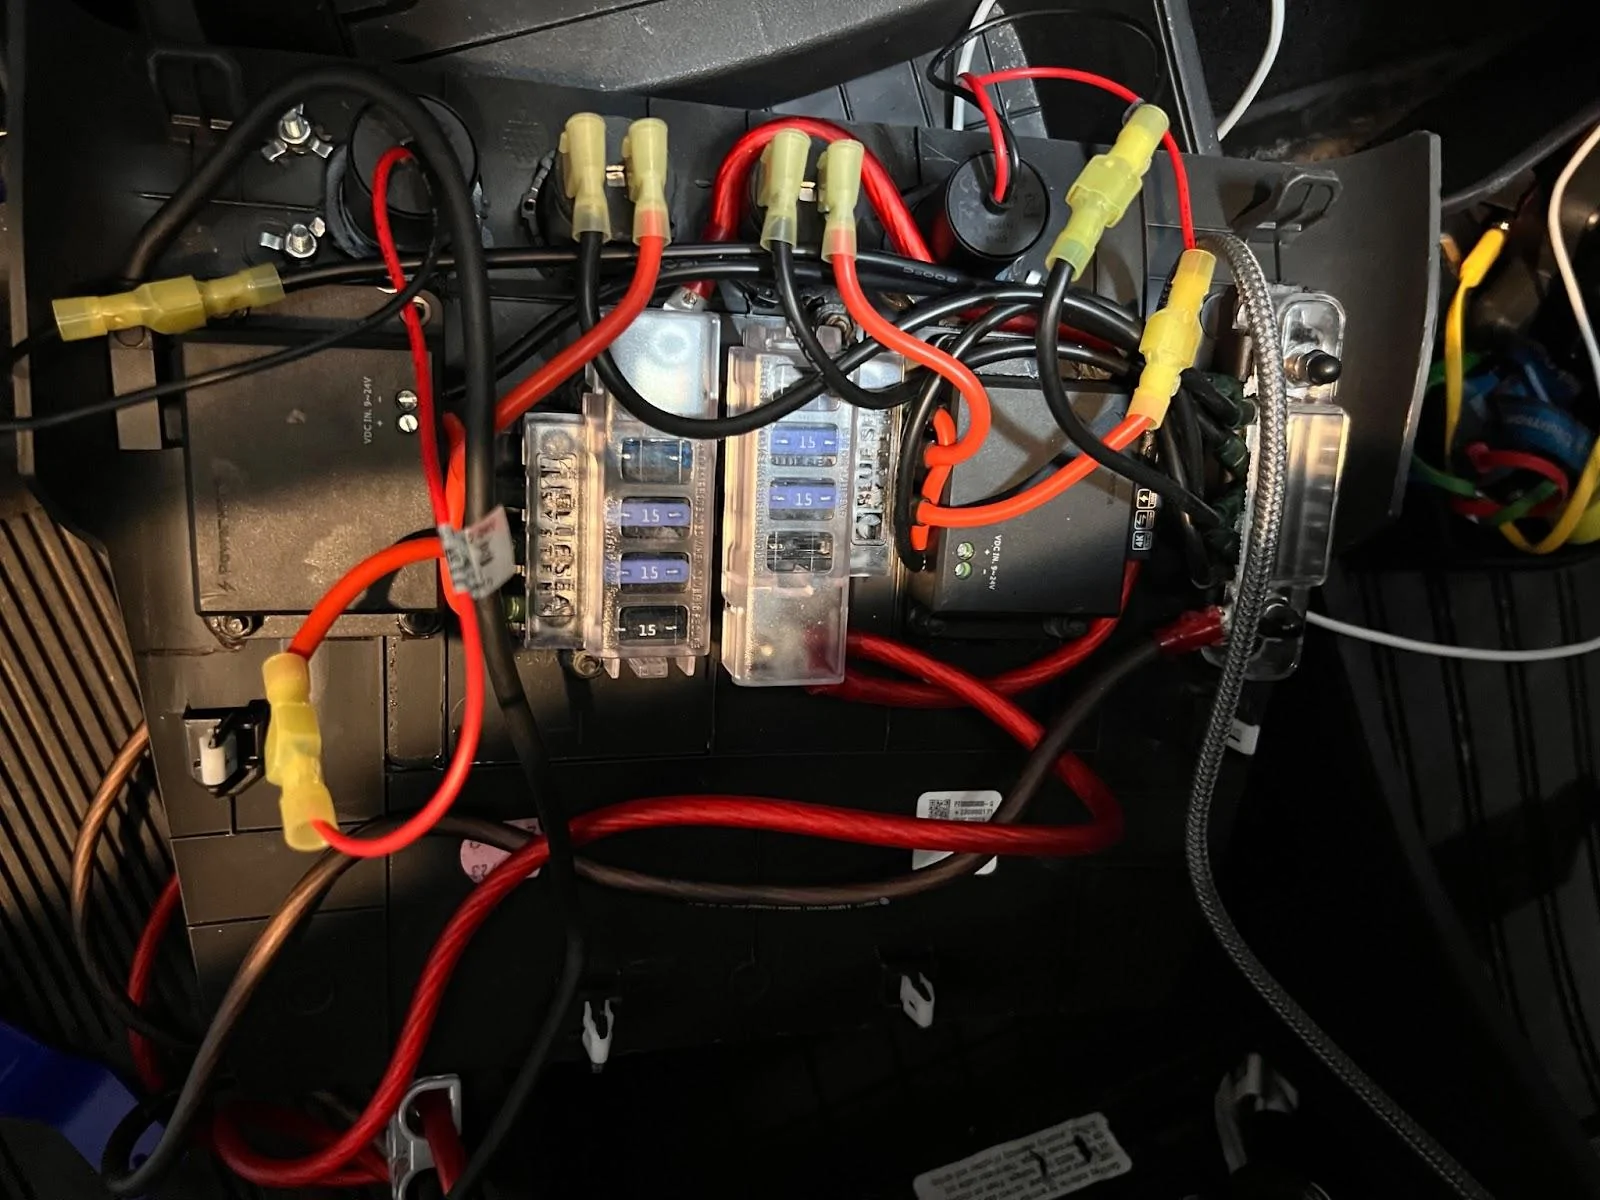
The completed work from the frunk perspective:
And here is a summary of the Switch Pro configuration

I’m currently not using Trigger 1 or 2 (truck wake/unlock), just the Ignition trigger off the marker light. I’m using Off-Delay to keep certain devices on for 30 minutes to 2 hours after the truck is turned off (exiting the truck and closing the door turns off the marker light and turns the ignition trigger off).
I’ve currently got the following wired up:
Comma 3x AI Driver Assist
My biggest disappointment with Rivian is the incredibly pathetic driver assist on gen 1 vehicles. Rivian really dropped the ball for all us early adopters. Enter 3rd party solution Comma AI. Thanks to some terrific work by Lukas with a lot of community support, especially from gerrylum, we now have an awesome solution which comes close to a lot of Rivian’s early promises for Driver+. For my Comma setup, I’m using:
I strongly recommend that you get your harness directly from Lukas instead of Comma. Please support all the great work Lukas is doing to enable Comma on the Rivian.
See the most excellent Rivian Comma Tips guide from mcgaverty. I followed that guide and the referenced videos to get a clean working Comma 3x install.
As of this writing (July 3rd, 2025), I just completed a 2 hour drive from Boulder to Frisco Colorado. The drive involved in-town traffic, 2 lane highway, and multi-lane freeway through mountain terrain. The Comma was close to flawless on the drive for me. What I get with Comma 3x:
I’m running Sunnypilot dev-c3-new and the drive above was with the TR14 driving model.
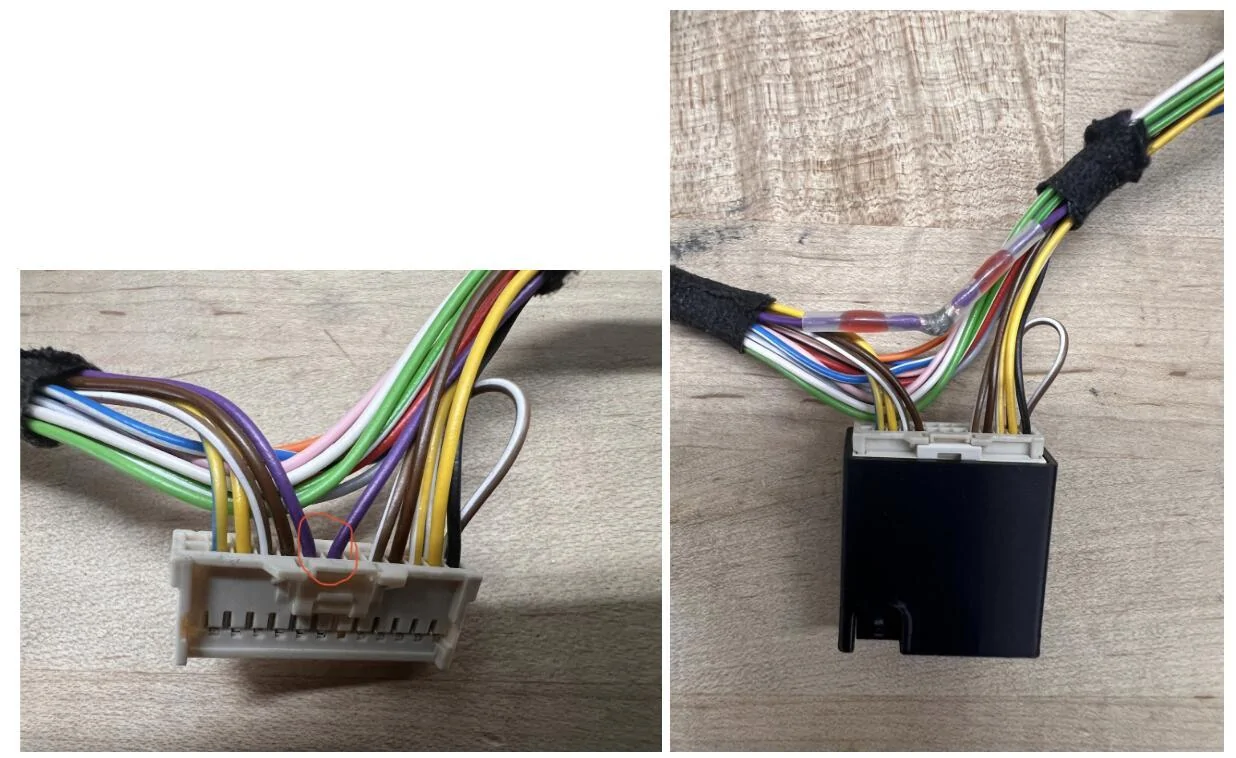
I have an earlier harness created by Lukas that dependent on AXM power. At no cost to me, he sent me an update box (the black detached part) along with OBD2 power connector in order to power my Comma off the OBD2 port.

I removed the ODB2 plug (not shown) and hard wired the single 12v power into a 35A switch on my Switch Pro. While the Comma doesn’t need 35A, it does have a large current rush on boot up to fill it’s capacitors. This was resulting in a fault on the Switch Pro. I eliminated this problem by moving that power lead to a 35A switch. Thank you ChatGPT o3 for solving that problem. ChatGPT was referencing reddit posts for a Switch Pro install on a Ford F150 Lightening. I could never find the posts that ChatGPT was referencing - go figure?
I was having the Comma 3x randomly shut down. This has been attributed to being connected to AXM power. I had to delete the connection to AXM power by pulling the two purple wire pins and soldering them together; this maintains the 12V power from AXM to the sensor harness but removes the connection to Comma 3x. Newer harnesses do not need this modification as AXM power is no longer supported due to the various power issues users have had.

Frunk 12v Outlets
I added two 12v outlets to my frunk, as my 2023 R1T gen 1 had these deleted. Originally these were wired directly into the existing 12V outlet lead in the Rivian harness for the frunk tub. With the addition of the Switch Pro, I took that 12v outlet frunk lead, and used it as a trigger on the Switch Pro for “truck awake”. I then connected the 12v outlets in the frunk directly to a 20A switch on the switch pro via the Blue Sea Fuse Bus in the frunk. Can’t recall the exact internet resources I used for this mod, but this video is pretty representative.
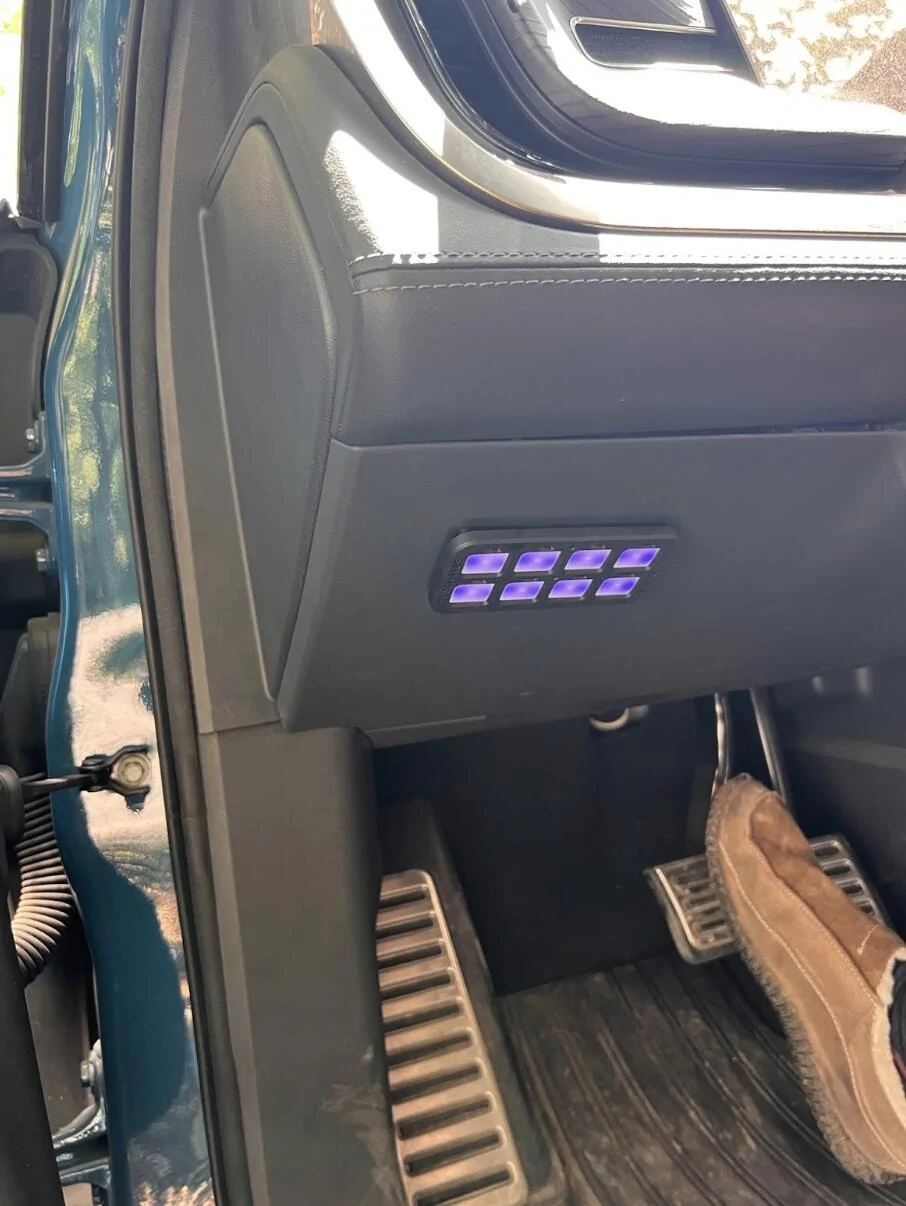
Cab Outlets
My 2023 R1T gen 1 also had the cab 12v outlet deleted. So I fixed that by adding:
Here is the back side.
I used a different Blue Sea Fuse Box than those used in the Switch Pro install to independently fuse each of the outlets. I’ve also got a common grounding bus for all the outlets. The grounding bus (negative) and the fuse boxes (positive) are connected to a single Switch Pro 35A outlet via the Blue Sea Fuse Box and Grounding bus in the cab that is wired through the firewall to the Switch Pro in the frunk.
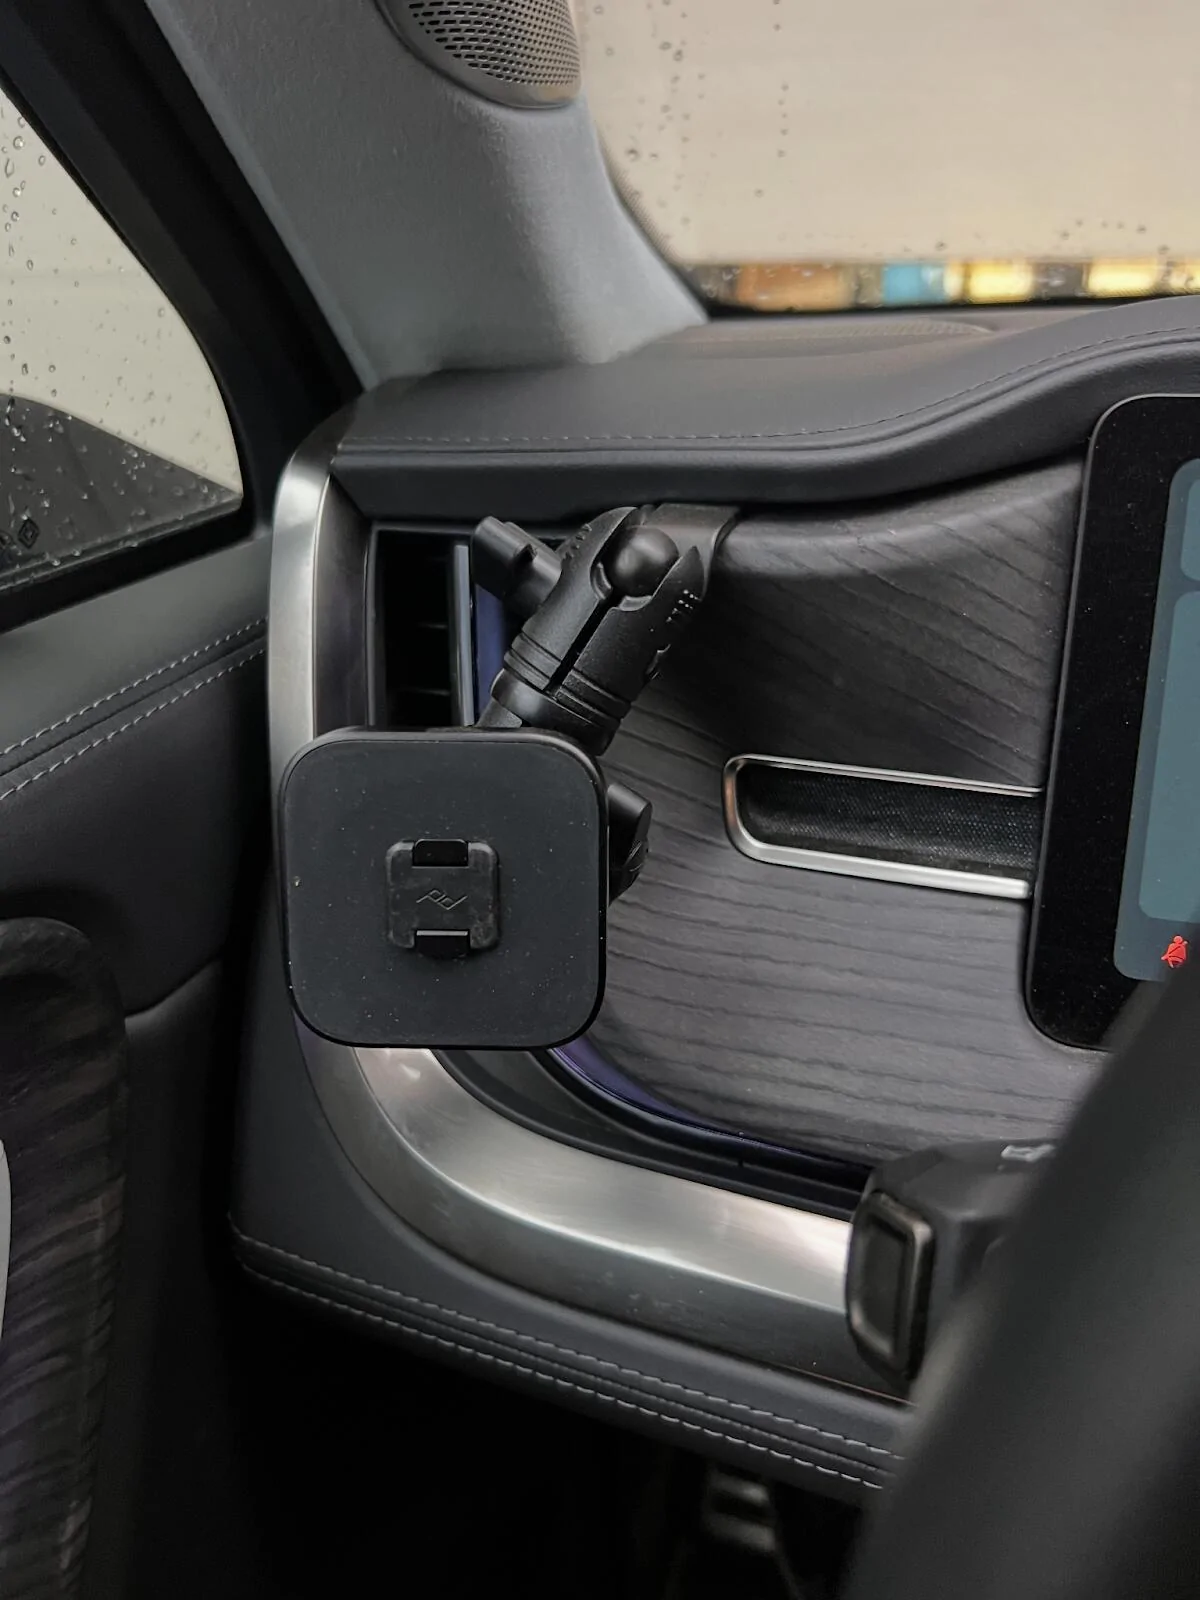
On the driver side I have a Peak Design Locking Qi2 magsafe mount with a 20mm ball connected to an EV Sportline dash mount with a Bulletpoint Mounting Solutions mini arm. The magsafe mount is connected to the Powerwerx USB-C port via USB-C extension cable. See this video on hiding Comma USB-C cables to get an idea of how to hide/route the USB-C cables for the magsafe mounts. So far I’m liking this setup, but note that the current positioning in the photos does block the AC vent; on the plus side, this keeps your phone cold, on the down side, that is less AC hitting me. You can shift the position of the arm to put the phone higher up where it isn’t blocking the vent.

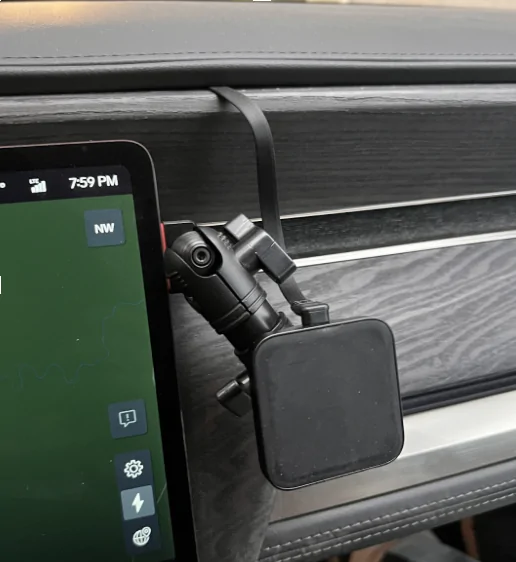
On the passenger side, I’ve got an older Peak Design magsafe mount. I’m using the same Bulletpoint Mounting Solutions mini arm with an Offroam mounting base. I’m using a USB-C 3.2 10ft cable with right angle along with a flat ribbon extension to connect the charger to the Powerwerx USB-C port.

Btech GMRS 50Pro
Next project on deck.
I have several handheld Btech GMRS Pro radios that I like alot. So I jumped on the opportunity to install a 50 watt equivalent in my truck. Pieces I’ve accumulated so far:
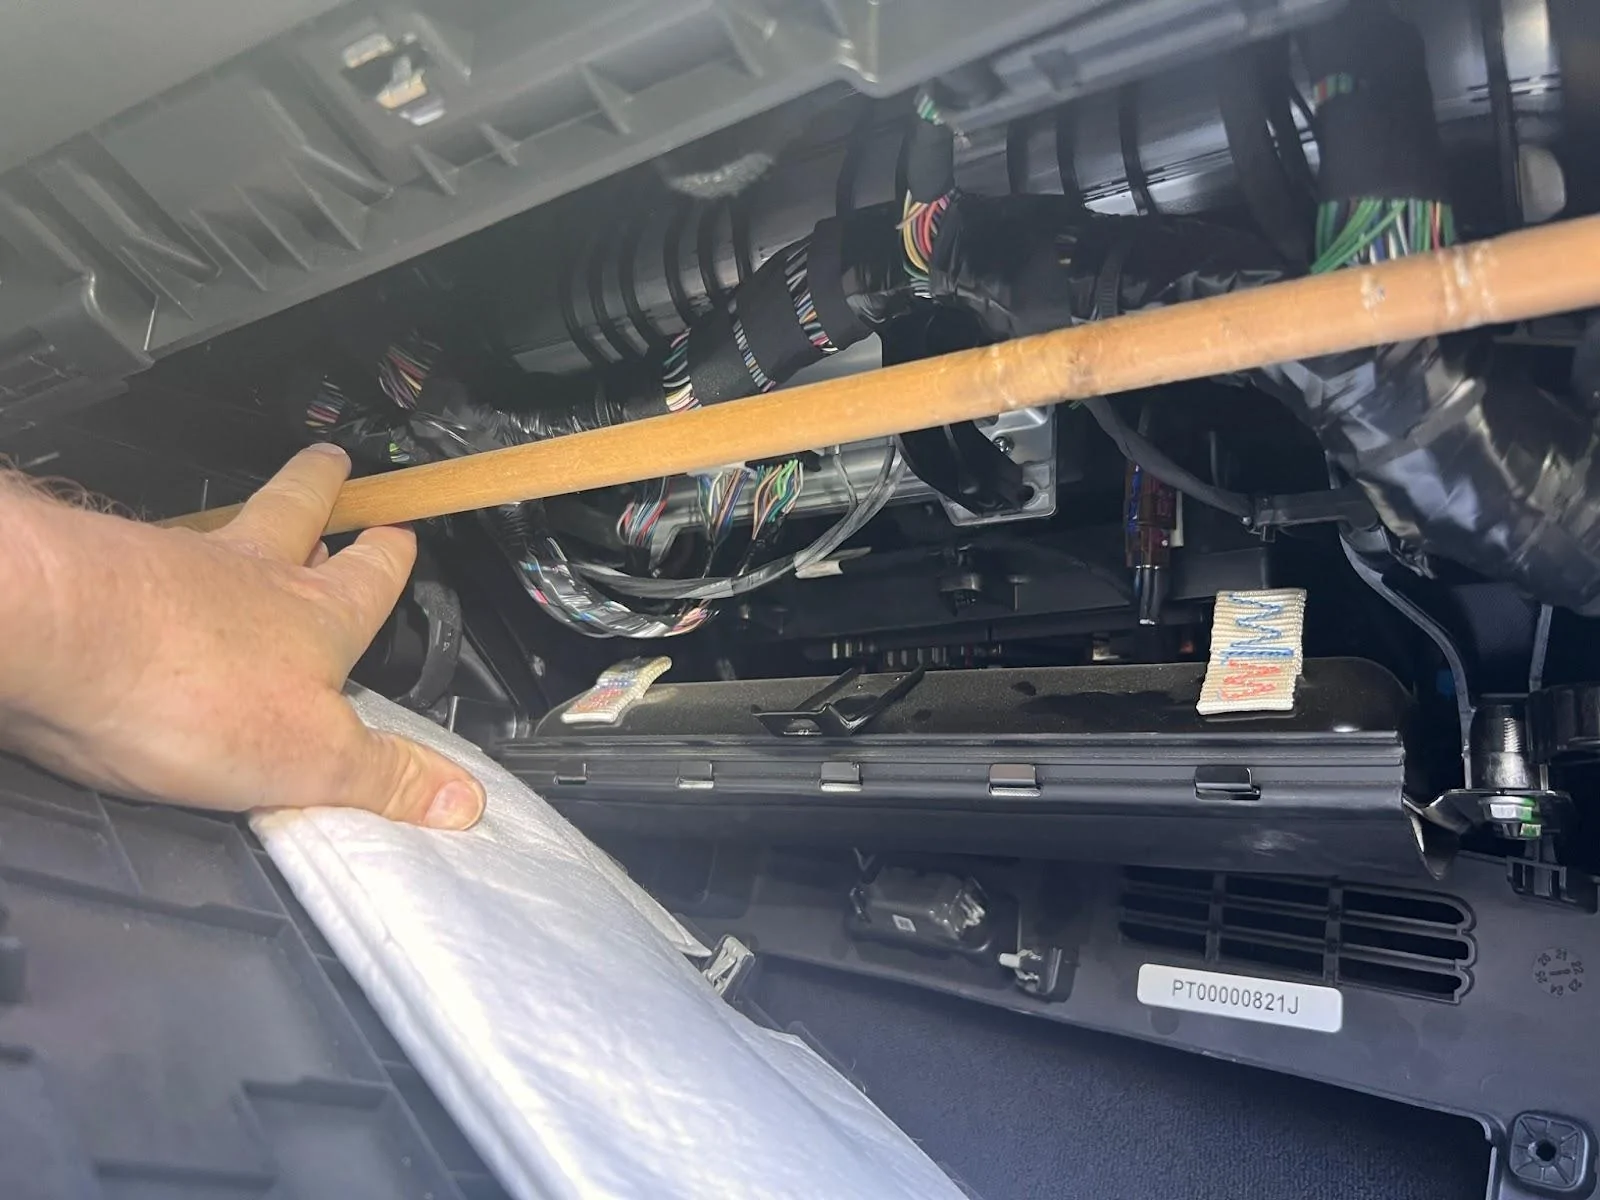
It looks like there is enough space on the passenger side under the dash to mount a radio. The wooden dowel is up against two plastic structural arms. I’m looking to use a metal rectangular tube secured to the plastic structural arms via U-bolts to then mount the GMRS radio to along with the Blue Sea fuse box and the grounding bus (from the Switch Pro install).

Thanks to everyone who has shared their mods online, it made it immensely easy to tackle my own mods.
Sulley R1T Mods
- Added MegaWatt rock slides. Have definitely made use of the rock slider and the kick-out on some Colorado off road trails.
- Installed Toyo Tire Open Country A/T III EV LT275/65 R20 126S E1 BSW tires
- Installed Switch Pro 9100 to provide power to various mods.
- Added two 12v outlets to the frunk.
- Added two USB-A ports, two USB-C PD 100 watt ports, and two 12v outlets to the center console
- Added two magsafe charging mounts to the dash
- Added Comma 3x for driver assist - total game changer
- Added Btech GMRS 50PRO radio [in progress]
General Inspiration
- K3g’s R1T Build on Rivian Forums
- Zonehawk R1T Build on Rivian Forums
- gerrylum’s YouTube videos on Comma 3x, Lukas’s work to enable Rivian support for Comma 3x, and the discord Comma and Sunnypilot #rivian channels, and the Rivian Comma Tips guide from mcgaverty
Switch Pro 9100 Install
I wanted better control of power for various mods and considered the Garmin Power Switch and the Switch Pros 9100. I ended up opting for the Switch Pros largely because of the solid state design and I wanted a physical switch panel. The Switch Pro shouldn’t be mounted face up where water could collect and the Switch Pro is a bit bigger than the Garmin Power Switch, so this proved to be a bit more of a challenge to mount. I ended up mounting below the 12v batteries. This area is accessed by removing the frunk.
I mounted the Switch Pro to a framing plate from home depot and then mounted the framing plate to a lip on the frame. This involved drilling at least 1 hole (maybe two) in the lip of the frame.
There is potential for the two harnesses coming out of the Switch Pro to rub on the frunk tub, so I wrapped those with extra electrical tape for protection (not shown).
This figure shows where I connected the Switch Pro to the 12V positive and negative leads.
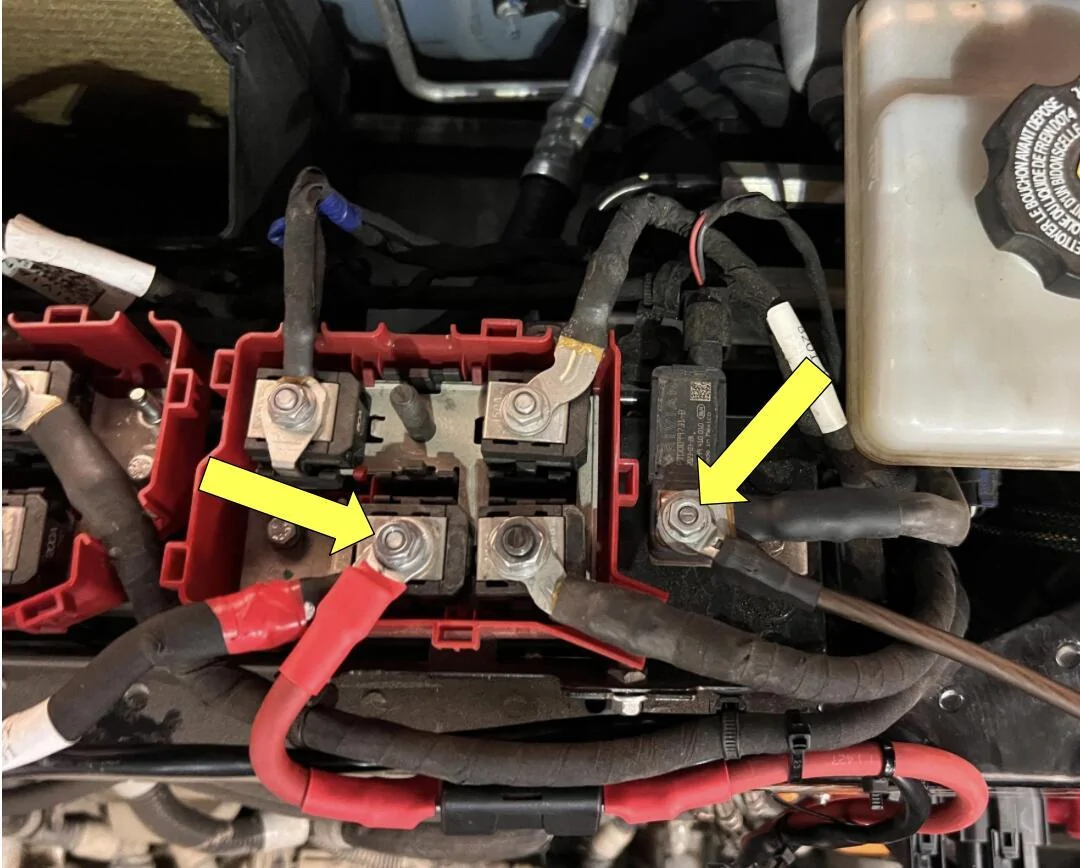
Some cutting of the red 12v batter cover was required to accommodate the extra 12V lead running to the Switch Pro.
I ran the main output/trigger harness up to a set of Blue Sea Fuse Blocks mounted up top using a mounting bracket from k3g.

I tied the pink (Trigger 1) and white (Trigger 2) wires into the 12v lead intended for the frunk 12v outlets. In doing so, those triggers get fired when the truck is unlocked and/or doors opened; essentially when the truck wakes up.
I tied the blue ignition trigger into the marker light in the front driver side wheel well. This trigger is fired when the brake pedal is pushed to “turn the truck on”.
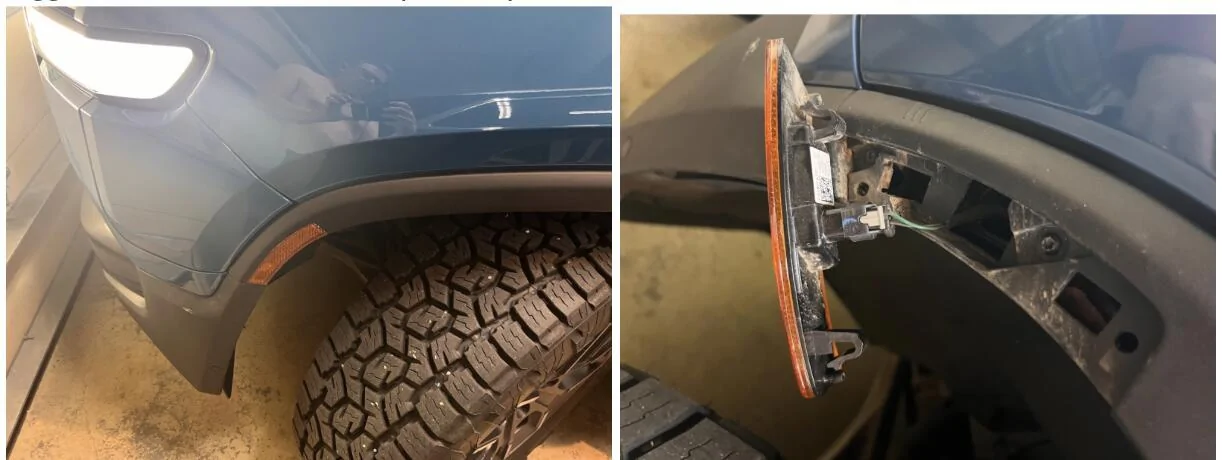
I fished a new wire from the opening at the wheel well up into the frunk using a coat hanger. I then used a water proof splice to connect the new blue trigger wire to the green positive 12v lead.
Important that your splice is able to fit up into the small hole where the wires come out.
The Switch Pro panel harness was fished through the firewall and into the cab. I was running the Switch Pro panel harness along with 7 other 8AWG wires, so I ended up cutting out a chunk of the firewall grommet to make room for all those wires.
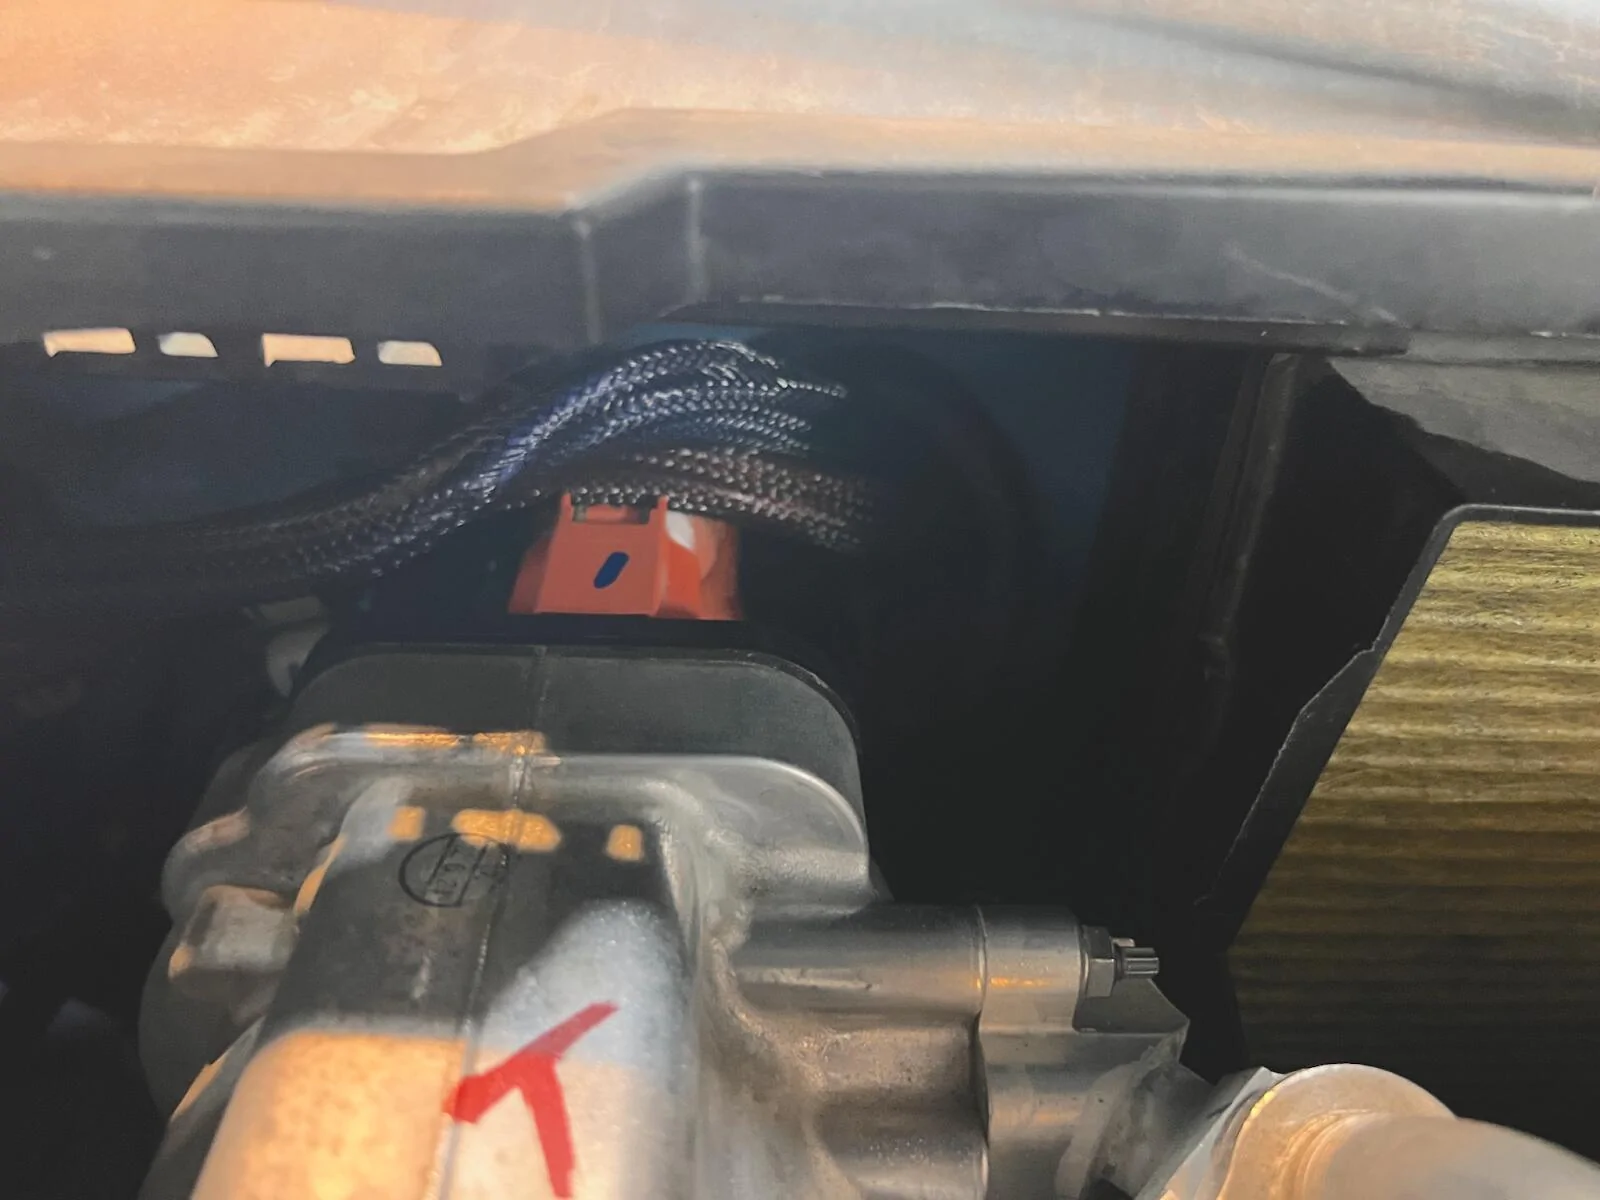
I then fished a 4 wire bundle (1 black and 3 blue wires) and a 3 wire bundle (3 red wires) through the firewall and into the cab. These were 8AWG wires (to support further extensions of these lines into the bed of the truck). I found it easiest to fish pulling line from the frunk into the cab with a coat hanger. I then used the pulling wire to pull the wire bundles from the cab into the frunk. Here is a view from the passenger foot well.
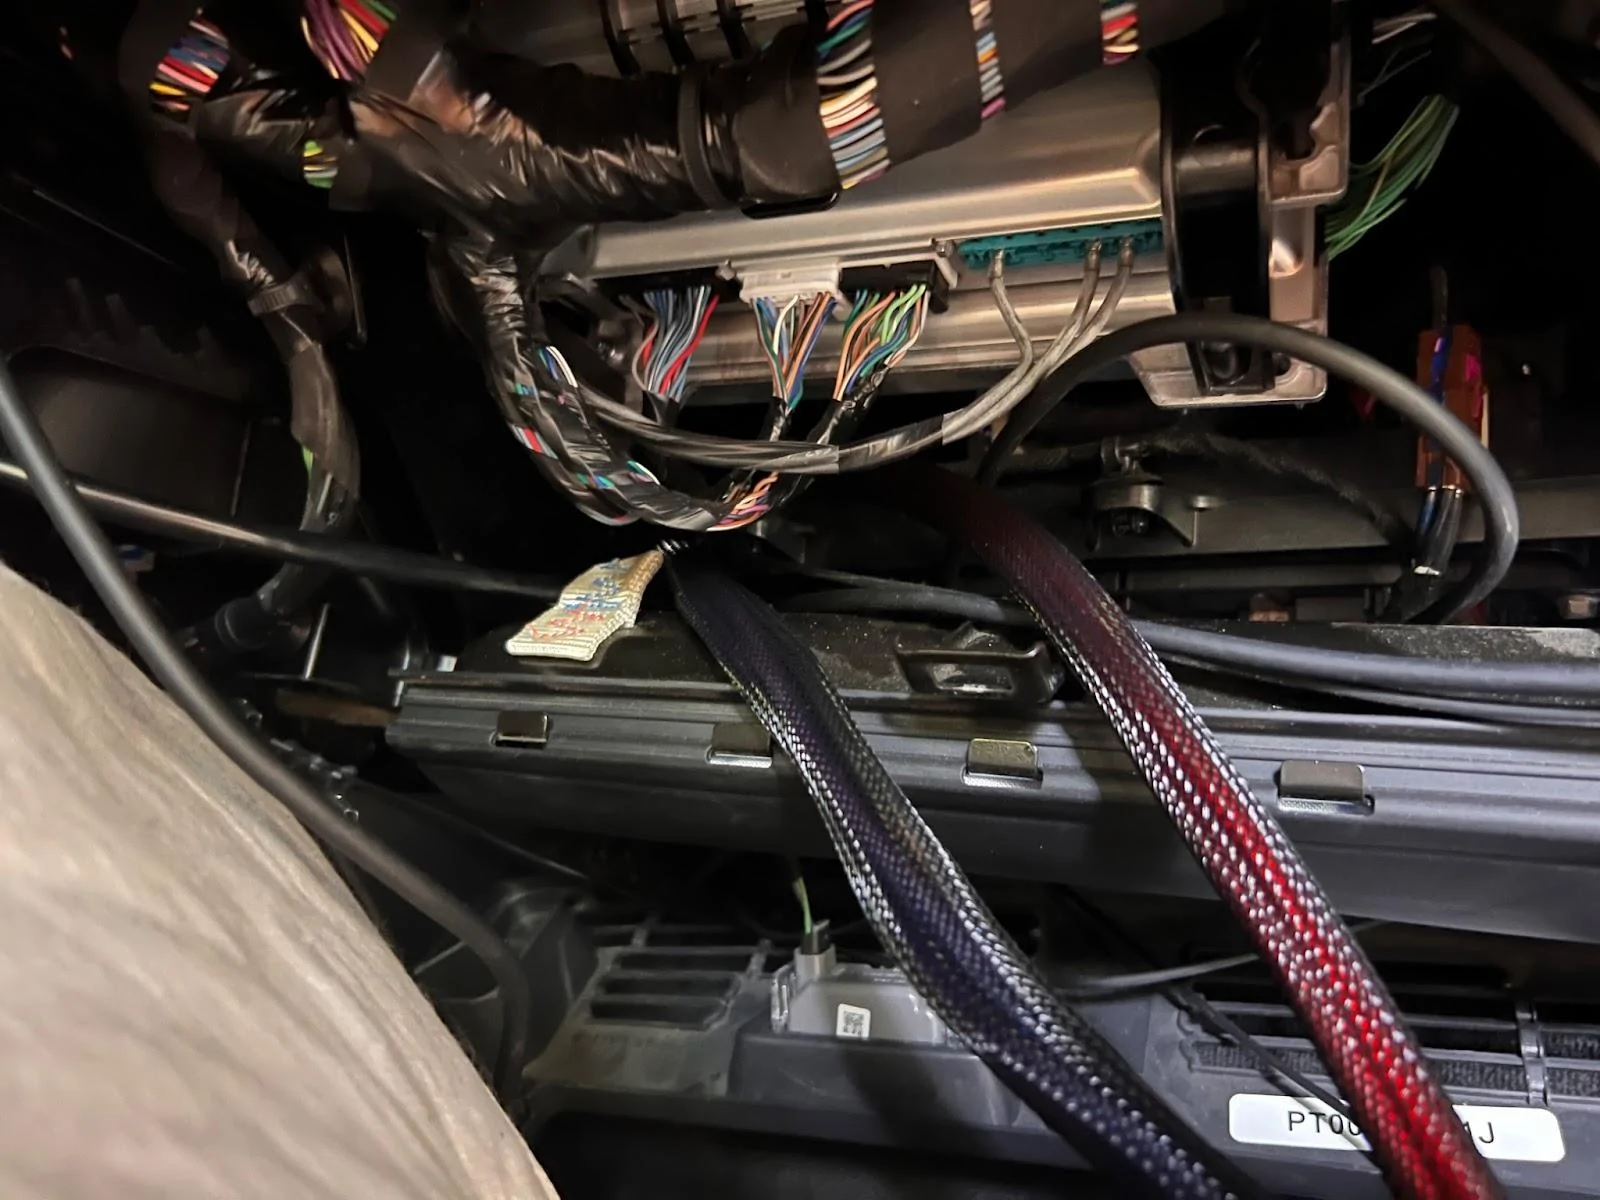
Three were connected to 20A switches on the Switch Pro via the Blue Sea Fuse Boxes in the frunk, three were connected to 35A switches on the Switch Pro via the Blue Sea Fuse Boxes in the frunk, and one was connected to the battery ground/negative in the frunk. In the compartment above the passenger footwell, I attached the 6 power leads to Blue Sea Fuse Box and the battery negative to a grounding block (not shown). Mounting of the the fuse box and the grounding block is TBD as part of my GMRS radio install.
The completed work from the frunk perspective:
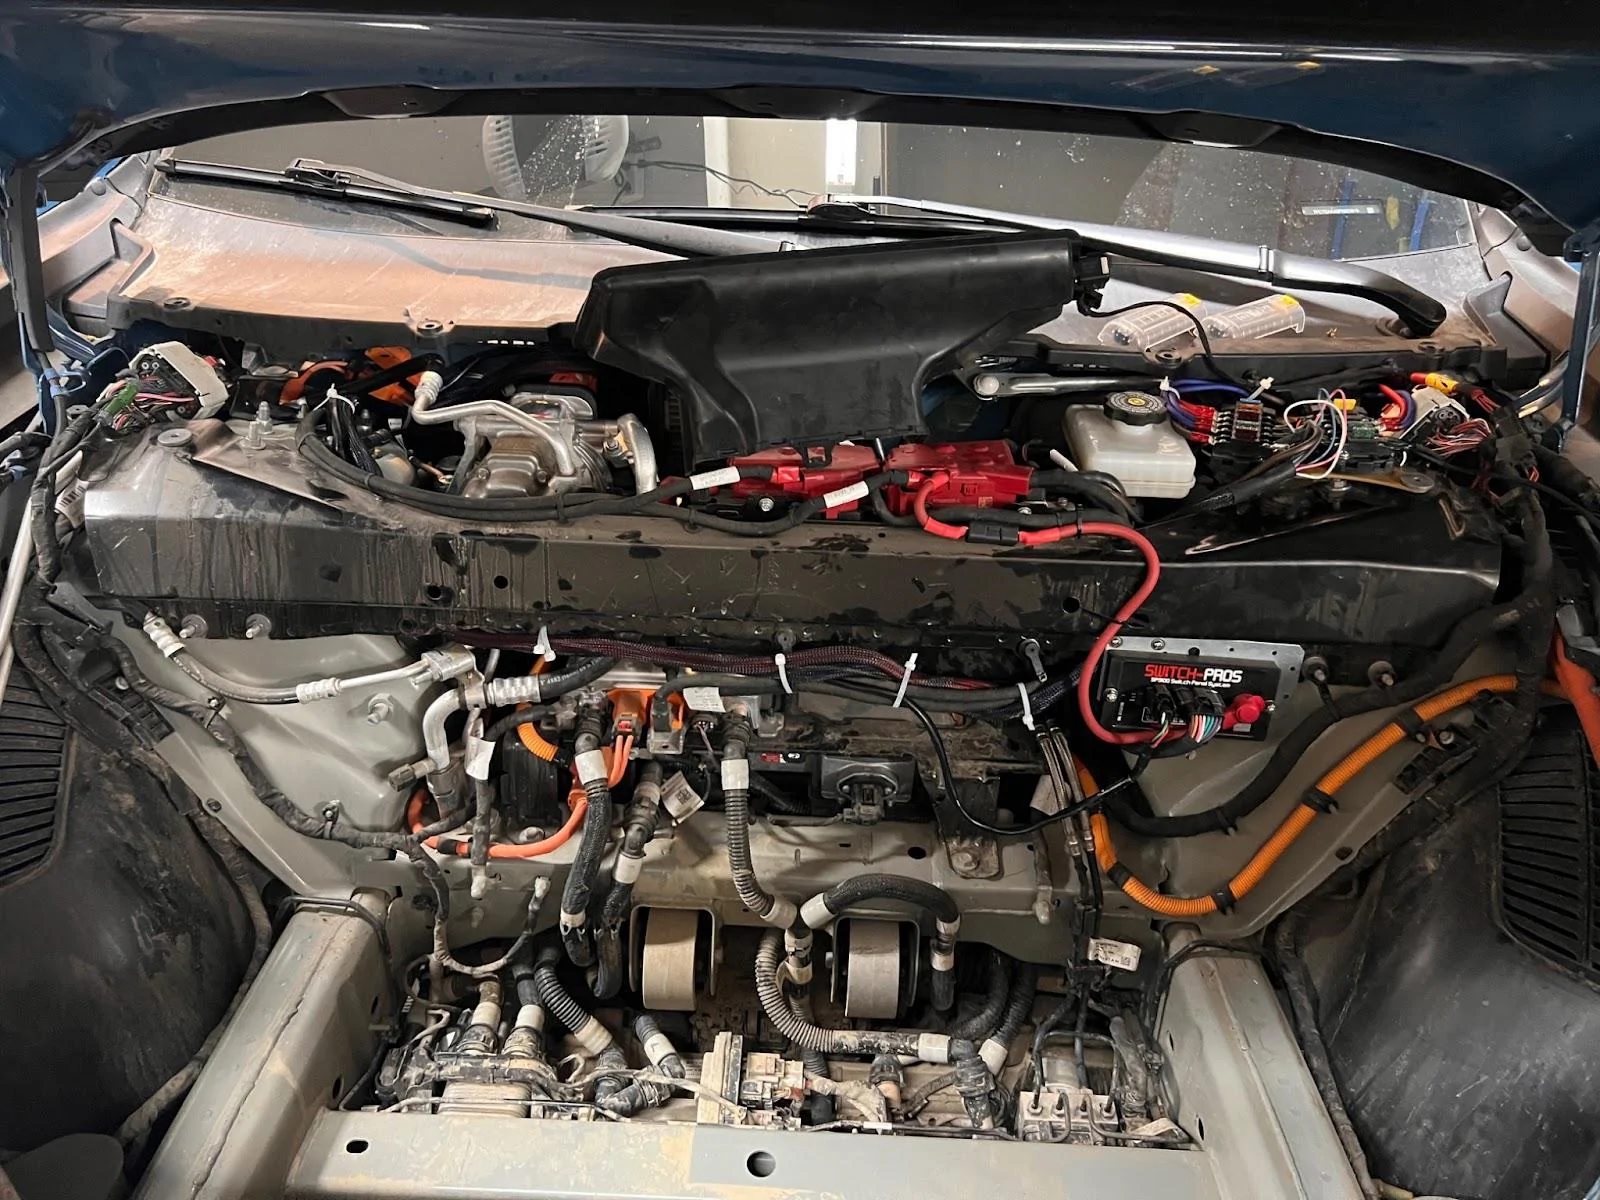
And here is a summary of the Switch Pro configuration
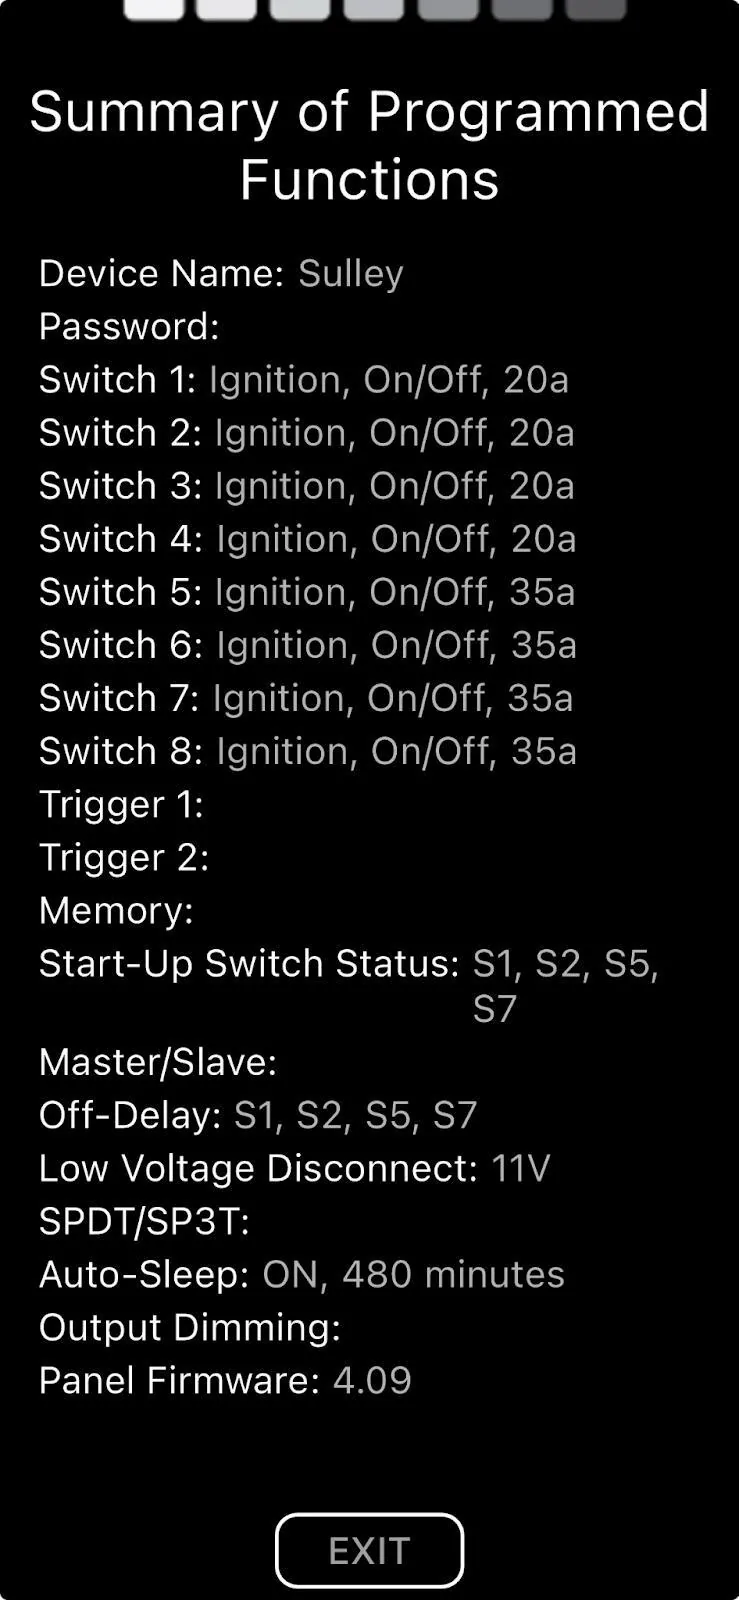
I’m currently not using Trigger 1 or 2 (truck wake/unlock), just the Ignition trigger off the marker light. I’m using Off-Delay to keep certain devices on for 30 minutes to 2 hours after the truck is turned off (exiting the truck and closing the door turns off the marker light and turns the ignition trigger off).
I’ve currently got the following wired up:
- 2 Frunk 12v outlets (20A Switch) with 30 minute power off delay
- Cab outlets -- 2 12v outlets, 2 USB-C 100 watt PD outlets, 2 USB-A outlets, and 2 PowerWerx USB-C boxes (35A Switch) with 30 minute power off delay
- Comma 3x (35A Switch) with 2 hour power off delay - The Comma 3x only pulls several amps, but when it first powers up there is a rush of current to fill the capacitors. When connected to a 20A switch on the Switch Pro, it triggers a power fault resulting in the Comma not powering up. Moving to a 35A switch on the Switch Pro resolved this.
- Btech GMRS 50Pro Radio (20A Switch) with 30 minute power off delay
Comma 3x AI Driver Assist
My biggest disappointment with Rivian is the incredibly pathetic driver assist on gen 1 vehicles. Rivian really dropped the ball for all us early adopters. Enter 3rd party solution Comma AI. Thanks to some terrific work by Lukas with a lot of community support, especially from gerrylum, we now have an awesome solution which comes close to a lot of Rivian’s early promises for Driver+. For my Comma setup, I’m using:
- Comma 3x
- Lukas’ gen1 harness kit
- Lukas’ gen1 longitudinal upgrade
- Lukas’ mod to supply fuse tap power to the Comma 3x (instead of relying on AXM power)
- Chun mount with 8 degree mount. Contact @bgill66 on discord to purchase
- USB-C 3.2 10ft cable with right angle for the main USB-C cable between the harness and the Comma 3x recommended on Comma #rivian discord channel.
- USB-C base extension and USB-C magnetic adapter recommended on Comma #rivian discord channel. These are used to connect the secondary Comma 3x USB-C port with the longitudinal upgrade via the thin USB-C cable that I believe came with the Lukas Longitudinal upgrade.
I strongly recommend that you get your harness directly from Lukas instead of Comma. Please support all the great work Lukas is doing to enable Comma on the Rivian.
See the most excellent Rivian Comma Tips guide from mcgaverty. I followed that guide and the referenced videos to get a clean working Comma 3x install.
As of this writing (July 3rd, 2025), I just completed a 2 hour drive from Boulder to Frisco Colorado. The drive involved in-town traffic, 2 lane highway, and multi-lane freeway through mountain terrain. The Comma was close to flawless on the drive for me. What I get with Comma 3x:
- Hands free driving in-town via MADS mode (I control throttle, Comma controls steering)
- Hands free and foot free driving on 2 lane high ways and multi-lane freeways
- Use on unmapped roads with smooth navigation of construction work
- Doesn’t shut down when going through tunnels like Driver+
I’m running Sunnypilot dev-c3-new and the drive above was with the TR14 driving model.
I have an earlier harness created by Lukas that dependent on AXM power. At no cost to me, he sent me an update box (the black detached part) along with OBD2 power connector in order to power my Comma off the OBD2 port.
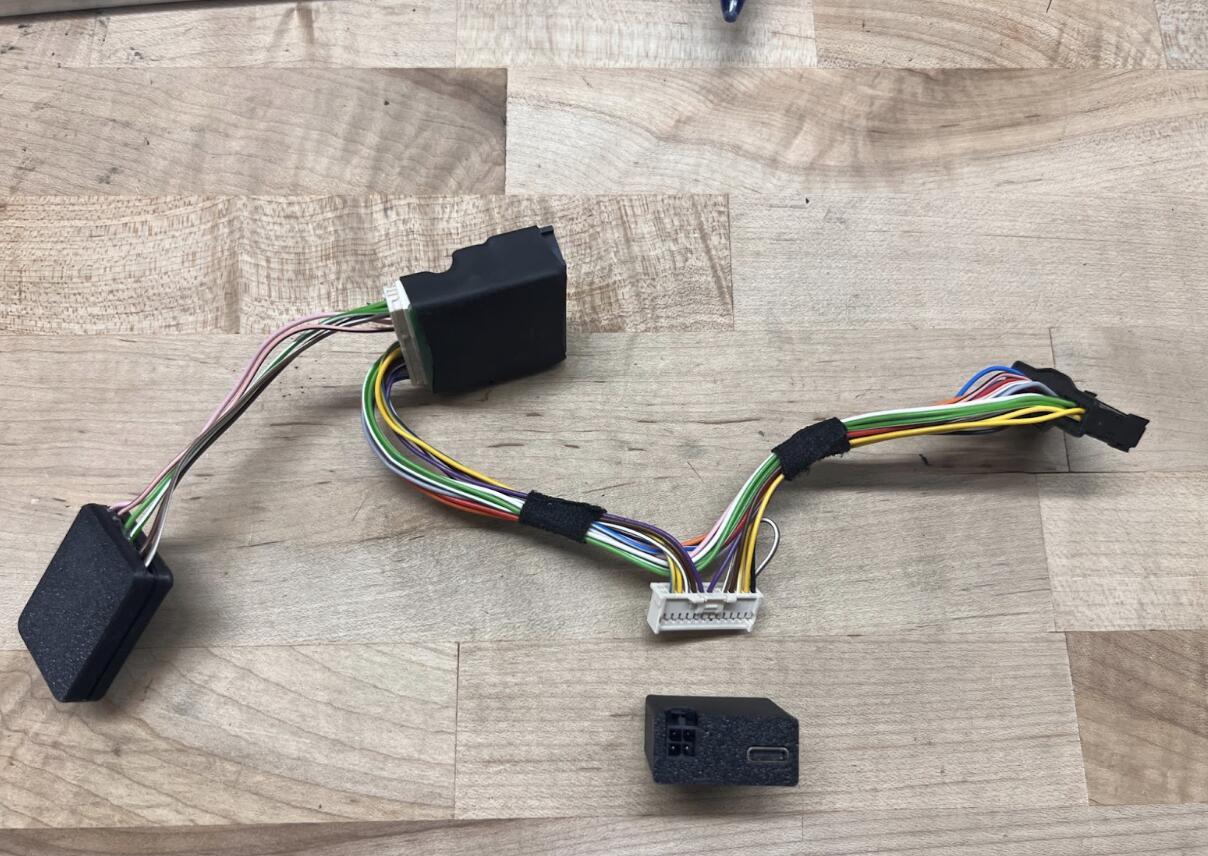
I removed the ODB2 plug (not shown) and hard wired the single 12v power into a 35A switch on my Switch Pro. While the Comma doesn’t need 35A, it does have a large current rush on boot up to fill it’s capacitors. This was resulting in a fault on the Switch Pro. I eliminated this problem by moving that power lead to a 35A switch. Thank you ChatGPT o3 for solving that problem. ChatGPT was referencing reddit posts for a Switch Pro install on a Ford F150 Lightening. I could never find the posts that ChatGPT was referencing - go figure?
I was having the Comma 3x randomly shut down. This has been attributed to being connected to AXM power. I had to delete the connection to AXM power by pulling the two purple wire pins and soldering them together; this maintains the 12V power from AXM to the sensor harness but removes the connection to Comma 3x. Newer harnesses do not need this modification as AXM power is no longer supported due to the various power issues users have had.
Frunk 12v Outlets
I added two 12v outlets to my frunk, as my 2023 R1T gen 1 had these deleted. Originally these were wired directly into the existing 12V outlet lead in the Rivian harness for the frunk tub. With the addition of the Switch Pro, I took that 12v outlet frunk lead, and used it as a trigger on the Switch Pro for “truck awake”. I then connected the 12v outlets in the frunk directly to a 20A switch on the switch pro via the Blue Sea Fuse Bus in the frunk. Can’t recall the exact internet resources I used for this mod, but this video is pretty representative.
Cab Outlets

My 2023 R1T gen 1 also had the cab 12v outlet deleted. So I fixed that by adding:
- Two 12v outlets
- Two combo USB-A / USB-C PD 3.1 100 watt outlets
- And not seen from the exterior, two Powerwerx Quick Charge 75W USB Device Chargers, used to connect the dash mounted magsafe chargers to
Here is the back side.
I used a different Blue Sea Fuse Box than those used in the Switch Pro install to independently fuse each of the outlets. I’ve also got a common grounding bus for all the outlets. The grounding bus (negative) and the fuse boxes (positive) are connected to a single Switch Pro 35A outlet via the Blue Sea Fuse Box and Grounding bus in the cab that is wired through the firewall to the Switch Pro in the frunk.
On the driver side I have a Peak Design Locking Qi2 magsafe mount with a 20mm ball connected to an EV Sportline dash mount with a Bulletpoint Mounting Solutions mini arm. The magsafe mount is connected to the Powerwerx USB-C port via USB-C extension cable. See this video on hiding Comma USB-C cables to get an idea of how to hide/route the USB-C cables for the magsafe mounts. So far I’m liking this setup, but note that the current positioning in the photos does block the AC vent; on the plus side, this keeps your phone cold, on the down side, that is less AC hitting me. You can shift the position of the arm to put the phone higher up where it isn’t blocking the vent.
On the passenger side, I’ve got an older Peak Design magsafe mount. I’m using the same Bulletpoint Mounting Solutions mini arm with an Offroam mounting base. I’m using a USB-C 3.2 10ft cable with right angle along with a flat ribbon extension to connect the charger to the Powerwerx USB-C port.
Btech GMRS 50Pro
Next project on deck.
I have several handheld Btech GMRS Pro radios that I like alot. So I jumped on the opportunity to install a 50 watt equivalent in my truck. Pieces I’ve accumulated so far:
- Btech GMRS 50Pro radio
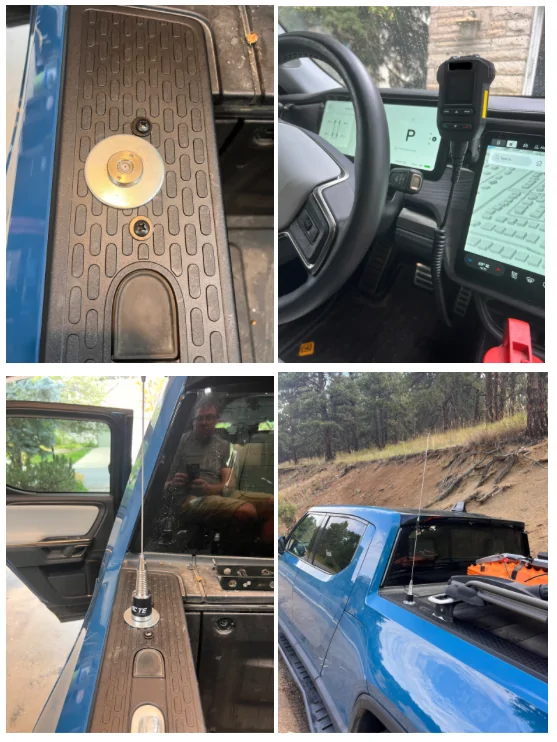
- GX16 panel mount that I’ll be mounting on the trim piece under the steering wheel on the right side
- GX16 extension cable to connect the radio to the GX16 panel mount
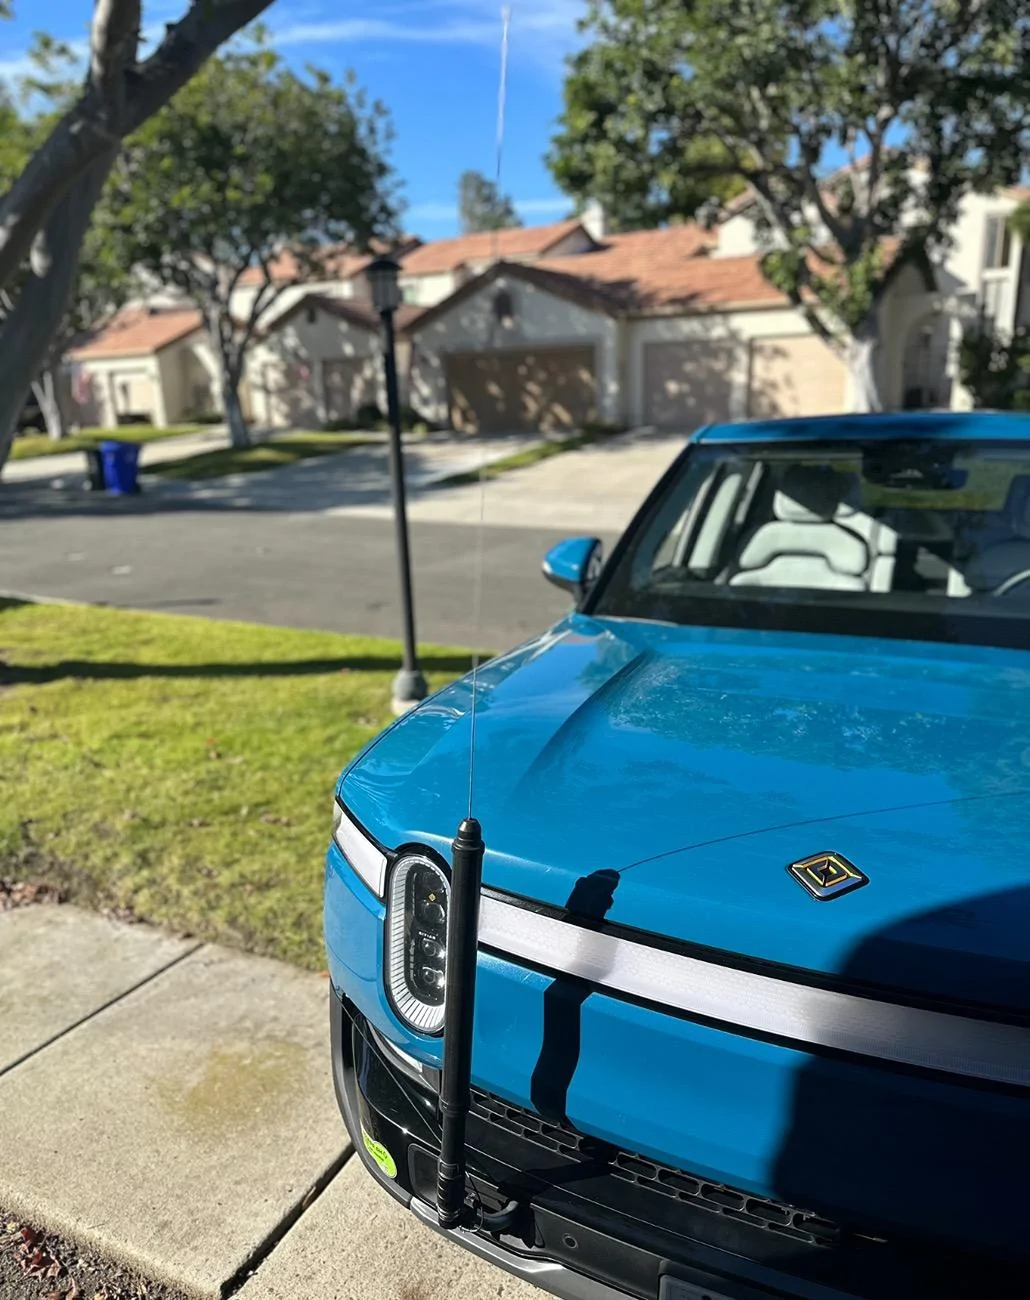
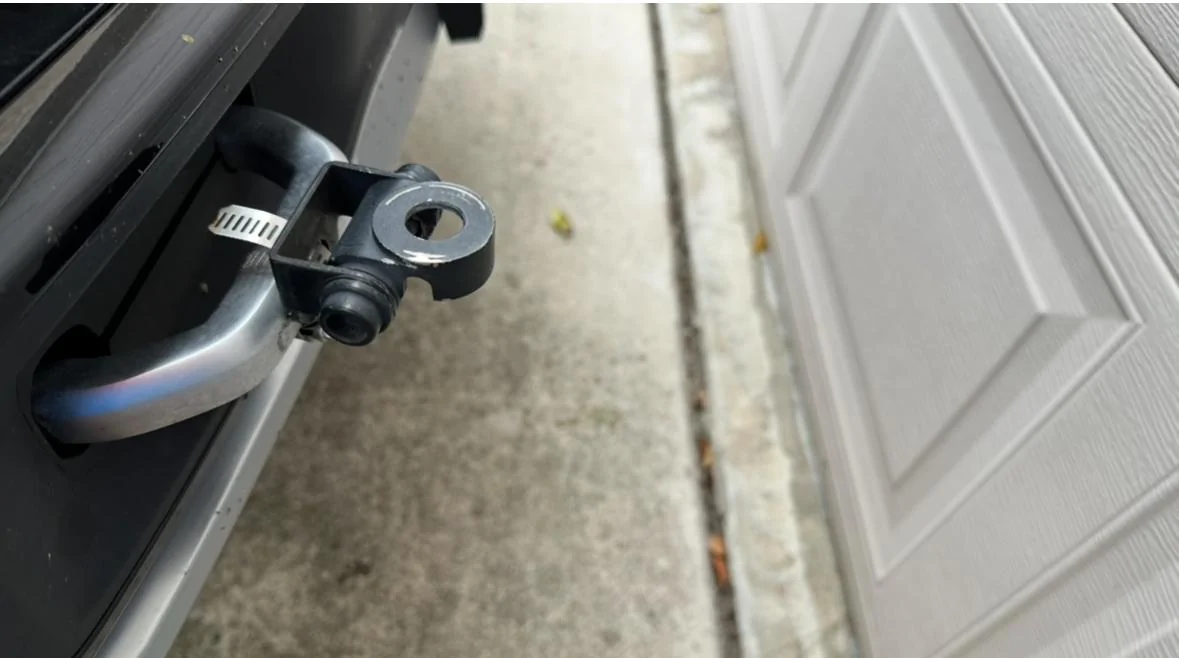
- Larsen NMOHFTHK Thick Surface NMO Mount which I plan to mount on the truck bed side top
- Tram GMRS antenne
It looks like there is enough space on the passenger side under the dash to mount a radio. The wooden dowel is up against two plastic structural arms. I’m looking to use a metal rectangular tube secured to the plastic structural arms via U-bolts to then mount the GMRS radio to along with the Blue Sea fuse box and the grounding bus (from the Switch Pro install).

Sponsored
Last edited: