

R1SKY
Active Member
- First Name
- Kyle
- Joined
- Jul 14, 2023
- Threads
- 9
- Messages
- 42
- Reaction score
- 73
- Location
- SF Bay Area
- Vehicles
- 991.2 Turbo, 997.2 GT3, 1966 GT 289, Lucid Air GT
- Thread starter
- #1
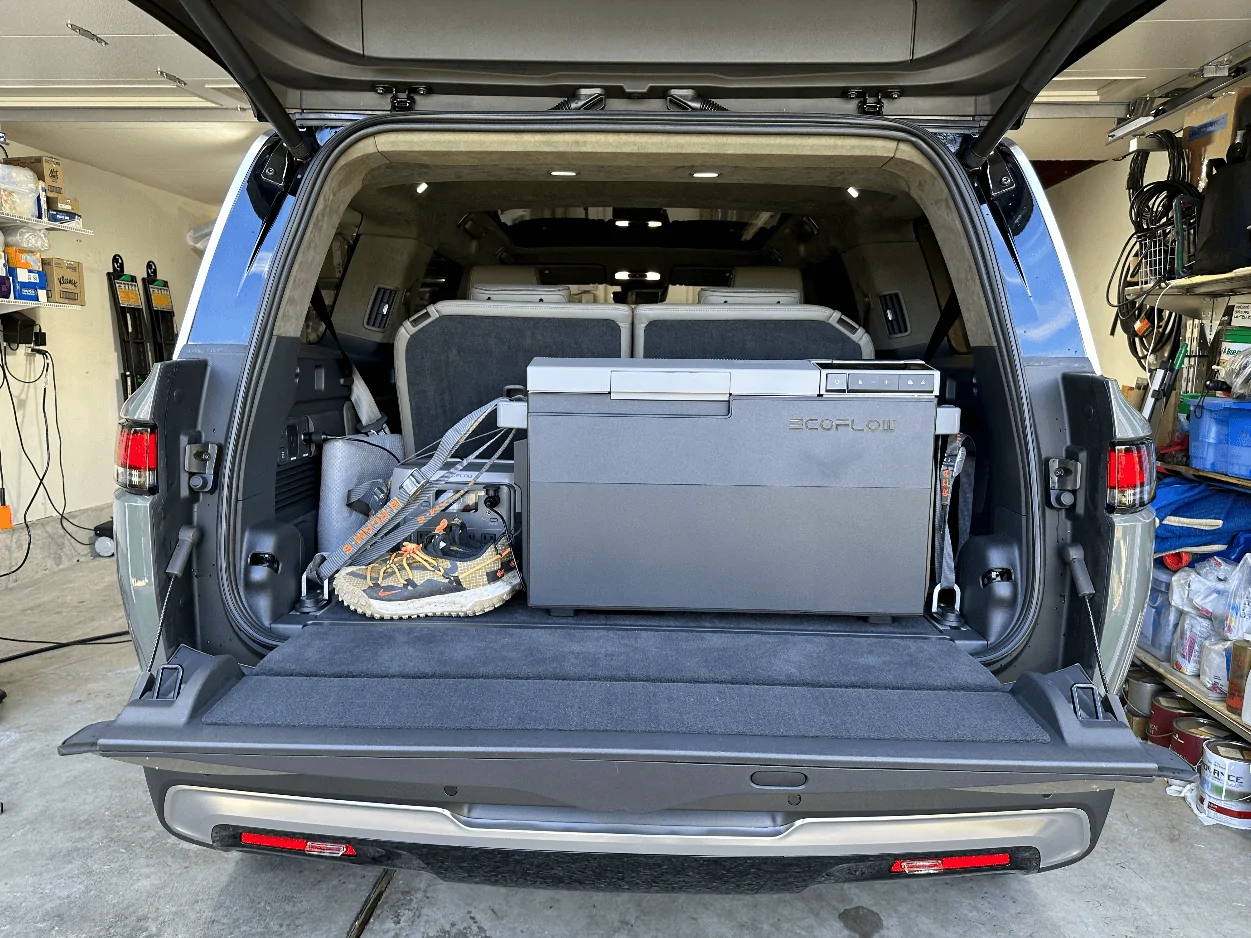
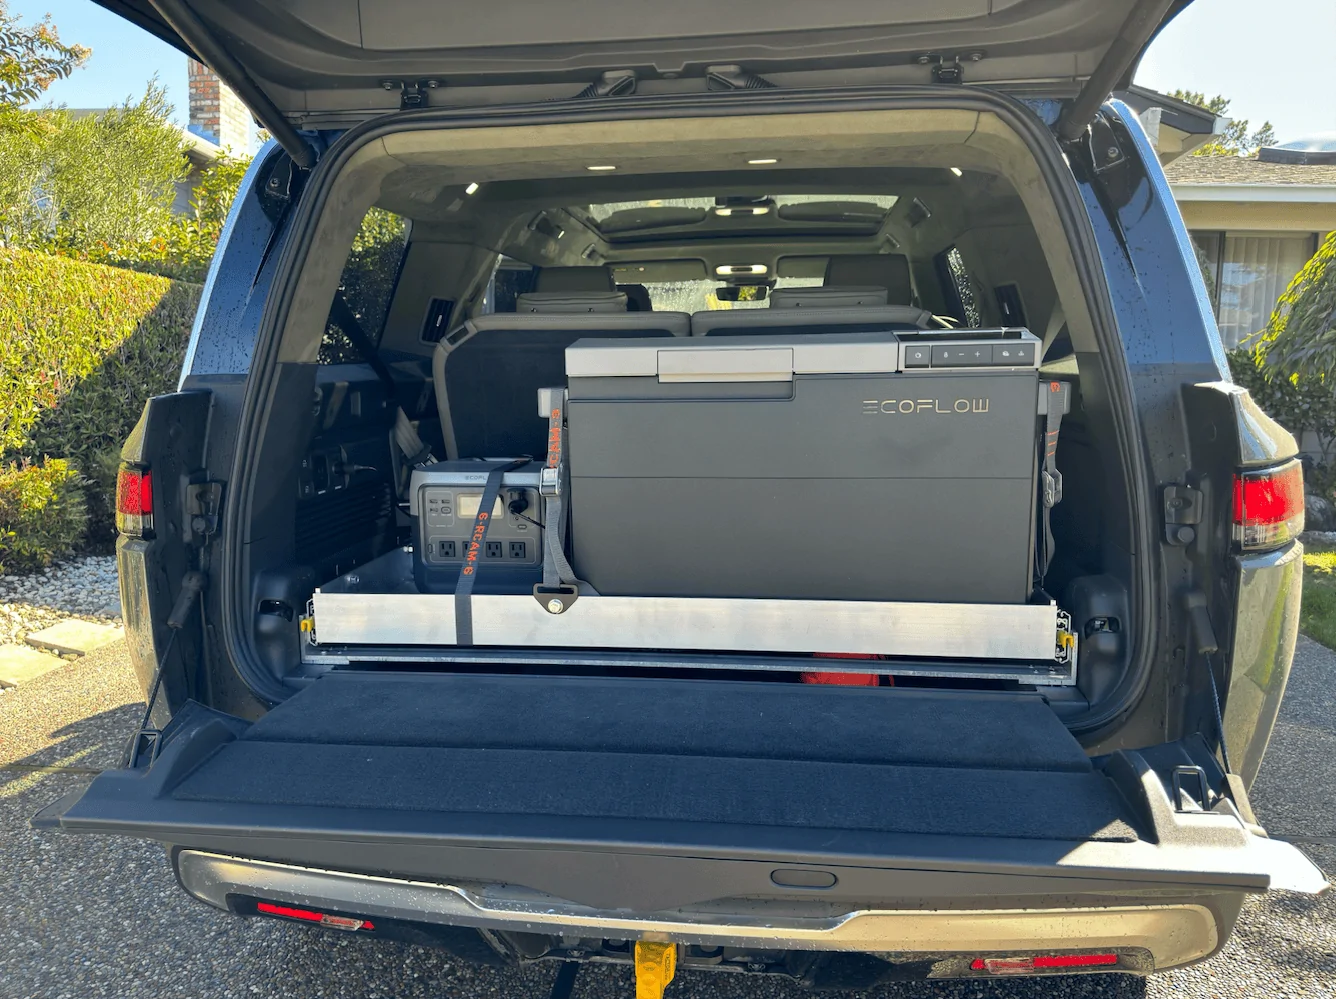
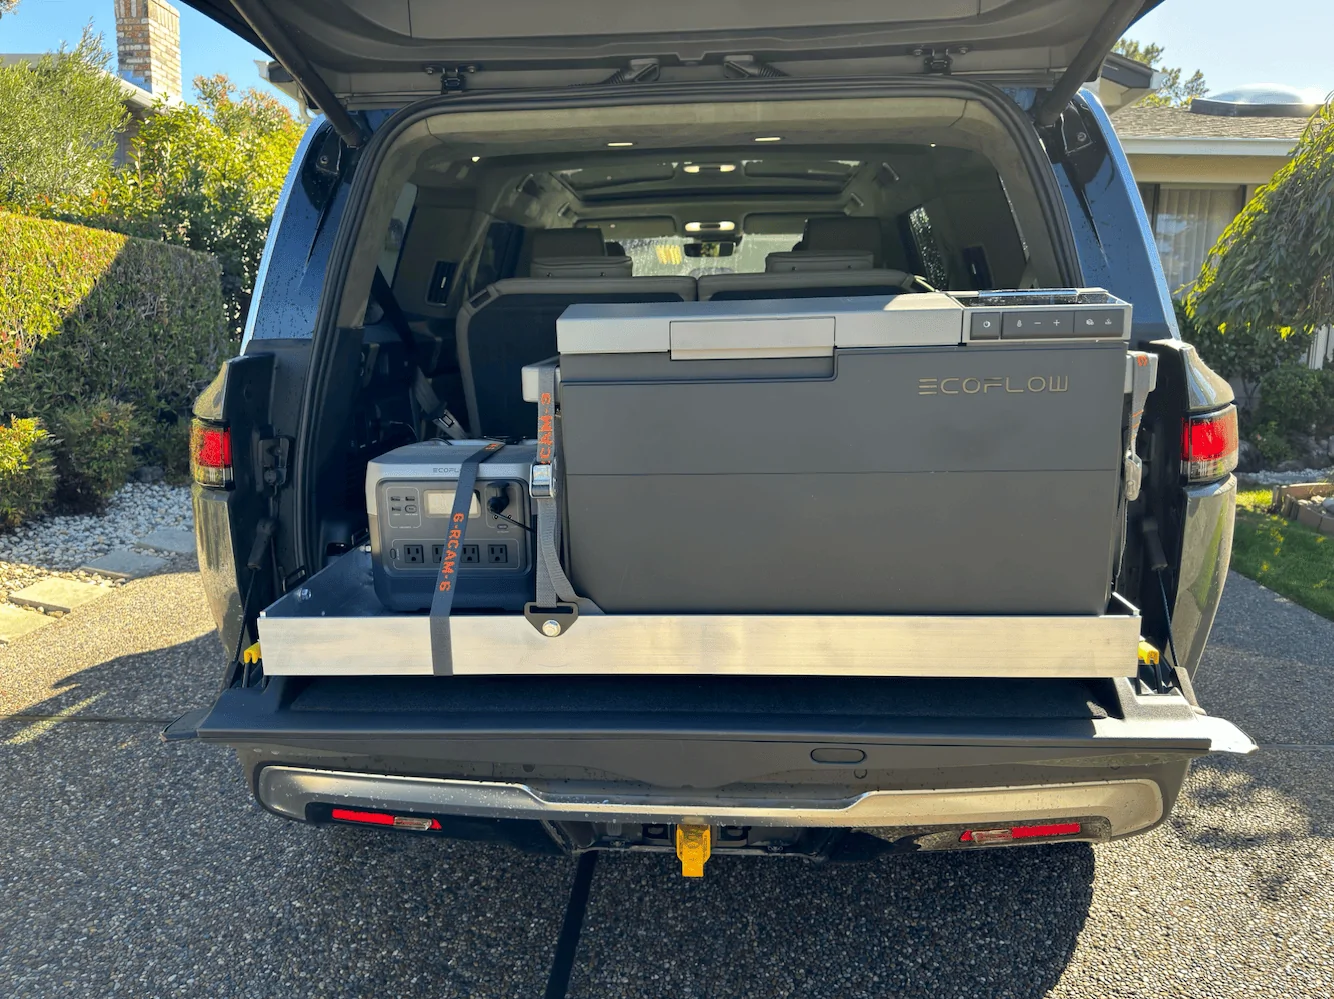
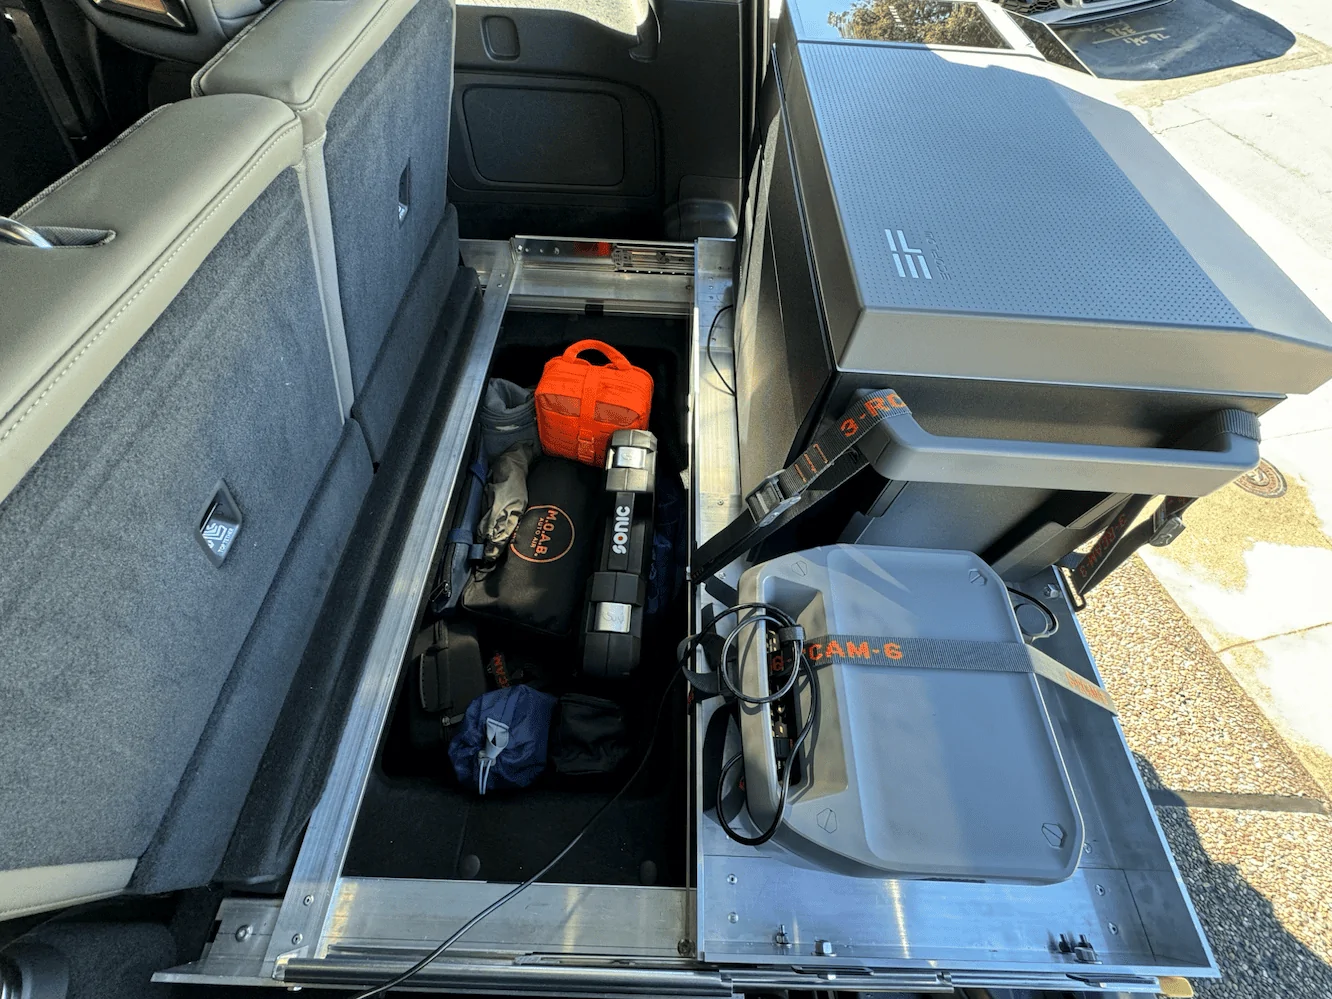
So I finally decided to make a bolt on fridge slide, this idea has been on my mind for a while now it just took some time to get some confidence to do it and see it through. Currently the Ecoflow Glacier and River 2 Pro fit in the R1S trunk space without sacrificing seating capacity, but the size and weight made it cumbersome to move to access the spare tire storage area.
Before

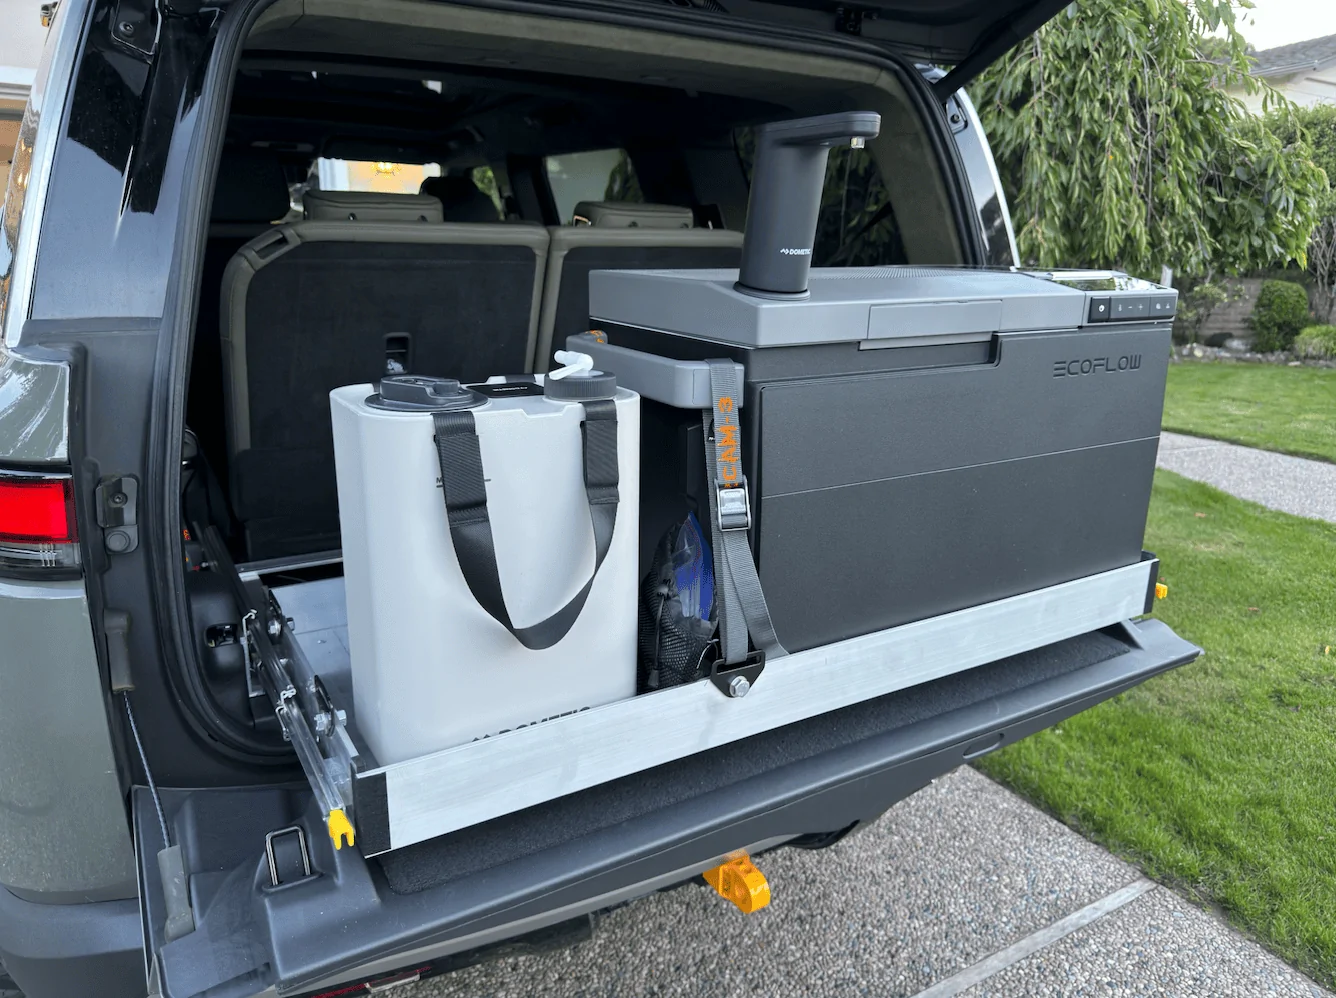
After

Bill of Materials
• 6063-T52 Mill Finish Alum Angle 3”x3”x48”x0.25” - 5qt - $136 Total
• Aluminum Rectangular Bar 6061-T6511 4”x48”x0.25” - 1qt - $30
• Aluminum Rectangular Bar 6061-T6511 12”x48”x0.25” - 1qt - $88
• SHUHANG Heavy Duty Drawer Slides with Lock 76mm - 16in - 1qt - $80
• M8 x 70mm 10Pcs Flat Head Hex Bolts, 304 Stainless Steel - 1qt - $10
• GPCA - Tie Down Metal D-Plates 6pcs - 1qt - $17
• Riveter
• Misc Bolts, Washers and Nylock Nuts
Total $361
The Base
• 6063-T52 Mill Finish Alum Angle 3”x3”x19”x0.25” - 2qt
• Aluminum Rectangular Bar 6061-T6511 2”x44”x0.25” - 2qt
• SHUHANG Heavy Duty Drawer Slides with Lock 76mm - 16in
• M8 x 70mm 10Pcs Flat Head Hex Bolts, 304 Stainless Steel - 1qt
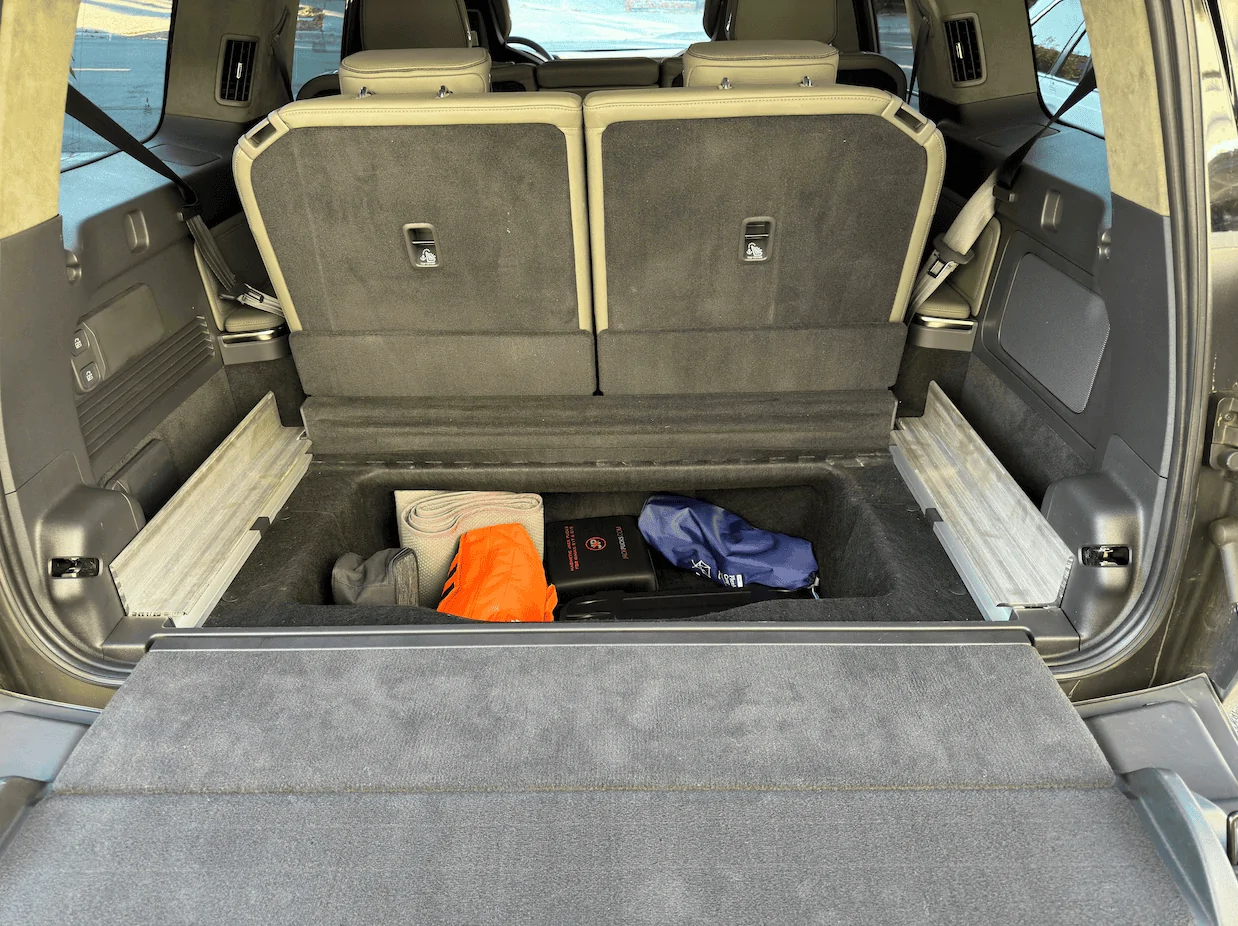
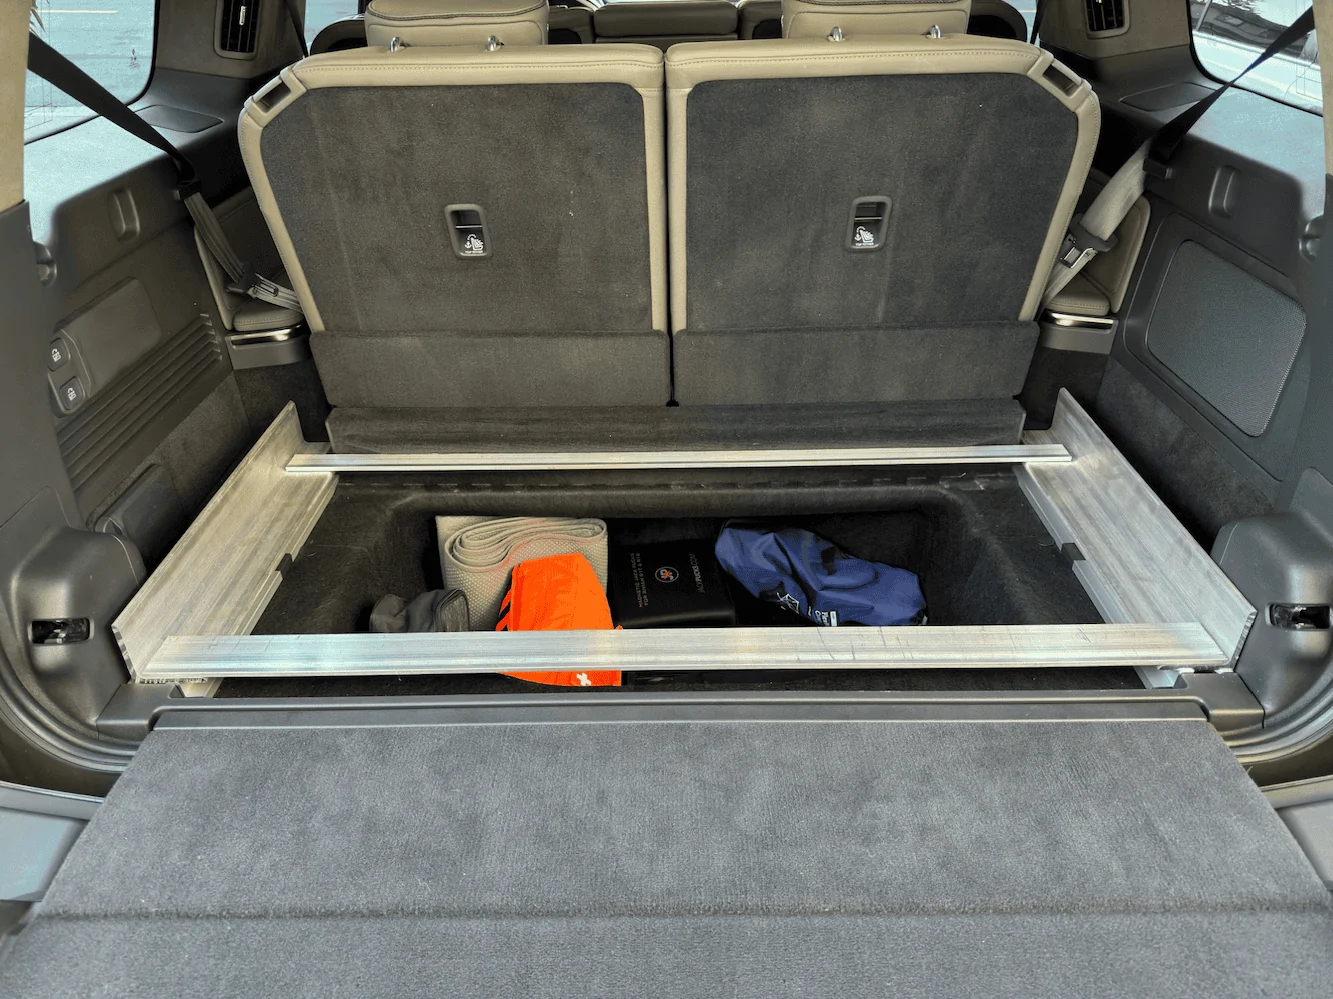
There were two options I came up with for mounting the base to the car, first was to use the existing L-Track style mounting system or use extended bolts in place of the existing bolts that hold the rail in place. I tried using 1” OD washers I had, but it seems the OD needed is slight smaller like 0.9” OD. Perhaps if I used metric washers like a 25mm OD washer it might have worked, but I had some reservations on how well it’d hold.
Instead I decided to remove the 6 bolts that help secure the rail and used 70mm M8 extended bolts. I test fit it with one of the angle pieces and gave it the shake test and it was rock solid and ended up shaking the whole car.
I went with the these 76mm drawer slides (yellow lock handles) because it is rated to hold up to 500lbs and I opted for the built-in locking mechanism. For the slides I originally tried using the 53mm with a lock (blue lock handles), but I was worried it’d be too much stress on it since they are rated for 150lbs. I also considered getting non-locking slides and attaching a bolt style latch to secure it from moving, but could already envision the lock bolt clanking in the bolt hole as I drive on rough terrain.
When it comes to joining everything together I (for the most part) used some 5mm long rivets.


This is a shot of the base with the 53mm slides (blue handles)

The two different mounting solutions


The Tray
• 6063-T52 Mill Finish Alum Angle 3”x3”x18”x0.25” - 2qt
• 6063-T52 Mill Finish Alum Angle 3”x3”x42.5”x0.25” - 2qt
• Aluminum Rectangular Bar 6061-T6511 12”x48”x0.25” - 1qt
• GPCA - Tie Down Metal D-Plates 6pcs - 1qt
This part was pretty straight forward, the only decision was to figure out which side I wanted to mount the fridge since there would be a gap under the fridge to save weight and allow better ventilation. I ended up making holes to run the tray either way so the fridge could go on the left or right.


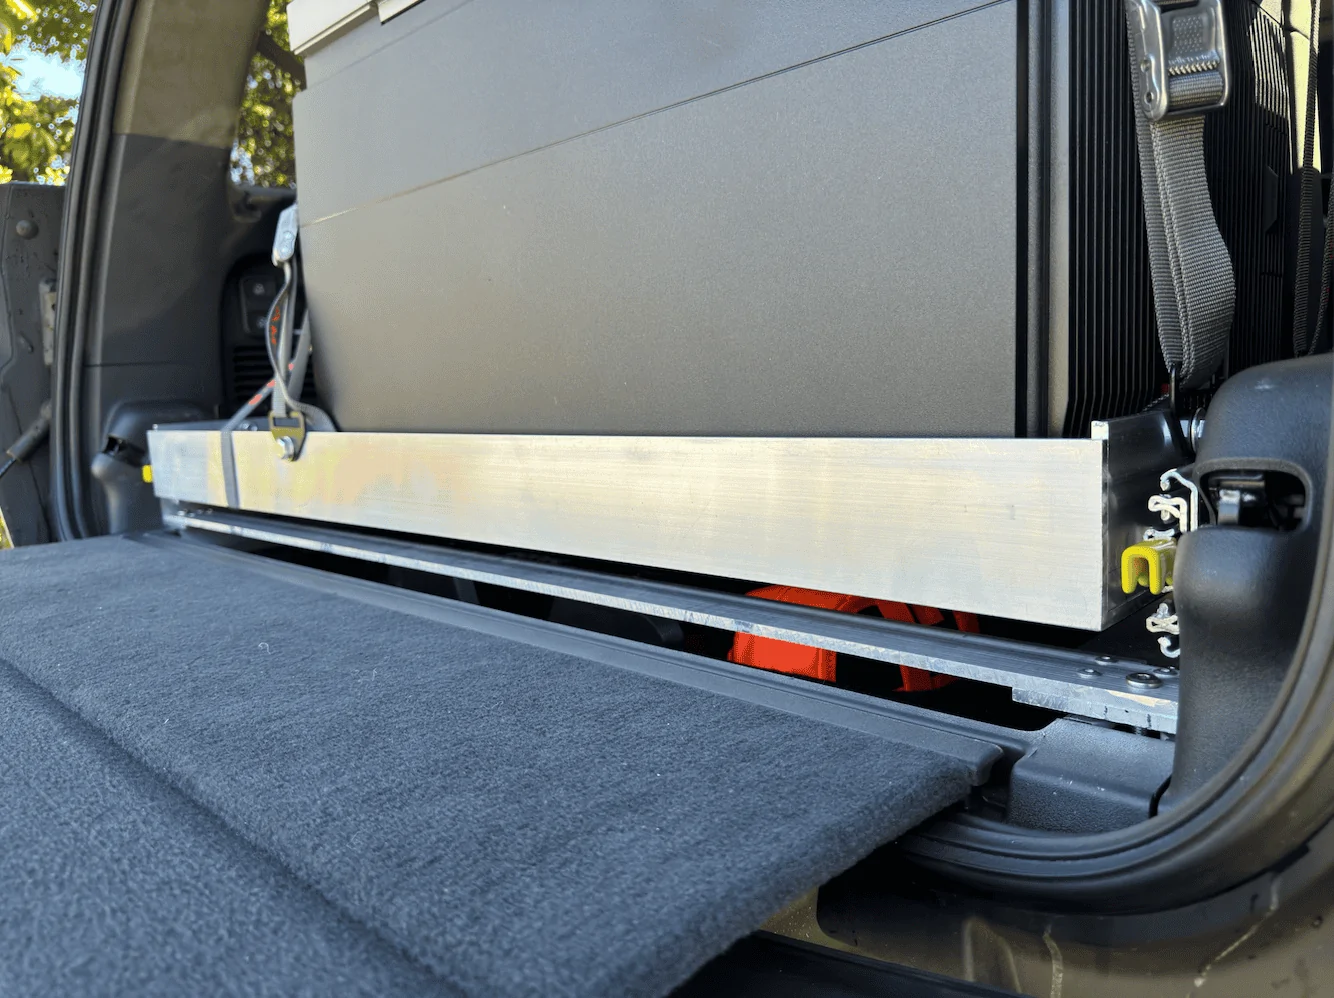
I didn’t really go into this earlier, but the bumps in the drop gate presents clearance issue in two ways. When the gate is up it takes away clearance and can come in close contact with the locks latches, but when down it has clearance issues with the tray when extended. So when I was test fitting before I started drilling and assembly I knew I was going to mount the slides pretty high up on the base angles and then on the tray I would mount it pretty low to allow for the most clearance just in case there was any sag in the slides when extended under load.

In the end I am pretty happy with how it's turned out, I've already made a few modifications like moving the drawer further out to allow the fridge lid to open more since it was limited by the angle of the third row seat. I've also added an additional set of tie downs for the fridge that aren't as long.
Here's some quick pros and cons I've found so far.
Pros
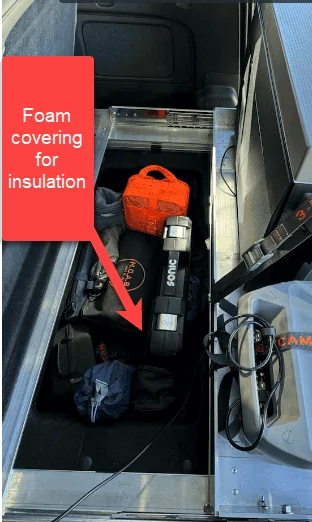
• Easy access to the spare tire storage area
• Easy access to the fridge and other items on the tray slide
• Provides a secure solution for spare tire storage area as the only way to get to it is to open the gate and slide out the tray
• Full bolt-on so it can be removed without any additional holes or evidence left behind
Cons
• Flat floor feature is no longer
• Adds some extra weight ~50lbs.
• Noisier (air compressor for the air suspension is more audible)
• Crossbars for supporting the base takes away from some of the opening to the storage area


Before
After
Bill of Materials
• 6063-T52 Mill Finish Alum Angle 3”x3”x48”x0.25” - 5qt - $136 Total
• Aluminum Rectangular Bar 6061-T6511 4”x48”x0.25” - 1qt - $30
• Aluminum Rectangular Bar 6061-T6511 12”x48”x0.25” - 1qt - $88
• SHUHANG Heavy Duty Drawer Slides with Lock 76mm - 16in - 1qt - $80
• M8 x 70mm 10Pcs Flat Head Hex Bolts, 304 Stainless Steel - 1qt - $10
• GPCA - Tie Down Metal D-Plates 6pcs - 1qt - $17
• Riveter
• Misc Bolts, Washers and Nylock Nuts
Total $361
The Base
• 6063-T52 Mill Finish Alum Angle 3”x3”x19”x0.25” - 2qt
• Aluminum Rectangular Bar 6061-T6511 2”x44”x0.25” - 2qt
• SHUHANG Heavy Duty Drawer Slides with Lock 76mm - 16in
• M8 x 70mm 10Pcs Flat Head Hex Bolts, 304 Stainless Steel - 1qt
There were two options I came up with for mounting the base to the car, first was to use the existing L-Track style mounting system or use extended bolts in place of the existing bolts that hold the rail in place. I tried using 1” OD washers I had, but it seems the OD needed is slight smaller like 0.9” OD. Perhaps if I used metric washers like a 25mm OD washer it might have worked, but I had some reservations on how well it’d hold.
Instead I decided to remove the 6 bolts that help secure the rail and used 70mm M8 extended bolts. I test fit it with one of the angle pieces and gave it the shake test and it was rock solid and ended up shaking the whole car.
I went with the these 76mm drawer slides (yellow lock handles) because it is rated to hold up to 500lbs and I opted for the built-in locking mechanism. For the slides I originally tried using the 53mm with a lock (blue lock handles), but I was worried it’d be too much stress on it since they are rated for 150lbs. I also considered getting non-locking slides and attaching a bolt style latch to secure it from moving, but could already envision the lock bolt clanking in the bolt hole as I drive on rough terrain.
When it comes to joining everything together I (for the most part) used some 5mm long rivets.
This is a shot of the base with the 53mm slides (blue handles)
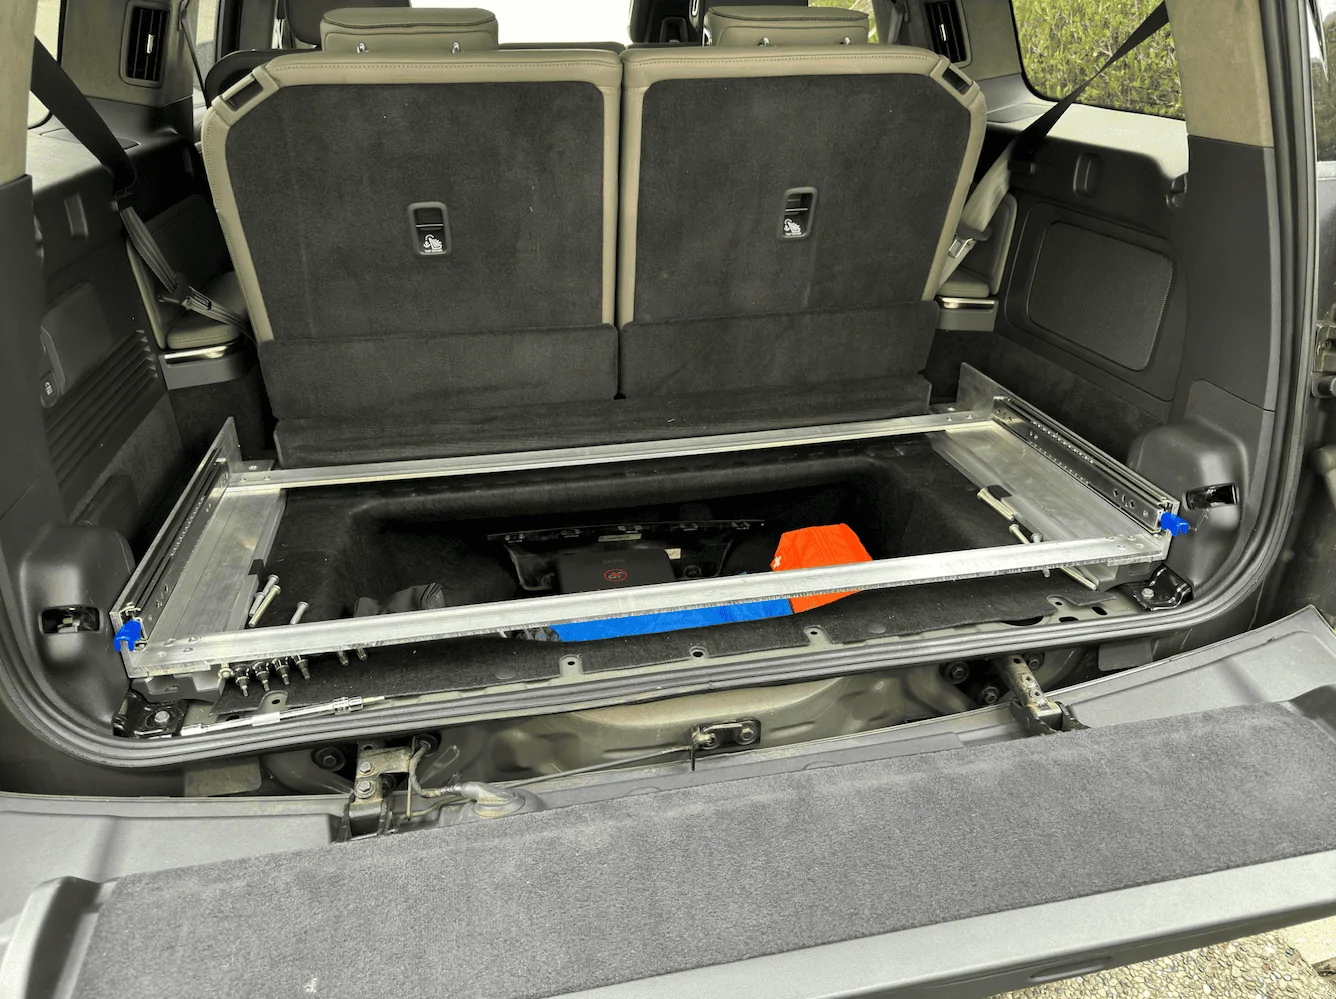
The two different mounting solutions
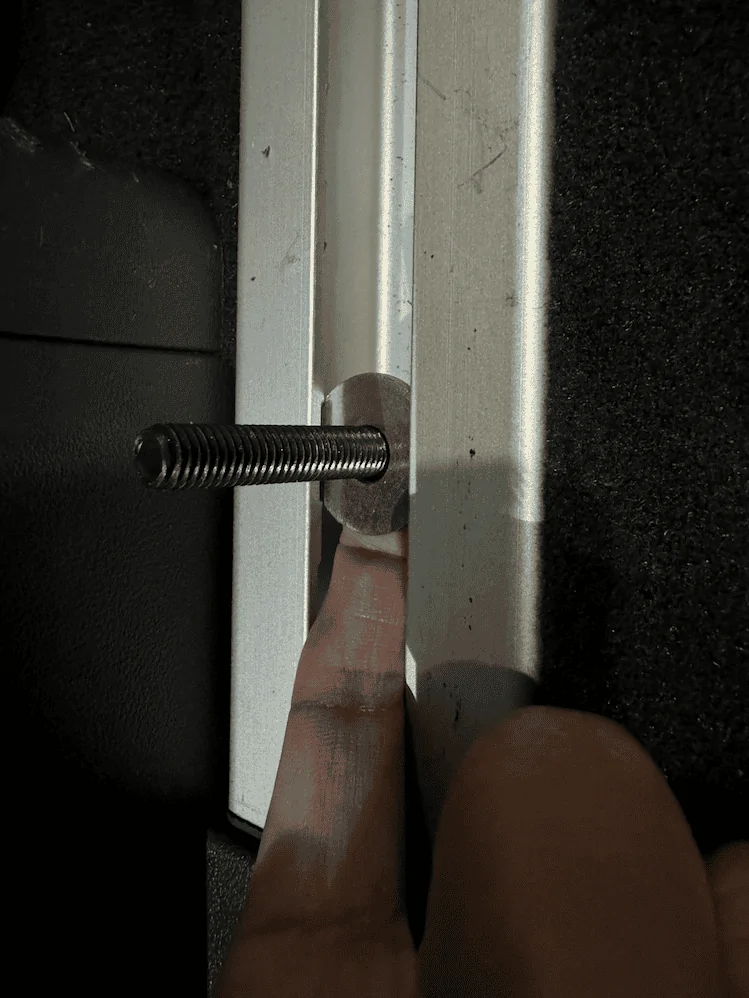
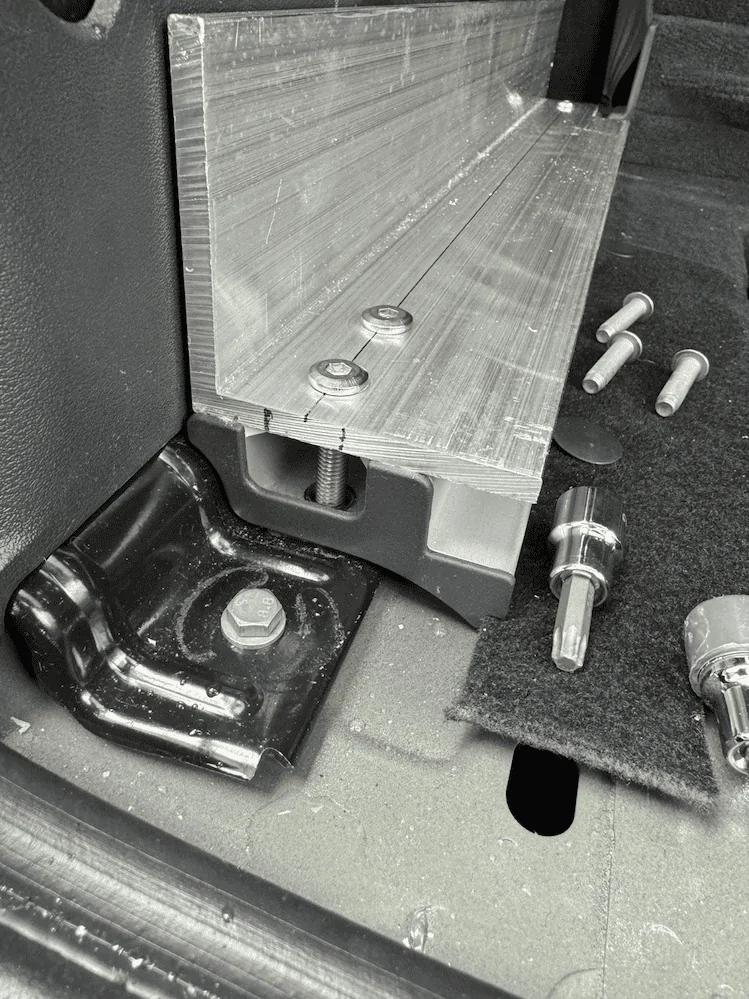
The Tray
• 6063-T52 Mill Finish Alum Angle 3”x3”x18”x0.25” - 2qt
• 6063-T52 Mill Finish Alum Angle 3”x3”x42.5”x0.25” - 2qt
• Aluminum Rectangular Bar 6061-T6511 12”x48”x0.25” - 1qt
• GPCA - Tie Down Metal D-Plates 6pcs - 1qt
This part was pretty straight forward, the only decision was to figure out which side I wanted to mount the fridge since there would be a gap under the fridge to save weight and allow better ventilation. I ended up making holes to run the tray either way so the fridge could go on the left or right.
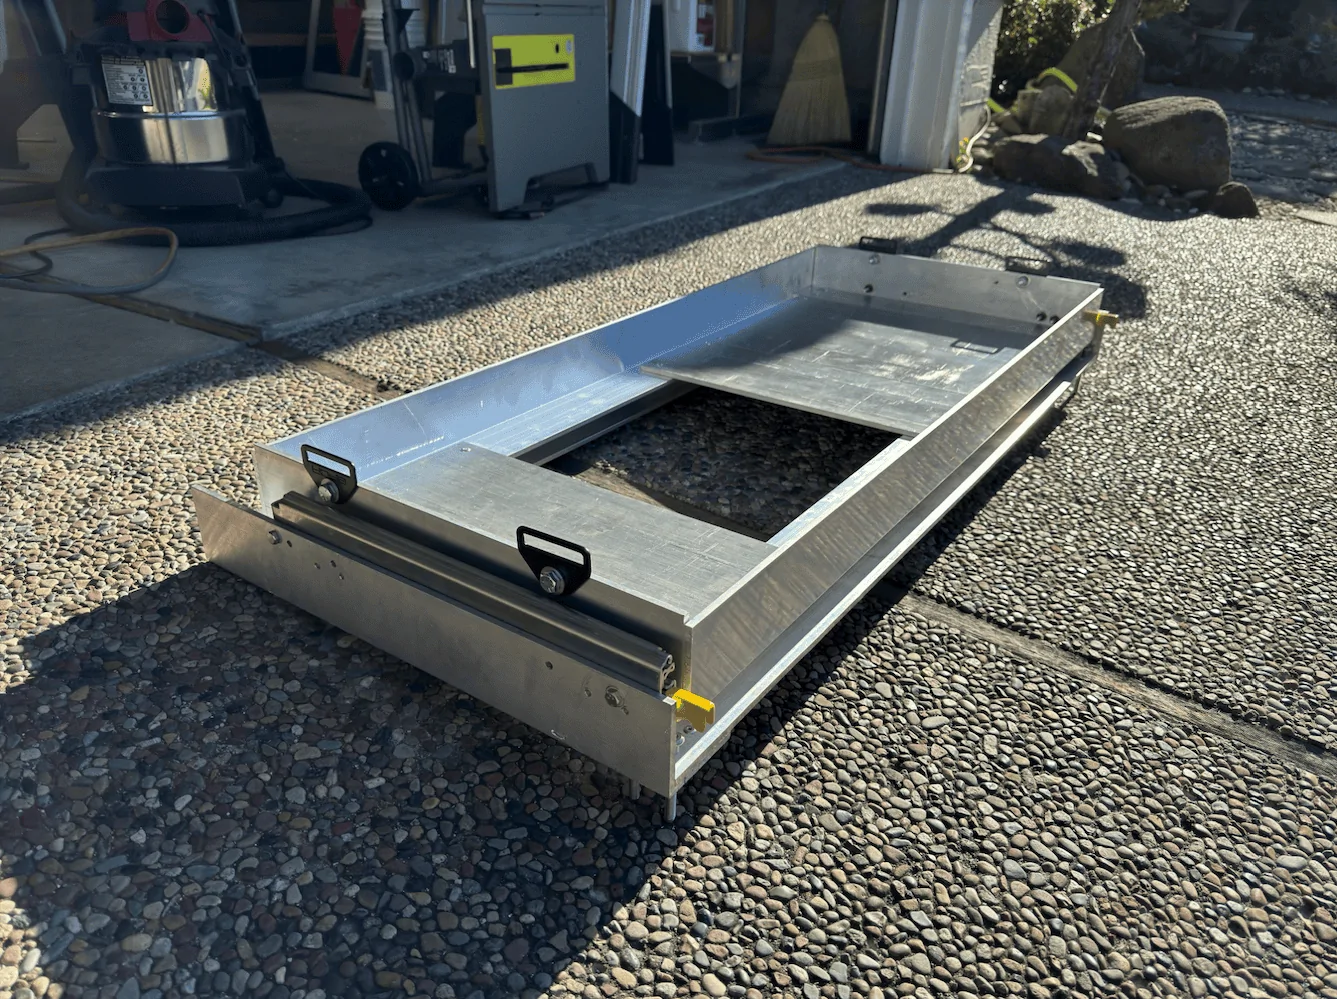
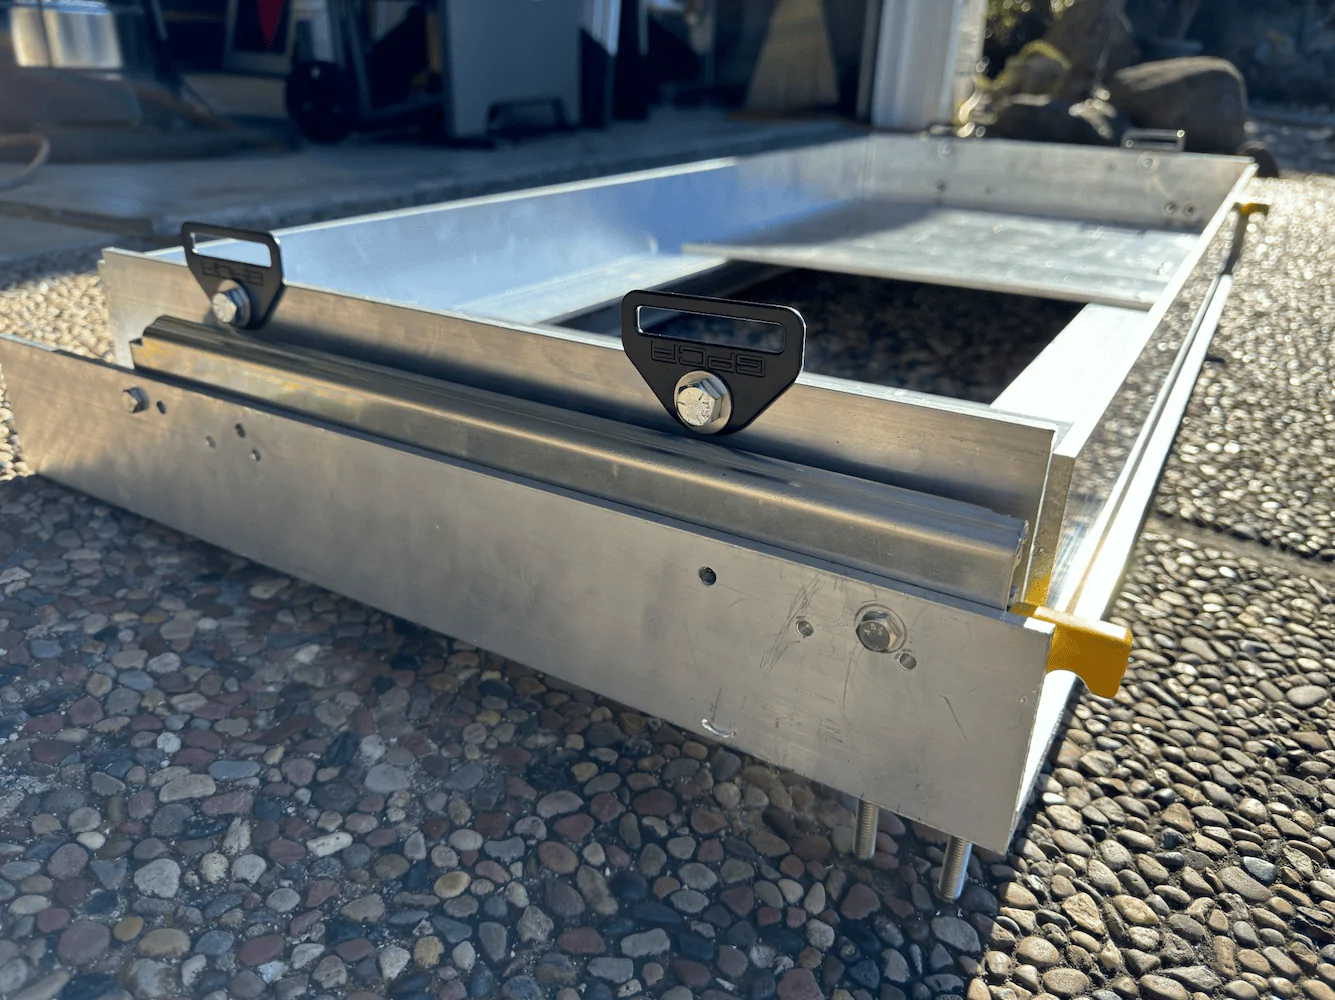
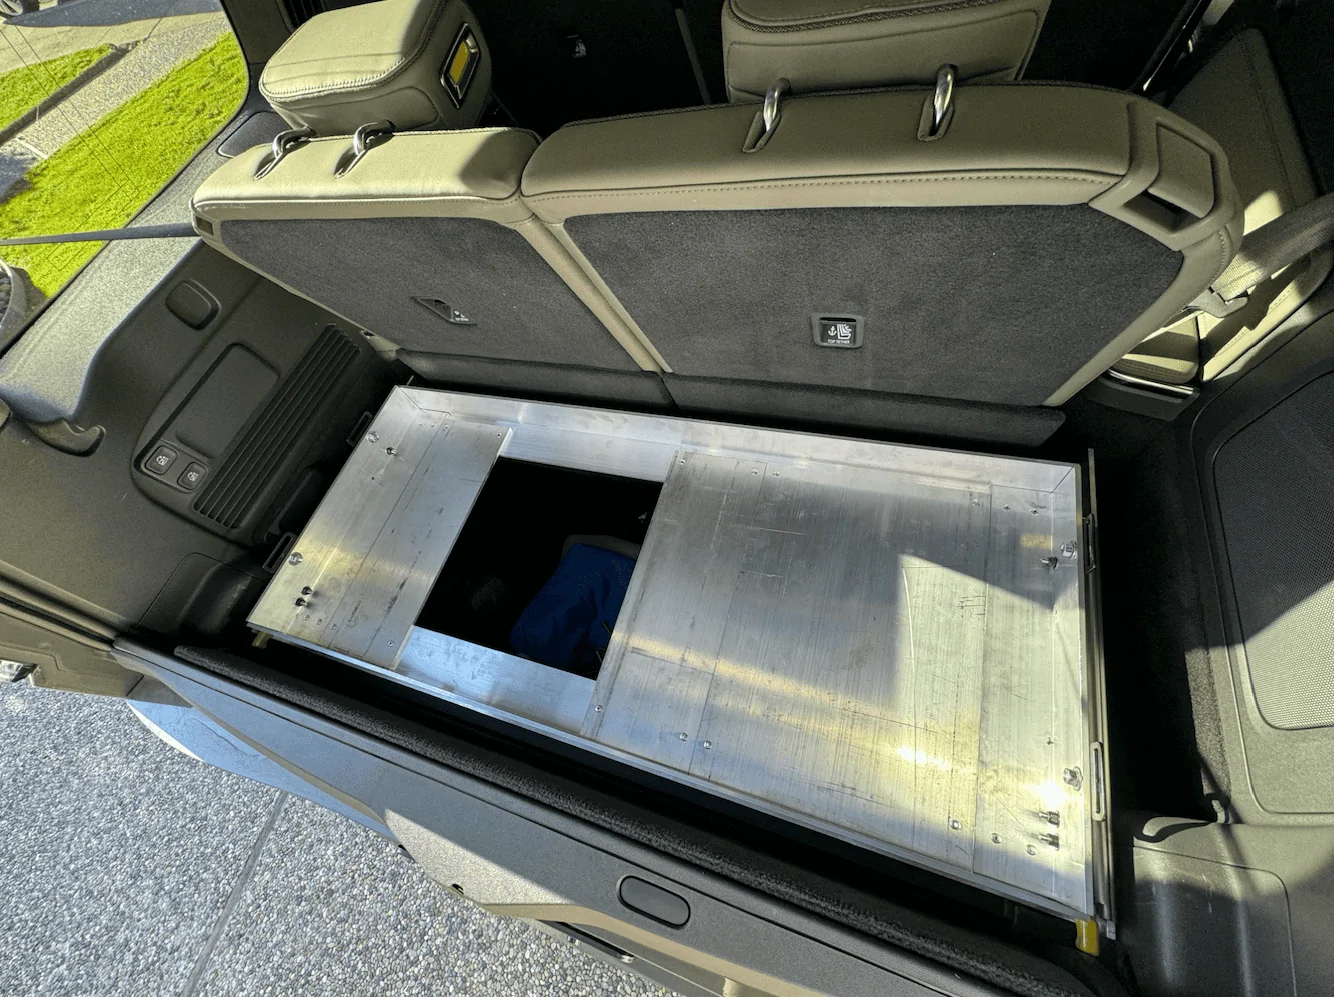
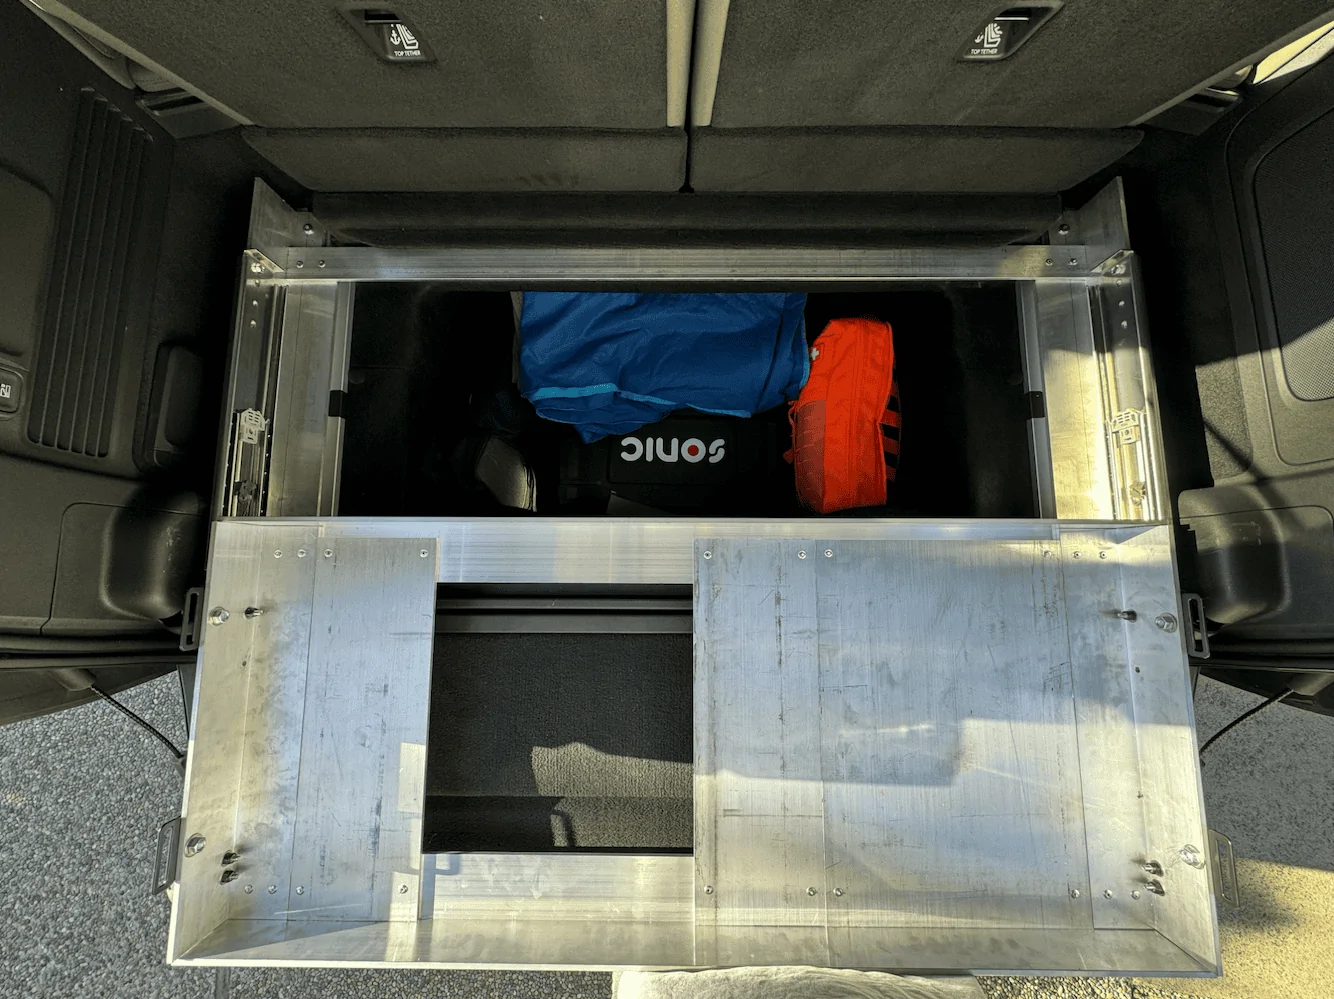
I didn’t really go into this earlier, but the bumps in the drop gate presents clearance issue in two ways. When the gate is up it takes away clearance and can come in close contact with the locks latches, but when down it has clearance issues with the tray when extended. So when I was test fitting before I started drilling and assembly I knew I was going to mount the slides pretty high up on the base angles and then on the tray I would mount it pretty low to allow for the most clearance just in case there was any sag in the slides when extended under load.
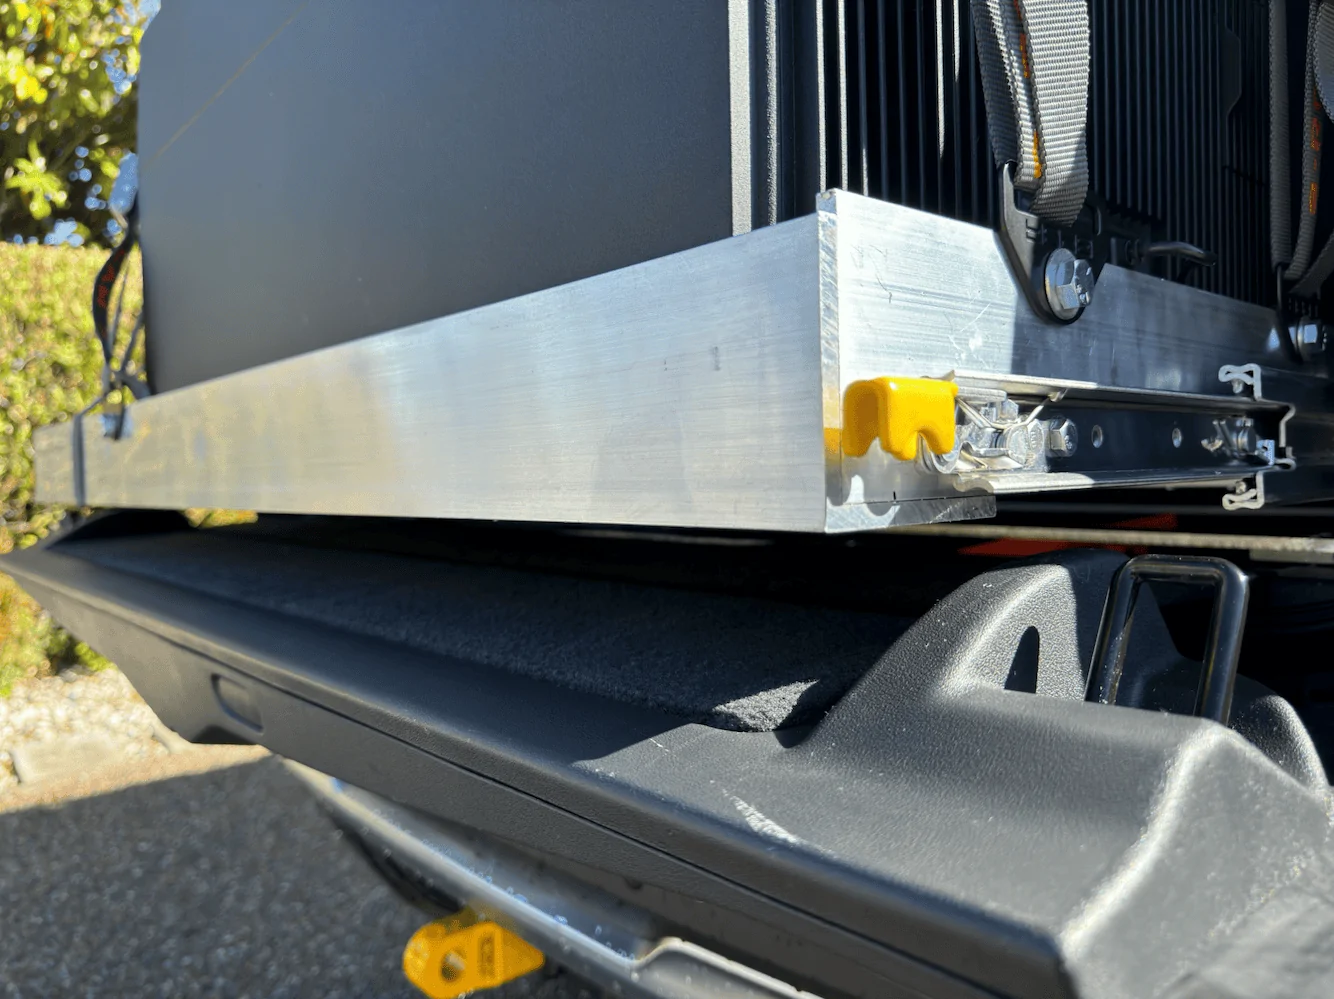
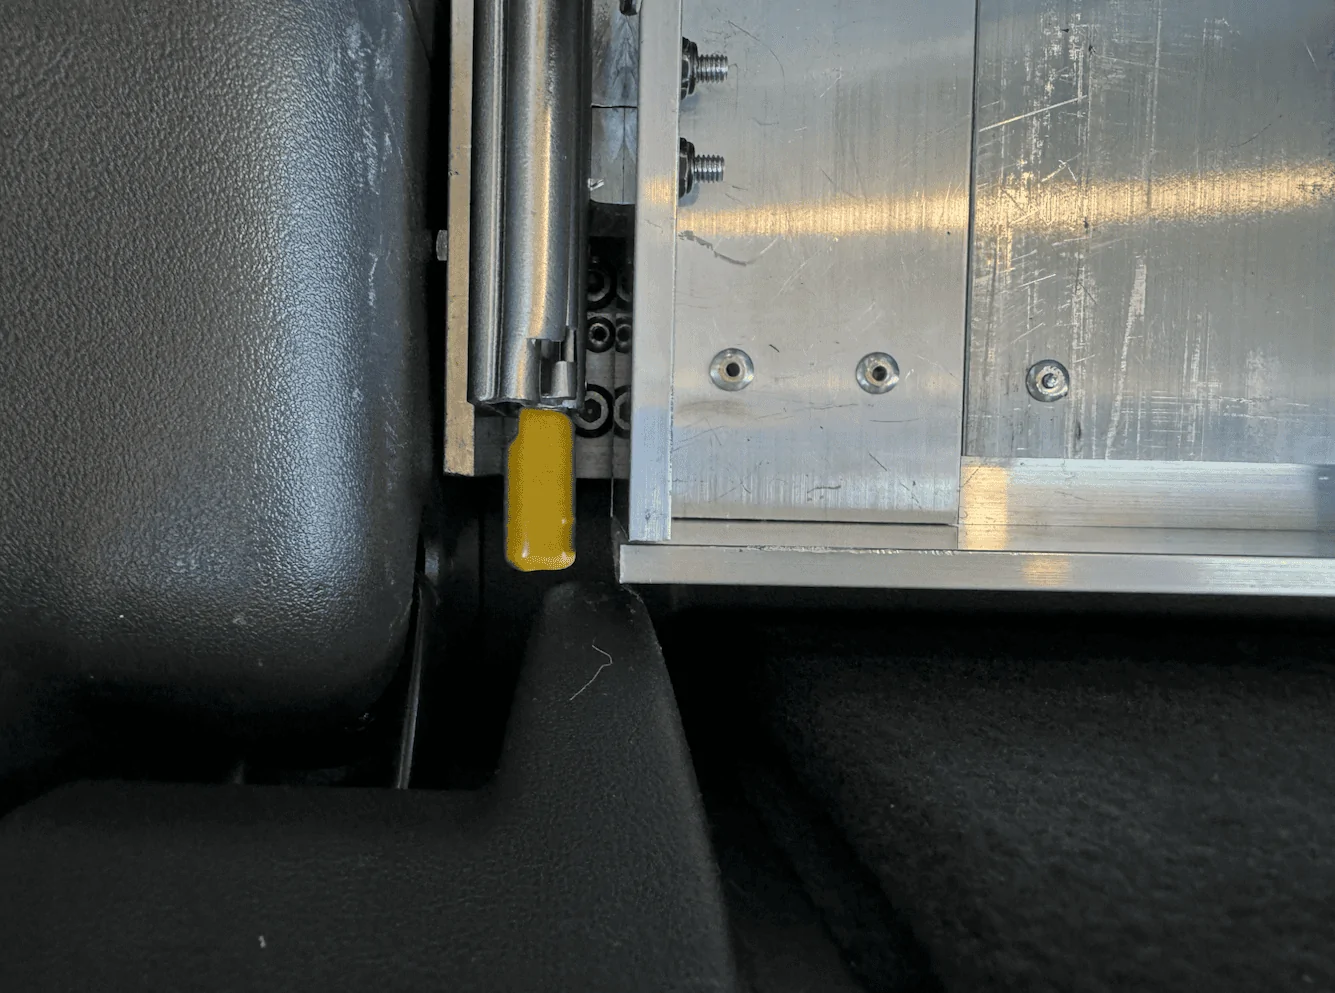
In the end I am pretty happy with how it's turned out, I've already made a few modifications like moving the drawer further out to allow the fridge lid to open more since it was limited by the angle of the third row seat. I've also added an additional set of tie downs for the fridge that aren't as long.
Here's some quick pros and cons I've found so far.
Pros
• Easy access to the spare tire storage area
• Easy access to the fridge and other items on the tray slide
• Provides a secure solution for spare tire storage area as the only way to get to it is to open the gate and slide out the tray
• Full bolt-on so it can be removed without any additional holes or evidence left behind
Cons
• Flat floor feature is no longer
• Adds some extra weight ~50lbs.
• Noisier (air compressor for the air suspension is more audible)
• Crossbars for supporting the base takes away from some of the opening to the storage area
Sponsored
Last edited:




 What I would love to do is a powered fridge for the gear tunnel. full length with full slide out. I think that would be super valuable.


